
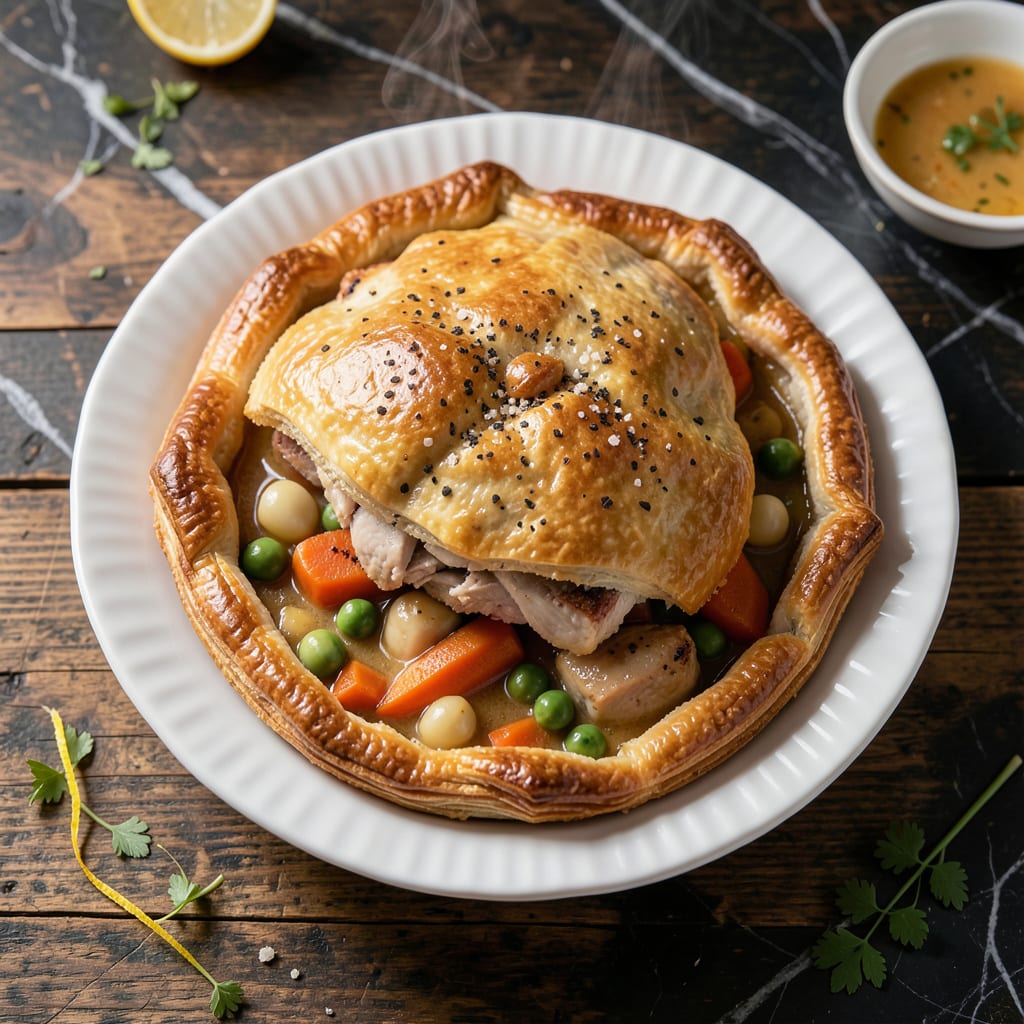
This British pot pie delivers a flaky, buttery crust over a rich, savory filling that’s pure comfort in every bite. The traditional recipe combines tender meat and vegetables in a velvety gravy, all baked to golden perfection.
With simple ingredients and straightforward steps, this dish brings classic British flavor to your table. The pastry stays crisp while the filling remains hearty and satisfying, making it ideal for any meal.
Ingredients for British Pot Pie
Simple pantry staples and fresh herbs create this comforting classic with golden pastry.
| Ingredient | Amount | Notes |
|---|---|---|
| All-Purpose Flour 🌾 | 2 ½ cups | Plus extra for dusting work surface |
| Unsalted Butter 🧈 | 1 cup | Cold and cubed for flaky crust |
| Ice Water 💧 | ½ cup | For pastry dough hydration |
| Salt 🧂 | 1 tsp | Divided between crust and filling |
| Boneless Chicken Thighs 🍗 | 1 ½ lb | Cut into bite-sized pieces |
| Carrots 🥕 | 2 whole | Peeled and diced |
| Yellow Onion 🧅 | 1 whole | Finely chopped for filling |
| Frozen Peas 🌱 | 1 cup | No need to thaw |
| All-Purpose Flour 🌾 | ¼ cup | For thickening gravy |
| Chicken Stock 🥣 | 2 cups | Low-sodium preferred |
| Whole Milk 🥛 | ½ cup | For creamy gravy base |
| Fresh Thyme Leaves 🌿 | 2 tsp | Stems removed before using |
| Fresh Rosemary 🌿 | 1 tsp | Finely chopped for depth |
| Black Pepper 🌶️ | ½ tsp | Freshly ground for best flavor |
| Large Egg 🥚 | 1 whole | For egg wash on crust |
The butter is non-negotiable for that signature flaky, buttery crust. European-style butter (like Plugrá or Kerrygold) has higher fat content for superior texture. For the filling, bone-in chicken thighs add more flavor but boneless are easier. Most supermarkets carry both—look for skin-on if you want to render extra fat for the gravy.
No fresh herbs? Dried thyme and rosemary at one-third the amount work in a pinch. Short on chicken stock? Beef stock adds richness but changes the flavor profile. The milk can be swapped for half-and-half for extra creaminess. Frozen mixed vegetables can replace the peas and carrots (just skip the corn—it gets mushy).
The assembled pie freezes beautifully before baking for up to 3 months. Baked pies keep in the fridge for 4-5 days. Reheat in the oven to maintain crust crispness—microwaving makes it soggy.
Why You’ll Love This Recipe
- One Pan Wonder: I love that everything—flaky crust, tender chicken thighs, and rich filling—comes together in a single dish with minimal cleanup.
- Buttery Perfection: The all-purpose flour and cold butter create layers so crisp and golden, I could eat the crust alone.
- Feeds the Crowd: Honestly, it’s my go-to for Sunday dinner, leftovers, and even a cozy midnight snack.
- Budget Friendly: Boneless chicken thighs stretch further than breasts, and the simple pantry staples keep costs low without sacrificing flavor.
Step-by-Step Instructions for British Pot Pie
Here’s the method. Straightforward, tested, works every time.
Step 1: Prepare the Flaky Pastry Crust
In a large bowl, combine the 2.5 cups All-Purpose Flour with ½ tsp Salt. Add the 1 cup Unsalted Butter, cold and cubed, and work it into the flour with your fingertips until the mixture resembles coarse crumbs with pea-sized butter pieces visible. This creates the flaky layers in your crust.
Gradually drizzle in the 0.5 cup Ice Water while gently stirring with a fork, just until the dough begins to come together. Don’t overmix—stop as soon as it forms a shaggy mass. Turn the dough out onto a lightly floured surface, shape into a disk, wrap in plastic, and refrigerate for 30 minutes.
Step 2: Cook the Hearty Filling Base
In a large pot, brown the 1.5 lb Boneless Chicken Thighs, cut into bite-sized pieces, over medium-high heat for 5-7 minutes until no longer pink. Remove and set aside. In the same pot, add the 2 whole Carrots (peeled and diced) and 1 whole Yellow Onion (finely chopped), cooking until softened, about 5 minutes.
Sprinkle the 0.25 cup All-Purpose Flour over the vegetables and stir for 1 minute to cook off the raw flour taste. This creates a roux that will thicken your filling beautifully.
Step 3: Build the Creamy Sauce and Finish Filling
Slowly pour in the 2 cups Chicken Stock and 0.5 cup Whole Milk, whisking constantly to prevent lumps. Add the 1 cup Frozen Peas, 2 tsp Fresh Thyme Leaves, 1 tsp Fresh Rosemary, and 0.5 tsp Black Pepper. Return the chicken to the pot and simmer for 10-12 minutes until the sauce thickens to a gravy-like consistency.
Taste and adjust seasoning with the remaining ½ tsp Salt if needed. The filling should be rich and creamy, with the vegetables tender but not mushy. Remove from heat and let cool slightly while you roll out the pastry.
Step 4: Assemble and Bake to Golden Perfection
On a lightly floured surface, roll out the chilled pastry to a 12-inch circle. Transfer the filling to a 9-inch pie dish and top with the pastry, crimping the edges to seal. Cut a few small slits in the center to allow steam to escape. Brush the top with the 1 whole Large Egg beaten with a splash of water for a glossy finish.
Bake at 375°F for 35-40 minutes until the crust is golden brown and the filling is bubbling. Let rest for 10 minutes before serving—this allows the filling to set slightly, making it easier to slice and serve. Each portion should reveal a flaky, buttery crust over a rich, creamy filling packed with tender chicken and vegetables.
Pro Tips For Making British Pot Pie
- Chill the Dough: Pop your pastry in the fridge for at least 30 minutes before rolling—I learned this the hard way after my first few pies shrank like woolen sweaters in the wash.
- Brown the Chicken: Sear those boneless thighs in batches so they actually brown instead of steaming, about 3-4 minutes per side in a screaming hot pan with a knob of butter.
- Skip the Warm Water: Use ice water for the pastry and keep it cold; after ruining two crusts with lukewarm water, I finally got that flaky, layered texture every time.
- Vent the Top: Cut a few small slits in the lid before baking—sounds obvious, but I skipped this once and ended up with a soggy, collapsed center instead of a golden, crisp crust.
Troubleshooting This Recipe
Soggy Bottom Crust
This usually happens when the filling is too wet or the pastry isn’t blind-baked. To fix, simmer your filling until it’s thick enough to coat the back of a spoon. I also recommend brushing the pie dish with 1 tbsp melted butter before adding the pastry—it creates a moisture barrier. 💡
Pastry Shrinks
If your crust pulls away from the edges, it might be overworked or not rested long enough. Let the dough chill for the full 30 minutes and roll it just slightly larger than your dish. Dock the base with a fork to prevent puffing.
Filling Too Thin
Thin filling often means the roux didn’t cook long enough. Stir the ¼ cup flour into the vegetables for a full 2 minutes before adding liquids. If it’s still thin, mix 1 tbsp cornstarch with 1 tbsp cold water and stir into the filling before baking.
Crust Not Browning
For a deeper golden color, brush the pastry with egg wash (1 egg + 1 tbsp water) twice—once before baking and once halfway through. Bake on the lower oven rack for the last 10 minutes to help crisp the bottom.
Overflowing Pie
Prevent spills by filling the dish no more than ¾ full and placing a baking sheet under the pie dish. Let the filling cool slightly before adding the top crust. This gives the gravy time to thicken further. ⚡
Dry Filling
If your filling seems dry after baking, it may have overcooked. Reduce the baking time by 5 minutes and tent with foil if the crust browns too quickly. You can also add ¼ cup extra chicken stock to the filling before assembling.
Nutrition Facts
Frequently Asked Questions
Can I use store-bought pie crust instead?
Yes, but homemade tastes better. Store-bought works in a pinch—just thaw and roll as directed. For best results, brush with egg wash before baking.
Why did my crust turn out tough?
Overworking the dough develops gluten, making it tough. Handle minimally and chill for the full 30 minutes before rolling.
Can I make this ahead of time?
Assemble the pie, cover, and refrigerate for up to 24 hours. Add 5-10 minutes to baking time if cold.
What’s the best way to reheat leftovers?
Warm in a 350°F oven for 15-20 minutes until heated through. Microwaving makes the crust soggy.

- 4C Bread Crumbs Meatballs Recipe: Crispy Crust and Juicy Centers - September 25, 2026
- 6 Oz Chocolate Chip Cookie Recipe: Perfectly Balanced Crispy Edges and Chewy Hearts - September 25, 2026
- 6-Inch Coffee Cake Recipe: Vanilla Bean Swirls and Buttery Streusel Topping - September 25, 2026