
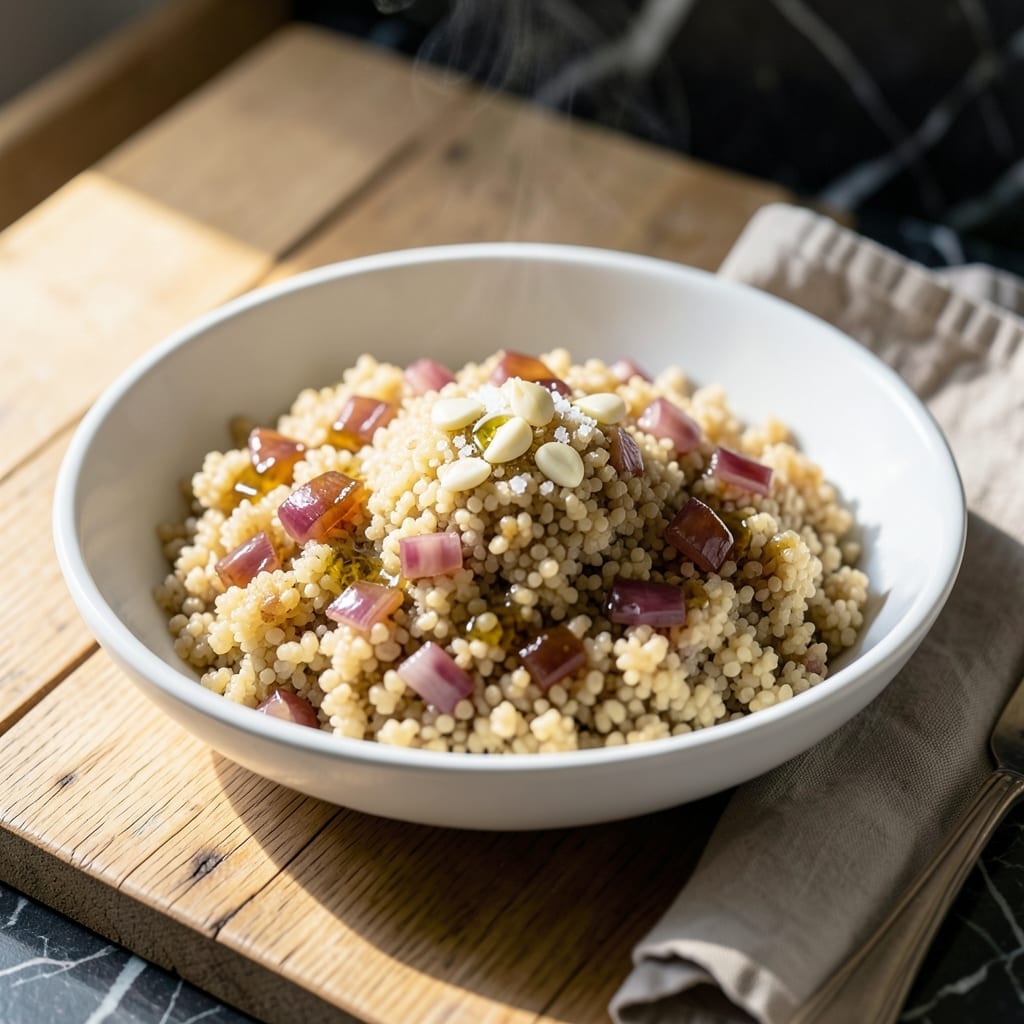
I’ve perfected a method for cooking bulgur in the Instant Pot that delivers perfectly tender grains with a rich, nutty depth every time. The pressure cooker cuts the usual stovetop time in half while preserving flavor and texture.
This approach uses a precise 1:2 bulgur-to-liquid ratio and just 15 minutes of pressure cooking. No soaking, no stirring—just set it and let the Instant Pot work its magic. The result is fluffy, separate grains with no mushiness.
What you’ll love most is how versatile this becomes. Use it as a base for salads, a side for grilled proteins, or even as a warm breakfast cereal with nuts and honey. The nutty flavor shines through in every bite.
Ready to transform a humble grain into something extraordinary? Let’s begin.
Ingredients for Bulgur Instant Pot
Simple pantry staples transform into fluffy, nutty grains ready in minutes.
| Ingredient | Amount | Notes |
|---|---|---|
| Fine Bulgur Wheat 🌾 | 2 cups | Rinsed before cooking |
| Vegetable Broth 💧 | 4 cups | Low-sodium preferred |
| Extra-Virgin Olive Oil 🫒 | 1 tbsp | For toasted nutty flavor |
| Sea Salt 🧂 | ½ tsp | Adjust to taste |
| Garlic Cloves 🧄 | 3 cloves | Minced or pressed |
| Red Onion 🧅 | ½ whole | Finely diced |
| Fresh Parsley 🌿 | ¼ cup | Chopped for garnish |
| Lemon Juice 🍋 | 1 tbsp | Freshly squeezed |
| Ground Cumin 🌿 | ½ tsp | Toasted for warmth |
| Black Pepper 🌶️ | ¼ tsp | Freshly ground |
| Toasted Almonds 🥜 | ¼ cup | Sliced for texture |
| Raisins 🍇 | ¼ cup | Optional for sweetness |
The bulgur quality matters most here. Bob’s Red Mill or Whole Foods bulk bins have reliable fine grind—avoid coarse or cracked wheat (it won’t cook evenly). The broth is your flavor foundation, so use low-sodium to control salt levels. I grab Imagine Foods or make my own from veggie scraps. That 1:2 ratio is non-negotiable though—measure the liquid carefully (I use a glass measuring cup for accuracy).
No vegetable broth? Water plus a bouillon cube works in a pinch. Fresh out of parsley? Cilantro or mint add nice contrast. The cumin can be skipped if you dislike earthy flavors, but a pinch of smoked paprika adds depth. For breakfast-style bulgur, swap raisins for dried apricots and add cinnamon. The almonds? Pecans or walnuts bring similar crunch (toast them first).
Cooked bulgur holds in the fridge for 4-5 days in an airtight container. Freeze portions for up to 3 months—just thaw and reheat with a splash of water. The texture stays perfect, and it’s even better the next day once flavors meld. I make a double batch for easy lunches (the raisins plump up nicely overnight).
Why You’ll Love This Recipe
- Set It and Forget: I toss everything in the Instant Pot and walk away—no stirring, no babysitting, just perfect bulgur every time.
- Garlicky Goodness: The garlic cloves infuse the vegetable broth with a deep, savory warmth that makes the bulgur taste anything but bland.
- Meal Prep Magic: Honestly, it’s my Sunday staple—cook a big batch and use it in salads, bowls, or as a side all week long.
- Pantry Hero: Between us, a bag of fine bulgur and a few kitchen staples turn into a filling, budget-friendly meal in under 20 minutes.
Step-by-Step Instructions for Bulgur in an Instant Pot
This method delivers perfectly tender bulgur with vibrant flavor in record time.
Step 1: Sauté the Aromatics
Set your Instant Pot to the “Sauté” function and add the 1 tbsp extra-virgin olive oil. Once the oil shimmers, add the finely diced 0.5 whole red onion and cook for 3-4 minutes until it softens and becomes translucent.
Stir in the minced 3 cloves garlic cloves and 0.5 tsp ground cumin, cooking for an additional 30 seconds until fragrant. This step builds a flavor foundation that infuses the entire dish. Watch closely to prevent the garlic from burning.
Step 2: Toast the Bulgur and Add Liquids
Add the 2 cups fine bulgur wheat to the pot and stir to coat it in the aromatic oil. Toast for 1-2 minutes until the grains become slightly fragrant and just begin to turn light golden at the edges.
Pour in the 4 cups vegetable broth, 0.5 tsp sea salt, and 0.25 tsp black pepper. Stir well to combine, scraping the bottom of the pot to deglaze and prevent any sticking during pressure cooking.
Step 3: Pressure Cook to Perfection
Secure the lid on your Instant Pot and set the valve to “Sealing.” Cook on high pressure for 5 minutes. The bulgur will absorb the liquid completely, becoming tender and fluffy.
Once the cooking cycle completes, allow the pressure to release naturally for 10 minutes, then quick-release any remaining pressure. This gradual release prevents the grains from becoming mushy.
Step 4: Finish with Fresh and Textural Elements
Open the lid and fluff the bulgur with a fork. Fold in the 0.25 cup raisins (if using) and 0.25 cup toasted almonds, reserving a small handful of almonds for garnish. The raisins will plump slightly from the residual heat.
Drizzle with the 1 tbsp lemon juice and toss gently to distribute. Taste and adjust seasoning with additional sea salt if needed. The acidity brightens all the flavors beautifully.
Step 5: Garnish and Serve
Transfer the bulgur to a serving bowl and sprinkle with the reserved toasted almonds and 0.25 cup chopped fresh parsley. The parsley adds a pop of color and freshness that balances the dish.
Serve warm as a side or a light main. The texture should be tender with a slight bite, and every spoonful should burst with nutty, savory, and slightly sweet notes from the almonds, cumin, and raisins.
Pro Tips For Making Bulgur Instant Pot
- Use Equal Liquid Ratio: For fine bulgur, stick to a 1:1 ratio with vegetable broth—I learned this the hard way after ending up with mushy batches when I eyeballed it.
- Toast the Bulgur: Sauté the bulgur in olive oil for 2-3 minutes before adding liquid; it brings out a nutty flavor that plain boiling just can’t match.
- Skip the Over-Stirring: Resist the urge to stir after pressure cooking—bulgur can turn gluey if disturbed too much. Let it sit for 5 minutes undisturbed after releasing.
- Add Garlic Last: Press the garlic cloves in after sautéing the bulgur so it doesn’t burn—burnt garlic tastes bitter and ruins the dish.
Flavor Customization for bulgur instant pot
Sweet and Savory
For a dessert-like twist, increase the ¼ cup raisins to ½ cup and add ½ tsp cinnamon with the cumin. I toss in 2 tbsp brown sugar and ¼ cup dried apricots for extra sweetness. Serve with warm milk for a cozy breakfast cereal.
Mediterranean Flair
Swap the cumin for ½ tsp dried oregano and add ½ cup crumbled feta after cooking. Stir in ¼ cup chopped Kalamata olives and 2 tbsp chopped fresh dill. This version pairs beautifully with grilled chicken or lamb.
Spiced and Smoky
Add ½ tsp smoked paprika and a pinch of cayenne pepper for heat. I also stir in 2 tbsp sun-dried tomatoes for a tangy depth. Top with crumbled cotija cheese and fresh cilantro instead of parsley. 🌶️
Herb-Focused
Use 1 tsp dried thyme and ½ tsp rosemary instead of cumin. Stir in ¼ cup grated Parmesan after cooking for a rich, savory note. Fresh basil makes a great garnish here, adding a bright, aromatic finish.
Nutty and Crunchy
Toast ½ cup pine nuts or walnuts and fold them in with the almonds. Add 1 tsp lemon zest with the juice for extra brightness. This version has incredible texture contrast and works well in grain bowls.
Breakfast Style
Skip the raisins and stir in ½ cup dried cranberries and ½ tsp vanilla extract after cooking. Top with Greek yogurt and a drizzle of honey. I love this with a sprinkle of cinnamon for a warm, comforting start to the day. ✨
Nutrition Facts
Frequently Asked Questions
Can I use coarse bulgur instead of fine?
Fine bulgur works best for this recipe, cooking perfectly in 5 minutes. Coarse bulgur needs 10-12 minutes under pressure and extra liquid to soften properly.
Why do I need to toast the bulgur first?
Toasting for 1-2 minutes enhances the nutty flavor and prevents a mushy texture. It’s a quick step that makes a big difference in the final dish.
What if my bulgur turns out mushy?
This usually happens from too much liquid or not releasing pressure naturally. Stick to the 1:2 ratio and allow 10 minutes natural release for best results.
Can I make this without an Instant Pot?
Yes! Use a pot with a tight lid. Bring ingredients to boil, then reduce to low heat for 12-15 minutes until liquid is absorbed.

- 6 Oz Chocolate Chip Cookie Recipe: Perfectly Balanced Crispy Edges and Chewy Hearts - September 25, 2026
- 6-Inch Coffee Cake Recipe: Vanilla Bean Swirls and Buttery Streusel Topping - September 25, 2026
- 1 Hour Soup Recipe: Velvety Richness Without the Wait - September 25, 2026