
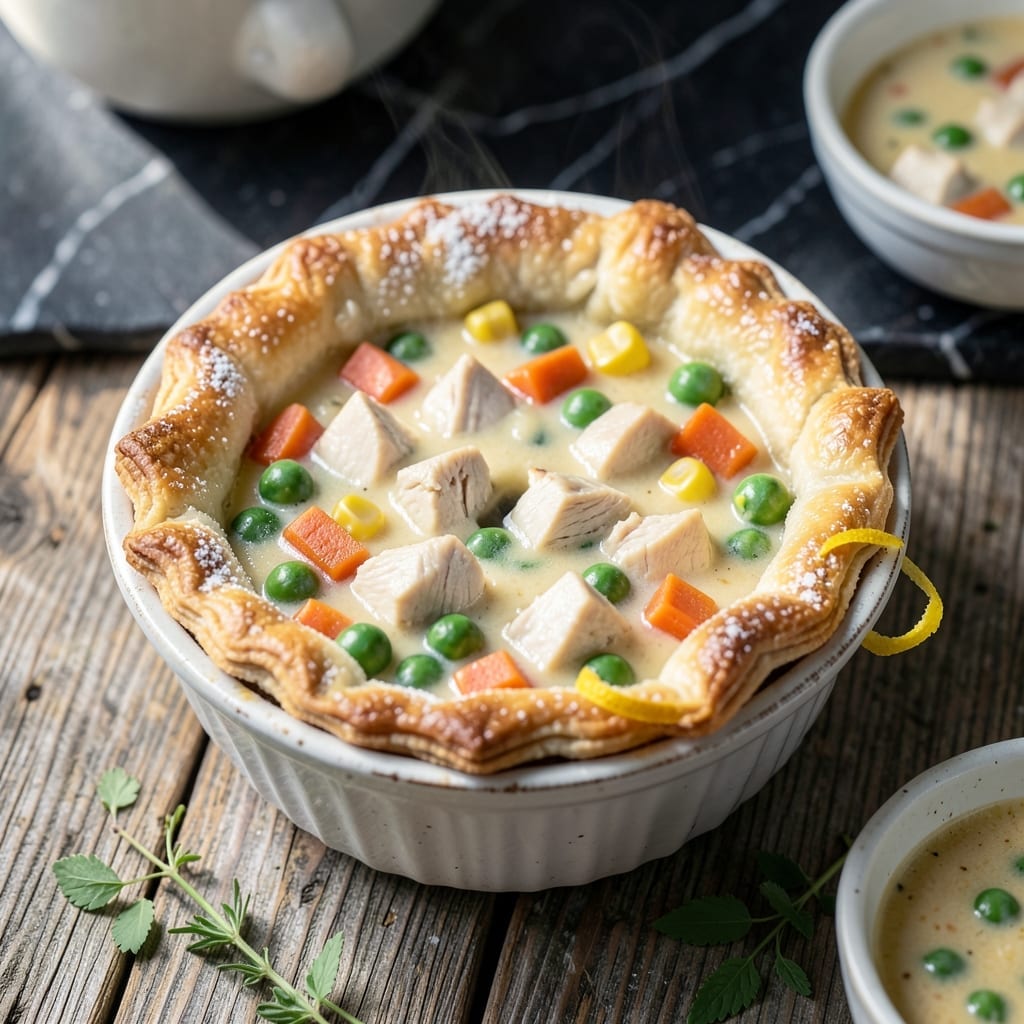
This recipe transforms store-bought convenience into a flaky, homemade-tasting classic that’s perfect for individual servings. I’ve adapted Campbell’s trusted flavors to create mini pot pies with the golden, buttery crust everyone loves.
The beauty lies in the simplicity: creamy filling meets tender pastry in every bite. Using pre-made ingredients cuts prep time without sacrificing quality, making this dish both practical and impressive.
You’ll get a crisp, golden top and a rich, savory filling that’s hearty enough for dinner. The individual portions make it ideal for families or meal prep.
Serve warm for a comforting meal that feels like home. Here’s how to make them just right.
Ingredients for Campbell’s Mini Pot Pie
Store-bought shortcuts meet homemade quality in this comforting classic with a golden, flaky finish.
| Ingredient | Amount | Notes |
|---|---|---|
| Campbell's Cream of Chicken Soup 🥫 | 2 cans | 10.5 oz each, undiluted |
| Frozen Mixed Vegetables 🥕 | 2 cups | Peas, carrots, corn, green beans |
| Cooked Chicken Breast 🍗 | 2 cups | Diced or shredded |
| Refrigerated Pie Crust 🥧 | 2 sheets | 1 box, thawed per package instructions |
| Unsalted Butter 🧈 | 2 tbsp | Melted, for brushing |
| All-Purpose Flour 🌾 | 1 tbsp | For thickening if needed |
| Chicken Broth 🍲 | ¼ cup | Low-sodium preferred |
| Garlic Powder 🧄 | ½ tsp | For depth of flavor |
| Dried Thyme 🌿 | ½ tsp | Crushed between fingers |
| Onion Powder 🧅 | ½ tsp | Balances savory notes |
| Salt 🧂 | ½ tsp | Adjust to taste |
| Black Pepper 🌶️ | ¼ tsp | Freshly ground preferred |
| Whole Milk 🥛 | ¼ cup | For creamier filling |
| Large Egg 🥚 | 1 whole | For egg wash |
The pie crust is non-negotiable for that flaky texture. Pillsbury refrigerated crusts are the standard—just thaw them properly (follow package times, don’t rush). For the soup, Campbell’s Cream of Chicken is the base flavor here, so don’t substitute without testing. The chicken should be pre-cooked (rotisserie works great) and finely diced for even distribution in each mini pie. Look for mixed vegetables without added sauces—plain peas and carrots blend best.
No rotisserie chicken? Canned chicken at half the amount (drained well) works in a pinch. Fresh vegetables can replace frozen—just blanch and chop small. Need more creaminess? Add an extra tablespoon of flour to the filling. For herb variations, dried sage or rosemary at half the quantity complements the thyme nicely. The egg wash is optional but gives that professional golden sheen.
Assemble just before baking for the crispiest crust. Leftovers keep 3-4 days refrigerated—reheat in oven to revive the flakiness. Freeze unbaked pies on a tray first, then transfer to bags for up to 2 months.
Why You’ll Love This Recipe
- Ready in Minutes: I love how the refrigerated pie crust and pre-cooked chicken cut the prep time to almost nothing.
- That Creamy Magic: The Campbell’s Cream of Chicken Soup makes the filling so rich and satisfying, especially with the flaky crust on top.
- Kid-Approved Dinner: Between us, even my pickiest eater goes for these mini pot pies—perfect for busy weeknights or lazy weekends.
- Budget-Friendly Feast: Honestly, feeding the whole family for under $10 with ingredients I already have on hand? That’s a win in my book.
Step-by-Step Instructions for Campbell’s Mini Pot Pie
This method ensures a golden crust with a creamy, savory filling every time.
Step 1: Prepare the Savory Filling
In a large bowl, combine the 2 cans Campbell’s Cream of Chicken Soup, 2 cups Frozen Mixed Vegetables, 2 cups Cooked Chicken Breast, 0.25 cup Chicken Broth, 0.5 tsp Garlic Powder, 0.5 tsp Dried Thyme, 0.5 tsp Onion Powder, 0.5 tsp Salt, and 0.25 tsp Black Pepper.
Stir in the 0.25 cup Whole Milk until the mixture is smooth and well combined. If the filling seems too thin, sprinkle in the 1 tbsp All-Purpose Flour and mix thoroughly. The consistency should be thick but pourable, coating the back of a spoon. Taste and adjust seasoning if needed—you want a balanced savory flavor.
Step 2: Cut and Fit the Pie Crusts
Preheat your oven to 375°F. Unroll the 2 sheets Refrigerated Pie Crust on a lightly floured surface. Using a 4-inch round cutter or a small bowl as a guide, cut out 8 circles from each sheet. You’ll need 16 circles total—8 for the bottom and 8 for the top of the mini pot pies.
Press each circle into the cups of a standard muffin tin, creating a well for the filling. The crust should extend slightly above the rim to allow for crimping later. If the dough tears, patch it with a small piece of crust—just press it together gently to seal. Keep the remaining circles covered to prevent drying out.
Step 3: Assemble the Mini Pot Pies
Spoon the filling into each crust-lined muffin cup, filling them to about ¾ full. Avoid overfilling, as the mixture will expand slightly during baking. Top each with a second crust circle, pressing the edges together to seal. Use a fork to crimp the edges for a decorative finish and to ensure a tight seal.
Cut a small slit in the top of each pot pie to allow steam to escape during baking. This step is crucial—without it, the filling may bubble out or the crust may not brown evenly. Brush the tops lightly with the 2 tbsp Unsalted Butter, melted, to enhance browning.
Step 4: Bake to Golden Perfection
Bake the mini pot pies in the preheated oven for 30-35 minutes, or until the crusts are deep golden brown and the filling is bubbling. Rotate the muffin tin halfway through baking to ensure even browning, especially if your oven has hot spots.
You’ll know they’re done when the crusts are flaky and the edges are crisp. If the tops begin to brown too quickly, tent the pan loosely with aluminum foil to prevent over-browning. Remove from the oven and let them cool in the pan for 5 minutes before transferring to a wire rack.
Step 5: Add the Finishing Touch
While the pot pies are still warm, whisk the 1 whole Large Egg with 1 tablespoon of water to create an egg wash. Lightly brush the tops of the pot pies with the egg wash for an extra sheen and golden finish. This step adds a professional touch and enhances the visual appeal.
Let the mini pot pies cool for an additional 10 minutes before serving. The filling will thicken slightly as it cools, making them easier to handle. Serve warm, and enjoy the flaky layers of crust with the hearty, creamy filling inside.
Pro Tips For Making Campbell’S Mini Pot Pie
- Pre-cook the Filling: Simmer the soup, veggies, and chicken together for 5 minutes before baking—this prevents a soggy crust and guarantees the filling is hot all the way through.
- Thaw the Veggies: Drain and pat dry the frozen mixed vegetables first, or they’ll release too much water and turn your pot pies into soup.
- Vent the Crust: Cut a few small slits in the top of each pie crust before baking, or steam will build up and make the crust collapse in the middle.
- Butter the Tops: Brush the pie crusts with a little melted unsalted butter before baking for a golden, flaky finish—way better than plain crust.
Essential Equipment for This Dish
Muffin Tin Essentials
Use a standard 12-cup muffin tin with non-stick coating for easy release. I prefer Wilton non-stick for its durability and even heat distribution. Avoid dark-colored pans as they may over-brown the crust.
Crust Cutting Tools
A 4-inch round cutter works perfectly for uniform circles, but a small bowl or glass also works. For precise cuts, OXO Good Grips makes a comfortable cutter. Always cut on a floured surface to prevent sticking.
Pastry Brush Choice
Apply melted butter with a silicone pastry brush for smooth, even coverage. I love Ateco’s heat-resistant brushes—they won’t melt and clean up easily. Avoid natural bristle brushes for this task.
Mixing Bowls
A large 3-4 quart mixing bowl gives room to combine filling ingredients thoroughly. Pyrex glass bowls let you see the consistency as you stir. The wide base makes folding in chicken and vegetables easier.
Oven Thermometer
For perfect results, verify your oven temperature with an oven thermometer. I trust Taylor Precision models. Many home ovens run 25°F hot or cold, which affects baking time significantly. 🌡️
Cooling Rack
Transfer baked pies to a wire cooling rack after the initial 5-minute rest. This prevents soggy bottoms by allowing air circulation. Look for a rack with small grid spacing to support the mini pies properly.
Nutrition Facts
Frequently Asked Questions
Can I use puff pastry instead of pie crust?
Yes, puff pastry makes an excellent flaky alternative. Cut it the same way, but bake at 375°F for 25-30 minutes since it browns faster. The layers will be lighter and more delicate.
Why did my filling turn out watery?
This usually happens if the vegetables weren’t thawed and drained first. Pat them dry and thicken the filling with an extra 1 tablespoon of flour before baking.
How do I reheat leftovers without a soggy crust?
Place them on a baking sheet in a 350°F oven for 10-12 minutes. This restores the crispness better than a microwave. Avoid covering them.

- 4C Bread Crumbs Meatballs Recipe: Crispy Crust and Juicy Centers - September 25, 2026
- 6 Oz Chocolate Chip Cookie Recipe: Perfectly Balanced Crispy Edges and Chewy Hearts - September 25, 2026
- 6-Inch Coffee Cake Recipe: Vanilla Bean Swirls and Buttery Streusel Topping - September 25, 2026