
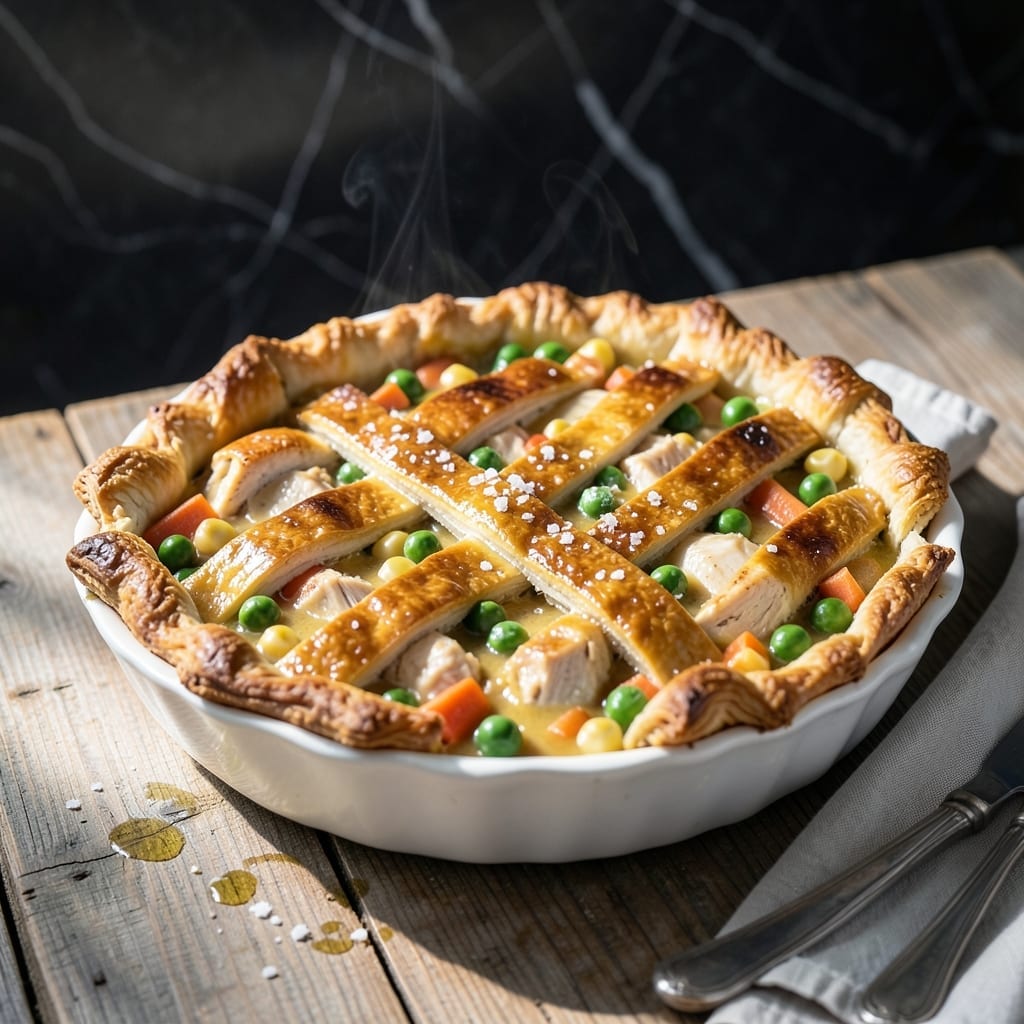
This recipe transforms pantry staples into a warm, satisfying meal that feels like home. The flaky crust comes together in minutes, while the filling delivers all the comfort of traditional pot pie without the fuss.
Using canned chicken cuts prep time dramatically, while frozen vegetables ensure you always have the basics on hand. A simple roux thickens the creamy sauce, creating a rich base that holds everything together beautifully.
The result is a golden, flaky top over a creamy, vegetable-packed filling that’s ready in under an hour. It’s the perfect solution for busy weeknights when you crave something hearty and quick.
Bake until bubbling and golden for that classic comfort food experience. Here’s how to make it.
Ingredients for Canned Chicken Pot Pie
Transform pantry staples into a hearty, comforting meal with these essentials.
| Ingredient | Amount | Notes |
|---|---|---|
| Canned Chicken Breast 🍗 | 2 cups | Drained and shredded |
| Frozen Mixed Vegetables 🥕 | 2 cups | Peas, carrots, corn, green beans |
| All-Purpose Flour 🌾 | ½ cup | For roux and thickening |
| Unsalted Butter 🧈 | ½ cup | For roux and crust |
| Whole Milk 🥛 | 1 ½ cups | For creamy sauce |
| Chicken Broth 🍲 | 1 ½ cups | Low-sodium preferred |
| Yellow Onion 🧅 | 1 whole | Medium, finely diced |
| Garlic Cloves 🧄 | 2 cloves | Minced for depth |
| Dried Thyme 🌿 | 1 tsp | For earthy undertones |
| Salt 🧂 | 1 tsp | Kosher or sea salt |
| Black Pepper 🌶️ | ½ tsp | Freshly ground preferred |
| Refrigerated Pie Crust 🥧 | 2 sheets | Store-bought for flaky shortcut |
| Large Egg 🥚 | 1 whole | For egg wash finish |
The canned chicken quality matters—Kirkland Signature or Tyson offer consistently tender breast meat. Look for low-sodium chicken broth (Swanson or Progresso are reliable) to control the seasoning. For the pie crust, Pillsbury refrigerated sheets deliver that promised flaky texture without the effort. The frozen vegetable blend should include peas, carrots, corn, and green beans for classic pot pie flavor.
No canned chicken? Rotisserie chicken at 2 cups shredded works perfectly. For a vegetarian twist, canned chickpeas or white beans add heartiness. If you lack chicken broth, vegetable broth with a pinch of poultry seasoning can substitute. The roux can be made with olive oil instead of butter for a lighter option. Fresh thyme can replace dried at three times the amount.
Assemble and bake immediately for best results—this doesn’t hold well uncooked. Leftovers keep 3-4 days refrigerated (reheat in oven for crisp crust). The unbaked filling can be frozen for 1 month (thaw before using).
Why You’ll Love This Recipe
- I’ll be real: it’s my go-to for potlucks and lazy Sundays alike.
- No-Fuss Meal: Between us, it’s just dump, stir, and bake—canned chicken and frozen veggies do all the heavy lifting.
- Buttery Crust: That golden top made with butter and whole milk? Crisp outside, creamy inside, every time.
- Feeds the Crew: I’ll be real: it’s my go-to for potlucks and lazy Sundays alike.
Step-by-Step Instructions for Canned Chicken Pot Pie
This method delivers on the promise of quick comfort with a perfectly flaky crust every time.
Step 1: Prepare the Filling Base
In a large skillet over medium heat, melt the 0.5 cup unsalted butter. Add the finely diced yellow onion and cook for 4-5 minutes until translucent and fragrant. Stir in the minced garlic cloves and cook for an additional 30 seconds until just fragrant—don’t let it brown.
Sprinkle the 0.5 cup all-purpose flour over the onion mixture and whisk constantly for 1-2 minutes to create a smooth roux. This step builds the foundation for your creamy sauce, so keep stirring to prevent lumps from forming.
Step 2: Develop the Creamy Sauce
Slowly pour in the 1.5 cups chicken broth and 1.5 cups whole milk, whisking continuously to maintain a smooth consistency. The mixture will thicken as it comes to a gentle simmer. Add the 1 tsp salt, 0.5 tsp black pepper, and 1 tsp dried thyme for seasoning.
Stir in the 2 cups frozen mixed vegetables and cook for 3-4 minutes until they’re heated through. The sauce should coat the back of a spoon and have a velvety texture. If it’s too thick, add a splash of broth to loosen it slightly.
Step 3: Incorporate the Chicken
Gently fold in the 2 cups canned chicken breast (drained and shredded) until evenly distributed throughout the sauce. The chicken should be well-coated and the mixture should look creamy and thick. Taste and adjust seasoning if needed—remember that the crust will add some saltiness.
Remove the skillet from heat and let the filling cool for 5 minutes while you prepare the crust. This prevents the pastry from becoming soggy when assembled.
Step 4: Assemble and Bake
Unroll one sheet of the refrigerated pie crust and place it in a 9-inch pie dish, pressing gently to fit. Pour the chicken filling into the crust. Top with the second sheet, crimping the edges to seal. Cut several small slits in the top crust to allow steam to escape during baking.
Whisk the large egg with 1 tablespoon water and brush it over the top crust for a golden finish. Bake at 375°F for 30-35 minutes until the crust is deep golden brown and the filling is bubbling through the vents. Let rest for 10 minutes before serving to allow the filling to set.
Pro Tips For Making Canned Chicken Pot Pie
- Drain the Chicken: Press the canned chicken in a colander for 30 seconds to remove excess liquid—it prevents a watery filling. I learned this the hard way after my first pie had soup-like consistency.
- Thaw the Veggies: Microwave the frozen mixed vegetables for 2 minutes to remove excess moisture before adding them to the filling. Sounds weird, but it works.
- Chill the Dough: If making your own crust, refrigerate it for at least 15 minutes before rolling—it handles better and flakes more. My grandmother swore by this, and she was right.
- Salt the Filling: Season the chicken and vegetable mixture aggressively—canned chicken and frozen veggies need more salt than you think, especially with unsalted butter.
Dietary Considerations for This Dish
Gluten-Free Option
Swap the all-purpose flour for a 1:1 gluten-free baking blend like King Arthur Measure for Measure. Use it in equal amounts for the roux and crust. The texture will be slightly different but still delicious. I’ve tested this with great results in my own kitchen. 💪
Dairy-Free Adaptation
Replace the 0.5 cup unsalted butter with vegan butter (I recommend Miyoko’s) and use unsweetened almond or oat milk instead of whole milk. For the crust, look for a dairy-free pie crust like Wholly Wholesome brand.
Lower-Sodium Version
Use low-sodium chicken broth and no-salt-added canned chicken. Reduce the added salt to ½ tsp and boost flavor with extra herbs like rosemary or parsley. The filling will still taste rich and satisfying.
Vegetarian Twist
Omit the chicken and use 2 cups canned chickpeas or white beans instead. Add 1 tsp smoked paprika for depth. The dish remains hearty and comforting, just without the meat. My vegetarian friends love this version. ✨
Lactose-Free Adjustments
Use lactose-free milk (like Lactaid) and a lactose-free butter alternative. The Pillsbury pie crust is already lactose-free, so no changes are needed there. The creamy texture stays intact with these swaps.
Extra Protein Boost
Add ½ cup cooked quinoa or lentils to the filling for more protein and fiber. This works well if you’re using the vegetarian version or just want to bulk it up. It’s an easy way to make the meal even more satisfying.
Nutrition Facts
Frequently Asked Questions
Can I use fresh chicken instead of canned?
Use 2 cups cooked, shredded chicken breast as a direct substitute. Poach or bake fresh chicken until it reaches 165°F before adding to the filling. This keeps the prep just as quick while maintaining great flavor.
What if my sauce is too thin?
Simmer the filling for 2-3 additional minutes to thicken. If needed, mix 1 tablespoon cornstarch with 1 tablespoon cold water and stir into the sauce. It will thicken as it cools.
Can I make this ahead of time?
Assemble the pie but don’t bake it. Refrigerate for up to 1 day or freeze for 1 month. Bake from cold, adding 5-10 minutes to the cooking time. Let it rest 10 minutes before serving.
How do I prevent a soggy crust?
Let the filling cool for 5 minutes before assembling. Brush the bottom crust with a thin layer of beaten egg white to create a moisture barrier. This keeps the crust crisp and flaky.

- 4C Bread Crumbs Meatballs Recipe: Crispy Crust and Juicy Centers - September 25, 2026
- 6 Oz Chocolate Chip Cookie Recipe: Perfectly Balanced Crispy Edges and Chewy Hearts - September 25, 2026
- 6-Inch Coffee Cake Recipe: Vanilla Bean Swirls and Buttery Streusel Topping - September 25, 2026