
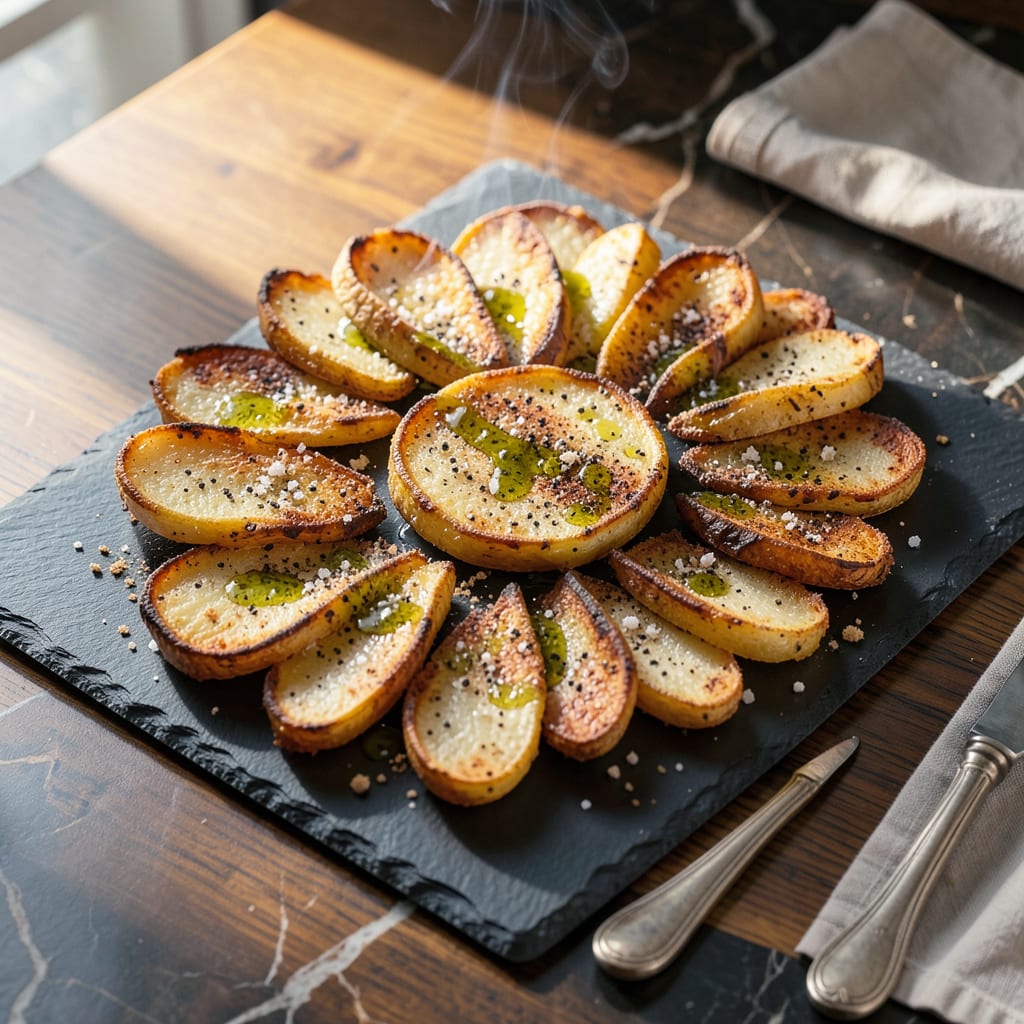
Canned sliced potatoes can transform into a crispy, golden side dish in just 20 minutes—no peeling or chopping required. This method delivers restaurant-quality results by leveraging high heat and proper drainage to eliminate excess moisture, ensuring perfectly crisp edges every time.
The key is a two-step process: thoroughly patting the potatoes dry before tossing them with oil and seasonings, then roasting at 425°F until golden. What emerges is a versatile side with shatteringly crisp exteriors and tender centers, ready to complement any main course.
Ingredients for Canned Sliced Potatoes
Pantry staples and canned potatoes achieve restaurant-quality crispiness with this precise ingredient combination.
| Ingredient | Amount | Notes |
|---|---|---|
| Canned sliced potatoes 🥔 | 2 cans | 14.5 oz each, drained thoroughly |
| Extra-virgin olive oil 🫒 | 3 tbsp | Divided for coating and drizzling |
| Diamond Crystal kosher salt 🧂 | 1 tsp | Adjust to taste after roasting |
| Freshly ground black pepper 🌶️ | ½ tsp | Coarse grind preferred |
| Garlic powder 🧄 | 1 tsp | Not garlic salt |
| Smoked paprika 🌶️ | ½ tsp | For depth and color |
| Onion powder 🧅 | ½ tsp | Balances garlic flavor |
| Dried rosemary 🌿 | ½ tsp | Crushed between fingers |
| Dried thyme 🌿 | ½ tsp | Rubbed to release oils |
| Nutritional yeast 🧀 | 1 tbsp | Optional for cheesy flavor |
| Fresh parsley 🌿 | 2 tbsp | Chopped, for garnish |
The potatoes are the foundation—Del Monte or Great Value brands work consistently well due to their uniform slicing. Thorough drainage and patting dry are non-negotiable for achieving crispness. Diamond Crystal kosher salt is specified for its clean flavor and precise measurement control. For the olive oil, California Olive Ranch or Colavita provide the neutral base needed for high-heat roasting without burning. The spices should be fresh (check expiration dates) for maximum potency, particularly the smoked paprika which contributes both color and depth.
No smoked paprika? Regular paprika plus a pinch of liquid smoke can approximate the flavor. Dried herbs can be substituted with one-third the amount of fresh (1 tsp dried = 1 tbsp fresh). For those avoiding oil, avocado oil spray provides a lighter alternative. The nutritional yeast is optional but recommended for umami depth—Bragg or Bob’s Red Mill are reliable brands. If using table salt instead of kosher, reduce by half due to its finer grain and higher salinity.
Drained potatoes can be stored in the refrigerator for 24 hours prior to roasting if needed. The seasoning blend keeps in an airtight container for 6 months—scale up and store for future use. Roasted potatoes are best served immediately but can be reheated at 375°F for 8-10 minutes to restore crispness. Avoid microwaving as it will compromise texture.
Why You’ll Love This Recipe
- No-Peel Magic: I skip the tedious scrubbing and chopping—just drain, toss, and roast. Those pre-sliced canned potatoes save me 15 minutes of prep every single time.
- Crispy Meets Creamy: Here’s what sold me—the edges get golden and crackly while the centers stay soft, all thanks to that olive oil and a hot oven. Garlic powder adds just enough punch without overpowering.
- My Weeknight MVP: Between us, this is my backup plan for busy days. Pairs with grilled chicken, scrambled eggs, or straight from the pan as a snack (yes, even on a Tuesday night).
- Budget Stretch: A can costs less than fresh potatoes, lasts months in the pantry, and still delivers. I’ll be real: I’ve served these to company, and nobody guessed they weren’t homemade.
Step-by-Step Instructions for Canned Sliced Potatoes
This method transforms simple canned potatoes into crispy, flavorful perfection with minimal effort.
Step 1: Prepare and Dry the Potatoes
Begin by thoroughly draining the 2 cans canned sliced potatoes in a colander. Press them gently between paper towels to remove all excess moisture. This step is crucial—wet potatoes will steam rather than crisp when roasted.
Transfer the dried potatoes to a large bowl. You’ll notice they appear slightly translucent at the edges when properly dried. This ensures maximum crispiness during roasting and prevents soggy results.
Step 2: Season and Coat Evenly
Drizzle 2 tbsp extra-virgin olive oil over the potatoes and toss gently to coat. Add the 1 tsp Diamond Crystal kosher salt, 0.5 tsp freshly ground black pepper, 1 tsp garlic powder, 0.5 tsp smoked paprika, 0.5 tsp onion powder, 0.5 tsp dried rosemary, and 0.5 tsp dried thyme.
Use your hands to distribute the seasonings evenly, ensuring every slice is well-coated. The smoked paprika will give the potatoes a rich color, while the rosemary and thyme add aromatic depth. For best results, crush the dried herbs between your fingers as you sprinkle them to release their essential oils.
Step 3: Arrange for Maximum Crispiness
Preheat your oven to 425°F and line a baking sheet with parchment paper. Arrange the seasoned potato slices in a single layer, ensuring they don’t overlap. This spacing allows hot air to circulate around each piece, promoting even browning.
Drizzle the remaining 1 tbsp extra-virgin olive oil over the arranged potatoes. This final touch encourages caramelization and helps achieve those coveted crispy edges. The high oven temperature will create a perfect balance between tender centers and crispy exteriors.
Step 4: Roast to Golden Perfection
Roast the potatoes for 15-20 minutes, then carefully flip each slice using a thin spatula. Return them to the oven for an additional 5-10 minutes until both sides are golden brown and the edges appear crispy.
Watch for visual cues: the potatoes should develop a deep golden color and the edges will curl slightly when perfectly crisp. The total cooking time may vary slightly depending on your oven, but don’t exceed 25 minutes total to prevent over-browning.
Step 5: Finish and Serve Immediately
Remove the potatoes from the oven and immediately sprinkle with 1 tbsp nutritional yeast while still hot. This adds a subtle cheesy flavor that complements the smoky spices. Toss gently to distribute evenly.
Transfer to a serving platter and garnish with 2 tbsp fresh parsley. The bright green parsley provides a fresh contrast to the rich, crispy potatoes. Serve immediately while hot—the texture is best when fresh from the oven, with crispy edges and tender centers in every bite.
Serving Suggestions for Leftovers
Breakfast Pairings
These crispy potatoes make an incredible breakfast side. Serve them alongside scrambled tofu with turmeric for a protein-packed vegan meal. The smoky paprika in the potatoes pairs beautifully with the earthy tofu. 🌟
For a heartier option, try them with avocado toast on sourdough. The creamy avocado balances the crispy texture perfectly. I love adding a sprinkle of chili flakes for extra kick.
Lunch Combinations
Pack these potatoes with a chickpea salad sandwich for a satisfying lunch. The garlic and rosemary notes complement the chickpeas’ nuttiness. Use whole grain bread to keep it hearty.
They also shine next to a grilled veggie wrap. The crispiness contrasts wonderfully with soft grilled zucchini and bell peppers. A drizzle of tahini sauce ties everything together.
Dinner Accompaniments
For dinner, serve these alongside black bean burgers. The smoky flavors in both components create harmony. I recommend topping the burgers with caramelized onions for extra depth.
They’re equally perfect with portobello mushroom steaks. The umami from the mushrooms enhances the potatoes’ savory notes. A side of garlic aioli completes this elegant vegan meal.
Garnishing Tips
Beyond parsley, try topping with crumbled vegan feta for a Mediterranean twist. The saltiness cuts through the richness. I use Violife brand for its authentic texture.
For a fresh herb boost, add chopped dill or chives. Their bright flavors contrast beautifully with the smoky spices. A squeeze of lemon zest adds zing.
Serving Temperature
These potatoes are best served piping hot straight from the oven. The crispiness is at its peak during the first 10 minutes after cooking. I always serve them on a pre-warmed plate.
If you must hold them, keep in a 200°F oven for up to 30 minutes. Avoid covering, as trapped steam will make them soggy. The texture changes noticeably after cooling.
Presentation Ideas
Arrange the potatoes in a cast iron skillet for a rustic presentation. The dark pan makes the golden edges pop. I love this look for family-style serving.
For individual portions, use small white ramekins. The contrast shows off the potatoes’ color. A sprinkle of flaky sea salt just before serving adds visual interest and texture.
Nutrition Facts
Frequently Asked Questions
Why do I need to pat the potatoes dry?
Excess moisture is the enemy of crispiness. When canned potatoes aren’t thoroughly dried, they’ll steam instead of roast, resulting in soggy slices. A quick pat with paper towels removes surface liquid for that perfect golden crunch.
Can I use fresh potatoes instead?
You can, but they’ll need parboiling first to achieve similar texture. Canned potatoes are pre-cooked, so they crisp up faster at 425°F. Fresh potatoes require 15-20 minutes longer in the oven for the same results.
How do I prevent them from sticking?
Use parchment paper and nonstick spray for foolproof release. If you prefer metal contact for extra crispiness, a well-seasoned cast iron skillet works beautifully—just preheat it in the oven first.
What if I don’t have smoked paprika?
Combine 1/2 tsp regular paprika with 1/8 tsp cayenne for similar depth. Alternatively, a pinch of liquid smoke (just 2-3 drops) mixed with sweet paprika mimics the flavor closely.
Can I make these ahead of time?
For best texture, roast just before serving. However, you can prep the seasoned potatoes up to 4 hours ahead and refrigerate. Spread them on the tray while cold for even cooking, adding 2-3 extra minutes to the bake time.

- 8 Bean Soup Recipe Crock Pot: Hearty Vegetable Medley in One Pot - September 25, 2026
- 4C Bread Crumbs Meatballs Recipe: Crispy Crust and Juicy Centers - September 25, 2026
- 6 Oz Chocolate Chip Cookie Recipe: Perfectly Balanced Crispy Edges and Chewy Hearts - September 25, 2026