
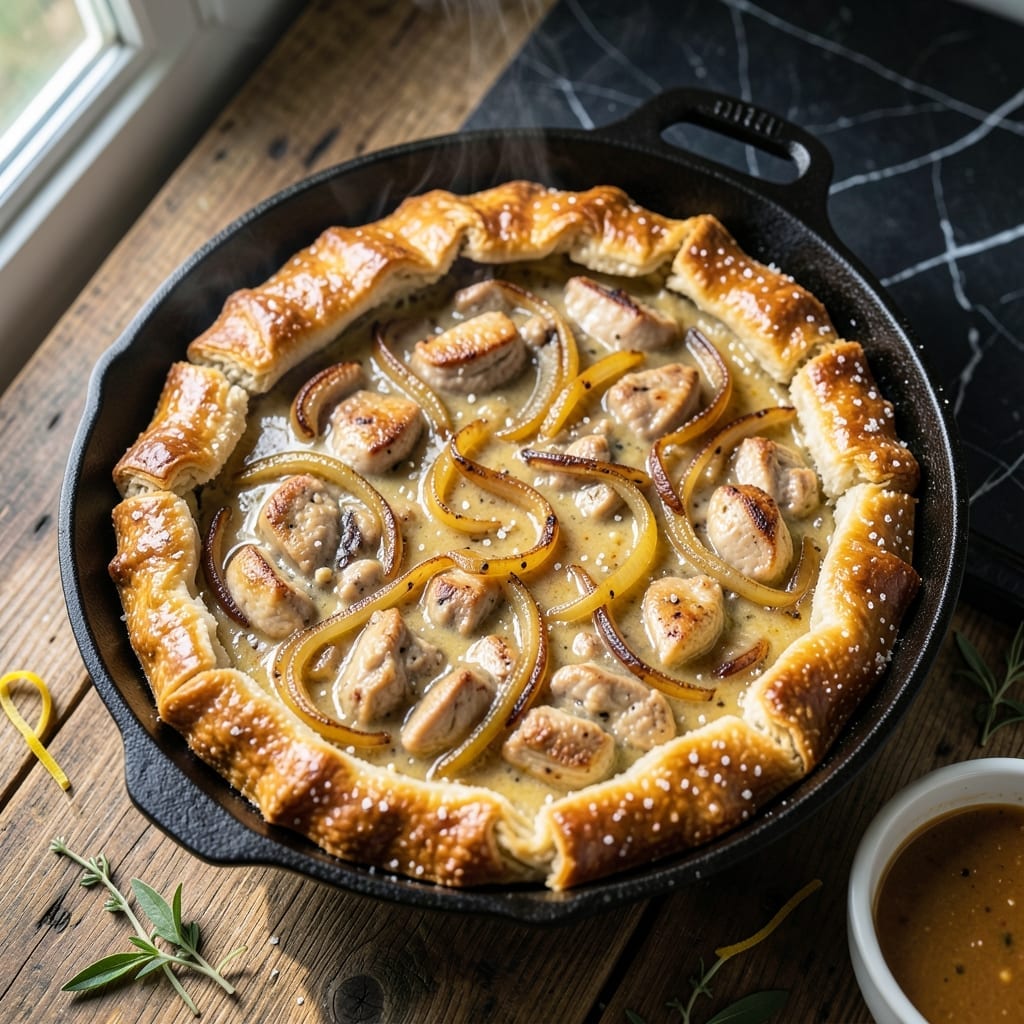
There’s nothing quite like a golden, flaky crust encasing a rich, herb-infused filling in a cast iron skillet. This method delivers that classic comfort with a rustic touch.
The cast iron creates a deep, even heat that ensures the bottom crust stays perfectly crisp while the filling bubbles beneath. Fresh herbs and tender chicken make every bite satisfying.
I’ve refined the technique to balance a buttery top with a hearty, savory base. The result is a dish that feels both timeless and effortlessly impressive.
Serve it straight from the skillet for a meal that’s as warm as it is welcoming. Here’s how to make it right.
Ingredients for Cast Iron Chicken Pot Pie
Buttery crust meets hearty chicken and herbs in this rustic skillet classic.
| Ingredient | Amount | Notes |
|---|---|---|
| All-Purpose Flour 🌾 | 2 ½ cups | Plus extra for dusting |
| Unsalted Butter 🧈 | 1 cup | Cold, cubed for crust |
| Ice Water 💧 | ½ cup | For crust dough |
| Salt 🧂 | 1 tsp | Divided for crust and filling |
| Boneless Skinless Chicken Thighs 🍗 | 1 ½ lb | Cut into bite-sized pieces |
| Yellow Onion 🧅 | 1 whole | Medium, finely diced |
| Carrots 🥕 | 2 whole | Medium, diced |
| Celery Stalks 🥬 | 2 whole | Diced for filling |
| Fresh Thyme 🌿 | 1 tbsp | Chopped, or 1 tsp dried |
| Fresh Rosemary 🌿 | 1 tbsp | Chopped, or 1 tsp dried |
| Garlic Cloves 🧄 | 3 cloves | Minced for filling |
| Chicken Broth 🫕 | 1 ½ cups | Low-sodium preferred |
| Whole Milk 🥛 | ½ cup | For creamy filling |
| Frozen Peas 🌱 | 1 cup | No need to thaw |
| Black Pepper 🌶️ | ½ tsp | Freshly ground preferred |
The cast iron is key here. A 10-12 inch skillet gives you that deep, even heat distribution for a crisp bottom crust. For the butter, Plugrá or Kerrygold are excellent choices—high fat content means flakier pastry. The chicken thighs stay juicier than breasts during cooking. Look for air-chilled at Whole Foods if you want to splurge, but any supermarket brand works.
No fresh herbs? Dried at one-third the amount works perfectly. Swap the peas for frozen corn or green beans—just keep the total volume similar. The milk can be half-and-half for extra richness, or whole milk if that’s what you have. For a shortcut, use rotisserie chicken (about 3 cups shredded) and skip the cooking step. The broth can be homemade or quality boxed.
The crust dough can rest in the fridge for up to 2 days, or freeze it for 1 month. The filling actually tastes better the next day—assemble the pie and bake when ready. Leftovers keep 3-4 days in the fridge, but that crispy bottom won’t survive reheating (worth it fresh).
Why You’ll Love This Recipe
- One Pan Magic: I toss everything into my cast iron—flour, butter, chicken thighs—and the skillet does half the work for me.
- Buttery Crust Love: That flaky, golden crust from the butter and ice water? I’ll fight my kids for the last bite.
- Weeknight Hero: Honestly, it’s my go-to for busy Tuesdays when I need something hearty with zero fuss.
- Leftovers Win: I make a double batch because the flavors deepen overnight, and reheating in the cast iron keeps it crisp.
Step-by-Step Instructions for Cast Iron Chicken Pot Pie
This method ensures a golden crust and rich, herb-infused filling with minimal effort.
Step 1: Prepare the Flaky Crust Dough
In a large bowl, combine the 2.5 cups All-Purpose Flour with ½ tsp Salt from the 1 tsp Salt. Cut in the 1 cup Unsalted Butter (cold and cubed) using a pastry cutter or your fingers until the mixture resembles coarse crumbs with pea-sized butter pieces visible.
Gradually add the 0.5 cup Ice Water, one tablespoon at a time, mixing just until the dough comes together. Overworking will develop gluten and toughen the crust. Shape into a disk, wrap in plastic, and chill for 30 minutes while you prepare the filling.
Step 2: Cook the Chicken and Vegetables
In your cast iron skillet over medium-high heat, cook the 1.5 lb Boneless Skinless Chicken Thighs (cut into bite-sized pieces) until lightly browned and cooked through, about 6-8 minutes. Remove and set aside.
In the same skillet, sauté the diced 1 whole Yellow Onion, 2 whole Carrots, and 2 whole Celery Stalks for 5 minutes until softened. Add the minced 3 cloves Garlic Cloves, 1 tbsp Fresh Thyme, and 1 tbsp Fresh Rosemary, cooking for 1 minute until fragrant.
Step 3: Create the Creamy Filling
Sprinkle the remaining ½ tsp Salt and 0.5 tsp Black Pepper over the vegetables. Pour in the 1.5 cups Chicken Broth and 0.5 cup Whole Milk, stirring to deglaze the pan. Simmer for 5 minutes until slightly thickened.
Return the chicken to the skillet along with the 1 cup Frozen Peas. Stir to combine and remove from heat. The filling should be thick and hearty, with vegetables tender but not mushy.
Step 4: Assemble and Bake the Pot Pie
Roll out the chilled dough to fit your skillet, leaving a slight overhang. Place it over the filling, crimping the edges to seal. Cut several slits in the top to allow steam to escape.
Bake at 375°F for 30-35 minutes until the crust is golden brown and the filling is bubbling. Let rest for 10 minutes before serving to allow the filling to set.
Pro Tips For Making Cast Iron Chicken Pot Pie
- Chill the Dough: Keep your butter cold when making the crust—work quickly and pop the dough in the fridge for 15 minutes before rolling. I learned this the hard way after my first three pies had tough, flat crusts.
- Brown the Chicken: Sear the chicken thighs in the cast iron first until golden—about 4 minutes per side. This builds flavor and keeps the meat juicy, even after baking.
- Vent the Top: Cut a few small slits in the crust before baking to let steam escape. After one exploded pie, I finally figured out this prevents a soggy mess.
- Preheat the Pan: Heat your cast iron in the oven for 10 minutes before adding the pie. Sounds weird, but it works—guarantees a crisp bottom crust every time.
Essential Equipment for cast iron chicken pot pie
Cast Iron Skillet
A 10-12 inch cast iron skillet is non-negotiable for this recipe. I recommend Lodge for its durability and even heat distribution. The heavy base prevents burning and ensures your crust browns perfectly. Season it well before use.
Pastry Tools
For the flakiest crust, use a pastry cutter to work the cold butter into the flour. A rolling pin with adjustable thickness guides helps roll the dough evenly. I also keep a bench scraper handy for clean cuts and easy transfer.
Mixing Bowls
A large stainless steel mixing bowl gives you plenty of room to work the dough without overworking it. I prefer Cuisinox for their weight and stability. Chill the bowl beforehand to keep the butter cold.
For the filling, a medium bowl holds the cooked chicken while you prepare the vegetables in the skillet.
Measuring Essentials
Accurate measurements matter, especially for the crust. I use OXO Good Grips measuring cups and spoons for precision. A kitchen scale ensures your 1.5 lb chicken is spot-on, though volume measurements work fine here. 💡
Thermometer
An instant-read thermometer takes the guesswork out of checking the chicken’s doneness. Look for 165°F internal temperature in the thickest pieces. I trust my ThermoWorks ThermoPop for fast, accurate readings.
Serve and Slice
A heatproof spatula helps lift portions from the hot skillet. For clean slices, I use a serrated knife to cut through the crust without crushing it. Serve directly from the skillet for that rustic presentation. 🔥
Nutrition Facts
Frequently Asked Questions
What size skillet works best?
A 10-12 inch cast iron skillet is ideal for even cooking and proper crust browning. Smaller skillets may cause overflow, while larger ones could lead to a thin filling layer.
Can I use pre-made pie crust?
Yes, store-bought crust works in a pinch. For best results, use 1 refrigerated pie crust and press it into the skillet before adding the filling. Homemade crust offers superior flakiness, though.
How do I prevent a soggy bottom crust?
Preheat your skillet in the oven for 5 minutes before adding the dough. Also, avoid overfilling with liquid. The cast iron’s heat helps create that perfect crisp base.
Can I make this ahead of time?
Assemble the pie completely and refrigerate for up to 24 hours before baking. Add 5-10 minutes to the baking time if starting from cold.

- 6 Oz Chocolate Chip Cookie Recipe: Perfectly Balanced Crispy Edges and Chewy Hearts - September 25, 2026
- 6-Inch Coffee Cake Recipe: Vanilla Bean Swirls and Buttery Streusel Topping - September 25, 2026
- 1 Hour Soup Recipe: Velvety Richness Without the Wait - September 25, 2026