
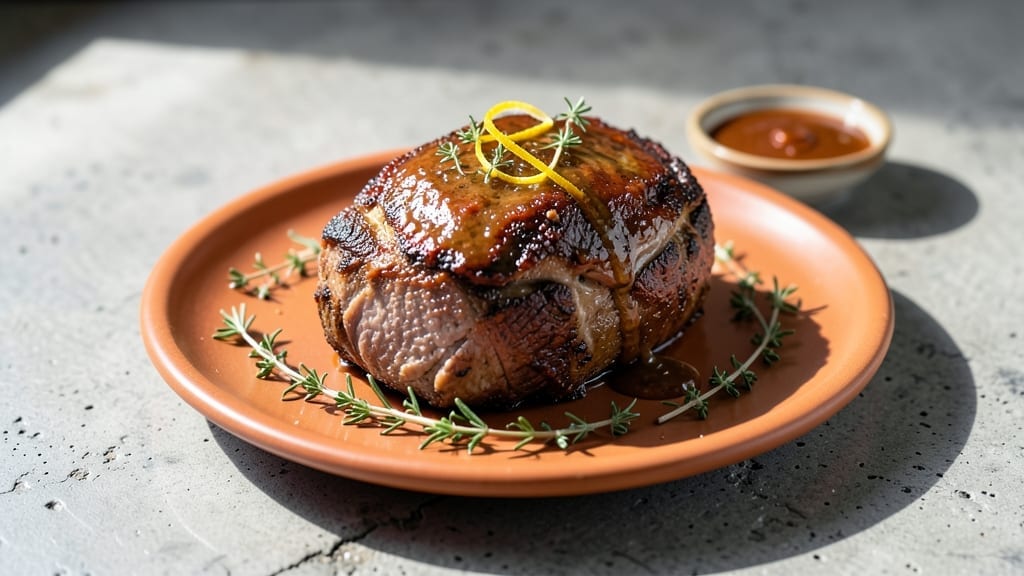
Mastering a cast iron Dutch oven pot roast transforms tough beef chuck into melt-in-your-mouth perfection with a smoky-spiced crust that seals in every flavor. The Dutch oven’s even heat distribution ensures tender meat and rich, caramelized juices—no fancy equipment required.
My technique focuses on precise searing and slow braising for restaurant-quality results at home.
The secret lies in the Dutch oven’s ability to retain heat while developing deep, complex flavors over time. You’ll start with a well-seared crust on chuck roast, then slow-cook it until the meat practically falls apart.
This method creates a rich, flavorful broth that reduces into a glossy sauce, elevating every bite.
By the end, you’ll have fall-off-the-bone meat with a crust that crackles with spice and herbs, all blanketed in a velvety sauce. The Dutch oven’s cast iron ensures even cooking and flavor infusion, making this dish foolproof for weeknight dinners or holiday feasts.
Pair with classic sides like creamy mashed potatoes, roasted carrots, or crusty bread to soak up every last drop of that smoky sauce. This recipe delivers professional-quality results with minimal effort—just patience and the right technique.
Ingredients for cast iron dutch oven pot roast
The foundation of a perfect Dutch oven pot roast starts with quality beef and aromatic vegetables.
| Ingredient | Amount | Notes |
|---|---|---|
| Beef Chuck Roast 🥩 | 3 lb | Center-cut for even cooking |
| Yellow Onion 🧅 | 2 whole | Medium size, sliced into wedges |
| Carrots 🥕 | 4 whole | Medium size, cut into chunks |
| Garlic Cloves 🧄 | 6 cloves | Peeled and smashed |
| Fresh Thyme Sprigs 🌿 | 4 whole | Or 1 tbsp dried thyme |
| Fresh Rosemary Sprigs 🌿 | 2 whole | Or 1 tsp dried rosemary |
| Dry Red Wine 🍷 | 1 ½ cups | Bold Cabernet Sauvignon preferred |
| Beef Broth 🥫 | 2 cups | Low-sodium preferred |
| Tomato Paste 🍅 | 2 tbsp | Smooth, not chunky |
| Olive Oil 🫒 | 2 tbsp | Extra-virgin for searing |
| Kosher Salt 🧂 | 1 ½ tsp | Diamond Crystal preferred |
| Freshly Ground Black Pepper 🌶️ | 1 tsp | Coarsely ground |
| Smoked Paprika 🌶️ | 1 tsp | For smoky depth |
| Bay Leaves 🍃 | 2 whole | Dried, standard size |
The beef chuck roast is the cornerstone of this dish, and center-cut pieces are essential for even cooking. Whole Foods Market or Costco typically carry high-quality chuck roasts with good marbling, which ensures tenderness. Look for cuts that are bright red with visible fat—this is what creates the rich, flavorful sauce. If you’re buying a whole roast, trim excess fat to about 1/4-inch thickness for optimal browning. The onions and carrots should be firm and vibrant; local farmers markets often have fresher produce with better flavor. For the herbs, fresh thyme and rosemary from the grocery store’s produce section are ideal, but ensure they’re plump and fragrant—not wilted or dried out.
No red wine on hand? Dry sherry or beef broth works equally well, though the flavor profile will differ slightly. Substituting dried herbs is acceptable, but use one-third the amount of fresh—dried herbs are more concentrated. For the tomato paste, Trader Joe’s or Whole Foods carry high-quality, smooth varieties that won’t clump. If you’re short on time, pre-sliced onions and baby carrots can be used, though their flavor won’t be as robust. The smoked paprika adds depth, but if unavailable, a pinch of liquid smoke can mimic the effect. Always ensure your spices are fresh—ground spices lose potency quickly, so check the date on the package.
This pot roast develops deeper flavor the longer it sits, so plan to cook it at least 3 hours for optimal tenderness. Store any leftovers in an airtight container in the refrigerator for up to 5 days, though the meat will continue to tenderize over time. For longer storage, freeze portions in a sealed container for up to 3 months. Reheat gently on the stove with a splash of broth to maintain moisture. The sauce thickens as it cools, so adding a little extra liquid when reheating ensures a silky texture. Portion the meat and sauce separately for easy serving—this dish reheats beautifully and tastes even better the next day.
Why You’ll Love This Recipe
- One-Pan Magic: The Dutch oven does all the work—no extra pots, no messy pans. Just dump in the chuck roast, toss in the onions and carrots, add the garlic and thyme, and let the cast iron turn tough meat into melt-in-your-mouth perfection while you sip wine or scroll through your phone.
- Deep, Savory Crust: That crust? Oh, it’s everything—golden and caramelized from browning the meat first, while the thyme infuses the onions into something almost sweet. Between us, the first bite is the reason I keep making this, even when I should be eating healthier.
- Leftovers That Don’t Suck: Honestly, the second day is often better. The meat gets even more tender, and I just reheat it in the same pot with a splash of broth or water. My kids fight over it—proof it’s not just me being dramatic.
- Budget Beef, Big Payoff: A chuck roast costs less than steak but feeds five for way under $20. The onions and carrots stretch the meal, and the garlic-thyme combo makes it taste like you slaved over it. (Spoiler: You didn’t.)
Step-by-step instructions for cast iron Dutch oven pot roast
This method delivers a deeply flavorful, tender pot roast with a rich crust and aromatic sauce.
Sear the Beef Chuck Roast for Maximum Flavor
Heat the cast iron Dutch oven over medium-high heat until it’s smoking hot. Add the 2 tablespoons olive oil and swirl to coat the bottom evenly. Place the 3 lb beef chuck roast in the pan, fat-side down, and press down gently with a spatula. Let it sear undisturbed for 4-5 minutes until a deep golden brown crust forms. Flip the roast and repeat on the second side for another 4-5 minutes.
Here’s the thing—this searing step isn’t just about browning. The Maillard reaction creates complex flavors that will infuse throughout the cooking process. If you notice the roast isn’t releasing easily from the pan after 3-4 minutes, it’s not ready to flip. The key is patience at this stage. Once both sides are beautifully browned, remove the roast and set it aside on a plate.
Build the Aromatic Base with Onions, Carrots, and Herbs
In the same Dutch oven, add the sliced 2 whole yellow onion wedges and 4 whole carrots cut into chunks. Cook them for 5-6 minutes, stirring occasionally, until they begin to soften and take on color. Add the 6 peeled and smashed garlic cloves, 4 whole fresh thyme sprigs, and 2 whole fresh rosemary sprigs. Stir everything together and cook for another 2 minutes until the garlic is fragrant.
The reason we cook these vegetables first is to develop their flavors before adding liquids. You’ll know they’re ready when they’re softened but still retain their shape. At this point, sprinkle the 1.5 teaspoons kosher salt, 1 teaspoon freshly ground black pepper, and 1 teaspoon smoked paprika over the vegetables. Stir well to combine these seasonings with the aromatic base you’ve created.
Deglaze and Develop the Sauce
Pour in the 1.5 cups dry red wine, scraping up any browned bits from the bottom of the Dutch oven with a wooden spoon. Let the wine simmer for 3-4 minutes until it reduces by about half and the alcohol aroma has cooked off. Stir in the 2 tablespoons tomato paste and cook for another minute until it’s fully incorporated and the mixture thickens slightly.
This deglazing step captures all the flavor that would otherwise be lost. The wine not only adds depth but also helps break down the meat fibers during the long cook. The tomato paste adds richness and balances the acidity of the wine. You’ll notice the mixture will darken as it reduces, creating a beautiful foundation for your sauce.
Braise the Roast to Tender Perfection
Return the seared beef chuck roast to the Dutch oven, placing it on top of the vegetable mixture. Pour in the 2 cups beef broth and add the 2 whole bay leaves. Bring the liquid to a gentle simmer, then cover the Dutch oven with its lid. Reduce the heat to low and transfer the pot to the oven preheated to 325°F.
Braise the roast for 3 to 3.5 hours, or until the meat is fork-tender with a probe sliding in easily. Here’s where the magic happens—the low, slow cooking transforms tough muscle fibers into melt-in-your-mouth tenderness. I check for doneness by inserting a meat thermometer into the thickest part of the roast; it should read 205°F. If your oven runs hot, start checking after 3 hours.
Rest and Serve with Rich Pan Sauce
Remove the Dutch oven from the oven and transfer the roast to a cutting board. Tent it loosely with aluminum foil and let it rest for 15-20 minutes. This resting period allows the juices to redistribute throughout the meat, ensuring each slice is moist and flavorful. While the roast rests, skim any excess fat from the surface of the sauce in the Dutch oven.
Slice the roast against the grain into ¼-inch thick pieces and serve with the vegetables and sauce. The result should be fall-off-the-bone tender meat with a rich, smoky crust and a deeply flavorful sauce that coats every bite. The vegetables will be tender but still hold their shape, absorbing all the aromatic flavors from the cooking process. Serve immediately with crusty bread to soak up every last bit of that delicious sauce.
Pro Tips For Making Cast Iron Dutch Oven Pot Roast
- CRANK THE HEAT FIRST: High heat for 5 minutes—yes, even with a heavy Dutch oven. This sears the roast properly, creating that flavorful crust that won’t dissolve into the sauce later. (I used to skip this and ended up with bland, gray meat every time.)
- SALT THE ROAST BEFORE SEARING: Generously salt the beef chuck roast at least 40 minutes before cooking—it penetrates deeper and seasons the meat evenly. No need to add extra salt later; trust the initial dose.
- DON’T CROWD THE VEGETABLES: Arrange onions, carrots, and garlic in a single layer around the roast—no overlapping. Tight packing steams them instead of browning, and you’ll end up with soggy, flavorless veggies.
- USE THYME SPRIGS WISELY: Tuck 2-3 thyme sprigs directly into the meat’s surface before searing—they’ll infuse the crust with aroma as it cooks. Discard them after browning; they’re for flavor, not eating. (Yes, I’ve tried leaving them in—don’t.)
Storing and reheating your leftovers
Refrigerator Storage
Let your pot roast cool completely before transferring to an airtight container—I use glass Pyrex with snap-on lids for best results. Store in the refrigerator at 40°F or below for up to 5 days, though the meat continues tenderizing over time.
The sauce thickens as it cools, so add 1-2 tablespoons of beef broth when reheating to restore its silky texture. 🥫
Freezer Storage
For longer storage, freeze portions in quart-sized freezer bags with 1-inch headspace to prevent expansion. I recommend dividing into 2-3 meal portions for easy reheating. Label with the date and freeze for up to 3 months.
The Dutch oven’s cast iron helps preserve flavor during freezing, but expect slight texture changes after thawing. 🧊
Stovetop Reheating
My preferred method is stovetop reheating—it maintains the best texture. Place meat and sauce in a heavy-bottomed pot, add ¼ cup beef broth, and heat over medium-low for 10-15 minutes.
Stir occasionally to prevent sticking, and taste for seasoning adjustments. The sauce should reach 165°F for safe consumption. 🔥
Oven Reheating
For hands-off reheating, transfer to a preheated 300°F oven in a covered Dutch oven with 1 cup beef broth. Bake for 1.5-2 hours until the meat reaches 165°F.
This method works best for large batches and keeps the sauce rich. I often use this when serving to a crowd. 🍽️
Microwave Safety
For quick reheating, use microwave-safe containers with 2-minute intervals on 50% power. Stir between intervals and add 2 tablespoons broth to prevent drying. This method is fastest but less ideal for maintaining sauce consistency. I reserve it for single servings. ⏱️
Reheating Tips
Always reheat to 165°F to ensure food safety. If the sauce appears too thick after reheating, stir in 1-2 tablespoons of broth to restore its velvety consistency. The meat will be even more tender after reheating—this is normal and delicious! 💡
Nutrition facts
Frequently asked questions
Why does my pot roast turn out tough instead of tender?
The key is patience—don’t rush the cooking time. Braising requires 3+ hours at 325°F to break down collagen in the meat. If your roast is still tough, extend cooking to 4 hours or add ½ cup extra broth to keep it moist. Also, avoid cutting into the meat until it’s fully rested (15-20 minutes) to prevent juices from escaping.
Can I use a different cut of beef instead of chuck roast?
Chuck roast is ideal for its marbling and collagen content, but you can substitute beef short ribs or brisket—both work beautifully. Avoid lean cuts like sirloin or filet mignon, as they lack the fat needed for rich sauce development. If using a tougher cut, increase cooking time by 30-60 minutes to ensure tenderness.
How do I prevent the sauce from being too thin?
Simmer the sauce uncovered for 5-10 minutes after removing the meat to reduce it naturally. For a thicker sauce, mix 1 tablespoon cornstarch with 2 tablespoons cold water, stir into the sauce, and simmer until it reaches your desired consistency. Avoid adding flour directly, as it can make the sauce cloudy.
What’s the best way to reheat pot roast without drying it out?
Use the stovetop method: Add ¼ cup beef broth to the Dutch oven, cover, and heat on low-medium for 10-15 minutes. The broth keeps the meat moist and restores the sauce’s richness. Never microwave without adding liquid—it causes the meat to dry out and the sauce to separate.
Can I make this recipe in an electric pressure cooker?
Yes! Sear the roast first, then add all ingredients except the bay leaves. Cook on high pressure for 45 minutes, then let the pressure release naturally. The meat will be even more tender, but the sauce may be thinner. Reduce it afterward by simmering uncovered for 5 minutes. The pressure cooker cuts time to just 1 hour total!

- Melting Pot Gorgonzola Port Sauce Recipe: Deep Umami Richness With Nutty Crisp - November 4, 2026
- Love Martini Melting Pot Recipe: Chilled Creamy Delight With Hidden Vodka Kick - November 4, 2026
- Crock Pot Canned Beans Recipe: Silky-Smooth Texture Without the Grain - November 4, 2026