
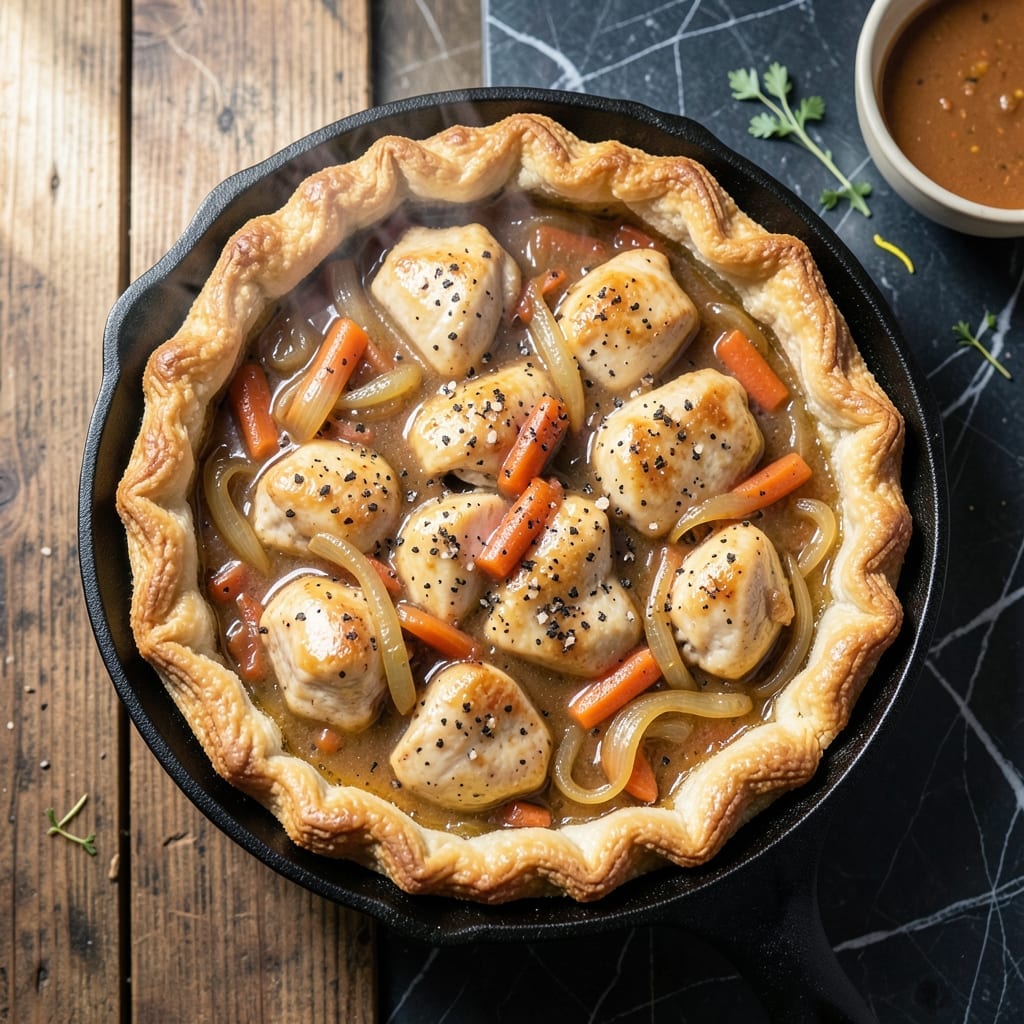
There’s something undeniably comforting about a golden, flaky crust encasing a rich, savory filling—especially when it’s baked in cast iron. This method ensures a perfectly crisp base and evenly cooked ingredients every time.
The filling comes together with tender chicken, hearty vegetables, and a velvety gravy that soaks into every bite. Using a cast iron skillet creates a deep, even heat that’s ideal for achieving that coveted golden brown finish.
What sets this apart is the way the crust bakes directly against the filling, forming a seal that locks in moisture and flavor. It’s a foolproof technique that delivers professional results without the fuss.
Serve it straight from the skillet for a rustic, impressive meal that’s as satisfying to make as it is to eat.
Ingredients for Cast Iron Pot Pie
A flaky crust and hearty filling come together for this comforting skillet classic.
| Ingredient | Amount | Notes |
|---|---|---|
| All-Purpose Flour 🌾 | 2 cups | Plus extra for dusting |
| Unsalted Butter 🧈 | ½ cup | Cold, cubed for crust |
| Ice Water 💧 | ½ cup | Plus 1 tbsp as needed |
| Chicken Thighs 🍗 | 1 ½ lb | Boneless, skinless, cubed |
| Yellow Onion 🧅 | 1 whole | Medium, finely diced |
| Carrots 🥕 | 2 whole | Medium, peeled and diced |
| Celery Stalks 🌿 | 2 whole | Finely diced for mirepoix |
| Garlic Cloves 🧄 | 3 cloves | Minced for depth of flavor |
| Chicken Broth 🍲 | 1 ½ cups | Low-sodium preferred |
| Heavy Cream 🥛 | ½ cup | Full-fat for richness |
| Frozen Peas 🌱 | ¾ cup | No need to thaw |
| Fresh Thyme 🌿 | 1 tbsp | Chopped, or 1 tsp dried |
| Salt 🧂 | 1 tsp | Diamond Crystal kosher preferred |
| Black Pepper 🌶️ | ½ tsp | Freshly ground for best flavor |
| Egg 🥚 | 1 whole | For egg wash on crust |
The crust demands cold ingredients—Land O’Lakes unsalted butter is a reliable choice, and King Arthur flour delivers consistent results. For the chicken, bone-in, skin-on thighs add more flavor, but boneless works fine for ease. The cast iron skillet is non-negotiable for that deep, even heat distribution. Look for a 10-inch Lodge skillet if you need to invest in one.
Out of chicken? Turkey thighs work just as well. No fresh thyme? Dried at one-third the amount is a fine swap. For the broth, Better Than Bouillon makes a great low-sodium option. The peas can be fresh if you prefer, but frozen (the petite kind) are more consistent. Skip the cream entirely for a lighter version, but the filling won’t be as luscious.
Assemble the pie and refrigerate up to 24 hours before baking if prepping ahead. Leftovers keep 3-4 days in the fridge—reheat in the oven to revive the crust. The filling thickens as it cools, making it even better the next day.
Why You’ll Love This Recipe
- One Pot Magic: I toss everything into my cast iron skillet—chicken, onions, buttery crust—and let the oven do the work.
- Buttery Crust Perfection: The flaky, golden layers from that butter-and-flour combo? Worth every bite.
- Feeds a Hungry Crowd: I’ve served this at Sunday dinners and weeknight rush hours with equal success.
- Leftovers? Even Better: Honestly, the filling thickens up overnight, making day-two portions taste even richer.
Step-by-Step Instructions for Cast Iron Pot Pie
Master this technique for a flaky crust and rich, creamy filling that defines comfort food.
Step 1: Prepare the Pie Crust
In a large bowl, combine the 2 cups All-Purpose Flour and 1 tsp Salt. Add the 0.5 cup Unsalted Butter (cold and cubed) and work it into the flour using your fingers or a pastry cutter until the mixture resembles coarse crumbs with pea-sized butter pieces visible.
Create a well in the center and add the 0.5 cup Ice Water, 1 tablespoon at a time, mixing gently with a fork until the dough just comes together. The dough should be shaggy but hold when pressed. Overworking develops gluten and makes the crust tough. Wrap in plastic and refrigerate for 30 minutes.
Step 2: Cook the Filling Base
In your cast iron skillet over medium-high heat, add the 1.5 lb Chicken Thighs (cubed) and cook until browned on all sides, about 6-8 minutes. Remove with a slotted spoon and set aside. The fond left in the pan will add depth to your filling.
In the same skillet, add the 1 whole Yellow Onion (finely diced), 2 whole Carrots (peeled and diced), and 2 whole Celery Stalks (finely diced). Sauté for 5-6 minutes until the vegetables soften and the onion becomes translucent. Stir in the 3 cloves Garlic Cloves (minced) and 1 tbsp Fresh Thyme, cooking for an additional 30 seconds until fragrant.
Step 3: Build the Creamy Filling
Return the chicken to the skillet. Pour in the 1.5 cups Chicken Broth and 0.5 cup Heavy Cream, stirring to combine. Bring to a gentle simmer and cook for 8-10 minutes until the liquid reduces slightly and thickens. The mixture should coat the back of a spoon.
Add the 0.75 cup Frozen Peas (no need to thaw) and 0.5 tsp Black Pepper, stirring to distribute evenly. Cook for an additional 2-3 minutes until the peas are heated through. Taste and adjust seasoning if needed, though the salt from earlier should suffice.
Step 4: Assemble and Bake to Perfection
Roll out the chilled dough on a lightly floured surface to a 12-inch circle. Place it over the filling in the cast iron skillet, tucking the edges inside to create a rustic crust. Cut a few slits in the center to allow steam to escape.
Whisk the 1 whole Egg with 1 tablespoon of water and brush it over the crust for a golden finish. Bake in a preheated 375°F oven for 30-35 minutes until the crust is deep golden brown and the filling is bubbling. Let rest for 10 minutes before serving to allow the filling to set.
Pro Tips For Making Cast Iron Pot Pie
- Pre-Cook the Chicken: Brown the chicken thighs first in the cast iron—this builds flavor and guarantees they’ll be fully cooked when the pie finishes baking. I learned this the hard way after pulling a pie with underdone meat once.
- Chill the Dough: Let the crust dough rest in the fridge for at least 30 minutes before rolling it out, or the butter will melt too fast and you’ll end up with a tough, flat crust instead of flaky layers.
- Vent the Top: Cut a few small slits in the top crust before baking—this lets steam escape and prevents a soggy bottom. Sounds obvious, but I skipped it my first time and had a sad, gummy mess.
- Use Cold Butter: Keep your butter ice-cold when cutting it into the flour, and use ice water for the dough. Warm butter = flat, dense crust, and nobody wants that in a pot pie.
Best Sauces and Condiments for This Dish
Classic Gravy Boost
For extra richness, serve with a side of homemade chicken gravy made from the pan drippings. I whisk 2 tbsp flour into 2 cups of the filling liquid, then simmer until thickened. The cast iron adds depth to the gravy’s flavor. 💫
Herb-Infused Cream
A dollop of thyme-infused crème fraîche adds a bright, tangy contrast to the rich filling. Mix ½ cup crème fraîche with 1 tsp chopped fresh thyme and a pinch of salt. It’s my go-to for elevating the dish.
Spicy Mustard Kick
Pair with Dijon mustard or a whole-grain mustard for a sharp, tangy bite. I love Maille brand—just 1 tsp per serving cuts through the creaminess. It’s a game-changer for balancing the richness.
Citrus Zing
A light squeeze of lemon juice over each serving brightens the flavors. Use ½ lemon per pie for a subtle lift. The acidity complements the savory filling without overpowering it.
Fresh Herb Garnish
Sprinkle with chopped parsley or chives right before serving for freshness. About 1 tbsp per slice adds color and a clean, herbal note. It’s a simple touch that makes the dish pop.
Hot Sauce Option
For heat lovers, a few dashes of Tabasco or Crystal hot sauce adds a spicy kick. Start with ¼ tsp per serving and adjust to taste. The heat contrasts beautifully with the creamy filling.
Nutrition Facts
Frequently Asked Questions
Can I make this ahead of time?
Yes! Assemble the pie and refrigerate up to 24 hours before baking. This lets flavors meld and saves time. Just add 5-10 minutes to the baking time if starting cold.
Why did my crust turn out soggy?
This usually happens if the filling was too wet or the oven wasn’t hot enough. Ensure your filling simmers until thickened and preheat the oven to 375°F. Cutting steam vents helps too.
Can I use store-bought crust?
Use 1 refrigerated pie crust for convenience. Let it warm slightly for easier handling, but keep it cold until baking for best flakiness.
How do I prevent the filling from bubbling over?
Place a baking sheet on the rack below to catch spills. Also, let the filling cool slightly before adding the crust to reduce overflow during baking.

- 4C Bread Crumbs Meatballs Recipe: Crispy Crust and Juicy Centers - September 25, 2026
- 6 Oz Chocolate Chip Cookie Recipe: Perfectly Balanced Crispy Edges and Chewy Hearts - September 25, 2026
- 6-Inch Coffee Cake Recipe: Vanilla Bean Swirls and Buttery Streusel Topping - September 25, 2026