
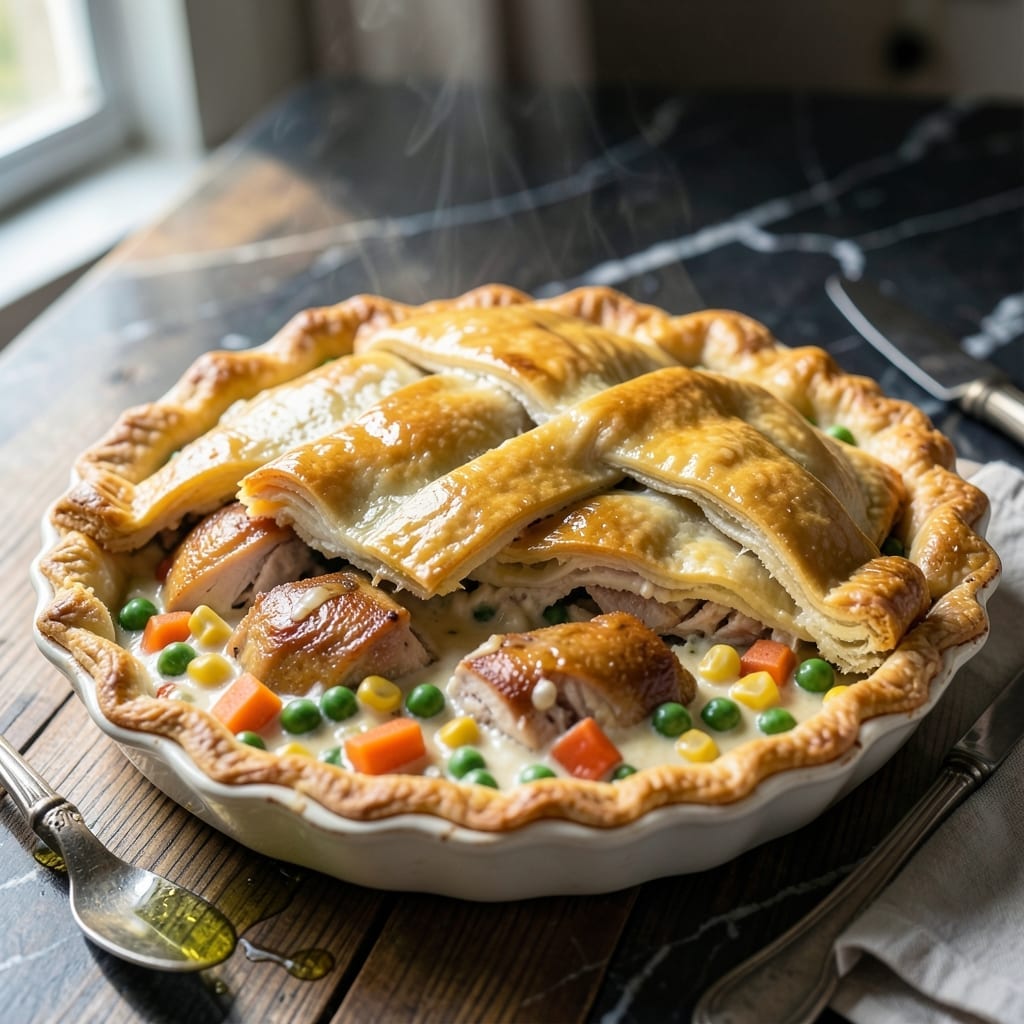
Comfort food doesn’t need to break the bank, and this creation proves it with a flaky crust that rivals any bakery’s. I developed this version during lean times when hearty meals were essential but budgets tight.
The filling comes together with inexpensive staples: chicken thighs, frozen vegetables, and a simple roux that thickens into a velvety sauce. A store-bought pie crust keeps costs down while delivering that coveted golden, flaky finish.
What you get is a steaming, satisfying dish with tender chicken, creamy vegetables, and a crust that shatters with every bite. It’s the kind of meal that warms both body and soul without straining your wallet.
Perfect for family dinners or meal prep, this dish delivers restaurant-quality comfort at a fraction of the price. Here’s how to make it.
Ingredients for Cheap Chicken Pot Pie
Budget-friendly staples come together for this hearty, comforting dish with flaky layers.
| Ingredient | Amount | Notes |
|---|---|---|
| Store-Bought Pie Crust 🥧 | 2 sheets | Refrigerated, for top and bottom |
| Boneless Skinless Chicken Thighs 🍗 | 1 ½ lb | Cut into bite-sized pieces |
| Frozen Mixed Vegetables 🥕 | 2 cups | Peas, carrots, corn, green beans |
| Unsalted Butter 🧈 | ½ cup | For the roux |
| All-Purpose Flour 🌾 | ½ cup | For thickening the sauce |
| Whole Milk 🥛 | 1 ½ cups | Or use 2% for lighter option |
| Chicken Broth 🍲 | 1 ½ cups | Low-sodium preferred |
| Yellow Onion 🧅 | 1 whole | Diced, about 1 cup |
| Garlic Cloves 🧄 | 2 cloves | Minced for depth |
| Dried Thyme 🌿 | 1 tsp | Or use poultry seasoning |
| Salt 🧂 | 1 tsp | Adjust to taste |
| Black Pepper 🌶️ | ½ tsp | Freshly ground preferred |
| Large Egg 🥚 | 1 whole | For egg wash on crust |
The pie crust is your shortcut here. Pillsbury refrigerated crusts (in the orange tubes) are my go-to—always flaky, always reliable. For the chicken, thighs stay juicier than breasts and cost less. Grab a family pack, use what you need, freeze the rest (they thaw fast). Frozen veggies are already cleaned and cut—no waste, no prep. Just dump them in frozen; they’ll cook perfectly in the filling.
Out of chicken broth? Bouillon cubes plus water work in a pinch (1 cube per cup). No thyme? Poultry seasoning at the same amount gives similar warmth. If you’ve got fresh herbs lurking in the crisper, toss in a teaspoon of chopped rosemary or sage. The milk can be swapped for half-and-half if you want it extra creamy, or evaporated milk for a richer texture without the price tag.
Assemble and bake the same day, or prep it in the morning and refrigerate until ready to bake. Leftovers? They’ll keep 3-4 days in the fridge. The crust softens over time, but a quick broil brings the crunch back. Freeze unbaked pies for up to 2 months (add 10-15 minutes to baking time).
Why You’ll Love This Recipe
- One Pan Wonder: I just dump the frozen veggies and chicken into the crust, no thawing or pre-cooking required.
- Flaky, Creamy Heaven: The butter-flour roux with those juicy chicken thighs makes the filling so rich it’s ridiculous.
- Feeds the Crew: Between us, I’ve served this for Sunday dinner, potlucks, and even my picky nephew’s birthday—always a hit.
- Pocketbook Friendly: Honestly, five ingredients and one store-bought crust keep my grocery bill under ten bucks for six servings.
Step-by-Step Instructions for Chicken Pot Pie
This budget-friendly comfort classic comes together with a few simple techniques.
Step 1: Cook the Chicken and Vegetables
In a large skillet over medium-high heat, cook the 1.5 lb boneless skinless chicken thighs in batches until browned on all sides, about 5-6 minutes per batch. Remove the chicken and set aside, leaving the rendered fat in the skillet.
In the same skillet, add the diced yellow onion and cook for 3-4 minutes until softened. Stir in the 2 cloves minced garlic cloves and cook for 30 seconds until fragrant. Add the 2 cups frozen mixed vegetables and cook for 2 minutes to thaw slightly and remove any excess moisture.
Step 2: Make the Creamy Filling
Melt the 0.5 cup unsalted butter in the skillet over medium heat. Once melted, whisk in the 0.5 cup all-purpose flour and cook for 1-2 minutes until the mixture turns a light golden color. This roux will thicken the filling beautifully.
Gradually pour in the 1.5 cups chicken broth and 1.5 cups whole milk, whisking constantly to prevent lumps. Stir in the 1 tsp dried thyme, 1 tsp salt, and 0.5 tsp black pepper. Bring the mixture to a simmer and cook for 5 minutes until it thickens enough to coat the back of a spoon.
Step 3: Shred Chicken and Combine
While the sauce simmers, shred the cooked chicken thighs into bite-sized pieces using two forks. Return the shredded chicken to the skillet and stir to combine with the creamy sauce and vegetables. Cook for another 2-3 minutes to let the flavors meld together.
Taste and adjust the seasoning if needed. The filling should be rich and creamy with a velvety texture that clings to the chicken and vegetables.
Step 4: Assemble and Bake
Preheat your oven to 375°F. Line a 9-inch pie dish with one sheet of the store-bought pie crust. Pour the chicken and vegetable filling into the crust, spreading it evenly. Top with the second sheet of pie crust, crimping the edges to seal. Cut a few slits in the top crust to allow steam to escape.
Whisk the 1 whole large egg and brush it over the top crust for a golden finish. Bake for 30-35 minutes until the crust is golden brown and the filling is bubbling. Let it rest for 10 minutes before slicing to allow the filling to set.
Pro Tips For Making Cheap Chicken Pot Pie
- Precook the Chicken: Shred or cube the thighs and cook them separately first—this prevents rubbery meat and guarantees they’re fully done before baking.
- Thaw the Veggies: Drain and pat dry the frozen vegetables to avoid a watery filling that can make the crust soggy.
- Vent the Crust: Cut a few small slits in the top pie crust so steam can escape, or you’ll end up with a sad, sunken pie.
- Use Cold Butter: Keep your butter ice-cold when making the roux—it creates a flakier texture in the filling and prevents greasiness.
Pro Cooking Tips for This Dish
Roux Mastery
Cook your roux over medium heat until it turns a light golden color—about 1-2 minutes. This builds flavor without risking burnt taste. I whisk constantly to prevent lumps and ensure even cooking. 🔥
Thickening the Filling
When adding the 1.5 cups chicken broth and 1.5 cups whole milk, pour slowly while whisking. This prevents clumping and ensures a smooth, velvety sauce. Simmer for 5 minutes to reach the perfect consistency.
Prevent Soggy Bottom
Pre-bake your bottom crust for 8-10 minutes at 375°F before adding the filling. This creates a barrier that keeps the crust crisp. I use a fork to dock the crust with small holes to prevent air bubbles.
Venting the Top
Cut 4-5 slits in the top crust to allow steam to escape. Without proper venting, the filling can become watery and the crust soggy. Space them evenly for best results.
Egg Wash Magic
Whisk the 1 large egg with 1 tbsp water for a glossy finish. Brush it evenly over the top crust just before baking. This gives that beautiful golden color and professional shine.
Rest Before Serving
Let your pie rest for 10 minutes after baking. This allows the filling to set, making it easier to slice and serve. I know it’s hard to wait when it smells so good! 💛
Nutrition Facts
Frequently Asked Questions
Can I use canned chicken instead of thighs?
Yes! Use 2 cans (10 oz each) of drained chicken for a quick swap. It’s pre-cooked and budget-friendly. Just skip the initial browning step and add it directly to the sauce.
How do I avoid a soggy bottom crust?
Pre-bake the bottom crust for 8-10 minutes at 375°F before adding the filling. This creates a protective barrier. Also, ensure the filling is thick and not watery.
Can I make this ahead of time?
Assemble the pie and refrigerate for up to 24 hours before baking. Or freeze unbaked pies for up to 2 months. Add 10-15 minutes to baking time if frozen.
What if my filling is too thin?
Simmer it longer or mix 1 tbsp cornstarch with 1 tbsp cold water and stir into the filling. Cook for an additional 2-3 minutes until thickened.

- 4C Bread Crumbs Meatballs Recipe: Crispy Crust and Juicy Centers - September 25, 2026
- 6 Oz Chocolate Chip Cookie Recipe: Perfectly Balanced Crispy Edges and Chewy Hearts - September 25, 2026
- 6-Inch Coffee Cake Recipe: Vanilla Bean Swirls and Buttery Streusel Topping - September 25, 2026