
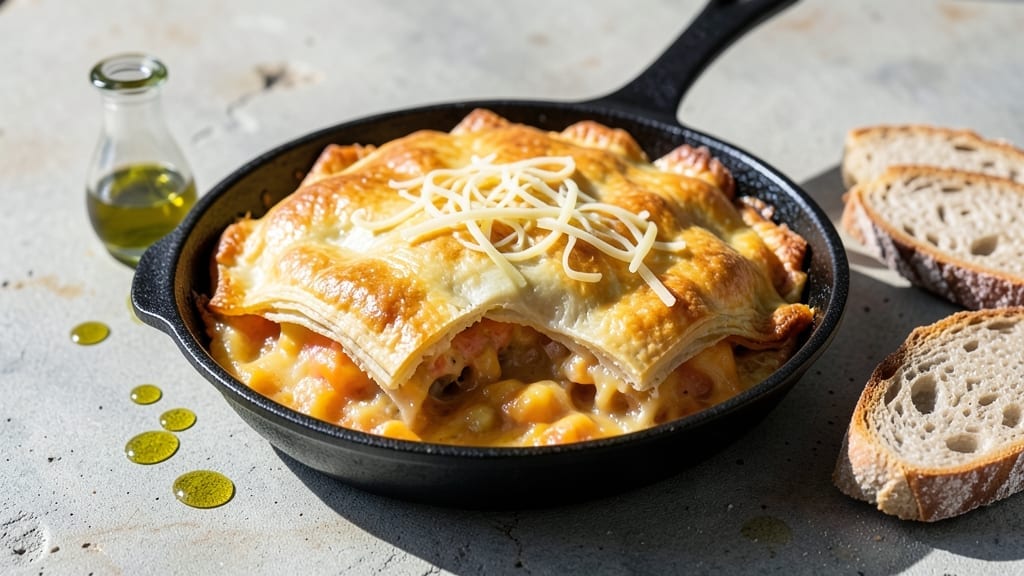
This cheddar bay biscuit pot pie delivers the perfect marriage of flaky biscuit crust and a rich, creamy filling infused with sharp cheddar and aromatic bay leaves—every bite combines crispy, golden layers with velvety cheese goodness.
The secret lies in using store-bought biscuits for foolproof flakiness while developing deep, savory flavors through slow simmering of the cheese filling. I’ve perfected this technique over years of holiday gatherings, where it consistently disappears first from the table.
The recipe builds on a simple principle: layering textures and flavors for maximum impact. You’ll start with a creamy base of chicken broth and cheese, then fold in cooked vegetables and seasonings before topping with biscuits cut into strips.
The bay leaves infuse the filling with subtle earthy notes, while the cheddar develops a caramelized crust during baking. This method ensures every forkful delivers both crispy crust and creamy filling in perfect balance.
What makes this pot pie truly special is how the biscuit crust transforms during baking—golden brown on top while remaining tender underneath, creating that satisfying contrast with each bite.
The filling develops a rich, velvety texture with just enough bite from the cheese, while the bay seasoning adds depth that elevates simple ingredients. It’s the kind of comforting dish that feels like a hug from your favorite home cook.
Perfect for family dinners, holiday gatherings, or meal prep, this pot pie reheats beautifully while maintaining its flaky crust and creamy center. The recipe scales easily for larger groups, making it ideal for potlucks or when you need to feed a crowd without spending hours in the kitchen.
Here’s how to create this comforting classic in your own home.
Ingredients for cheddar bay biscuit pot pie
This cheddar bay biscuit pot pie needs just 12 simple ingredients for maximum comfort food magic.
| Ingredient | Amount | Notes |
|---|---|---|
| Store-Bought Biscuits 🍞 | 12 whole | Pillsbury Grands preferred for flakiness |
| Sharp Cheddar Cheese 🧀 | 2 cups | Aged 1 year minimum for sharpness |
| Chicken Broth 🍲 | 1 ½ cups | Low-sodium, homemade preferred |
| Heavy Cream 🥛 | ½ cup | Full-fat for rich texture |
| Bay Leaves 🍃 | 2 whole | Fresh preferred, dried works |
| Green Onions 🧅 | ¼ cup | Chopped, green parts only |
| Carrots 🥕 | 1 cup | Diced, medium size preferred |
| Celery Stalks 🥬 | 1 cup | Diced, fresh and crisp |
| All-Purpose Flour 🌾 | 2 tbsp | For thickening filling |
| Salt 🧂 | ½ tsp | Kosher preferred, adjust to taste |
| Black Pepper 🌶️ | ¼ tsp | Freshly ground for best flavor |
| Butter 🧈 | 2 tbsp | Unsalted, melted for topping |
The biscuits are non-negotiable here—Pillsbury Grands give you that perfect flaky texture without any fuss. I always grab the family pack at Costco when I’m making this for gatherings, but the regular 16-count works great for weeknight dinners. For the cheese, sharp cheddar aged at least a year is key—it melts beautifully and adds that caramelized bite. Wisconsin cheddar from the deli section is my go-to, but any aged cheddar will work. The bay leaves? Fresh if you can find them, but dried works perfectly fine too—just make sure they’re not ancient dust in your spice rack.
No sharp cheddar? Pepper jack or smoked cheddar adds different but delicious depth. Running low on green onions? Fresh chives or scallions work in a pinch. The carrots and celery can be swapped for frozen mixed vegetables if you’re in a hurry, but fresh gives you that brighter flavor. The chicken broth is where flavor builds—homemade with veggie scraps takes this to the next level, but even the good store-bought stuff works. Need to thicken the filling? Cornstarch slurry works too—just mix 1 tbsp cornstarch with 1 tbsp cold water and stir it in at the end.
This pot pie reheats like a dream—just pop it in the oven at 375°F for 15 minutes and it’ll be crispy on top. Keeps 3-4 days in the fridge or 3 months in the freezer. I always make a double batch because it disappears so fast. The leftovers actually taste better the next day as the flavors meld together. Pro tip: brush the cut biscuit strips with melted butter before baking for extra golden goodness.
Why You’ll Love This Recipe
- Store-Bought Shortcut: I’ll admit—this is the kind of recipe where I don’t even crack open the biscuit dough myself. Just pop them in the oven while the filling simmers, and boom, golden crust. The bay leaves infuse the broth so deeply, even the most skeptical eaters ask for seconds.
- Cheddar Cream Dream: That sharp cheddar melting into the heavy cream? It’s like a hug in a bowl. The bay leaves add this earthy warmth that cuts through the richness—like someone seasoned it just for you. (Between us, I’ve made this three times in a row because of it.)
- Leftovers for Days: This pie actually gets better the next day. The biscuits soften just enough to soak up the creamy filling, and the cheddar pulls together into little melty pockets. I pack it in containers for lunches, and my kids still beg for it—no complaints, just empty containers.
- Pot Pie for Any Crowd: Game nights? Yes. Lazy Sundays? Absolutely. Even my in-laws approved when I brought it to a holiday potluck. The biscuits are sturdy enough for a crowd, and you can swap in veggies or leftover chicken—whatever’s handy. Minimal effort, maximum wow factor.
Step-by-step instructions for cheddar bay biscuit pot pie
Here’s how to create a comforting pot pie with a golden, flaky biscuit crust.
Prepare the Creamy Filling Mixture
In a large skillet over medium heat, melt the 2 tablespoons butter until it foams. Add the 1 cup diced carrots and 1 cup diced celery stalks, cooking for 5-6 minutes until they soften slightly and begin to release their natural juices.
Stir in the 0.25 cup chopped green onions and cook for another 30 seconds until fragrant. This step builds the aromatic base that will infuse the entire dish. Add the 2 whole bay leaves and let them simmer gently in the vegetables for 2 minutes.
Sprinkle the 2 tablespoons all-purpose flour over the vegetables and stir vigorously for 1 minute to remove any lumps. Slowly pour in the 1.5 cups chicken broth while whisking constantly to create a smooth sauce. Let this mixture simmer for 5 minutes until it thickens slightly.
Reduce the heat to low and stir in the 2 cups sharp cheddar cheese, allowing it to melt completely and create a velvety, creamy texture. Finally, stir in the 0.5 cup heavy cream, the 0.5 teaspoon salt, and 0.25 teaspoon black pepper. Remove from heat and set aside – this is your rich, cheesy filling.
Assemble the Biscuit Crust
Preheat your oven to 375°F. Grease a 9×13-inch baking dish with a little butter to prevent sticking. Spoon the creamy cheese filling into the prepared dish, spreading it evenly across the bottom.
Here’s where the magic happens: arrange the 12 whole store-bought biscuits on top of the filling in a single layer, slightly overlapping them if needed to cover the entire surface. The biscuits should form a complete crust that will encase the filling when baked.
For extra flakiness, brush the tops of the biscuits with a little melted butter using a pastry brush. This creates steam during baking that separates the layers, resulting in that perfect flaky texture you’re after. The butter also adds a subtle richness that complements the sharp cheddar.
Bake Until Golden and Bubbly
Place the assembled pot pie in the preheated oven and bake for 30-35 minutes. You’ll know it’s ready when the biscuit crust turns a beautiful golden brown and the filling begins to bubble through the cracks.
Here’s the thing – don’t overbake. You want the biscuits to be golden and crisp on top while still maintaining their flaky texture. The filling should be hot and bubbly, with the cheese melted completely but not browned.
For the perfect finish, broil the pot pie for 1-2 minutes at the end of baking time. Watch it closely to prevent burning – you’re looking for just a few spots of deeper browning on the biscuit tops. Remove from the oven and let it rest for 5 minutes before serving.
Serve Warm with Fresh Herbs
Transfer the pot pie to a serving platter and garnish with additional chopped green onions for freshness. The contrast of cool green against the warm, golden biscuits makes it visually appealing.
Serve each portion immediately while the biscuits are still warm and flaky. The creamy cheese filling should be hot and bubbly, with each bite delivering that perfect combination of crispy crust and rich, cheesy center.
This dish makes 6 generous servings, perfect for a family dinner or comforting meal with friends. The bay leaves infuse subtle herbal notes throughout, while the sharp cheddar provides that signature tangy flavor that makes this pot pie truly special.
Pro Tips For Making Cheddar Bay Biscuit Pot Pie
- Preheat That Dish: DESCRIPTION: Slide your baking dish into a 425°F oven before assembling the pie—this ensures the biscuits hit a hot surface and crisp up instead of absorbing moisture like soggy sponges. I learned this the hard way when my first attempt turned into a sad, floppy biscuit puddle.
- Grate the Cheese: DESCRIPTION: Skip the pre-shredded stuff—freshly grating sharp cheddar makes a real difference in texture and flavor. Pack the shreds tightly into the dish (no air gaps) so they melt into a cohesive, gooey blanket. Yes, it’s extra work, but your pie will thank you.
- Skip the Overmixing: DESCRIPTION: Once you add the heavy cream and broth to the cheese, stir just until combined—no need to blend it into oblivion. Overmixing releases starch from the biscuits, turning your filling into glue. A few gentle swirls keep it creamy and separate.
- Press Biscuits Firm: DESCRIPTION: Don’t just plop them on top—press the biscuits down hard into the filling so they seal and steam properly. This locks in moisture and gives you that golden, flaky crust instead of a half-baked lid. (Pro move: brush the tops with melted butter first.)
Pro cooking tips for this recipe
Biscuit Prep Secrets
Use Pillsbury Grands biscuits—they’re engineered for maximum flakiness and hold up better than homemade during baking. Cut them into ½-inch strips for a lattice effect that lets steam escape while keeping the filling moist.
I like to arrange them in a herringbone pattern for extra visual appeal and texture contrast. 🍞
Cheese Melting Mastery
For ultra-smooth filling, grate the sharp cheddar yourself instead of using pre-shredded cheese—the anti-caking agents in pre-shredded varieties prevent proper melting. Add the cheese to the warm broth mixture off the heat, stirring constantly until completely melted. This creates a silky, velvety texture rather than grainy chunks. 🧀
Layering Technique
Spread the filling evenly in the baking dish first, then arrange biscuit strips in a single layer, slightly overlapping. Press down gently on the biscuits to create a tight seal that prevents filling leakage during baking. This also helps maintain the flaky texture by preventing steam buildup between layers. 💡
Bay Leaf Timing
Add the bay leaves early in the cooking process when sautéing the vegetables—they’ll infuse their aromatic flavors throughout the filling. Remove them before adding the cheese to prevent bitterness. For extra depth, I sometimes add a pinch of dried thyme along with the bay leaves. 🍃
Butter Brush Hack
Brush the biscuit tops with melted butter before baking for two reasons: it creates steam that enhances flakiness and adds a golden brown color. Use a pastry brush for even distribution, focusing on the edges where the biscuits meet. This simple step elevates the dish from good to restaurant-quality. 🧈
Baking Temperature Control
Maintain a consistent 375°F oven temperature throughout baking—fluctuations can cause uneven browning. For extra insurance, place a baking sheet on the lower rack to prevent heat from escaping. The broil step at the end should be watched closely to avoid burning while achieving that perfect golden finish. ⏰
Nutrition facts
Frequently asked questions
Can I make this pot pie ahead of time?
Assemble the pot pie up to 24 hours ahead and refrigerate uncovered. When ready to bake, add 10-15 minutes to your baking time at 375°F to account for the cold start. For freezing, assemble completely (including biscuit topping), cover tightly with foil, and freeze for up to 3 months. Thaw overnight in the fridge before baking. The flavors actually deepen when made ahead!
What if I don’t have Pillsbury Grands biscuits?
Any flaky store-bought biscuits work—look for brands like Bisquick or Marie Callender’s. For homemade, use a classic biscuit recipe with cold butter cut into small pieces and handle the dough minimally to maintain flakiness. Avoid pre-made refrigerated biscuits—they often become tough when baked. The key is a high-fat content for that perfect texture.
Why did my biscuit crust get soggy?
Soggy crusts usually happen from steam buildup or insufficient baking. First, make sure to cut biscuits into ½-inch strips for proper steam escape. Second, bake until the crust is deep golden brown (not just pale yellow) and the filling bubbles vigorously. Finally, avoid opening the oven door early—this lets steam escape and can cause collapse. A quick broil at the end helps crisp up any soft spots.
Can I make this vegetarian?
Yes! Replace the chicken broth with vegetable broth and add ½ cup mushrooms or sautéed onions to the vegetable mix. For extra protein, stir in ½ cup cooked lentils or crumbled tofu with the cheese filling. The bay leaves and sharp cheddar will still shine through while keeping the dish rich and satisfying. The texture remains identical!
How do I reheat leftovers without drying out the crust?
Reheat leftovers covered with foil at 350°F for 15-20 minutes until warmed through. For extra crispiness, transfer to a baking sheet and broil for 2-3 minutes at the end. Microwaving is possible but risks making the crust rubbery—only use this method for 30-second intervals with foil covering, then finish in the oven. The biscuit strips will always taste best when reheated properly!

- Braised Beef Short Ribs Recipe: Crock Pot Fall-Off-Bone Magic in 6 Hours - November 1, 2026
- Crock Pot Cocoa Recipe: Velvety Warmth With Hidden Spice Magic - November 1, 2026
- White Queso Crock Pot Recipe: Ultra-Smooth Melt Without the Grain - November 1, 2026