
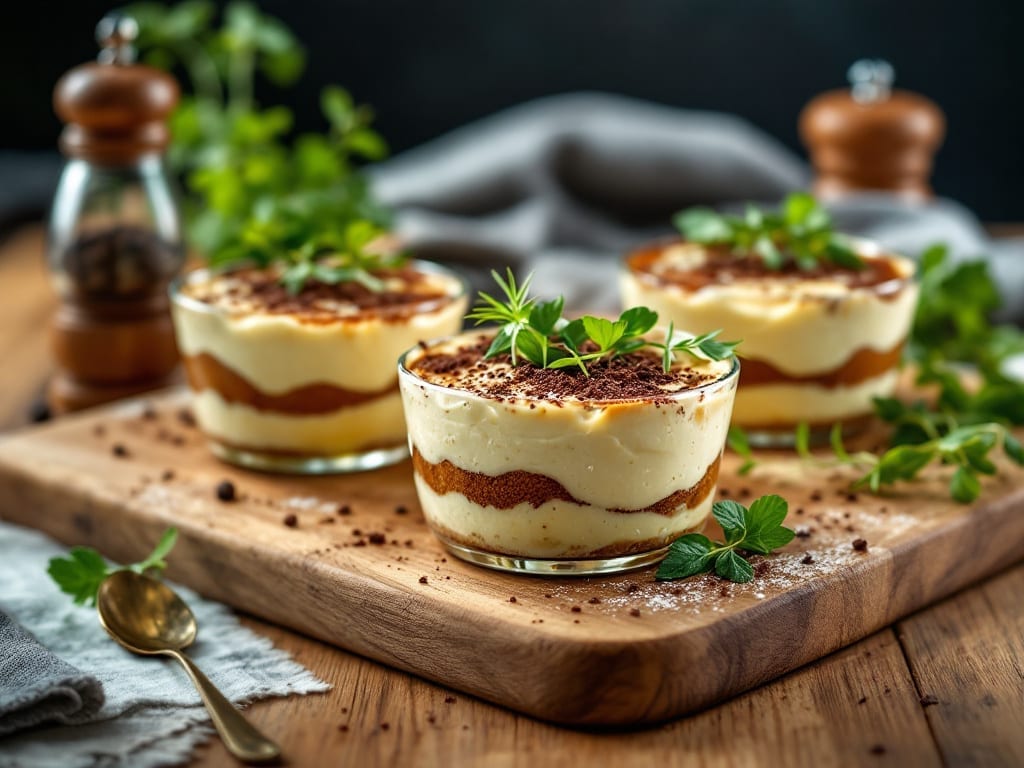
Creating tiramisu pots lets you serve this classic Italian dessert in elegant, individual portions perfect for gatherings or café-style indulgence. The layered technique—coffee-soaked ladyfingers, rich mascarpone cream, and dusted cocoa—transforms simple ingredients into a showstopping treat with minimal effort.
This method preserves the traditional flavors while adapting perfectly for modern kitchens, whether you use freshly brewed espresso or instant coffee.
The beauty of this recipe lies in its simplicity and precision. Each layer must be assembled carefully to achieve that signature balance of textures—light, airy ladyfingers, velvety mascarpone cream, and a hint of bitterness from the cocoa.
With just a few essential ingredients and a little patience, you’ll create a dessert that tastes like it came from a high-end café. The chilling time ensures the flavors meld beautifully, delivering a creamy, coffee-infused experience in every bite.
What makes this version special is the convenience of serving individual portions without sacrificing restaurant-quality results. The pots allow for easy handling, making it ideal for parties or when you want to impress guests with a dessert that feels both elegant and approachable.
Once assembled, simply refrigerate and serve—no last-minute stress, just pure indulgence. This recipe proves that even the most classic desserts can be adapted for effortless enjoyment.
Whether you’re hosting a dinner party or treating yourself to a café-style dessert at home, this tiramisu pots recipe delivers rich, layered flavors with minimal fuss.
The traditional method remains intact, but the modern twist of individual servings makes it practical for any occasion. Let’s get started on creating your perfect batch!
Ingredients for tiramisu pots
Six elegant servings of café-style tiramisu with precise layers and velvety textures—no shortcuts needed.
| Ingredient | Amount | Notes |
|---|---|---|
| Ladyfingers (Savoiardi) 🍞 | 12 whole | High-quality, lightly sweetened |
| Mascarpone Cheese 🧀 | 1 ½ cups | Full-fat, room temperature |
| Granulated Sugar 🍚 | ½ cup | Fine grain preferred |
| Large Eggs 🥚 | 4 whole | Room temperature, separated |
| Unsalted Butter 🧈 | ¼ cup | Cold, cubed for whipping |
| Espresso Powder ☕ | 2 tbsp | High-quality, finely ground |
| Dark Chocolate Cocoa Powder 🍫 | ¼ cup | Dutch-processed for smoothness |
| Vanilla Extract 🌿 | 1 tbsp | Pure, high-quality preferred |
| Kahlúa Coffee Liqueur 🍷 | ½ cup | Optional, for extra richness |
| Heavy Whipping Cream 🥛 | 1 cup | Cold, for final layer |
| Marsala Wine 🍷 | ¼ cup | Dry, for coffee mixture |
| Diamond Crystal Kosher Salt 🧂 | ¼ tsp | Fine grain for delicate seasoning |
The ladyfingers are non-negotiable here—Buitoni or Drumstick are the gold standard, but any high-quality brand with minimal sweetness works. Store them airtight to prevent sogginess. For the mascarpone, full-fat is essential—low-fat versions won’t whip properly. If you can’t find it, cream cheese blended with heavy cream is a decent substitute, though purists will notice the difference. The espresso powder should be freshly ground for maximum intensity; pre-ground often loses potency. Starbucks or Peet’s both offer excellent quality, or grind your own beans at home if possible.
No Kahlúa? Skip it entirely—the recipe still shines, though it loses that signature liqueur depth. For the coffee mixture, instant espresso powder dissolved in warm water works in a pinch, but freshly brewed espresso yields superior results. The cocoa powder must be Dutch-processed for smoothness; natural cocoa adds bitterness. If you’re avoiding alcohol, replace the Marsala with an equal amount of strong black coffee. For the cream, whipping cream at 35% fat achieves the best stability, though heavy whipping cream works fine. The eggs should be separated carefully—room temperature prevents curdling.
Assembled tiramisu pots require 4-6 hours of chilling for optimal texture, though they can be made a day ahead. Store leftovers in an airtight container with parchment between layers to prevent drying. They’ll keep for 3-4 days in the fridge, though the ladyfingers may lose crispness after 2 days. For serving, dust with extra cocoa powder just before presenting—this prevents the cream from absorbing moisture. Freezing isn’t recommended, as the ladyfingers become gummy.
Why You’ll Love This Recipe
- No-Fuss Layers: I swear by this method—just dip, stack, repeat. No fancy piping bags or measuring cups needed; the ladyfingers soak up the custard like sponges, and the mascarpone adds that velvety richness without a single whisk burn.
- Coffee Kiss Magic: That first spoonful? Pure satisfaction. The espresso-soaked ladyfingers meet the buttery mascarpone—sweet, creamy, with just enough bitterness to make it ridiculously good. Honestly, I’ve made tiramisu before, but this version actually tastes like the Italian kind you’d pay $12 for.
- Portion Control Perfection: Individual pots mean no awkward slicing or leftovers going stale. Perfect for date nights (no sharing required), office potlucks, or when you just want dessert without committing to a whole cake. My roommate’s birthday? Solved.
- Budget-Friendly Luxury: Mascarpone might sound fancy, but a single tub stretches for four servings—way cheaper than bakery tiramisu. And those eggs? They’re the secret weapon—whipped light and sweet, they cut through the richness like a dream. (Yes, even on a Tuesday night.)
Step-by-step instructions for tiramisu pots
Here’s the precise method for assembling café-style tiramisu in individual servings.
Prepare the Coffee Mixture
In a small saucepan, combine the 0.25 cup Marsala Wine, 0.5 cup Kahlúa Coffee Liqueur, 2 tbsp Espresso Powder, and 0.5 cup Granulated Sugar. Bring to a gentle simmer over medium heat, stirring constantly until the sugar fully dissolves and the mixture reaches 160°F. Remove from heat and let steep for 10 minutes—this develops the coffee’s depth.
Here’s the thing—don’t rush this step. The sugar needs time to fully integrate, and the espresso powder should dissolve completely. If you taste it now, you’ll notice a smooth, balanced coffee flavor without bitterness. Strain through a fine-mesh sieve into a bowl and let cool to room temperature before using.
Create the Mascarpone Cream Base
In a stand mixer fitted with the whisk attachment, beat the 4 whole Large Eggs on medium-high speed until they triple in volume and form soft peaks. Gradually add the 0.5 cup Granulated Sugar while mixing, then incorporate the 1 tbsp Vanilla Extract and 0.25 tsp Diamond Crystal Kosher Salt. Continue whipping until the mixture is pale and thick enough to hold its shape.
With the mixer running on low speed, add the 1.5 cups Mascarpone Cheese in three additions, allowing each to fully incorporate before adding the next. This gentle folding prevents deflating the air you’ve just incorporated. The final mixture should be smooth, velvety, and thick enough to pipe—if you lift the whisk, the cream should hold a peak.
Assemble the Tiramisu Layers
Dip each of the 12 whole Ladyfingers (Savoiardi) into the cooled coffee mixture for 2-3 seconds per side, just enough to moisten without making them soggy. Arrange four ladyfingers in the bottom of each of the 6 serving pots, slightly overlapping them to create an even base.
Spread ¼ of the mascarpone cream mixture evenly over the ladyfingers in each pot, using a spatula to create a smooth layer. Repeat with another layer of dipped ladyfingers, followed by another ¼ of the cream. The key here is even distribution—press down gently to eliminate air pockets that could prevent clean slicing later.
Finalize and Chill
Pipe a thin layer of the remaining mascarpone cream over the top of each assembled pot, then dust lightly with the 0.25 cup Dark Chocolate Cocoa Powder using a fine-mesh sieve. Finally, whip the 1 cup Heavy Whipping Cream to stiff peaks and pipe a decorative rosette on top of each pot, then dust with additional cocoa powder.
Cover each pot tightly with plastic wrap and refrigerate for at least 6 hours, preferably overnight. This extended chilling time allows the flavors to meld completely and the ladyfingers to soften just enough to create that signature tiramisu texture. The longer it chills, the more pronounced the coffee flavor becomes—don’t be tempted to serve it sooner than 6 hours.
Serve with Precision
Before serving, run a thin knife around the edge of each pot to loosen the tiramisu from the sides. Chill the knife in the freezer for 10 seconds before each cut to ensure clean slices. Serve immediately with additional cocoa powder dusted on top and a small espresso on the side for dipping.
Each slice should reveal distinct layers: the moistened ladyfingers, the creamy mascarpone mixture, and the delicate whipped cream topping. The coffee flavor should be present but not overpowering, with the cocoa powder adding a subtle bitterness that balances the sweetness. This is where the café-style presentation truly shines—individual portions that showcase each component perfectly.
Pro Tips For Making Tiramisu Pots
- Toast Ladyfingers Slowly: Spread them on a wire rack, not a baking sheet, and let them dry out at room temp for 10-15 minutes first. I learned this the hard way—over-toasting turns them into brittle sticks that crumble when layered, and under-toasting leaves them soggy. A gentle toast at 275°F (135°C) for 5-6 minutes does the trick.
- Whip Eggs to Ribbon Stage: Stop beating the egg yolks and sugar when the mixture coats the back of a spoon but still drizzles slowly—like thick ribbon. Over-whipping introduces air that collapses later, making your custard grainy. I used to push it too far, and the texture suffered.
- Chill Mascarpone Fully: Take the mascarpone out of the fridge 30 minutes before using and let it soften to room temp—it folds into the custard so much better. Cold mascarpone makes the mixture lumpy, and no one wants a lumpy tiramisu. (Yes, even if you’re impatient like me.)
- Layer Fast, Press Gently: Work in batches—dip, layer, and press the ladyfingers down just enough to hold the custard, but don’t mash them. A crowded pot means a messy unravel later. I skip the coffee soak in pots (too much liquid) and just brush with espresso syrup for the same effect.
Storing and reheating this tiramisu pots
Refrigerator Storage
Assembled tiramisu pots stay fresh in the fridge for 3-4 days when stored properly. Use airtight containers with parchment paper between layers to prevent drying. I always store them in their original serving pots—this keeps the structure intact and makes slicing easier later.
The ladyfingers will soften slightly but maintain their texture for up to 3 days. 🧊
Freezing Considerations
While possible, I don’t recommend freezing tiramisu pots—the ladyfingers become gummy and lose their delicate texture. If you must, freeze individual portions for up to 1 month, but expect the cream to separate slightly upon thawing.
The coffee-soaked layers will survive better than the whipped cream topping. Thaw overnight in the fridge before serving.
Reheating (When Needed)
Tiramisu isn’t typically reheated, but if you want to warm a slice, use the microwave at 50% power for 10 seconds to gently revive the cream.
For a stovetop approach, place the slice on a warm plate and cover with a damp paper towel for 20 seconds—this restores moisture without overcooking. Serve immediately after warming. ⏳
Serving After Storage
Before serving stored tiramisu, dust with fresh cocoa powder to refresh the presentation. If the whipped cream has separated, pipe a new rosette on top right before serving. The coffee-soaked layers will still taste rich and flavorful, but the texture may be slightly firmer after refrigeration.
Chill your serving knife in the freezer for 10 seconds before slicing for clean cuts. 🍫
Make-Ahead Tips
Assemble the pots 1 day ahead for the best flavor development—the coffee and mascarpone meld beautifully overnight. Store them uncovered in the fridge for up to 24 hours before adding the final whipped cream layer.
This prevents sogginess while maximizing flavor infusion. The longer they rest, the more pronounced the coffee notes become. 💡
Reviving Texture
If the ladyfingers dry out after storage, briefly warm the entire pot in the microwave at 30% power for 5 seconds to restore moisture. For a more elegant fix, pipe a thin layer of warmed mascarpone cream over the top before serving.
This technique works especially well if you’ve stored the dessert for 3 days—it brings back that signature creamy texture. 🔥
Nutrition facts
Frequently asked questions
Can I use instant coffee instead of espresso powder?
Yes, but with one key adjustment: dissolve 1 tablespoon instant espresso powder in ¼ cup warm water first to create a concentrated base. This mimics the strength of espresso powder while keeping the same smooth texture. The flavor will be slightly less intense, but the coffee-soaked layers will still taste rich and aromatic. For best results, use high-quality instant espresso like Starbucks or Nescafé Azera.
How do I prevent the ladyfingers from getting soggy?
Dip the ladyfingers for only 1-2 seconds per side in the coffee mixture—just enough to moisten, not soak. Arrange them in a single layer at the bottom of each pot with minimal overlap to allow airflow. For extra insurance, sprinkle a thin layer of cocoa powder between cream layers before adding more ladyfingers. This creates a barrier that keeps them crisp.
What’s the best way to serve tiramisu pots at a party?
Serve them directly from the pots using a serrated knife chilled in the freezer for 10 seconds before each cut. Place a small espresso cup or saucer beside each pot for dipping. For a café-style touch, dust with extra cocoa powder just before serving and garnish with a few coffee beans. This presentation feels elegant while keeping the dessert approachable for guests.
Can I make this recipe without alcohol?
Replace the Marsala wine and Kahlúa with an equal amount of strong black coffee (brewed and cooled). For depth, add 1 teaspoon vanilla extract and a pinch of cinnamon to the coffee mixture. The flavor will be slightly different but still delicious, with a more pronounced coffee-forward taste. The ladyfingers will absorb the liquid beautifully.
Why does my mascarpone cream taste grainy?
Graininess usually means the eggs weren’t whipped enough or the mascarpone wasn’t fully incorporated. Whip the eggs until they’re pale and tripled in volume (about 5-7 minutes on medium-high), and add the mascarpone in 3 gradual additions while mixing on low. If it still feels grainy, strain the mixture through a fine-mesh sieve before assembling. Using cold ingredients can also cause this—make sure everything is room temperature.

- Braised Beef Short Ribs Recipe: Crock Pot Fall-Off-Bone Magic in 6 Hours - November 1, 2026
- Crock Pot Cocoa Recipe: Velvety Warmth With Hidden Spice Magic - November 1, 2026
- White Queso Crock Pot Recipe: Ultra-Smooth Melt Without the Grain - November 1, 2026