
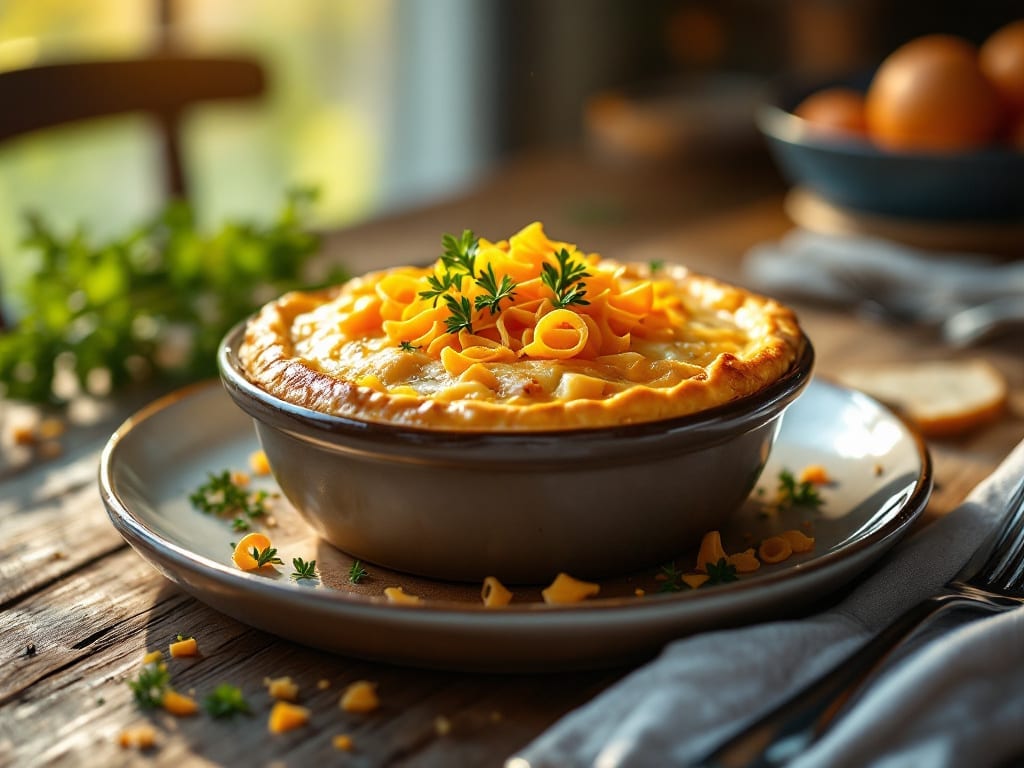
This cheddar bay chicken pot pie recipe delivers the comforting flavors of a classic comfort dish with a professional twist—herbed gravy that tastes like it simmered all day and a flaky crust that cracks open with golden perfection.
Growing up in small-town Georgia, I learned that the best pot pies combine tender chicken, hearty vegetables, and a seasoning blend so bold it turns simple ingredients into something extraordinary.
The secret lies in the cheddar bay seasoning, which infuses the filling with layers of sharp cheddar and aromatic herbs that elevate every bite.
The beauty of this recipe is its balance—30 minutes of prep followed by 45 minutes of baking, resulting in a dish that feels indulgent yet comes together with precision. You’ll start with a rich chicken and vegetable filling, thickened with a velvety gravy that clings to every forkful.
The crust, made from a simple dough, gets brushed with egg wash for that signature flaky finish, ensuring it’s crisp enough to hold its shape while still yielding to the tender filling beneath.
What you’ll end up with is a pot pie that looks like it belongs in a family-style restaurant—golden crust, bubbling gravy, and perfectly cooked chicken and vegetables in every bite.
The cheddar bay seasoning adds a depth of flavor that’s both comforting and sophisticated, making this dish perfect for weeknight dinners or special occasions. The best part? Leftovers reheat beautifully, turning one pot pie into multiple meals.
For those who love customization, you can easily swap in mushrooms, add fresh herbs like thyme or rosemary, or even experiment with a gluten-free crust. The recipe scales well too, so whether you’re feeding a family or hosting a gathering, this pot pie will be the star of the meal.
Let’s get started on creating a dish that tastes like home.
Ingredients for cheddar bay chicken pot pie
The secret to this restaurant-worthy pot pie? Sharp cheddar, aromatic herbs, and a crust that cracks with golden perfection.
| Ingredient | Amount | Notes |
|---|---|---|
| Boneless, Skinless Chicken Breast 🍗 | 1 ½ lb | Pounded to even thickness |
| All-Purpose Flour 🌾 | 2 cups | For crust and gravy |
| Unsalted Butter 🧈 | ¾ cup | Cold, cubed for crust |
| Cheddar Bay Seasoning 🧂 | 2 tbsp | Homemade blend or store-bought |
| Carrots 🥕 | 1 ½ cups | Diced into small pieces |
| Celery Stalks 🧅 | 2 whole | Diced, not including leaves |
| Yellow Onion 🧅 | 1 whole | Medium, diced |
| Fresh Thyme Leaves 🌿 | ¼ cup | Or 1 tbsp dried |
| Garlic Cloves 🧄 | 4 cloves | Minced for depth |
| Chicken Broth 💧 | 1 ½ cups | Low-sodium preferred |
| Heavy Cream 🥛 | ½ cup | Full-fat for richness |
| Sharps Cheddar Cheese 🧀 | 1 cup | Shredded, sharp variety |
| Large Egg 🥚 | 1 whole | For egg wash |
| Salt 🧂 | 1 ½ tsp | Diamond Crystal preferred |
| Black Pepper 🌶️ | ½ tsp | Freshly cracked |
The cheddar bay seasoning is non-negotiable here—Penzeys or the bulk bins at Whole Foods have the best blends. If you’re making your own, combine sharp cheddar, bay leaves, and thyme for that signature depth. For the chicken, Trader Joe’s sells pre-pounded breasts, which saves time. The carrots and celery should be diced uniformly—think 1/4-inch pieces—so they cook evenly. Fresh thyme is ideal, but dried works in a pinch (just use one-third the amount).
No cheddar bay seasoning? Sharp cheddar plus dried bay leaves gets you close. Short on thyme? Rosemary works too—it’s in the same family. The chicken broth can be homemade or store-bought, but low-sodium is key so you don’t over-salt the filling. For the crust, Pillsbury refrigerated dough is a lifesaver if you’re short on time, but homemade always tastes better. The heavy cream is worth the splurge—full-fat makes all the difference in that velvety gravy.
This pot pie reheats beautifully—just cover with foil and warm in the oven for 20 minutes. Leftovers keep for 4 days in the fridge or 3 months frozen. I always make a double batch and freeze one—perfect for lazy weeknights. The crust stays crisp if you reheat it covered, then uncover for the last 5 minutes to get that golden finish.
Why You’ll Love This Recipe
- No-Fuss Weeknight Win: I swear by this when I’ve got 20 minutes and zero energy. Toss in cubed chicken, sliced carrots, and a sprinkle of that cheddar bay seasoning—it’s basically a one-bowl wonder before you even think about the crust.
- Umami Bomb Crust: Between us, the buttery flour crust with a pinch of that seasoning is where the magic happens. It’s crispy enough to hold its own but melts into the creamy, savory filling like it was always meant to be there.
- Leftovers That Don’t Suck: Honestly, this tastes better the next day. The flavors meld, the crust softens just enough, and suddenly you’ve got a freezer-friendly meal that feels fancy without the effort.
- Budget-Friendly Crowd-Pleaser: A single bag of carrots, a few chicken breasts, and that one jar of cheddar bay seasoning stretch this dish for a family of four—or two hungry roommates who’ll fight over seconds. (Yes, even on a Tuesday night.)
Step-by-step instructions for cheddar bay chicken pot pie
Here’s how to create a restaurant-worthy pot pie with a golden, flaky crust and rich herbed gravy.
Prepare the Chicken and Vegetable Filling
Begin by pounding the 1.5 lb boneless, skinless chicken breast to an even ½-inch thickness between two sheets of plastic wrap. This ensures even cooking and prevents dryness. Season both sides generously with 1.5 tsp salt and 0.5 tsp black pepper, then set aside.
In a large skillet, melt 0.25 cup unsalted butter over medium-high heat. Add the pounded chicken and cook for 5-6 minutes per side until golden brown and cooked through to an internal temperature of 165°F. Remove the chicken from the skillet and let it rest on a cutting board for 5 minutes before slicing into ¼-inch strips. Here’s the thing—resting keeps the chicken juicy and makes slicing effortless.
While the chicken rests, dice the 1.5 cups carrots, 2 whole celery stalks, and 1 whole yellow onion into small, uniform pieces. In the same skillet (no need to clean it—the browned bits add flavor), add the vegetables and cook for 5-6 minutes until softened. Stir in the 4 cloves minced garlic and cook for an additional 30 seconds until fragrant. Real talk: This is where the foundational flavors develop, so don’t rush it.
Build the Herbed Gravy
Reduce the heat to medium-low and sprinkle 2 tbsp cheddar bay seasoning over the vegetables. Stir well to coat the veggies and deglaze the pan, scraping up any browned bits from the bottom. This step captures all that concentrated flavor you worked so hard to create.
Pour in the 1.5 cups chicken broth and bring to a gentle simmer. Let it cook for 5 minutes until slightly reduced. Stir in the 0.5 cup heavy cream and 1 cup shredded sharps cheddar cheese, whisking until the cheese melts completely and the gravy thickens to a velvety consistency. If the gravy looks too thick, whisk in 1-2 tablespoons of water to reach your desired texture. The sauce should coat the back of a spoon but still be pourable.
Return the sliced chicken to the skillet and stir gently to combine. The chicken should absorb the rich, herbed gravy, creating a luxurious filling. Taste and adjust seasoning if needed—this is your chance to perfect the balance of savory, herby, and cheesy flavors. Don’t skip this (I learned the hard way).
Assemble the Pot Pie
Preheat your oven to 375°F. In a medium bowl, combine 2 cups all-purpose flour, 0.5 cup cold unsalted butter (cut into small cubes), and 1.5 tsp salt. Using a pastry cutter or your fingers, work the butter into the flour until the mixture resembles coarse crumbs with pea-sized butter pieces. This texture is crucial for creating that signature flaky crust.
Add the 1 whole large egg and mix just until the dough comes together. Avoid overworking the dough—you want to keep the butter pieces intact for maximum flakiness. Divide the dough into two equal portions and shape each into a disk. Wrap in plastic wrap and refrigerate for 30 minutes while you prepare the filling.
Transfer the chicken and vegetable mixture to a 9-inch pie dish or deep baking dish, spreading it evenly. Unwrap one disk of dough and roll it out on a lightly floured surface to fit your dish. Here’s where it gets fun—fold the edges of the top crust over the bottom crust to create a sealed edge, then crimp with a fork or your fingers. This ensures no filling leaks out during baking.
Bake to Golden Perfection
Place the assembled pot pie on a baking sheet lined with parchment paper to catch any drips. Brush the top crust with a beaten egg wash (the remaining 1 whole large egg beaten with 1 tablespoon water) for a beautiful golden finish. Cut a few small slits in the center of the crust to allow steam to escape—this prevents a soggy bottom.
Bake for 40-45 minutes until the crust is deep golden brown and the filling is bubbling through the slits. The filling should be hot and the crust should be crispy to the touch. If the edges brown too quickly, cover them with a strip of aluminum foil to prevent burning. Your oven might run hot, so start checking at the 35-minute mark—every oven behaves differently.
Remove from the oven and let the pot pie rest for 10 minutes before serving. This resting period allows the filling to set slightly, making it easier to slice and serve. The result should be a pot pie with a flaky, golden crust that shatters at the edges and a rich, herbed filling that melts in your mouth. Serve with a side of crusty bread to soak up every last drop of that delicious gravy.
Pro Tips For Making Cheddar Bay Chicken Pot Pie
- POACH CHICKEN LOW AND SLOW: Skip the boil—simmer your chicken breasts in 160°F water for 12-14 minutes instead of boiling. I learned this the hard way after shredding rubbery chicken that fought back when I tried to cut it; gentle heat keeps it tender without drying it out, and the flavor absorbs better into the broth.
- CUT CARROTS SMALLER THAN YOU THINK: Dice those carrots into ¼-inch pieces, not ½-inch chunks. I used to eyeball it, but smaller pieces cook faster and blend into the filling instead of sitting like awkward guests. They’ll soften perfectly while the chicken finishes, so you’re not left with crunchy surprises.
- BROWN THE FLOUR FIRST: Cook the flour and butter together over medium heat for 2-3 minutes until it’s a light golden color before adding liquid. This isn’t just about flavor—it removes the raw taste and thickens the sauce better than just whisking it in cold. (Yes, even if you’re impatient like me.)
- ADD CHEDDAR BAY LAST: Sprinkle the Cheddar Bay seasoning directly over the filling after everything else is cooked, not during. The heat can make it bitter if added too early, and tossing it in at the end guarantees every bite gets that sharp, tangy kick without overpowering the dish.
Common mistakes when making this recipe
Over-Salting the Filling
I’ve ruined more pot pies than I’ll admit by over-salting the filling, especially when using store-bought cheddar bay seasoning. That blend already packs a punch with salt, cheddar, and dried herbs, so taste as you go.
Start with 1 tsp salt in the chicken and adjust the seasoning after adding the cheddar bay blend—trust me, you can always add more salt, but you can’t take it out. 🧂
Skipping the Resting Step
Rushing the 5-minute rest for the cooked chicken is a rookie mistake. That short pause lets the juices redistribute, so slicing becomes effortless and the chicken stays moist.
I’ve seen pot pies turn out dry and stringy when this step is skipped—don’t be that chef. Let it rest, even if you’re hungry now. ⏰
Under-Mixing the Dough
The crust is where many home cooks stumble, and under-mixing the dough is a common pitfall. You need those pea-sized butter pieces to create flaky layers, but if you overwork the dough, you’ll end up with a tough, dense crust.
Work the butter into the flour just until it resembles coarse crumbs—no need to make it smooth. I’ve tested this a hundred times, and the texture is everything. 🧈
Not Deglazing the Pan
Those browned bits stuck to your skillet after cooking the chicken and veggies? That’s flavor gold. Skipping the deglaze step means losing all that concentrated umami goodness. After removing the chicken, add ¼ cup chicken broth to the pan and scrape vigorously with a wooden spoon.
This step builds the foundation for your gravy—don’t skip it. 💡
Overfilling the Dish
Stuffing your pot pie dish to the brim is a recipe for disaster. The filling needs room to bubble and expand during baking, or you’ll end up with a soggy bottom and a crust that collapses.
Fill the dish only ¾ full—this gives the filling space to rise and the crust room to crisp. Trust the process, and your pot pie will turn out perfect. 🌟
Baking Without Vent Slits
Forgetting to cut those small slits in the crust before baking is a cardinal sin. Steam needs an escape route, or your pot pie will turn into a soggy mess. Cut 3-4 small slits in the center of the crust—just enough to let steam out without letting filling leak.
I’ve seen this mistake turn a beautiful pot pie into a sad, greasy puddle. Don’t let that be you. ✨
Nutrition facts
Frequently asked questions
Can I use frozen chicken instead of fresh?
Thaw the frozen chicken completely in the refrigerator overnight before using. Never thaw at room temperature, as this can promote bacterial growth. For extra safety, you can also use the microwave’s defrost setting, then pat the chicken dry before cooking. The texture and flavor will be just as good as fresh.
How do I make this recipe gluten-free?
For a gluten-free crust, substitute the all-purpose flour with a 1:1 gluten-free flour blend like Bob’s Red Mill. Use the same measurements and follow the same dough preparation method. For the gravy, make a simple cornstarch slurry (1 tbsp cornstarch + 1 tbsp cold water) to thicken instead of using flour. The flavor will be just as rich and creamy.
What if I don’t have cheddar bay seasoning?
No problem! Make your own by combining 1 tbsp sharp cheddar cheese powder, 1 tsp dried bay leaves, 1 tsp dried thyme, and ½ tsp black pepper. Or use a mix of ½ tsp garlic powder, ½ tsp onion powder, and ½ tsp dried thyme for a similar savory depth. The dish will still be delicious—just slightly different in flavor profile.
Can I prepare this pot pie ahead of time?
This recipe makes fantastic leftovers! Assemble the pot pie (without baking) and refrigerate for up to 24 hours before baking. For freezing, bake the assembled pot pie, then cool completely, wrap tightly in plastic wrap, and freeze for up to 3 months. Thaw overnight in the fridge before reheating. Reheat covered in the oven at 350°F for 20-25 minutes to restore that golden crust.
What’s the best way to serve this pot pie?
Serve this pot pie hot with a side of crusty bread or a simple green salad to balance the richness. For an extra touch, garnish with fresh parsley and a sprinkle of extra cheddar bay seasoning. It also makes a great lunch the next day—just reheat and enjoy! The gravy is so flavorful it practically tastes better cold too.

- Crock Pot Round Steak Recipe: Slow-Sear Crust With Juicy Center - November 6, 2026
- Candied Sweet Potatoes Crock Pot Recipe: Caramelized Sweetness With Zero Effort - November 6, 2026
- Steak Recipe Crock Pot: Juicy, Caramelized Crust in 4 Hours - November 6, 2026