
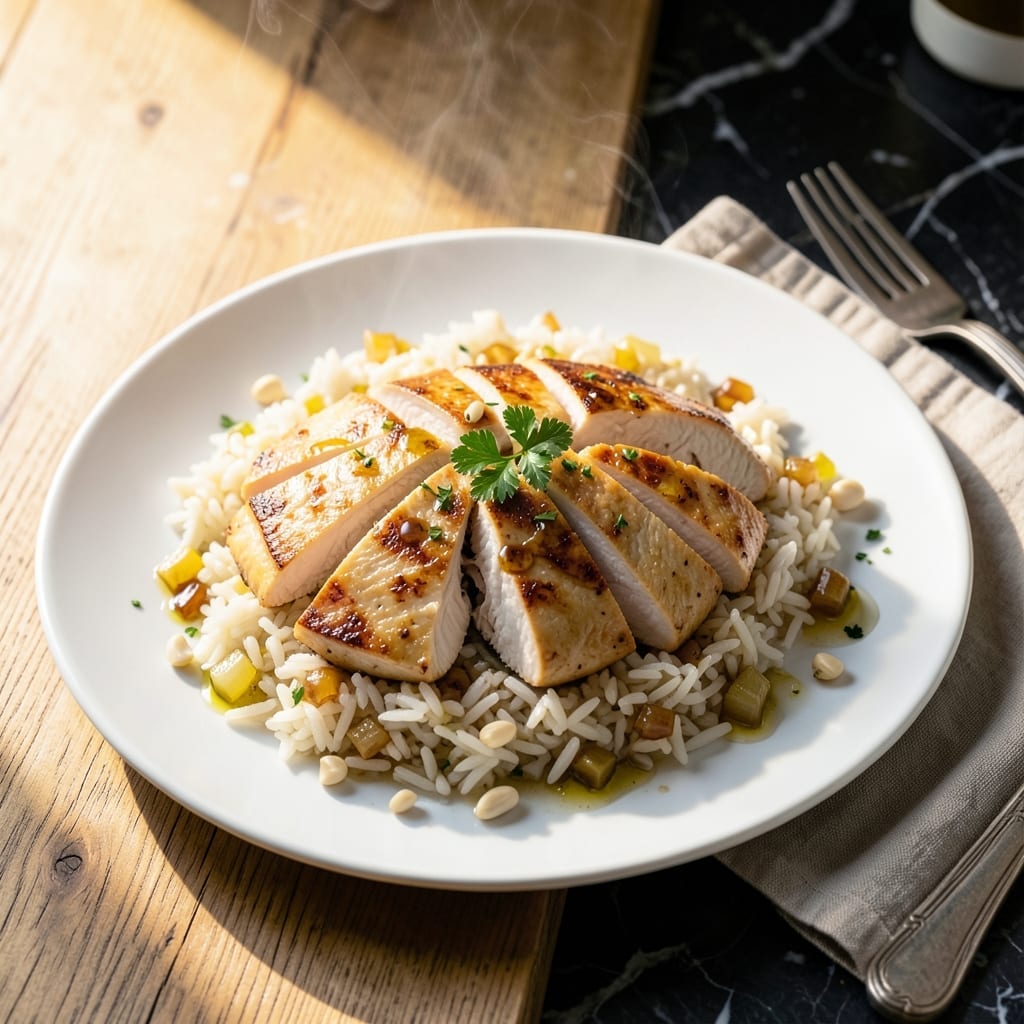
This one-pot method delivers tender chicken and perfectly cooked rice with minimal effort and maximum flavor. I developed this recipe to streamline dinner prep without sacrificing taste or texture.
The Instant Pot locks in moisture, ensuring juicy chicken breast every time while the rice absorbs all the fragrant herb-infused cooking liquid. No babysitting, no multiple pots—just set it and forget it.
What you get is a complete meal with fluffy rice and tender chicken, all infused with aromatic herbs. The flavors meld together beautifully during the cooking process, creating a dish that’s both comforting and satisfying.
Perfect for busy weeknights when you need a hearty meal on the table fast. Here’s how to make it.
Ingredients for Chicken Breast and Rice Instant Pot
One pot, minimal prep, maximum flavor. These are the building blocks for that perfect weeknight dinner.
| Ingredient | Amount | Notes |
|---|---|---|
| Boneless Skinless Chicken Breast 🍗 | 1 ½ lb | Cut into bite-sized pieces |
| Long-Grain White Rice 🍚 | 1 ½ cups | Uncooked, rinsed well |
| Chicken Broth 🥣 | 2 ½ cups | Low-sodium preferred |
| Olive Oil 🫒 | 2 tbsp | Divided for sautéing and finishing |
| Yellow Onion 🧅 | 1 whole | Finely diced |
| Garlic Cloves 🧄 | 3 cloves | Minced |
| Dried Thyme 🌿 | 1 tsp | Or 1 tbsp fresh |
| Dried Rosemary 🌿 | 1 tsp | Crushed between fingers |
| Bay Leaf 🍃 | 1 whole | Removed before serving |
| Salt 🧂 | 1 tsp | Adjust to taste after cooking |
| Black Pepper 🌶️ | ½ tsp | Freshly ground preferred |
| Fresh Parsley 🌿 | ¼ cup | Chopped, for garnish |
| Lemon Juice 🍋 | 1 tbsp | Freshly squeezed |
The chicken is the star here. Boneless, skinless breasts stay juicy in the Instant Pot—avoid pre-cut tenders as they can dry out. I grab mine from Costco for consistency, but any grocery store works. The rice matters too: long-grain white absorbs the herb-infused liquid best (jasmine or basmati work great). Rinse it well to remove excess starch—this prevents mushiness.
No fresh herbs? Dried work at one-third the amount. Fresh out of thyme? Swap in poultry seasoning. Chicken broth can be vegetable for a lighter touch. The onion and garlic are non-negotiable for flavor, but shallots can pinch-hit for onion. Don’t skip the bay leaf—it adds depth (remove it before serving though).
This keeps well for 3-4 days in the fridge. The rice soaks up liquid as it sits, so add a splash of broth when reheating. Freezes beautifully for 3 months—portion before freezing for easy grab-and-go meals.
Why You’ll Love This Recipe
- Set It and Forget: The instant pot does all the work—just dump in the chicken, rice, broth, and onion, then walk away.
- Rich Chicken Flavor: The broth soaks into the rice while the chicken stays juicy, no bland bites here.
- Meal Prep Magic: I make a big batch on Sunday and pack it for lunches all week. (Yes, even on a Tuesday night)
- Budget Friendly: One pound of chicken breast and a cup of rice feeds my family of four without breaking the bank.
Step-by-Step Instructions for Chicken Breast and Rice
This one-pot method delivers perfect texture and flavor with minimal effort.
Step 1: Sauté Aromatics and Brown Chicken
Set your Instant Pot to Sauté on Normal heat. Add 1 tbsp Olive Oil and swirl to coat the bottom. When the oil shimmers, add the finely diced Yellow Onion and cook for 3-4 minutes until it turns translucent and golden at the edges.
Push the onion to the sides and add the 1.5 lb Boneless Skinless Chicken Breast pieces in a single layer. Don’t stir—let them sear for 2-3 minutes until the bottoms develop a light golden crust. I press down gently with a spatula to ensure even browning.
Add the 3 cloves minced Garlic Cloves, 1 tsp Dried Thyme, and 1 tsp Dried Rosemary, stirring for 30 seconds until fragrant. This builds the flavor foundation for your dish.
Step 2: Toast Rice and Deglaze
Stir in the 1.5 cups Long-Grain White Rice and cook for 1-2 minutes, stirring constantly. You’ll notice the rice grains become slightly opaque—that’s how you know they’re properly toasted. This step prevents a mushy texture in the finished dish.
Pour in the 2.5 cups Chicken Broth and use a wooden spoon to scrape up any browned bits from the bottom. Add the 1 whole Bay Leaf, 1 tsp Salt, and 0.5 tsp Black Pepper. The liquid should look slightly murky—that means you’ve captured all the flavor from the fond.
Step 3: Pressure Cook to Perfection
Secure the lid, set the valve to Sealing, and cook on High Pressure for 5 minutes. I know it seems short, but the Instant Pot works fast with chicken and rice. The float valve will pop up when pressure is reached, and the cook time will begin counting down.
When the timer beeps, let the pressure release naturally for 10 minutes, then quick-release any remaining pressure. This gradual release prevents the rice from becoming sticky or the chicken from toughening. The rice should absorb all the liquid, and the chicken should reach 165°F internally.
Step 4: Finish and Serve
Carefully open the lid and remove the Bay Leaf—don’t forget this step, as it’s not meant to be eaten. Drizzle the remaining 1 tbsp Olive Oil over the top and add the 1 tbsp Lemon Juice. Stir gently to fluff the rice and distribute the chicken evenly.
Let the dish sit for 2-3 minutes to allow the flavors to meld. The rice should be tender but still hold its shape, and the chicken should pull apart easily with a fork. Garnish with the 0.25 cup chopped Fresh Parsley just before serving for a pop of color and freshness.
Pro Tips For Making Chicken Breast And Rice Instant Pot
- Use Natural Release: I learned this the hard way—quick-releasing the pressure turns the chicken rubbery. Let it sit for 10 minutes after cooking to keep the meat juicy.
- Trim the Chicken: Sounds obvious, but those little bits of fat or tendon on boneless breasts can make the texture uneven. A quick trim with kitchen shears takes 30 seconds and guarantees a cleaner bite.
- Toast the Rice: Before adding the broth, sauté the rice and diced onion in olive oil for 2-3 minutes until fragrant. It adds a nutty depth that plain steamed rice just can’t match.
- Check Liquid Ratios: My first few attempts were either soupy or dry because I eyeballed the broth. Stick to 1.5 cups broth per 1 cup rice, and adjust only if your rice brand specifies otherwise.
Perfect Pairings for chicken breast and rice instant pot
Fresh Salad Pairings
A crisp garden salad with balsamic vinaigrette adds a refreshing contrast to the hearty dish. I toss 4 cups mixed greens with 1 tbsp olive oil, 1 tsp balsamic vinegar, and a pinch of salt. The acidity cuts through the richness beautifully.
Steamed Vegetables
Broccoli or green beans steam perfectly while the Instant Pot works. Toss 2 cups chopped broccoli with 1 tsp olive oil and a sprinkle of garlic powder. Steam for 4-5 minutes until tender-crisp. Simple, healthy, and ready at the same time. 🥗
Wine Pairings
A light Pinot Grigio or Sauvignon Blanc complements the herb-infused flavors. I prefer a crisp New Zealand Sauvignon Blanc—its citrus notes balance the dish’s savory depth. Serve chilled for the best experience.
Bread Options
Warm garlic bread or naan soaks up any extra sauce. Brush a baguette with 2 tbsp melted butter and 1 minced garlic clove, then toast until golden. The buttery crunch adds a satisfying texture contrast.
Dessert Follow-Up
End with a light lemon sorbet or fruit salad to cleanse the palate. I love a simple mix of strawberries, blueberries, and kiwi with a drizzle of honey. It’s the perfect sweet finish to a savory meal. ✨
Nutrition Facts
Frequently Asked Questions
Can I use chicken thighs instead?
Yes! Use 1.5 lb boneless skinless thighs and keep the cook time the same. They’ll be even juicier than breasts. Adjust seasoning to taste after cooking.
Why do I need to toast the rice first?
Toasting for 1-2 minutes enhances nuttiness and prevents mushiness. It also helps the grains hold their shape during pressure cooking.
Can I make this with brown rice?
Yes, but increase liquid to 3 cups and cook time to 22 minutes on High Pressure. Natural release for 15 minutes ensures tender rice.
What if my rice is undercooked?
Add 1/4 cup hot broth, reseal the lid, and cook for another 2-3 minutes on High Pressure. Let it sit for 5 minutes before opening.

- 6 Oz Chocolate Chip Cookie Recipe: Perfectly Balanced Crispy Edges and Chewy Hearts - September 25, 2026
- 6-Inch Coffee Cake Recipe: Vanilla Bean Swirls and Buttery Streusel Topping - September 25, 2026
- 1 Hour Soup Recipe: Velvety Richness Without the Wait - September 25, 2026