
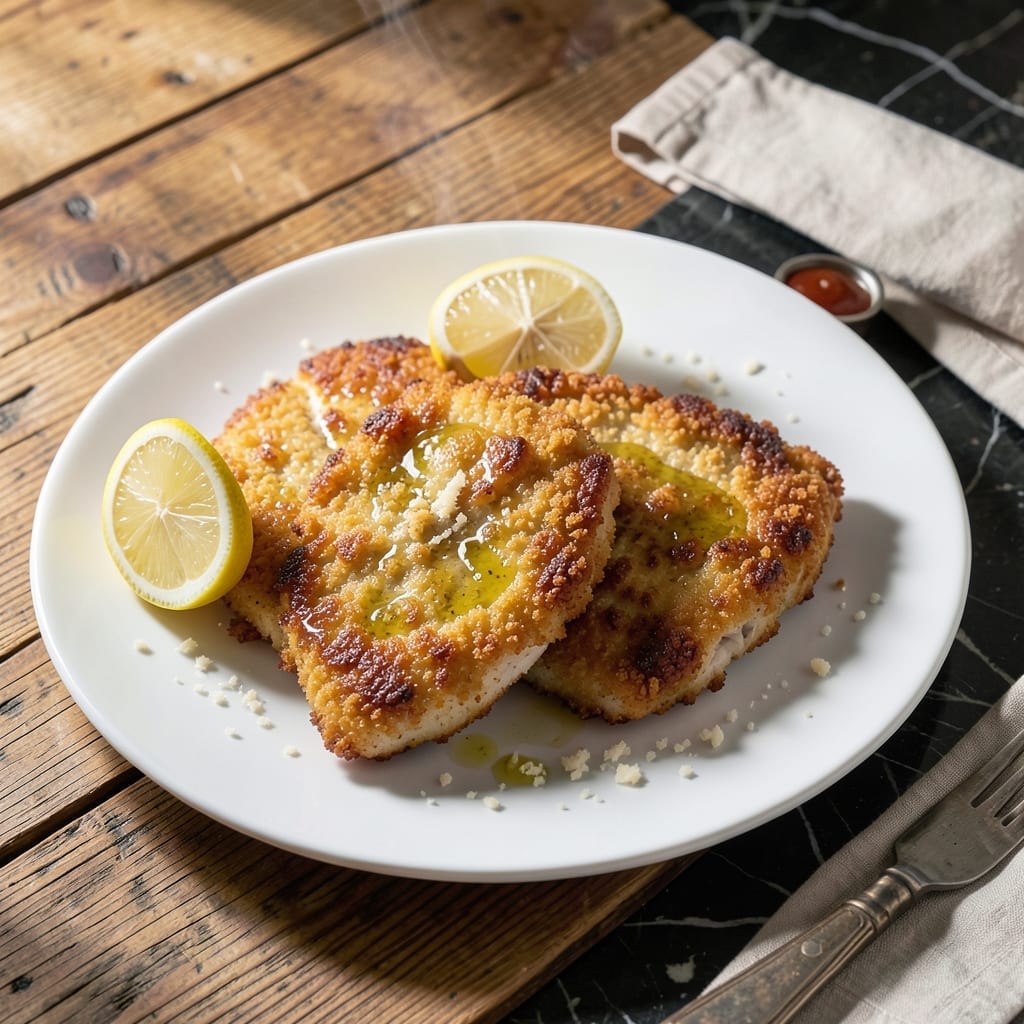
Achieving crispy breaded chicken cutlets in an Instant Pot might sound impossible, but this method delivers perfect results every time.
The secret lies in a two-step process: first browning the breaded cutlets using the sauté function, then finishing them with a quick pressure cook.
What emerges is golden, crispy chicken with a tender interior, all made in a fraction of the time of traditional methods.
This technique proves you can have restaurant-quality cutlets without deep frying or a messy stovetop.
Ingredients for Chicken Cutlet Instant Pot
Pantry staples meet fresh ingredients for restaurant-quality crispy breaded chicken in your Instant Pot.
| Ingredient | Amount | Notes |
|---|---|---|
| Chicken Breast Cutlets 🍗 | 1 ½ lb | Boneless, skinless, pounded to 1/4-inch thickness |
| All-Purpose Flour 🌾 | ¾ cup | For initial dredging |
| Large Eggs 🥚 | 2 whole | Beaten for egg wash |
| Panko Breadcrumbs 🍞 | 1 ½ cups | Japanese-style for extra crispiness |
| Grated Parmesan Cheese 🧀 | ½ cup | Freshly grated from block |
| Garlic Powder 🧄 | 1 tsp | For seasoning the breading |
| Onion Powder 🧅 | 1 tsp | For seasoning the breading |
| Paprika 🌶️ | ½ tsp | Sweet or smoked variety |
| Kosher Salt 🧂 | 1 tsp | Diamond Crystal preferred |
| Ground Black Pepper 🌶️ | ½ tsp | Freshly ground preferred |
| Olive Oil 🫒 | ½ cup | Divided for sautéing and finishing |
| Dijon Mustard 🟡 | 1 tbsp | For additional flavor in breading |
| Fresh Parsley 🌿 | 2 tbsp | Chopped, for garnish |
| Lemon Wedges 🍋 | 4 pieces | For serving |
The chicken cutlets are the foundation—use boneless, skinless breasts pounded to even 1/4-inch thickness for consistent cooking. Costco and Whole Foods sell pre-cut cutlets, saving prep time. For breadcrumbs, Kikkoman Panko delivers superior texture. The Parmesan should be freshly grated from a wedge (pre-shredded contains anti-caking agents that inhibit crisping). Look for Diamond Crystal kosher salt—its coarse texture adheres better to the breading.
No Panko? Regular breadcrumbs work at a 1:1 ratio, though the texture won’t be as crispy. Out of Parmesan? Pecorino Romano offers a sharper alternative. The Dijon mustard can be swapped for whole-grain mustard for visual appeal. For a gluten-free version, use almond flour and crushed cornflakes instead of all-purpose flour and Panko. Fresh parsley can be replaced with dried (use one-third the amount).
Prepped cutlets can be refrigerated for up to 1 day before cooking. Breaded cutlets freeze beautifully for 2 months—layer between parchment paper. Leftover cooked chicken keeps in the fridge for 3-4 days or freezes for 1 month. Reheat in the air fryer to restore crispiness.
Why You’ll Love This Recipe
- One-Pot Magic: I just toss the cutlets in flour, egg, then panko with parmesan—all in one bowl before the Instant Pot does the rest.
- Crispy Perfection: That parmesan in the panko gives it a golden crust with a rich, savory bite every time.
- Weeknight Hero: I’ve served these for dinner, meal prepped for lunches, and even made extras for sandwiches the next day.
- Budget Stretcher: A few chicken breasts turn into a filling meal that satisfies the whole family without breaking the bank.
Step-by-Step Instructions for Chicken Cutlet Instant Pot
This method delivers perfectly crispy breaded cutlets using the Instant Pot’s sauté and pressure functions.
Step 1: Season and Dredge the Chicken Breast Cutlets
Pat the 1.5 lb Chicken Breast Cutlets dry with paper towels. This critical step ensures the breading adheres properly. Season both sides generously with the 1 tsp Kosher Salt and 0.5 tsp Ground Black Pepper.
Create a breading station with three shallow dishes. Place the 0.75 cup All-Purpose Flour in the first dish. In the second, beat the 2 whole Large Eggs with the 1 tbsp Dijon Mustard until fully combined. For the third, mix the 1.5 cups Panko Breadcrumbs, 0.5 cup Grated Parmesan Cheese, 1 tsp Garlic Powder, 1 tsp Onion Powder, and 0.5 tsp Paprika.
Step 2: Bread the Chicken Cutlets
Working with one piece at a time, dredge each cutlet in the flour, shaking off any excess. The flour creates a base layer that helps the egg wash adhere. Next, dip it into the egg mixture, ensuring both sides are fully coated. Let any excess drip off for 5 seconds before moving to the breadcrumb mixture.
Press each cutlet firmly into the panko mixture, turning to coat completely. I use my palms to gently compress the breadcrumbs onto the surface, which helps create that signature crispy texture. Place the breaded cutlets on a plate and let them rest for 5 minutes to help the coating set.
Step 3: Sauté the Breaded Cutlets in the Instant Pot
Set your Instant Pot to the sauté function on normal heat. Add 0.25 cup Olive Oil and let it heat until shimmering. Carefully place half of the breaded cutlets in the pot, being careful not to overcrowd. Cook for 3-4 minutes per side until golden brown and crispy.
The Instant Pot’s wide surface area allows for even browning, but don’t flip too soon. Wait until you see the edges turning deep golden brown and the cutlet releases easily from the bottom. Transfer the cooked cutlets to a paper towel-lined plate to drain excess oil. Repeat with the remaining 0.25 cup Olive Oil and cutlets.
Step 4: Finish and Serve the Chicken Cutlets
Once all cutlets are cooked, transfer them to a serving platter. The Instant Pot method ensures they stay crispy while being incredibly tender inside. Garnish with the 2 tbsp Fresh Parsley, finely chopped, for a pop of color and freshness.
Serve immediately with the 4 pieces Lemon Wedges on the side. The acidity from the lemon cuts through the richness of the breading beautifully. For best results, enjoy these cutlets fresh from the Instant Pot—they’re at their crispiest right after cooking.
Pro Tips For Making Chicken Cutlet Instant Pot
- Preheat the Pot: I learned this the hard way—always use the sauté function to heat the oil for 2-3 minutes before adding the breaded cutlets. It prevents that sad, pale crust and gives you that golden panko crunch.
- Press the Crumbs: After dredging in flour and egg, really press the panko-parmesan mix into the chicken so it sticks. Sounds tedious, but it actually changes the outcome—no bare spots or floating breadcrumbs in your pot.
- Skip the Overcrowding: Resist the urge to cook all cutlets at once. Two at a time max in a 6-quart Instant Pot, or they’ll steam instead of crisp. I used to rush this part and wondered why my chicken was soggy.
- Rest Before Serving: Give the cutlets 5 minutes on a wire rack after cooking. My grandmother swore by this, and she was right: it keeps the crust crispy and lets the juices redistribute.
Pro Cooking Tips for Perfect Results
Perfect Breading Technique
Pat the cutlets completely dry before breading—this is non-negotiable for crispiness. I use paper towels and press firmly to remove all moisture. The flour layer should be thin; shake off excess aggressively to avoid gummy coating. 💡
Sauté Function Mastery
Let the olive oil heat until it shimmers but doesn’t smoke. Test with a breadcrumb—it should sizzle immediately. Cook in batches to avoid crowding, which steams instead of crisps. I wait until edges turn deep golden brown before flipping.
Temperature Control
Use normal heat on sauté mode—not high. Too hot burns the breadcrumbs before the chicken cooks through. The Instant Pot’s even heat distribution is perfect for this. Monitor closely; panko browns faster than regular breadcrumbs.
Resting for Crispiness
After breading, let cutlets rest 5 minutes before cooking. This helps the coating adhere better. Post-cooking, serve immediately—they lose crispness after 10 minutes. A wire rack keeps them crisp longer than a plate.
Oil Management
Use ½ cup olive oil total, divided between batches. Drain cooked cutlets on paper towels to remove excess oil. The Parmesan in the breading helps absorb some oil, reducing greasiness. 🔥
Instant Pot Advantage
The wide surface area browns better than most electric skillets. Unlike deep frying, you use less oil while achieving similar crispiness. I’ve found 6-quart models work best for even cooking.
Nutrition Facts
Frequently Asked Questions
Do I need to use panko breadcrumbs?
Panko creates the crispiest texture, but regular breadcrumbs work in a pinch. Use a 1:1 ratio and press firmly to adhere. The texture won’t be as crispy, but still delicious.
Can I make these ahead of time?
Breaded cutlets can be refrigerated for 1 day or frozen for 2 months. Thaw in the fridge before cooking. Reheat in an air fryer to restore crispiness.
How do I keep them crispy after cooking?
Serve immediately for maximum crispiness. Use a wire rack instead of a plate to prevent steam buildup. They stay crisp for about 10 minutes.
What if my breading falls off?
Pat cutlets completely dry before breading. Let breaded cutlets rest for 5 minutes to help coating set. Avoid flipping too soon during cooking.

- 4C Bread Crumbs Meatballs Recipe: Crispy Crust and Juicy Centers - September 25, 2026
- 6 Oz Chocolate Chip Cookie Recipe: Perfectly Balanced Crispy Edges and Chewy Hearts - September 25, 2026
- 6-Inch Coffee Cake Recipe: Vanilla Bean Swirls and Buttery Streusel Topping - September 25, 2026