
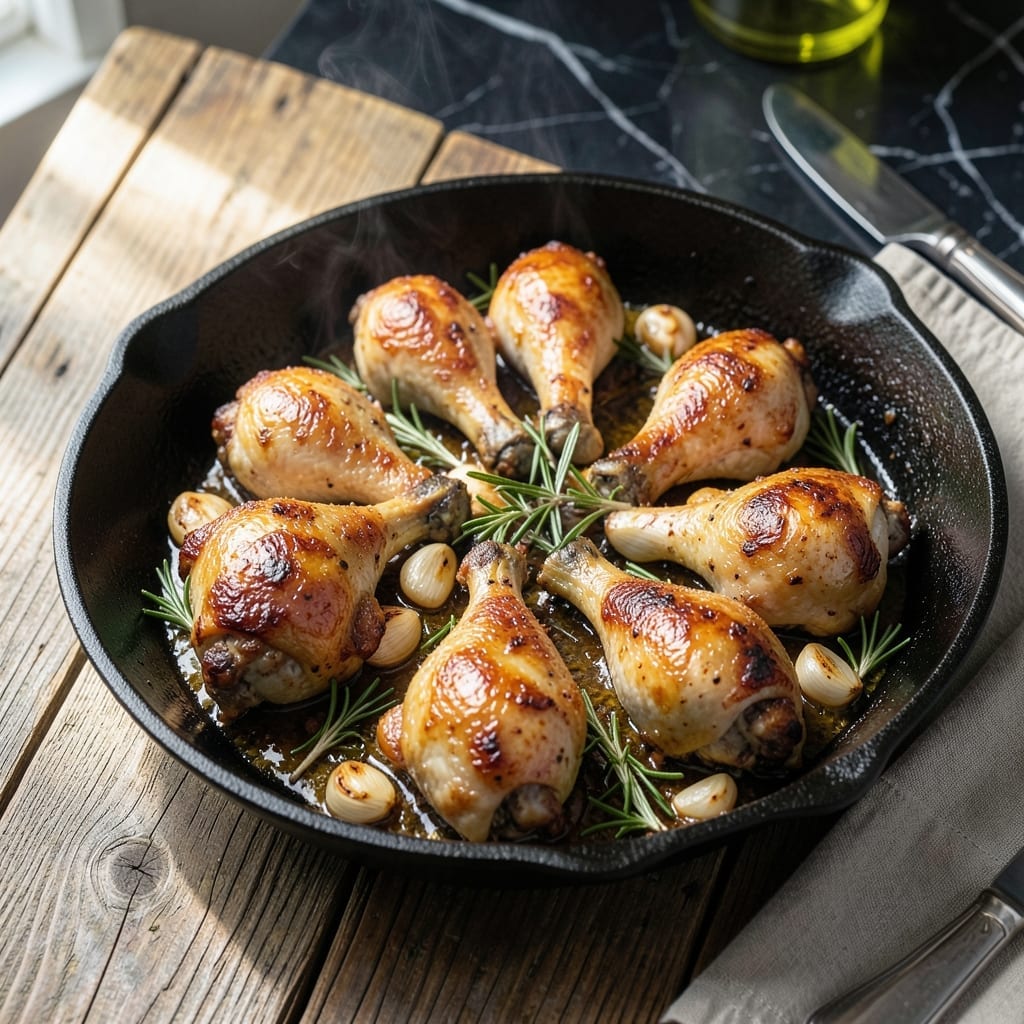
This one-pan method delivers crispy chicken legs with minimum effort and maximum flavor. The secret is searing the skin first, then finishing with a covered braise that locks in moisture while developing deep savory notes.
I’ve refined this technique to ensure every piece emerges golden and crispy, with juicy meat that falls off the bone. A simple blend of herbs and aromatics builds layers of flavor without complicating the process.
The beauty of cooking in a single pan means easy cleanup and concentrated flavors. The chicken renders its own fat, which bastes the legs as they cook, enhancing richness and texture.
By the end, you’ll have a dish that’s rustic yet refined, perfect for weeknight dinners or casual gatherings. This approach guarantees consistent results every time.
Ingredients for Chicken Legs One Pot
Bone-in chicken legs and a handful of aromatics create this one-pan wonder with crispy skin.
| Ingredient | Amount | Notes |
|---|---|---|
| Chicken Legs 🍗 | 8 pieces | Bone-in, skin-on preferred |
| Olive Oil 🫒 | 2 tbsp | Divided for searing and cooking |
| Kosher Salt 🧂 | 1 ½ tsp | Divided for seasoning |
| Black Pepper 🌶️ | 1 tsp | Freshly ground preferred |
| Garlic Cloves 🧄 | 6 cloves | Smashed, peeled |
| Fresh Rosemary 🌿 | 2 tbsp | Chopped, stems removed |
| Fresh Thyme 🌿 | 2 tbsp | Leaves stripped from stems |
| Dry White Wine 🍷 | ½ cup | Or substitute chicken broth |
| Chicken Broth 💧 | 1 cup | Low-sodium preferred |
| Lemon 🍋 | 1 whole | Zest and juice reserved |
| Bay Leaves 🍃 | 2 pieces | Dried for braising |
| Red Pepper Flakes 🌶️ | ½ tsp | Optional for heat |
The chicken legs are the star—bone-in, skin-on gives you that crispy texture the intro promises. Local butchers or Whole Foods often have the best selection, but standard grocery store legs work too (just check for even sizing). Fresh rosemary and thyme make a difference here; Trader Joe’s has great bundles. Pat the chicken dry before seasoning—worth the extra minute for maximum crispiness.
No white wine? Chicken broth with a splash of lemon juice works in a pinch. Dried herbs can swap in at one-third the amount of fresh. If you’ve got poultry seasoning, use 1 tsp to replace the rosemary and thyme. For extra depth, add a dash of soy sauce to the braising liquid. The red pepper flakes are optional—skip if you’re sensitive to heat.
This dish tastes even better the next day. Store leftovers in an airtight container for up to 4 days in the fridge. The braising liquid thickens as it cools—perfect for spooning over the reheated chicken. Freezes well for up to 3 months.
Why You’ll Love This Recipe
- One Pan Wonder: I toss everything in, let it roast, and that’s it—no extra bowls, no fuss.
- Garlic Lovers’ Dream: The cloves caramelize with the olive oil, making each bite ridiculously flavorful.
- Weeknight Savior: Between us, this is my go-to when I need dinner ready before the kids start asking.
- Budget-Friendly Feast: Chicken legs are cheap, and this feeds my family of four with leftovers for lunch.
Step-by-Step Instructions for Chicken Legs One Pot
This method ensures perfectly crispy skin while building layers of savory flavor in a single pan.
Step 1: Season and Sear the Chicken Legs
Pat the 8 pieces Chicken Legs completely dry with paper towels—this is essential for crispy skin. Season both sides generously with 1 tsp Black Pepper and 1 tsp Kosher Salt, pressing the seasoning into the skin.
Heat 1 tbsp Olive Oil in a large, heavy pot or Dutch oven over medium-high heat until shimmering. Add half the chicken legs, skin-side down, and sear for 6-7 minutes until the skin is deep golden brown and crispy. Flip and sear the other side for 4 minutes, then transfer to a plate. Repeat with the remaining chicken and 1 tbsp Olive Oil.
Step 2: Build the Aromatic Base
Reduce heat to medium and add the 6 cloves Garlic Cloves, 2 tbsp Fresh Rosemary, and 2 tbsp Fresh Thyme to the pot. Cook for 1-2 minutes, stirring constantly, until the herbs are fragrant and the garlic begins to soften. Be careful not to burn the garlic.
Add the 0.5 tsp Red Pepper Flakes (if using) and stir for 15 seconds to toast the flakes slightly, releasing their heat and aroma. This forms the flavor foundation for your braising liquid.
Step 3: Deglaze and Add Braising Liquid
Pour in the 0.5 cup Dry White Wine and scrape the browned bits from the bottom of the pot with a wooden spoon. Let the wine reduce by half, about 3-4 minutes, until the liquid looks syrupy and the alcohol smell has cooked off.
Add the 1 cup Chicken Broth, the zest and juice from the 1 whole Lemon, and the 2 pieces Bay Leaves. Stir to combine and bring to a gentle simmer. The liquid should smell bright and herbaceous.
Step 4: Braise to Perfection
Return the chicken legs to the pot, skin-side up, along with any accumulated juices. The liquid should come about halfway up the chicken. Cover the pot and reduce heat to low.
Braise for 35-40 minutes until the chicken is cooked through and the meat easily pulls away from the bone. The skin should remain crispy above the liquid line while the meat becomes fall-off-the-bone tender. Check occasionally and add a splash of broth if the liquid reduces too much.
Step 5: Reduce and Serve
Remove the lid and increase heat to medium. Simmer for 5-7 minutes to reduce the sauce slightly and intensify the flavors. The sauce should coat the back of a spoon and have a glossy, rich appearance.
Taste and adjust seasoning with the remaining 0.5 tsp Kosher Salt if needed. Remove the bay leaves and serve the chicken legs hot, spooning the aromatic braising liquid over the top. The skin will stay crispy while the meat remains juicy and flavorful.
Pro Tips For Making Chicken Legs One Pot
- Sear Skin First: Start the chicken legs skin-side down in a hot pan with olive oil for 5-6 minutes until golden—this renders the fat and guarantees crispy skin later. I learned this the hard way after too many soggy batches. —
- Smash the Garlic: Lightly crush the garlic cloves with the side of your knife before adding them whole. Sounds weird, but it works: the flavor infuses the oil without burning. —
- Skip the Crowding: Don’t overcrowd the pot or the chicken will steam instead of brown. I skip this when I’m lazy, but the dish is noticeably better when I don’t. —
- Rest Before Serving: Let the chicken rest 5-10 minutes in the pot after cooking—this keeps the juices from running all over the plate. My grandmother swore by this, and she was right.
Make-Ahead Tips for Leftovers
Overnight Prep
You can season and refrigerate the chicken legs up to 12 hours before cooking. I pat them dry, season with 1.5 tsp Kosher Salt and 1 tsp Black Pepper, then arrange on a plate uncovered in the fridge. This dries the skin further for extra crispiness. 💡
Braise Ahead
Complete the entire recipe up to the final reduction step, then let it cool and refrigerate for up to 2 days. The flavors meld beautifully overnight. When ready to serve, reheat gently and reduce the sauce as directed.
Freezer Method
Cook the dish completely, cool, then transfer to airtight containers. It freezes well for 3 months. Thaw in the fridge overnight, then reheat on the stovetop over medium-low heat until warmed through. ❄️
Reheating Tips
For best texture, reheat in a skillet over medium heat for 5-7 minutes per side. This revives the crispy skin. Add a splash of Chicken Broth to keep the meat moist.
Sauce Storage
The braising liquid thickens as it cools—store it separately in a jar. It keeps for 4 days refrigerated. Reheat gently and spoon over the chicken when serving.
Portion Control
Divide into single servings before storing. I use glass meal prep containers—they’re perfect for grabbing a quick lunch. Each portion reheats evenly in 3-4 minutes in the microwave.
Nutrition Facts
Frequently Asked Questions
Can I use chicken thighs instead?
Bone-in, skin-on thighs work perfectly with the same method. They may need 5-10 minutes less braising time since they’re smaller. The skin will crisp up just as beautifully.
What if my pot isn’t oven-safe?
No problem—this is a stovetop-only recipe. Just ensure your pot has a tight-fitting lid for the braising step. A heavy Dutch oven works best, but any deep pan will do.
How do I prevent soggy skin?
Pat the chicken very dry before seasoning, and don’t overcrowd the pan when searing. Leave space between pieces so steam can escape. The final uncovered simmer helps crisp it back up.
Can I make this without wine?
Yes! Substitute 0.5 cup Chicken Broth with 1 tbsp lemon juice for acidity. The flavor will be slightly milder but still delicious.

- 4C Bread Crumbs Meatballs Recipe: Crispy Crust and Juicy Centers - September 25, 2026
- 6 Oz Chocolate Chip Cookie Recipe: Perfectly Balanced Crispy Edges and Chewy Hearts - September 25, 2026
- 6-Inch Coffee Cake Recipe: Vanilla Bean Swirls and Buttery Streusel Topping - September 25, 2026