
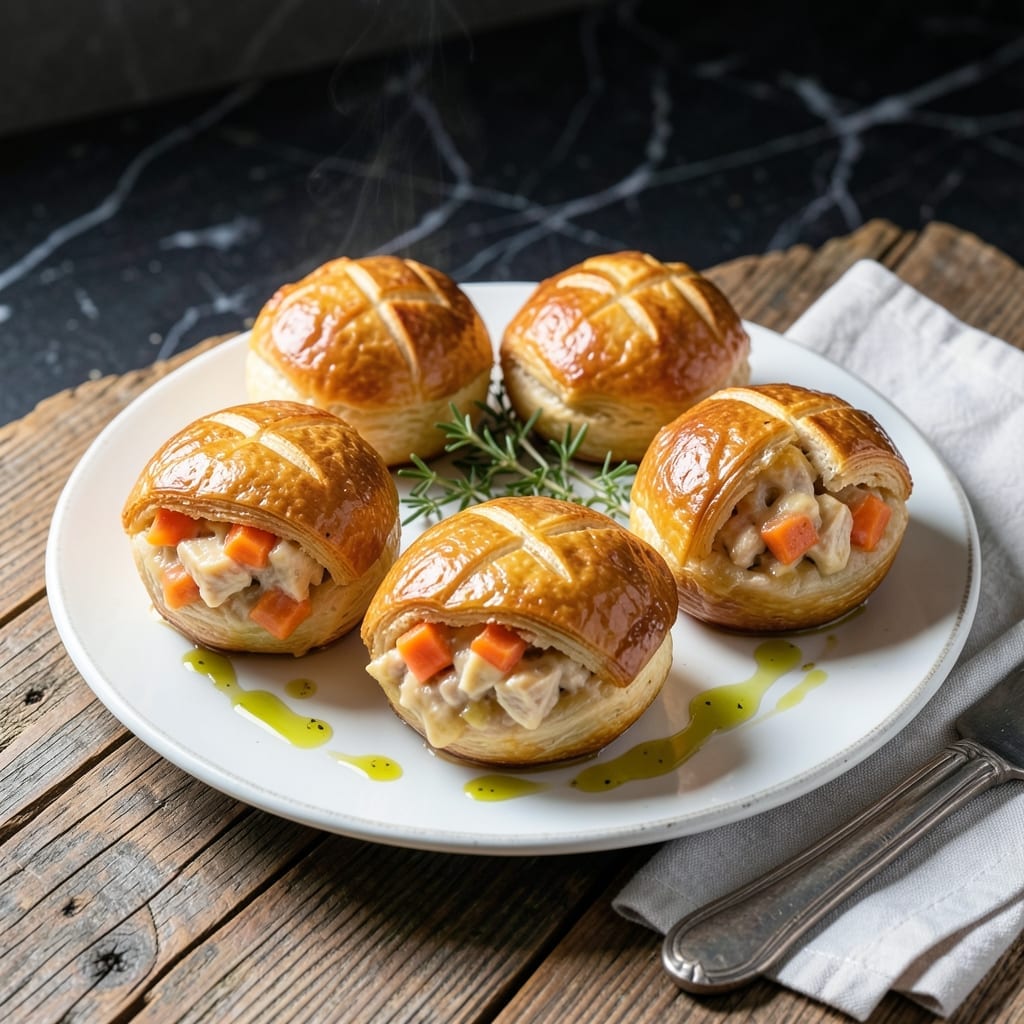
These handheld delights capture all the comfort of classic chicken pot pie in convenient, single-serving portions. I developed this recipe to solve the age-old problem of serving individual portions without sacrificing that signature flaky crust we all love.
The secret lies in using store-bought pie crust as a shortcut, allowing you to focus on the rich, creamy filling packed with tender chicken and vegetables. Each bomb encases a generous portion of that familiar pot pie filling in a golden, buttery package.
What emerges from the oven are perfectly golden pockets with a crisp, flaky exterior giving way to a steaming, savory center. The aroma alone will transport you to cozy family dinners, but the portable format makes them perfect for gatherings.
Serve warm with a side of gravy for dipping, or enjoy them straight from the baking sheet. This approach delivers all the satisfaction of chicken pot pie with none of the serving hassle.
Ingredients for Chicken Pot Pie Bombs
Nothing exotic here—just store-bought crust and pantry staples for that cozy comfort.
| Ingredient | Amount | Notes |
|---|---|---|
| Store-Bought Pie Crust 🥧 | 2 sheets | Thawed if frozen, standard 9-inch rounds |
| Boneless Skinless Chicken Breast 🍗 | 1 lb | Diced into small cubes |
| Unsalted Butter 🧈 | 4 tbsp | Divided for filling and crust |
| All-Purpose Flour 🌾 | ¼ cup | For thickening the filling |
| Yellow Onion 🧅 | ½ whole | Finely diced for filling |
| Carrots 🥕 | 2 whole | Peeled and finely diced |
| Celery Stalks 🌿 | 2 whole | Finely diced for filling |
| Frozen Peas 🌱 | ½ cup | Thawed and drained |
| Chicken Broth 🍲 | 1 ½ cups | Low-sodium preferred |
| Heavy Cream 🥛 | ½ cup | For creamy filling |
| Garlic Cloves 🧄 | 2 cloves | Minced for filling |
| Dried Thyme 🌿 | ½ tsp | For seasoning the filling |
| Salt 🧂 | ½ tsp | Adjust to taste |
| Black Pepper 🌶️ | ¼ tsp | Freshly ground preferred |
| Large Egg 🥚 | 1 whole | For egg wash on crust |
The pie crust is your shortcut to that signature flaky texture. Pillsbury or Marie Callender’s both work great (the kind in the red box). Thaw it completely before rolling or it’ll crack. For the chicken, rotisserie chicken saves time if you’re in a hurry—just shred about 2 cups and skip the cooking step. Look for good marbling if you’re buying raw breasts to cook yourself.
No fresh thyme? Dried rosemary or sage at half the amount works well. Swap celery for extra carrots if that’s what you’ve got. The heavy cream can be half-and-half (thinner but still tasty) or coconut milk for a dairy-free twist. For the veggies, frozen mixed vegetables (peas, carrots, corn) can replace the fresh stuff—no need to thaw first.
Assemble the bombs on a parchment-lined sheet pan for easy cleanup. Leftovers keep in the fridge for 3-4 days or freeze baked bombs for 2 months. Reheat in the oven to keep the crust crisp—microwave makes them soggy (worth the extra minute).
Why You’ll Love This Recipe
- No Fuss Assembly: I just roll out the store-bought crust, fill with the chicken and onion mix, and seal—no fancy techniques required.
- Buttery Comfort: The unsalted butter and flour make a rich, velvety sauce that soaks into every bite.
- Weeknight Hero: Between us, these are my go-to for busy Tuesdays when I need dinner on the table fast.
- Budget Stretcher: One pack of chicken breasts and a pie crust makes a solid batch, with leftovers that reheat beautifully.
Step-by-Step Instructions for Chicken Pot Pie Bombs
These handheld delights come together easily with store-bought crust and a creamy filling.
Step 1: Prepare the Creamy Chicken Filling
In a large skillet, melt 2 tbsp unsalted butter over medium heat. Add the diced boneless skinless chicken breast and cook for 5-7 minutes until no longer pink and just cooked through. Remove the chicken and set aside.
In the same skillet, add the remaining 2 tbsp unsalted butter. Sauté the finely diced yellow onion, carrots, and celery stalks for 4-5 minutes until the vegetables soften. Stir in the minced garlic cloves and cook for 30 seconds until fragrant.
Sprinkle the 0.25 cup all-purpose flour over the vegetables and stir for 1 minute to cook off the raw flour taste. Slowly pour in the 1.5 cups chicken broth and 0.5 cup heavy cream, stirring constantly until smooth.
Step 2: Finish the Filling and Cool
Return the cooked chicken to the skillet. Add the thawed and drained 0.5 cup frozen peas, 0.5 tsp dried thyme, 0.5 tsp salt, and 0.25 tsp black pepper. Stir well and simmer for 2-3 minutes until the filling thickens to a pudding-like consistency.
Remove the skillet from heat and let the filling cool completely. This step is crucial—hot filling will melt the pie crust and make the bombs difficult to seal. I like to spread the filling on a plate to speed up the cooling process.
Step 3: Assemble the Pot Pie Bombs
Preheat your oven to 375°F. Unfold the 2 sheets store-bought pie crust and, using a 3-inch round cutter, cut out circles. You should get about 12 circles per sheet. Re-roll the scraps to cut out more if needed.
Place a spoonful of the cooled filling in the center of half the circles. Lightly brush the edges with water, then top with another circle. Press the edges together with a fork to seal tightly. This prevents the bombs from bursting open during baking.
Step 4: Bake to Golden Perfection
Whisk the 1 whole large egg with a splash of water to make an egg wash. Brush the tops of the assembled bombs with the egg wash. This gives them that beautiful golden brown finish we all love.
Place the bombs on a parchment-lined baking sheet. Bake for 18-22 minutes until the crust is golden brown and the filling is bubbling. Rotate the pan halfway through baking for even browning.
Let the bombs cool for 5 minutes before serving. The filling will be extremely hot straight from the oven. Each bite should deliver flaky crust, creamy filling, and those classic pot pie flavors we crave.
Pro Tips For Making Chicken Pot Pie Bombs
- Chill the Crust: Let the store-bought pie crust sit in the fridge for 15-20 minutes before rolling it out—this keeps it from sticking and makes it way easier to work with.
- Dice Chicken Small: Cut the boneless skinless chicken breast into ½-inch pieces so they cook through quickly and evenly without drying out.
- Cook Onion First: Sauté the yellow onion in the butter before adding flour, as raw onion can make the filling taste harsh and underdeveloped.
- Vent the Bombs: Poke a small slit in the top of each pie bomb before baking to let steam escape, otherwise they’ll burst open in the oven.
Pro Cooking Tips for Perfect Results
Crust Perfection
Use a 3-inch round cutter for consistently sized bombs—I prefer Wilton brand for sharp, clean cuts. Roll your pie crust to ⅛-inch thickness before cutting to ensure even baking. Chill the assembled bombs for 15 minutes before baking to prevent shrinking. 💡
Filling Consistency
Your filling should be thick enough to hold its shape—like pudding. If it’s runny, cook it longer or add 1 tsp cornstarch mixed with 1 tbsp cold water. Cooling the filling completely is non-negotiable to avoid soggy bottoms.
Sealing Technique
Press edges firmly with a fork, then go back and crimp again. I also use my fingers to pinch the edges for extra security. A tiny bit of filling might escape during baking, but proper sealing keeps most of it contained.
Even Browning
Rotate your baking sheet halfway through the 18-22 minute bake time. For extra shine, brush with egg wash a second time after rotating. Parchment paper prevents sticking while allowing the bottoms to crisp. 🔥
Temperature Control
Bake at 375°F on the middle oven rack. If your oven runs hot, reduce to 350°F and add 2-3 minutes. The bombs are done when the crust is golden and the filling reaches 165°F internally.
Resting Time
Let them rest for 5 minutes after baking. This allows the filling to set slightly, making them easier to handle. Serve warm—they’ll stay crispy for about 20 minutes out of the oven.
Nutrition Facts
Frequently Asked Questions
Can I make these ahead of time?
Yes! Assemble and refrigerate uncooked bombs for up to 24 hours. Or freeze on a tray first, then transfer to a bag for up to 1 month. Bake from frozen, adding 3-5 minutes.
Why did my bombs burst open while baking?
This usually happens if the filling wasn’t cooled completely or edges weren’t sealed tightly. Press edges firmly with a fork, then crimp again with your fingers for extra security.
What size cutter should I use?
A 3-inch round cutter makes perfect single-serving portions. Roll crust to ⅛-inch thickness for even baking. You’ll get about 24 bombs from two pie crusts.

- 4C Bread Crumbs Meatballs Recipe: Crispy Crust and Juicy Centers - September 25, 2026
- 6 Oz Chocolate Chip Cookie Recipe: Perfectly Balanced Crispy Edges and Chewy Hearts - September 25, 2026
- 6-Inch Coffee Cake Recipe: Vanilla Bean Swirls and Buttery Streusel Topping - September 25, 2026