
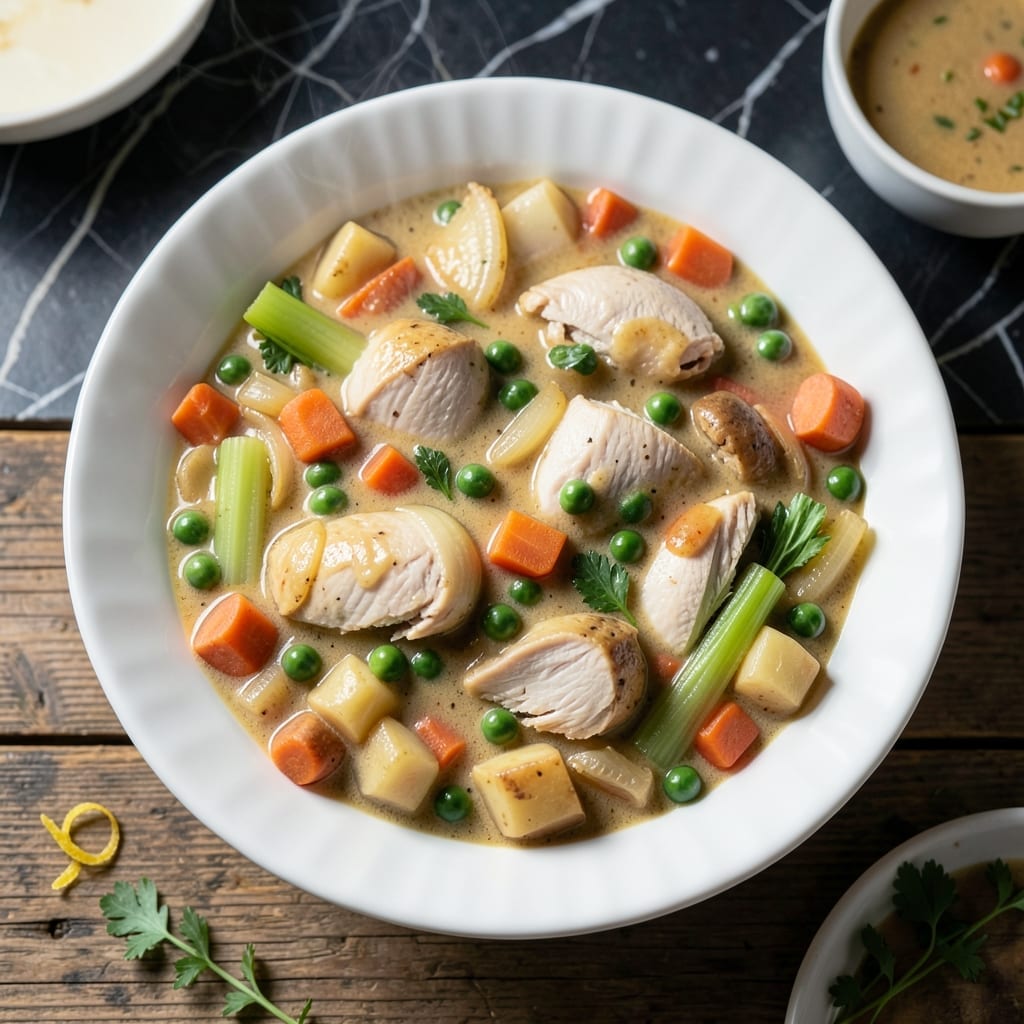
There’s something deeply satisfying about preserving the warmth of homemade chicken pot pie for future meals. This method transforms a beloved comfort dish into shelf-stable goodness you can enjoy months later.
I developed this recipe after realizing how much we missed that creamy, savory filling during busy weeks. The process ensures every jar contains the same rich flavors and tender chicken you’d expect from a fresh-baked pie.
The canning technique maintains the dish’s signature comfort while making it practical for long-term storage. You’ll appreciate having this hearty meal ready whenever the craving strikes.
With proper safety measures, this becomes a reliable way to stock your pantry with homemade quality. The results taste just as good as the day you made them.
Ingredients for Chicken Pot Pie Canning
Pantry staples and fresh veggies come together for this hearty, comforting classic ready for canning.
| Ingredient | Amount | Notes |
|---|---|---|
| Chicken Breast 🍗 | 2 lb | Boneless, skinless, diced into bite-sized pieces |
| Carrots 🥕 | 3 whole | Peeled and diced into 1/4-inch cubes |
| Celery Stalks 🌿 | 3 whole | Diced, leaves included for flavor |
| Yellow Onion 🧅 | 1 whole | Medium, finely diced for even distribution |
| Russet Potatoes 🥔 | 2 whole | Peeled and cubed into 1/2-inch pieces |
| Frozen Green Peas 🌱 | 1 ½ cups | No need to thaw before adding |
| Unsalted Butter 🧈 | ¾ cup | Divided for roux and finishing |
| All-Purpose Flour 🌾 | ¾ cup | For thickening the creamy filling |
| Chicken Broth 🥣 | 4 cups | Low-sodium preferred for controlled seasoning |
| Whole Milk 🥛 | 1 ½ cups | Full-fat for richest creamy texture |
| Garlic Cloves 🧄 | 3 cloves | Minced for depth of flavor |
| Fresh Thyme 🍃 | 2 tsp | Chopped, or 1 tsp dried thyme |
| Salt 🧂 | 1 ½ tsp | Diamond Crystal kosher preferred |
| Black Pepper 🌶️ | ½ tsp | Freshly ground for best flavor |
| Dried Bay Leaf 🌿 | 1 whole | Removed before canning for safety |
The chicken is the foundation here. Boneless, skinless breasts stay tender through canning—avoid dark meat as it can get stringy. I grab mine at Costco for bulk savings, but any supermarket works. For the vegetables, freshness matters most (the carrots and celery should snap, not bend). If you’re short on time, pre-diced mirepoix from Trader Joe’s is a decent shortcut. Just give it a quick rinse first.
No fresh thyme? Dried at one-third the amount works fine. Swap the peas for diced green beans if that’s what you’ve got frozen. Whole milk can be 2% in a pinch, but full-fat gives you that classic creamy texture. For a richer filling, replace 1 cup broth with heavy cream (just don’t boil it too hard). The bay leaf is optional but adds depth—just don’t forget to fish it out before jarred.
This keeps on the shelf for 12-18 months if properly processed. Once opened, use within 5 days. The filling thickens as it cools, so don’t worry if it looks thin going into jars. I like to label everything with the date—trust me, future you will appreciate it.
Why You’ll Love This Recipe
- One Jar Wonder: I toss in the chicken, carrots, celery, onion, and potatoes, seal it up, and the pressure canner does the rest—no babysitting required.
- That First Bite: The flaky crust I add later can’t hide how the chicken soaks up the veggie-rich broth, making every spoonful taste like home.
- Pantry Hero: Honestly, I can these in batches so I’ve got dinner ready for those nights I’d rather not cook.
- Stretches Further: One recipe fills multiple jars, and between us, it’s cheaper than buying pre-made pot pies and twice as good.
Step-by-Step Instructions for Chicken Pot Pie Canning
Here’s my tested method for creating a shelf-stable version of this comforting classic.
Step 1: Prepare and Cook the Filling Ingredients
In a large pot, melt ¼ cup of the unsalted butter over medium heat. Add the diced chicken breast, carrots, celery stalks, and yellow onion. Cook for 8-10 minutes until the chicken is no longer pink and the vegetables begin to soften.
Stir in the minced garlic cloves, fresh thyme, salt, and black pepper, cooking for an additional 1 minute until fragrant. Add the russet potatoes and frozen green peas, then pour in the chicken broth and whole milk. Bring to a gentle simmer.
Step 2: Thicken the Filling
In a separate bowl, whisk together the remaining ½ cup unsalted butter (melted) and the all-purpose flour to form a smooth paste. Slowly add this mixture to the simmering pot, stirring constantly to prevent lumps.
Add the dried bay leaf and continue cooking for 10-12 minutes, stirring frequently, until the filling thickens enough to coat the back of a spoon. The mixture should be creamy but not overly thick—it will firm up slightly during canning.
Step 3: Remove Bay Leaf and Prepare for Canning
Carefully remove and discard the dried bay leaf from the filling. Taste and adjust seasoning if needed, though remember flavors will concentrate slightly during canning. The filling should be rich, creamy, and packed with visible chunks of chicken and vegetables.
Ladle the hot filling into sterilized quart jars, leaving 1-inch headspace at the top. This space is crucial for proper sealing and prevents liquid from spilling during processing. Wipe the rims clean with a damp cloth to ensure a good seal.
Step 4: Process the Jars for Shelf Stability
Place the lids on the jars and screw on the bands until fingertip tight. Process the jars in a pressure canner at 11 pounds pressure (adjust for altitude) for 75 minutes for quarts. This extended processing time ensures the filling is safely preserved.
After processing, let the canner cool naturally. Remove the jars and place them on a towel-lined counter to cool completely. You’ll hear the satisfying “ping” of lids sealing as they cool. Check seals after 24 hours—any unsealed jars should be refrigerated and used within a week.
Pro Tips For Making Chicken Pot Pie Canning
- Precook the Chicken: Poach the chicken breast in broth before adding to the pie—it stays tender and absorbs way more flavor than raw chunks thrown in.
- Cut Potatoes Small: Dice the russet potatoes into ½-inch cubes so they soften fully during canning without turning mushy.
- Skip Raw Flour: I learned this the hard way—mix your flour with cold broth first to avoid gummy lumps in the filling.
- Vent the Jars: Leave a full 1-inch headspace in each jar to prevent the filling from bursting the seal during processing.
Storing and Reheating This chicken pot pie canning
Pantry Storage
Store your sealed jars in a cool, dark place like a pantry or cellar where the temperature stays between 50-70°F. Keep them off concrete floors to prevent temperature fluctuations. I like to organize mine by date for easy rotation. 📅
Shelf Life
Properly canned filling stays fresh for 12-18 months on the shelf. I always label my jars with the date—I use Ball Mason jars and a permanent marker for this. After 18 months, quality may decline but it’s still safe if sealed.
Refrigerator Storage
Once opened, transfer unused portions to an airtight container and refrigerate. The filling keeps for 4-5 days in the fridge. I find it thickens slightly after cooling, which is perfect for pie assembly.
Reheating for Pie
Empty the jar into a saucepan and heat over medium-low heat for 10-15 minutes, stirring occasionally. Add a splash of milk if it’s too thick. I often prepare my crust while it’s warming up.
Freezing Option
For longer storage after opening, freeze in quart-size freezer bags for up to 3 months. Lay flat to save space. Thaw overnight in the fridge before reheating.
When ready to use, warm gently on the stovetop with 2-3 tbsp milk to restore creaminess. ❄️
Nutrition Facts
Frequently Asked Questions
Can I use a water bath canner instead?
No, this must be pressure canned for safety. The filling contains low-acid ingredients like chicken and milk that require 11 pounds pressure to prevent spoilage. Water bath canning can’t reach the necessary temperature.
Why leave 1-inch headspace?
The filling expands during processing. 1-inch headspace prevents liquid from seeping under the lid, which could break the seal. It also allows for proper vacuum formation as the jars cool.
Can I add other vegetables?
Yes, but stick to low-moisture veggies like corn or green beans. Avoid high-water content vegetables such as zucchini or tomatoes, as they can make the filling too thin. Always maintain the same total volume.
How do I know if my jars sealed properly?
After 24 hours, check the lids. A properly sealed lid will be concave and won’t pop when pressed. If a lid flexes or makes a clicking sound, the jar didn’t seal and should be refrigerated.

- 4C Bread Crumbs Meatballs Recipe: Crispy Crust and Juicy Centers - September 25, 2026
- 6 Oz Chocolate Chip Cookie Recipe: Perfectly Balanced Crispy Edges and Chewy Hearts - September 25, 2026
- 6-Inch Coffee Cake Recipe: Vanilla Bean Swirls and Buttery Streusel Topping - September 25, 2026