
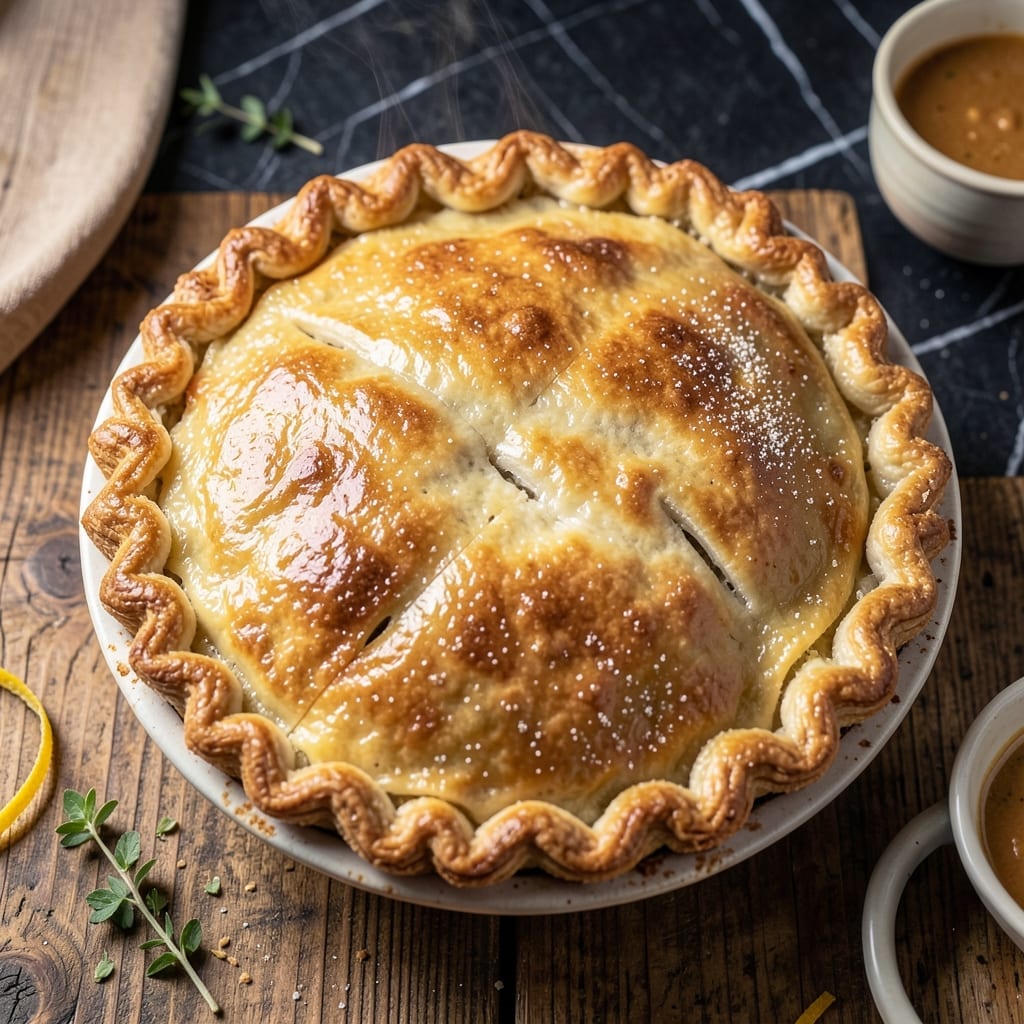
This crust delivers the flaky perfection every chicken pot pie deserves. I’ve refined this method using Crisco for a texture that shatters with every bite, yet remains sturdy enough to hold hearty fillings.
The secret lies in keeping the shortening cold and handling the dough minimally. This ensures layers form without toughening the pastry, creating that coveted golden, crisp finish.
With just a few ingredients and 15 minutes of prep, you’ll have a tender, buttery crust that elevates the entire dish. It bakes to a golden hue and holds its shape beautifully.
Perfect for both top and bottom layers, this recipe guarantees a pot pie worth savoring. Here’s how to make it.
Ingredients for Chicken Pot Pie Crust Recipe with Crisco
Cold fat and minimal handling create that shatteringly flaky texture you crave for pot pie.
| Ingredient | Amount | Notes |
|---|---|---|
| All-Purpose Flour 🌾 | 2 ½ cups | Plus extra for dusting surface |
| Crisco All-Vegetable Shortening 🧈 | ¾ cup | Chilled, cut into cubes |
| Salt 🧂 | 1 tsp | Fine table salt preferred |
| Ice Water 💧 | ½ cup | Plus 1 tbsp as needed |
| Unsalted Butter 🧈 | 4 tbsp | Chilled, cut into cubes |
| Granulated Sugar 🍚 | 1 tsp | Optional for golden color |
| Large Egg 🥚 | 1 whole | For egg wash finish |
The Crisco is non-negotiable here—it creates layers that butter alone can’t achieve. Find it in the baking aisle at any Walmart or Kroger. Make sure it’s the all-vegetable shortening, not the butter-flavored version. The butter adds flavor and richness, so use a good quality brand like Land O’Lakes. Keep both fats ice-cold until you’re ready to use them.
No Crisco? Leaf lard is the traditional substitute, but it’s harder to find. For a fully vegetarian version, use coconut oil (chilled solid) at a 1:1 ratio, though the flavor will be slightly different. The flour should be all-purpose—King Arthur or Gold Medal are reliable. If your kitchen is warm, pop the flour in the freezer for 10 minutes before starting.
The dough can rest in the fridge for up to 2 days, or freeze it for 3 months (wrap tightly in plastic). Baked crust keeps at room temperature for 24 hours—if it lasts that long. Let chilled dough sit at room temp for 10 minutes before rolling for easier handling.
Why You’ll Love This Recipe
- No-Fuss Mixing: I just pulse flour, Crisco, and salt in the food processor—no chilled butter to cut in, no messy hands.
- Buttery Crisp: The combo of shortening and butter gives me that flaky crust with a rich taste that melts in your mouth.
- Freezer Friendly: I can make double batches and freeze the dough for up to three months, ready for any last-minute pot pie craving.
- Budget Keeper: Crisco costs less than butter and stretches further, so I get that perfect crust without breaking the bank.
Step-by-Step Instructions for Chicken Pot Pie Crust With Crisco
Master the technique for creating a crust so flaky it shatters with every bite.
Step 1: Combine Flour, Salt, and Sugar
In a large mixing bowl, whisk together the 2.5 cups All-Purpose Flour, 1 tsp Salt, and 1 tsp Granulated Sugar. The sugar is optional but adds a subtle golden hue to the finished crust. I always use fine table salt here as it distributes more evenly throughout the dry ingredients.
Whisk vigorously for 30 seconds to ensure the salt and sugar are fully incorporated. You should see no visible streaks of white in the flour mixture. This step aerates the flour slightly, which helps create a lighter, more tender crust.
Step 2: Cut in Shortening and Butter
Add the 0.75 cup Crisco All-Vegetable Shortening (chilled and cut into cubes) and 4 tbsp Unsalted Butter (also chilled and cubed) to the flour mixture. Using a pastry cutter or two forks, work the fats into the flour until the mixture resembles coarse crumbs with pea-sized pieces of shortening and butter visible throughout.
This is the key to flakiness—those visible fat pieces will create steam during baking, which separates the flour into distinct layers. Work quickly to prevent the fats from melting. If the butter starts to soften or stick to your fingers, pause and chill the mixture for 10 minutes before continuing.
Step 3: Add Ice Water Gradually
Create a well in the center of the flour mixture and add 0.5 cup Ice Water, 1 tablespoon at a time. Using a fork, gently toss the flour mixture with the water until it just begins to come together. You may not need all the water—stop when the dough holds together when pressed but is not sticky.
I can’t stress this enough: less water is better. Too much water develops gluten, which makes the crust tough instead of tender. The dough should look shaggy and slightly dry in spots. If it’s crumbling apart, add water 1 teaspoon at a time until it just coherent.
Step 4: Form and Chill the Dough
Turn the dough out onto a lightly floured surface and gently press it into a cohesive ball. Be careful not to overwork it—just bring it together enough to form a disk. Divide the dough in half and shape each portion into a 1-inch thick disk. Wrap each tightly in plastic wrap.
Refrigerate the dough for at least 1 hour or up to 2 days. This chilling step is crucial—it allows the gluten to relax, the fats to solidify, and makes the dough easier to roll out. The longer you chill, the flakier your crust will be, so don’t rush this process.
Step 5: Roll, Fit, and Finish with Egg Wash
On a well-floured surface, roll out one disk of dough to a 12-inch circle about ⅛-inch thick. Transfer to a 9-inch pie dish, pressing gently into the bottom and up the sides. Trim the edges, leaving a ½-inch overhang. For a double-crust pie, roll out the second disk and place it over the filling.
Crimp the edges as desired, then brush the top crust with a beaten Large Egg for a golden, shiny finish. Cut several slits in the top crust to allow steam to escape. Bake according to your pot pie recipe—the egg wash will give it that beautiful, professional bakery appearance.
Pro Tips For Making Chicken Pot Pie Crust Recipe With Crisco
- Chill the Crisco: Cut the shortening into the flour while it’s still cold—about 10 minutes from the fridge. I learned this the hard way after my first few crusts turned out greasy instead of flaky.
- Use Ice-Cold Water: Fill a glass with ice and water, then measure from that for the liquid. Sounds weird, but it works: keeps the dough from developing tough gluten.
- Skip Overworking: Mix just until the dough comes together—lumpy is fine. After burning three batches to tough, chewy crusts, I finally figured out less handling means more flakiness.
- Butter for Flavor: Swap 1-2 tablespoons of the Crisco for unsalted butter in the crust. My grandmother swore by this, and she was right: it adds richness without sacrificing texture.
Pro Cooking Tips for Perfect Results
Keep It Cold
The key to flakiness is maintaining cold fat throughout. I keep my Crisco and butter in the freezer until ready to use, and even pop my mixing bowl in the fridge for 5 minutes between steps if my kitchen feels warm. 🌡️
Minimal Handling
Overworking the dough develops gluten, which makes it tough. I use a pastry cutter for the fat and a fork for the water, switching to my hands only for the final shaping. Stop mixing as soon as the dough clumps together.
Perfect Thickness
For a standard 9-inch pie dish, roll the dough to ⅛-inch thickness. I use a ruler to check—I’ve found this creates the ideal balance between sturdy enough to hold filling and thin enough to get that perfect flaky texture.
Prevent Shrinking
To keep your crust from shrinking during baking, dock the bottom crust by pricking it all over with a fork before adding filling. Also, let the dough rest at room temperature for 10 minutes after rolling but before fitting it into the dish. 💡
Venting Matters
Don’t skip the steam vents on the top crust. I cut 4-5 slits in a decorative pattern—not only does this prevent soggy bottoms, but it also makes your pie look professionally made.
Egg Wash Secret
For extra shine and browning, I whisk my egg wash with 1 tablespoon water or milk. Brush it on just before baking, and again halfway through if you want that deep golden color the intro promised.
Nutrition Facts
Frequently Asked Questions
Why use Crisco instead of butter for the crust?
Crisco has a higher melting point than butter, creating more steam during baking for extra flaky layers. It also lacks water, which prevents gluten development that can make crusts tough. Butter adds flavor, but Crisco ensures that perfect shatter.
Can I make the dough ahead of time?
The dough can rest in the fridge for up to 2 days or be frozen for 3 months. Let it sit at room temperature for 10 minutes before rolling to make handling easier.
How do I prevent a soggy bottom crust?
Dock the bottom crust by pricking it with a fork before adding filling. Also, ensure your filling is not too wet. Baking on a preheated baking sheet helps crisp the bottom.
What’s the best way to crimp the edges?
Use your fingers or a fork to press the top and bottom crust edges together. For a decorative touch, twist the edges slightly between your thumb and forefinger.

- 6 Oz Chocolate Chip Cookie Recipe: Perfectly Balanced Crispy Edges and Chewy Hearts - September 25, 2026
- 6-Inch Coffee Cake Recipe: Vanilla Bean Swirls and Buttery Streusel Topping - September 25, 2026
- 1 Hour Soup Recipe: Velvety Richness Without the Wait - September 25, 2026