
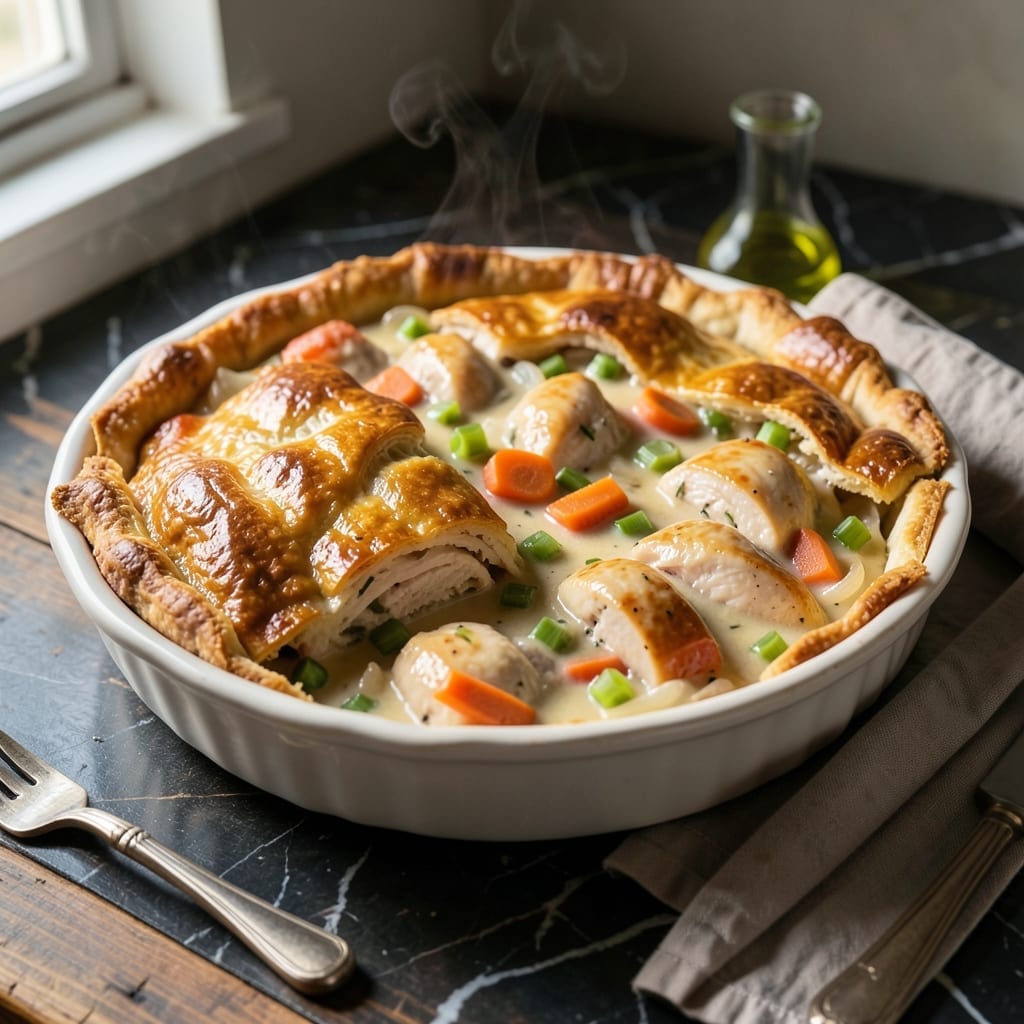
There’s nothing like the comfort of chicken pot pie, especially when it’s ready to bake straight from the freezer. This recipe captures that same rich, creamy filling and flaky crust without the last-minute effort.
I’ve refined this method to ensure the crust stays crisp and the filling doesn’t turn watery after freezing. The key is pre-cooking the filling just enough to thicken it, then sealing it under a buttery crust before storing.
When you’re ready to eat, simply bake from frozen. The result is a golden, bubbling pie with tender chicken, hearty vegetables, and a velvety sauce—just like it came fresh from the oven.
Perfect for busy weeks or unexpected guests. No one will guess it was made ahead.
Ingredients for Chicken Pot Pie Freezer Meal
Pantry staples, fresh veggies, and a flaky crust come together for this comforting classic.
| Ingredient | Amount | Notes |
|---|---|---|
| Chicken Breast 🍗 | 1 ½ lb | Boneless, skinless, diced |
| Unsalted Butter 🧈 | ½ cup | For roux and crust topping |
| All-Purpose Flour 🌾 | ½ cup | For roux and thickening |
| Onion 🧅 | 1 whole | Medium, finely diced |
| Carrots 🥕 | 2 whole | Peeled and diced |
| Celery Stalks 🌿 | 2 whole | Diced for flavor base |
| Garlic Cloves 🧄 | 3 cloves | Minced for depth |
| Chicken Broth 💧 | 2 cups | Low-sodium preferred |
| Whole Milk 🥛 | ¾ cup | For creamy sauce |
| Frozen Peas 🌱 | 1 cup | Thawed before adding |
| Salt 🧂 | 1 tsp | Adjust to taste |
| Black Pepper 🌶️ | ½ tsp | Freshly ground |
| Dried Thyme 🍃 | 1 tsp | For aromatic depth |
| Refrigerated Pie Crust 🥧 | 2 sheets | Store-bought for ease |
The chicken is the base here. Boneless, skinless breasts stay tender after freezing—thighs work too but dark meat can get chewy when reheated. For the crust, Pillsbury refrigerated sheets save time without sacrificing flakiness. I grab them from the dairy aisle at Kroger. The vegetables need to hold up to freezing—carrots, celery, and onions are classic (avoid potatoes, they turn mushy).
No chicken? Turkey breast works identically. Out of thyme? Poultry seasoning at half the amount gets you close. For a richer sauce, swap milk for heavy cream. Short on time? Rotisserie chicken shreds in perfectly—use about 3 cups. The peas can be swapped for corn or green beans (frozen works great for both).
Assemble and freeze for up to 3 months. Bake straight from frozen—add 10-15 minutes to the baking time. Leftovers keep 3-4 days in the fridge, but honestly, it’s so good it won’t last that long.
Why You’ll Love This Recipe
- No-Fuss Assembly: I just dump the chicken, carrots, and onions into the bag, mix the butter and flour for the roux, and freeze—no pre-cooking required.
- Buttery Comfort: The roux made with butter and flour thickens into this rich, velvety sauce that coats every bite of chicken and veggies.
- Weeknight Rescue: I pull one from the freezer at 8am, bake it after work, and dinner’s ready with zero stress.
- Double the Batch: Between us, I always make two—one for tonight, one for next month when I’m too tired to cook.
Step-by-Step Instructions for Chicken Pot Pie Freezer Meal
This method ensures a golden flaky crust and rich filling that reheats beautifully from frozen.
Step 1: Prepare and Cook the Chicken and Vegetables
Dice the 1.5 lb chicken breast into bite-sized pieces. Heat a large skillet over medium-high heat and add the diced onion, carrots, and celery stalks. Sauté for 5-7 minutes until the vegetables begin to soften and the onion becomes translucent.
Add the minced 3 cloves garlic cloves and cook for an additional 1 minute until fragrant. Push the vegetables to one side of the skillet and add the chicken pieces. Cook for 6-8 minutes, stirring occasionally, until the chicken is no longer pink and is cooked through.
Step 2: Create the Creamy Filling with a Roux
In the same skillet, melt the 0.5 cup unsalted butter over medium heat. Once melted, whisk in the 0.5 cup all-purpose flour to form a smooth roux. Cook for 1-2 minutes, stirring constantly, until the mixture turns a light golden color.
Gradually pour in the 2 cups chicken broth and 0.75 cup whole milk, whisking continuously to prevent lumps. Stir in the 1 tsp salt, 0.5 tsp black pepper, and 1 tsp dried thyme. Bring to a gentle simmer and cook for 3-4 minutes until the sauce thickens enough to coat the back of a spoon.
Step 3: Combine Filling Ingredients and Cool
Stir the thawed 1 cup frozen peas into the sauce along with the cooked chicken and vegetables. Mix well to ensure everything is evenly coated in the creamy sauce. Remove from heat and let the filling cool to room temperature, stirring occasionally to release heat.
This cooling step is crucial for freezer meal prep—adding hot filling to the pie crust can cause it to become soggy. The mixture should be completely cool before assembling the pies.
Step 4: Assemble the Pot Pies for Freezing
Line a 9-inch pie dish or four individual ramekins with one sheet of the 2 sheets refrigerated pie crust. Spoon the cooled chicken and vegetable filling into the crust, spreading it evenly. Top with the second sheet of pie crust, crimping the edges to seal.
Cut a few small slits in the top crust to allow steam to escape during baking. At this point, you can freeze the assembled pot pie for up to 3 months or bake immediately. If freezing, wrap tightly in plastic wrap and foil to prevent freezer burn.
Step 5: Bake to Golden Perfection
When ready to bake, preheat the oven to 375°F. If baking from frozen, add 10-15 minutes to the baking time. Bake for 30-40 minutes until the crust is deep golden brown and the filling is bubbly.
Let the pot pie rest for 5-10 minutes after baking to allow the filling to set. Serve warm for that ultimate comfort meal experience, with a flaky crust and rich, creamy chicken filling in every bite.
Pro Tips For Making Chicken Pot Pie Freezer Meal
- Par-Cook the Veggies: Blanch the carrots and onions for 2 minutes in boiling water before freezing—I learned this the hard way after biting into crunchy carrots straight from the freezer.
- Cube Chicken Small: Cut the chicken breast into ½-inch pieces so it cooks evenly when reheated; larger chunks stay raw in the center.
- Double the Butter: Use 4 tablespoons of unsalted butter for the roux instead of 2—sounds like a lot, but it prevents a dry, floury filling after freezing.
- Cool Before Freezing: Let the filling cool completely on the counter for 30 minutes before sealing; skipping this step leads to soggy crusts and ice crystals.
Troubleshooting This Recipe
Soggy Bottom Crust
This usually happens when the filling wasn’t cooled completely before assembling. Always let your mixture reach room temperature—this takes about 30-45 minutes. I also recommend brushing the bottom crust with 1 beaten egg white before adding filling to create a moisture barrier. 💡
Watery Filling
If your filling seems thin after thawing, it likely needed more thickening initially. Cook your roux for the full 2 minutes until golden, and simmer the sauce for at least 4-5 minutes until it coats a spoon. For rescue, mix 1 tbsp cornstarch with 1 tbsp cold water and stir into the filling before baking.
Crust Browning Too Fast
When baking from frozen, the top crust can over-brown. Tent the pie with aluminum foil after the first 20 minutes of baking. Alternatively, reduce your oven temperature to 350°F and extend baking time by 5-10 minutes. This gives the filling time to heat through without burning the crust.
Uneven Baking
If your pie has cold spots after baking, it might need more time. Use an instant-read thermometer to check the center reaches 165°F. For even heating, place your frozen pie on a preheated baking sheet rather than directly on the oven rack.
Peas Turn Gray
This happens when peas are frozen too long in the filling. Add them just before assembling, not during the initial cooking. Also, use high-quality frozen peas and thaw them completely before mixing into your filling. 🥗
Crust Doesn’t Brown
Brush the top crust with 1 beaten egg yolk mixed with 1 tbsp water before baking. This egg wash gives that beautiful golden color. If baking from frozen, wait until the last 10 minutes to add the wash so it doesn’t slide off.
Nutrition Facts
Frequently Asked Questions
Do I need to thaw before baking?
No, you can bake straight from frozen. Just add 10-15 minutes to the baking time. The crust will still turn golden and the filling will heat through perfectly.
What’s the best way to reheat leftovers?
Place individual portions in the microwave and heat on medium power for 2-3 minutes. For best texture, reheat in the oven at 350°F for 15-20 minutes.
Can I make this in individual portions?
Use ramekins or small oven-safe dishes. Each should hold about 1.5 cups of filling. Bake at 375°F for 25-30 minutes from frozen.
Why did my crust get soggy?
This usually means the filling wasn’t fully cooled before assembling. Always let it reach room temperature first, and brush the bottom crust with egg white for extra protection.

- 6 Oz Chocolate Chip Cookie Recipe: Perfectly Balanced Crispy Edges and Chewy Hearts - September 25, 2026
- 6-Inch Coffee Cake Recipe: Vanilla Bean Swirls and Buttery Streusel Topping - September 25, 2026
- 1 Hour Soup Recipe: Velvety Richness Without the Wait - September 25, 2026