
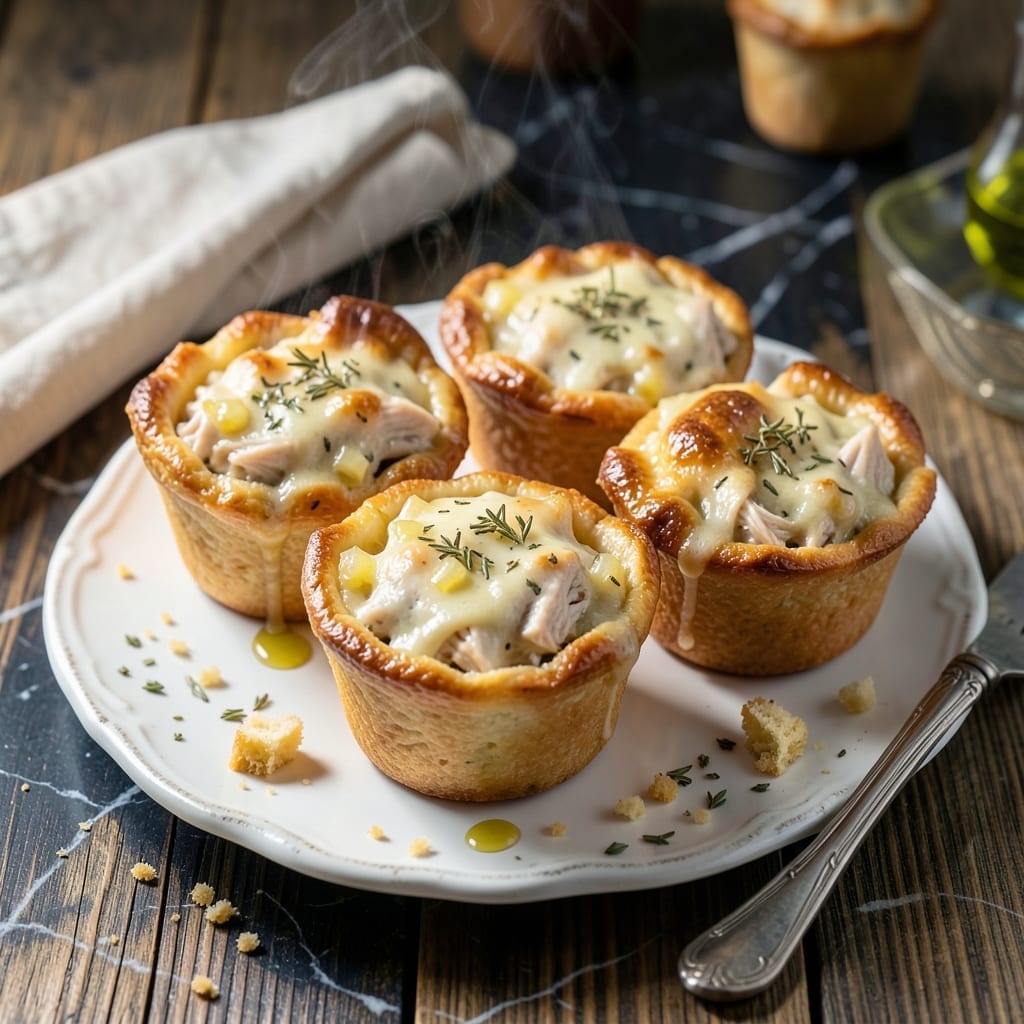
Individual chicken pot pies with flaky golden tops solve the comfort food dilemma in perfect single-serving portions. This method transforms classic pot pie into convenient, handheld treats that maintain all the creamy filling and buttery crust of the original.
The secret lies in using store-bought pie crust for effortless flaky layers while the filling bakes directly in muffin tins. Each bite delivers tender chicken, vegetables, and rich gravy encased in a crisp crust that shatters with every forkful.
These personal pies bake in under 30 minutes, making them ideal for weeknight dinners or impressive appetizers. The muffin format ensures every serving has the perfect ratio of filling to crust, with no soggy bottoms in sight.
Serve warm for maximum satisfaction. The recipe scales easily for crowds or meal prep.
Ingredients for Chicken Pot Pie Muffin
Flaky crusts and creamy filling come together in these handheld comfort food classics.
| Ingredient | Amount | Notes |
|---|---|---|
| Store-Bought Pie Crust 🥧 | 2 sheets | Thawed if frozen, for flaky tops |
| Boneless Skinless Chicken Breast 🍗 | 1 ½ lb | Diced into 1/2-inch cubes |
| Unsalted Butter 🧈 | 4 tbsp | For roux and richness |
| All-Purpose Flour 🌾 | ¼ cup | For thickening gravy |
| Whole Milk 🥛 | 1 cup | Or substitute half-and-half |
| Chicken Broth 🍲 | 1 ½ cups | Low-sodium preferred |
| Frozen Mixed Vegetables 🥕 | 1 ½ cups | Peas, carrots, corn, green beans |
| Yellow Onion 🧅 | ½ whole | Finely diced for filling |
| Garlic Cloves 🧄 | 2 cloves | Minced for depth of flavor |
| Dried Thyme 🌿 | ½ tsp | Or use fresh thyme at 1 tbsp |
| Dried Rosemary 🌿 | ½ tsp | Crushed for aromatic taste |
| Salt 🧂 | 1 tsp | Divided for seasoning layers |
| Black Pepper 🌶️ | ½ tsp | Freshly ground preferred |
| Large Egg 🥚 | 1 whole | For egg wash on crust |
The pie crust is critical here. Pillsbury refrigerated sheets deliver consistent flakiness without the fuss of homemade. Look for all-butter versions if you want to elevate the flavor. The chicken should be boneless, skinless—thighs can work too but may need slightly longer cooking. For vegetables, frozen is actually ideal (it’s pre-cut and retains texture) but fresh diced carrots and peas work if you prefer.
No thyme? Poultry seasoning at half the amount covers the bases. Short on broth? Water plus bouillon is a fine swap. The milk can be whole or 2%—avoid skim as it won’t give you the same richness. If you’re making these for a crowd, pre-made pie dough in bulk from Costco saves time without sacrificing quality.
The filled muffin tins can sit for 15 minutes before baking if you’re prepping ahead. Leftovers keep in the fridge for 3-4 days—reheat in the oven to maintain crust crispness. These also freeze beautifully for up to 2 months in airtight containers.
Why You’ll Love This Recipe
- One-Pan Magic: I just press the pie crust into muffin tins, fill with the creamy chicken mix, and bake—no extra bowls to wash.
- That Crispy Edge: The buttery crust gets golden and flaky while the inside stays rich and velvety from the milk and flour.
- Weeknight Hero: Honestly, I’ve served these for dinner, lunchboxes, and even as party bites—they’re always a hit.
- Budget Stretcher: A single chicken breast and one pie crust make a dozen muffins, so it feeds my family for days.
Step-by-Step Instructions for Chicken Pot Pie Muffins
Achieve perfect individual servings with this method for consistently flaky, golden results.
Step 1: Prepare the Filling Base
In a large skillet, melt the 4 tbsp Unsalted Butter over medium heat. Add the finely diced 0.5 whole Yellow Onion and cook for 3-4 minutes until softened and translucent. Stir in the minced 2 cloves Garlic Cloves, 0.5 tsp Dried Thyme, and 0.5 tsp Dried Rosemary, cooking for 30 seconds until fragrant.
This aromatic base builds the flavor foundation. Season with ½ tsp Salt and 0.5 tsp Black Pepper at this stage to layer the seasoning properly. The butter should foam but not brown—adjust heat if necessary to maintain control.
Step 2: Create the Creamy Roux and Cook the Chicken
Sprinkle the 0.25 cup All-Purpose Flour over the onion mixture, stirring constantly for 1-2 minutes to cook out the raw flour taste. Gradually whisk in the 1.5 cups Chicken Broth and 1 cup Whole Milk, ensuring no lumps form. Bring to a gentle simmer and cook for 3-4 minutes until the mixture thickens to a gravy-like consistency.
Add the diced 1.5 lb Boneless Skinless Chicken Breast to the skillet. Simmer for 8-10 minutes until the chicken is cooked through and no longer pink. Stir in the 1.5 cups Frozen Mixed Vegetables and remaining ½ tsp Salt, cooking for an additional 2-3 minutes until the vegetables are tender. Remove from heat and let cool slightly.
Step 3: Assemble the Muffin Tins
Preheat your oven to 375°F. Unroll the 2 sheets Store-Bought Pie Crust and cut each sheet into 6 equal squares, for a total of 12 pieces. Press each square into a standard muffin tin, ensuring the crust covers the bottom and sides completely. The edges should slightly overlap the rim to create that signature flaky top.
Spoon the chicken and vegetable filling into each crust-lined muffin cup, dividing it evenly. The filling should come up to the top of the crust but not overflow. This ensures each muffin has a balanced ratio of filling to crust.
Step 4: Top and Bake to Golden Perfection
Cut the remaining pie crust scraps into small shapes or strips to create tops for each muffin. Press gently to seal the edges. In a small bowl, beat the 1 whole Large Egg and brush the tops of each muffin with the egg wash. This step is crucial for achieving that golden brown, flaky finish.
Bake for 25-30 minutes until the crust is golden brown and the filling is bubbly. Rotate the pan halfway through baking to ensure even browning. Let the muffins cool in the pan for 5 minutes before carefully removing them to a wire rack. Serve warm for the best texture and flavor.
Pro Tips For Making Chicken Pot Pie Muffin
- Pre-Cook the Chicken: Poach or sauté the chicken breast first—raw chunks in the filling will dry out or stay undercooked. I learned this the hard way after pulling apart a muffin to find a pink center.
- Chill the Dough: Let the store-bought pie crust sit in the fridge for 15 minutes before cutting circles for the muffin tin. Warm dough shrinks and slumps, and nobody wants a sad, flat pot pie top.
- Thicken Before Baking: Simmer your milk and flour mixture until it coats the back of a spoon—watery filling turns these into soup cups, not pot pies. After burning three batches, I finally figured out the timing.
- Egg Wash the Tops: Brush the pie crust tops with a little beaten egg before baking for that golden finish. Sounds weird, but it works, and it’s the easiest upgrade you’ll do all day.
Pro Cooking Tips for Great chicken pot pie muffin
Crust Perfection
For maximum flakiness, keep your pie crust ice cold until ready to use. I always chill my muffin tin in the freezer for 10 minutes before pressing in the dough—this prevents shrinking. Use Pillsbury all-butter sheets for that bakery-quality texture we all love. 💛
Filling Consistency
The roux is the backbone of your filling. Cook it for the full 1-2 minutes to eliminate any raw flour taste. Your gravy should coat the back of a spoon but still drip slowly—too thick and it’ll be gluey; too thin and it’ll make the crust soggy.
Let the filling cool slightly before spooning it into the crusts. This prevents the bottom from getting gummy. I spread mine on a baking sheet to speed up cooling.
Even Baking
Rotate your muffin pan halfway through baking for uniform browning. If the tops are browning too quickly, tent with foil. For extra crispness, place a baking sheet on the rack below to catch any drips and create a drier heat environment. 🔥
Sealing Technique
Press the top crust pieces firmly onto the filled bottoms, then crimp the edges with a fork. This creates a tight seal that prevents filling from leaking. Brush with egg wash just before baking—not earlier, or it’ll dry out.
Resting Time
Those 5 minutes of cooling in the pan are crucial. The filling sets slightly, making the muffins easier to remove without breaking. Use a small offset spatula to gently lift them out if they stick.
Nutrition Facts
Frequently Asked Questions
Can I use puff pastry instead of pie crust?
Yes, puff pastry works beautifully and creates an even flakier texture. Just roll it slightly thinner than pie crust to avoid overly thick tops. Bake at the same 375°F temperature.
How do I prevent the bottoms from getting soggy?
Chill the muffin tin and dough for 10 minutes before filling. Also, let the filling cool slightly and use egg wash only on the tops to create a moisture barrier.
Can these be made ahead and reheated?
Store cooled muffins in an airtight container in the fridge for up to 3-4 days. Reheat in a 350°F oven for 10-12 minutes to restore crispness.
What if my filling is too thin?
Simmer the filling for an extra 2-3 minutes after adding the roux. If still thin, mix 1 tbsp cornstarch with 1 tbsp cold water and stir into the hot filling.

- 6 Oz Chocolate Chip Cookie Recipe: Perfectly Balanced Crispy Edges and Chewy Hearts - September 25, 2026
- 6-Inch Coffee Cake Recipe: Vanilla Bean Swirls and Buttery Streusel Topping - September 25, 2026
- 1 Hour Soup Recipe: Velvety Richness Without the Wait - September 25, 2026