
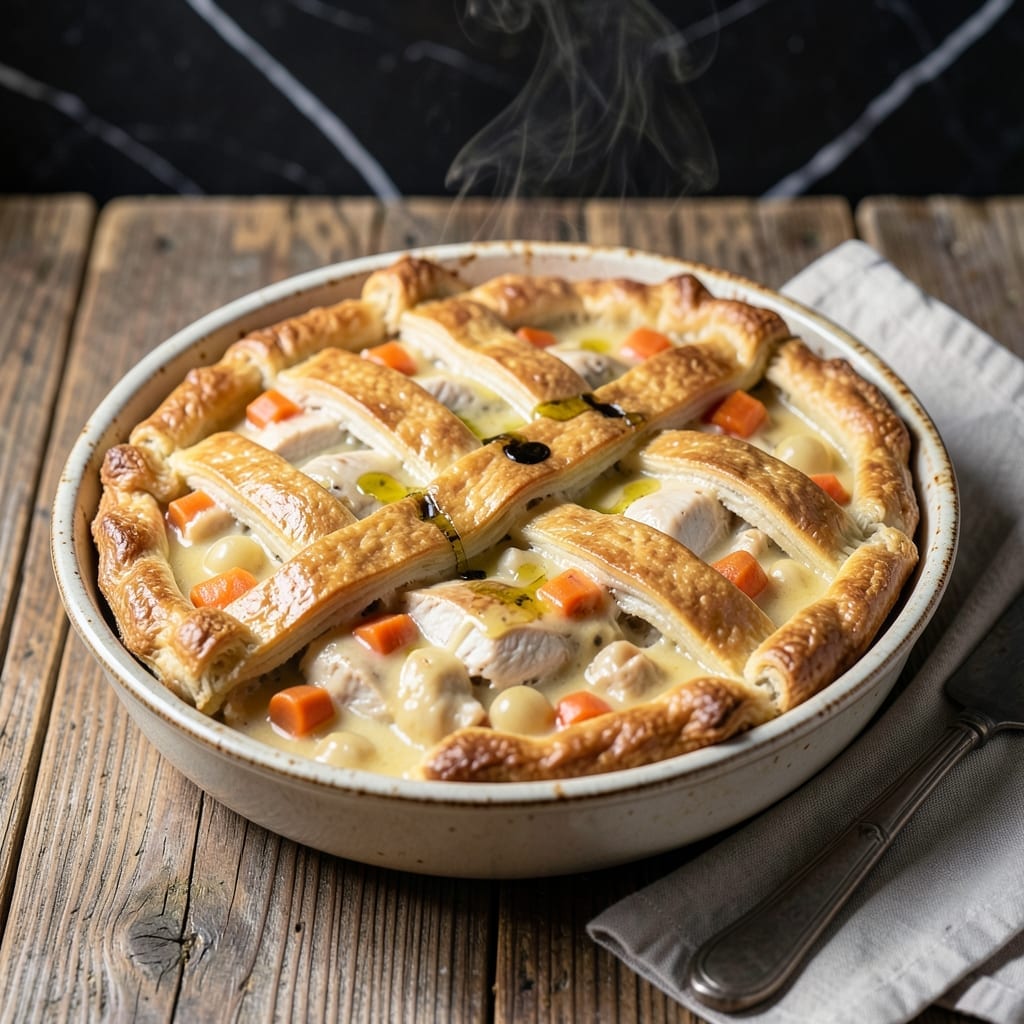
There’s nothing quite like the comfort of a golden, flaky crust encasing a creamy herb-infused filling packed with tender chicken and vegetables. This recipe delivers on that promise with a foolproof method for achieving the perfect balance between crust and filling.
I’ve refined this approach to ensure the crust stays crisp while the filling remains rich and velvety, without being overly heavy. The key lies in layering flavors and textures, starting with a buttery base and building up to a satisfying, hearty dish.
What sets this version apart is the attention to detail—pre-cooking the filling to concentrate flavors and brushing the crust with egg wash for that irresistible golden finish. It’s a meal that feels like a warm embrace in every bite.
Perfect for family dinners or cozy evenings, this dish brings nostalgia and satisfaction to the table.
Ingredients for Chicken Pot Pie Pan
Buttery crust meets herb-infused creamy filling with tender chicken and bright vegetables. Comfort defined.
| Ingredient | Amount | Notes |
|---|---|---|
| All-Purpose Flour 🌾 | 2 cups | Plus extra for dusting work surface |
| Unsalted Butter 🧈 | 1 cup | Cold, cubed for crust |
| Ice Water 💧 | ¼ cup | For pie dough hydration |
| Salt 🧂 | 1 tsp | Divided between crust and filling |
| Boneless Skinless Chicken Breast 🍗 | 1 ½ lb | Diced into bite-sized pieces |
| Carrots 🥕 | 2 whole | Peeled and diced |
| Frozen Green Peas 🌱 | 1 cup | No need to thaw |
| Yellow Onion 🧅 | 1 whole | Finely diced |
| Celery Stalks 🥬 | 2 whole | Diced, leaves included |
| Garlic Cloves 🧄 | 3 cloves | Minced for filling |
| Fresh Thyme 🌿 | 2 tsp | Leaves stripped from stems |
| Fresh Rosemary 🍃 | 1 tsp | Finely chopped |
| All-Purpose Flour 🌾 | ¼ cup | For thickening filling |
| Chicken Stock 🥫 | 1 ½ cups | Low-sodium preferred |
| Heavy Cream 🥛 | ½ cup | Full-fat for richness |
| Large Egg 🥚 | 1 whole | Beaten, for egg wash |
The crust demands cold butter—Plugrá or Kerrygold if you’re splurging, but any good unsalted works. Use King Arthur flour for the dough; its consistent protein content ensures flakiness. For the chicken, thigh meat stays juicier than breast, but breast works if that’s your preference. Look for vibrant orange carrots and firm celery with crisp leaves. Most supermarkets stock all of this year-round.
Out of fresh thyme? Dried thyme at one-third the amount works fine. No rosemary? A pinch of poultry seasoning covers it. Frozen peas can be swapped for fresh (just blanch them first). The heavy cream is non-negotiable for that velvety texture, but full-fat coconut milk makes a decent dairy-free stand-in. Chicken stock can be vegetable stock in a pinch, though the flavor will be milder.
The assembled pie keeps 2 days in the fridge—reheat in the oven to restore crust crispness. Freeze unbaked pies for up to 3 months; bake straight from frozen, adding 10-15 minutes. Leftovers? They vanish fast, but technically hold 4 days refrigerated (the crust softens, but it’s still delicious).
Why You’ll Love This Recipe
- One Pan Magic: The entire dish comes together in a single pan—flaky crust and all—so I spend less time cleaning and more time enjoying.
- Buttery Flaky Crust: The cold butter and ice water make the crust so tender it shatters with every bite, and that golden edge? Pure comfort.
- Feeds the Fam: Between us, this is my go-to for Sunday suppers and busy weeknights alike—everyone from picky kids to hungry adults asks for seconds.
- Leftovers? Yes Please: Honestly, it tastes even better the next day, and the portions stretch easily for lunches or another cozy dinner.
Step-by-Step Instructions for Chicken Pot Pie
Master the technique for a flaky crust and velvety filling that defines this classic comfort dish.
Step 1: Prepare the Pie Crust Dough
In a food processor, pulse the 2 cups All-Purpose Flour and ½ tsp Salt to combine. Add the 1 cup Unsalted Butter, cubed and chilled, and pulse until the mixture resembles coarse crumbs with pea-sized butter pieces visible. This texture ensures a flaky crust, so avoid over-processing.
With the processor running, drizzle in the 0.25 cup Ice Water one tablespoon at a time until the dough just begins to come together. It should hold when pressed but not be sticky. Turn the dough onto a lightly floured surface, shape into a disk, wrap in plastic, and refrigerate for 1 hour to relax the gluten and prevent shrinking during baking.
Step 2: Cook the Chicken and Vegetable Filling
In a large skillet over medium heat, cook the diced 1.5 lb Boneless Skinless Chicken Breast in batches until no longer pink, about 5-6 minutes. Remove and set aside. In the same skillet, add the 2 whole Carrots, 1 whole Yellow Onion, and 2 whole Celery Stalks, all diced, and cook for 5 minutes until softened.
Add the 3 cloves Garlic Cloves, minced, 2 tsp Fresh Thyme, and 1 tsp Fresh Rosemary, cooking for 1 minute until fragrant. Sprinkle the 0.25 cup All-Purpose Flour over the vegetables and stir for 2 minutes to cook out the raw flour taste. This creates a roux that will thicken the filling beautifully.
Step 3: Build the Creamy Sauce and Assemble
Gradually pour in the 1.5 cups Chicken Stock, whisking constantly to prevent lumps. Stir in the 0.5 cup Heavy Cream and the remaining ½ tsp Salt. Simmer for 3-4 minutes until the sauce thickens and coats the back of a spoon. Return the chicken to the skillet along with the 1 cup Frozen Green Peas and stir to combine. Remove from heat and let cool slightly.
On a lightly floured surface, roll out the chilled dough to a 12-inch circle and transfer it to a 9-inch pie pan, pressing gently into the bottom and sides. Trim excess dough, leaving a slight overhang. Pour the filling into the crust, ensuring it’s evenly distributed.
Step 4: Add the Top Crust and Bake to Golden Perfection
Roll out the remaining dough for the top crust and place it over the filling. Crimp the edges to seal, then cut several slits in the center to allow steam to escape. Brush the top with the 1 whole Large Egg, beaten, for a shiny, golden finish.
Bake in a preheated 375°F oven for 40-45 minutes until the crust is deep golden brown and the filling is bubbling. If the edges brown too quickly, tent them with foil. Let the pie rest for 10 minutes before slicing to allow the filling to set.
Pro Tips For Making Chicken Pot Pie Pan
- Chill the Dough: After mixing the flour, butter, and ice water, refrigerate the dough for at least 30 minutes—I learned this the hard way when my crust shrank in the pan because it was too warm.
- Poach the Chicken: Simmer the boneless chicken breasts in salted water for 12-15 minutes until just cooked through, then shred. This keeps the meat moist instead of drying it out in the oven.
- Vent the Top: Cut a few small slits in the top crust before baking to let steam escape, or you’ll end up with a soggy bottom like my first three attempts.
- Use Ice Water: The colder the water, the flakier the crust—about 4-6 tablespoons mixed in just until the dough holds together, no more. Sounds simple, but it actually changes the outcome.
Make-Ahead Tips for Leftovers
Prep Ahead Strategy
Make the pie dough up to 2 days in advance and refrigerate it tightly wrapped in plastic. This actually improves the texture as the flour fully hydrates. I often prep the dough the night before a busy cooking day. 💡
Filling Prep
Cook the entire chicken and vegetable filling up to 1 day ahead. Store it in an airtight container in the fridge. When ready to bake, let it sit at room temp for 30 minutes before assembling—cold filling can make the crust soggy.
Assemble Early
You can fully assemble the pie (crust, filling, and top) up to 12 hours before baking. Cover tightly with plastic wrap and refrigerate. This is perfect for holiday meals when oven space is at a premium.
Freeze for Later
Assemble the pie completely but don’t brush with egg wash. Wrap tightly in heavy-duty foil and freeze for up to 3 months. Bake from frozen, adding 10-15 minutes to the cooking time. ❄️
Crust Protection
If freezing, I recommend placing the assembled pie on a baking sheet first to freeze solid. This prevents the crust from getting crushed. Once frozen, wrap in foil and return to freezer until ready to bake.
Reheating Tips
For leftovers, reheat individual slices in a 350°F oven for 10-12 minutes to restore crust crispness. The microwave works in a pinch but will soften the crust significantly.
Nutrition Facts
Frequently Asked Questions
Can I use store-bought pie crust instead of homemade?
Yes, store-bought crust works in a pinch. Use 1 refrigerated pie crust for the bottom and another for the top. Let it sit at room temp for 15 minutes before rolling to prevent cracking.
Why did my filling turn out runny?
This usually happens if the filling wasn’t thickened enough before baking. Simmer the sauce for 3-4 minutes until it coats a spoon. Also, let the pie rest for 10 minutes after baking to set properly.
Can I substitute other vegetables?
Try adding ½ cup diced potatoes or 1 cup chopped green beans. Just ensure they’re cooked before adding to the filling to maintain the right texture.
How do I prevent a soggy bottom crust?
Blind-bake the bottom crust for 8-10 minutes before adding filling. Also, avoid overfilling and ensure your filling isn’t too wet when assembling.

- 4C Bread Crumbs Meatballs Recipe: Crispy Crust and Juicy Centers - September 25, 2026
- 6 Oz Chocolate Chip Cookie Recipe: Perfectly Balanced Crispy Edges and Chewy Hearts - September 25, 2026
- 6-Inch Coffee Cake Recipe: Vanilla Bean Swirls and Buttery Streusel Topping - September 25, 2026