
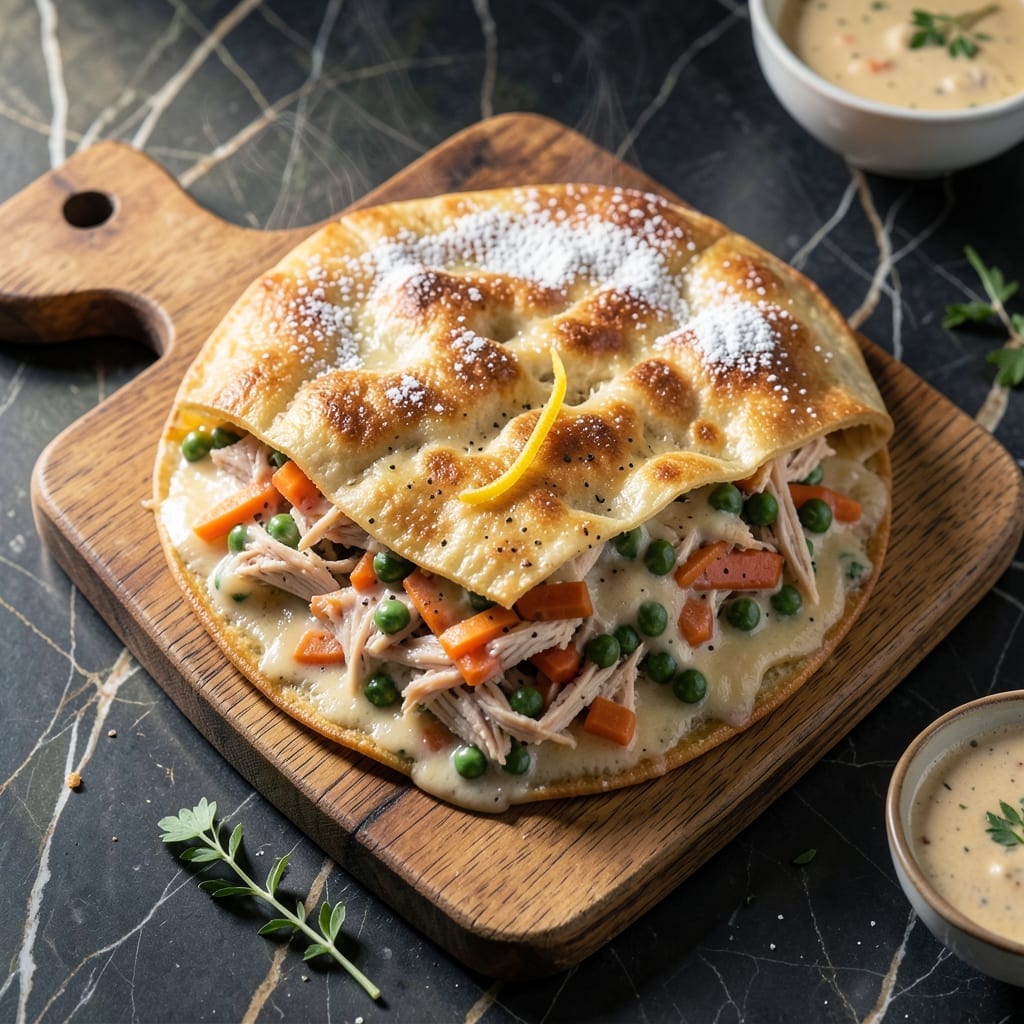
This isn’t your average quesadilla—it’s a creamy chicken pot pie filling wrapped in a golden, crispy tortilla. I developed this recipe to capture all the comforting flavors of a classic pot pie in a quick, handheld format.
The secret is pre-cooking the filling with shredded chicken, mixed vegetables, and a velvety sauce that stays perfectly contained between the tortillas. Each bite delivers that familiar pot pie taste with the satisfying crunch of a perfectly toasted quesadilla.
What you get is a meal that’s both nostalgic and innovative—warm, creamy filling with a crisp, golden exterior. It’s the kind of dish that satisfies comfort food cravings without the fuss of a traditional pie crust.
Ready in under 30 minutes, this is weeknight dinner solved. Here’s how to make it.
Ingredients for Chicken Pot Pie Quesadilla
Golden tortillas wrapped around that rich, comforting filling you know and love.
| Ingredient | Amount | Notes |
|---|---|---|
| Cooked Chicken Breast 🍗 | 2 cups | Shredded, rotisserie works great |
| Frozen Mixed Vegetables 🥕 | 1 ½ cups | Peas, carrots, corn, green beans |
| Cream of Chicken Soup 🥫 | 1 can | 10.5 oz size preferred |
| Chicken Broth 🍲 | ½ cup | Low-sodium for balance |
| All-Purpose Flour 🌾 | ¼ cup | For thickening the sauce |
| Unsalted Butter 🧈 | 2 tbsp | For cooking the filling |
| Large Flour Tortillas 🌯 | 8 pieces | Burrito size, about 10-inch |
| Shredded Cheddar Cheese 🧀 | 2 cups | Sharp or mild, your choice |
| Onion 🧅 | ½ whole | Finely diced for the filling |
| Garlic Cloves 🧄 | 2 cloves | Minced for depth of flavor |
| Dried Thyme 🌿 | ½ tsp | For classic pot pie taste |
| Salt 🧂 | ½ tsp | Adjust to taste after cooking |
| Black Pepper 🌶️ | ¼ tsp | Freshly ground preferred |
| Olive Oil 🫒 | 1 tbsp | For brushing tortillas |
The chicken is the foundation—rotisserie from Costco or Whole Foods saves time without sacrificing flavor. I always grab the white meat version for this. For the mixed veggies, frozen is perfect (and honestly better than canned). Look for bags with peas, carrots, corn, and green beans—that’s the classic pot pie combo. The cream of chicken soup? Campbell’s or Progresso both work great here.
No cream of chicken soup? Mushroom soup plus a little poultry seasoning gets you close. Short on time? Pre-shredded rotisserie chicken from the grocery store deli works in a pinch. Want extra veggies? Add diced celery or mushrooms to the filling. The flour can be swapped for cornstarch at 1 tbsp (it thickens faster). The cheddar? Monterey Jack or Colby melt just as nicely.
The filling keeps in the fridge for 3-4 days, so make it ahead. Quesadillas are best served fresh but reheat well in a skillet or air fryer. Assemble, wrap in foil, and freeze for up to 2 months (perfect for quick meals). Just thaw before cooking.
Why You’ll Love This Recipe
- I’ll be real: the filling tastes even better the next day, and it reheats like a dream for easy lunches.
- One Pan Magic: I love that I can dump the chicken, veggies, and creamy soup into a single skillet—no extra bowls, no fuss.
- That Creamy Crunch: The soup makes the filling rich, and the tortilla gets this golden crisp that’s impossible to resist.
- Feeds the Crew: Honestly, it’s my go-to for picky eaters and last-minute guests alike since everyone loves a quesadilla twist.
Step-by-Step Instructions for Chicken Pot Pie Quesadilla
This method ensures a creamy, comforting filling wrapped in a perfectly crispy tortilla.
Step 1: Sauté the Aromatics and Vegetables
Heat the 2 tbsp Unsalted Butter in a large skillet over medium heat. Once melted, add the 0.5 whole Onion (finely diced) and cook for 3-4 minutes until translucent and fragrant. I always let the onion soften completely before adding other ingredients—this builds a solid flavor foundation.
Add the 2 cloves Garlic Cloves (minced) and cook for 30 seconds until aromatic. Stir in the 1.5 cups Frozen Mixed Vegetables, 0.5 tsp Dried Thyme, 0.5 tsp Salt, and 0.25 tsp Black Pepper. Cook for another 2-3 minutes until the vegetables begin to thaw and soften slightly.
Step 2: Create the Creamy Filling
Sprinkle the 0.25 cup All-Purpose Flour over the vegetable mixture and stir well to coat everything evenly. This creates a roux that will thicken your filling beautifully. Cook for 1 minute to remove the raw flour taste.
Pour in the 1 can Cream of Chicken Soup and 0.5 cup Chicken Broth, stirring constantly. Bring the mixture to a gentle simmer and cook for 3-4 minutes until it thickens into a velvety sauce. Here’s the thing—if it seems too thick, add a splash more chicken broth.
Remove from heat and fold in the 2 cups Cooked Chicken Breast (shredded). The filling should be rich and creamy with visible chunks of chicken and vegetables. Taste and adjust seasoning if needed, though I find the soup provides plenty of base flavor.
Step 3: Assemble the Quesadillas
Lay out the 8 pieces Large Flour Tortillas on a clean surface. Divide the 2 cups Shredded Cheddar Cheese evenly among four of the tortillas, sprinkling it in an even layer. Then spoon the chicken filling on top of the cheese, dividing it equally between the four tortillas.
Top each with a second tortilla to form a sandwich. I like to press down gently to help everything adhere. The key here is not to overfill—you want the quesadillas to stay together when cooking.
Step 4: Cook Until Golden and Crispy
Heat a clean skillet over medium heat and brush lightly with 1 tbsp Olive Oil. Place one quesadilla in the skillet and cook for 3-4 minutes per side until golden brown and the cheese melts completely. Real talk: the first one might take a bit longer as you find the right heat level.
You’ll know it’s ready to flip when the bottom is crisp and the edges start to lift from the pan. Press down gently with a spatula during cooking to ensure even contact. Repeat with the remaining quesadillas, adding more olive oil as needed.
Let each quesadilla rest for 1 minute before slicing into wedges. This allows the filling to set slightly, preventing it from oozing out when you cut into it.
Pro Tips For Making Chicken Pot Pie Quesadilla
- Thaw the Veggies: Drain and pat dry your frozen mixed vegetables after thawing—excess water makes the filling soupy and the tortilla soggy. I learned this the hard way after my first few quesadillas fell apart.
- Thicken the Filling: Mix 2 tablespoons of all-purpose flour into the cream of chicken soup and broth mixture before cooking. This tightens the filling so it doesn’t ooze out when you fold the quesadilla.
- Shred Chicken Fine: Tear or chop the cooked chicken breast into small, even pieces—big chunks make the quesadilla hard to bite through and can tear the tortilla.
- Low and Slow: Cook the quesadilla over medium-low heat, flipping once, to melt the cheese fully and crisp the tortilla without burning the outside before the inside warms through.
Pro Cooking Tips for Perfect Results
Perfect Filling Consistency
Cook your filling until it reaches a thick, spoonable consistency—like melted ice cream. If it’s too thin, the quesadillas won’t hold together. I let mine simmer for the full 4 minutes to ensure it sets properly. A quick test: drag a spoon through it—if the path holds, it’s ready. 💡
Cheese Barrier Technique
Always layer the shredded cheddar cheese directly on the tortilla before adding filling. This creates a sticky barrier that prevents the filling from making the tortilla soggy. I use about ½ cup cheese per quesadilla for maximum adhesion.
Heat Control
Cook over medium heat—not high—to prevent burning the tortillas before the cheese melts. My trick: if the pan starts smoking, it’s too hot. Aim for a steady sizzle, not a fierce fry. 3-4 minutes per side gives perfect golden-brown results.
Press for Even Cooking
Use a spatula to gently press down on the quesadilla while cooking. This ensures even contact with the pan and prevents air pockets. I press for 10-15 seconds every minute or so. The weight also helps the cheese melt faster.
Rest Before Slicing
Let each quesadilla rest for 1 full minute after cooking. This lets the filling thicken slightly so it doesn’t ooze out when sliced. I set a timer—skipping this step leads to messy plates. ✨
Batch Cooking
If making multiple quesadillas, keep cooked ones warm in a 200°F oven on a wire rack. This prevents the bottoms from getting soggy while you finish the batch. I line my baking sheet with parchment for easy cleanup.
Nutrition Facts
Frequently Asked Questions
Can I use pre-shredded rotisserie chicken?
Pre-shredded rotisserie chicken works perfectly and saves time. Just ensure it’s well-drained to avoid excess moisture in the filling.
Why do I need cheese on both sides of the tortilla?
The cheese acts as a barrier, preventing the filling from making the tortilla soggy. It also helps hold everything together when cooking.
What if my filling is too runny?
Simmer it for 2-3 extra minutes until it thickens. If still too thin, mix 1 tbsp cornstarch with water and stir in.
Can I make these ahead of time?
Yes! Assemble, wrap in foil, and refrigerate for up to 2 days. Or freeze for 2 months—just thaw before cooking.

- 4C Bread Crumbs Meatballs Recipe: Crispy Crust and Juicy Centers - September 25, 2026
- 6 Oz Chocolate Chip Cookie Recipe: Perfectly Balanced Crispy Edges and Chewy Hearts - September 25, 2026
- 6-Inch Coffee Cake Recipe: Vanilla Bean Swirls and Buttery Streusel Topping - September 25, 2026