
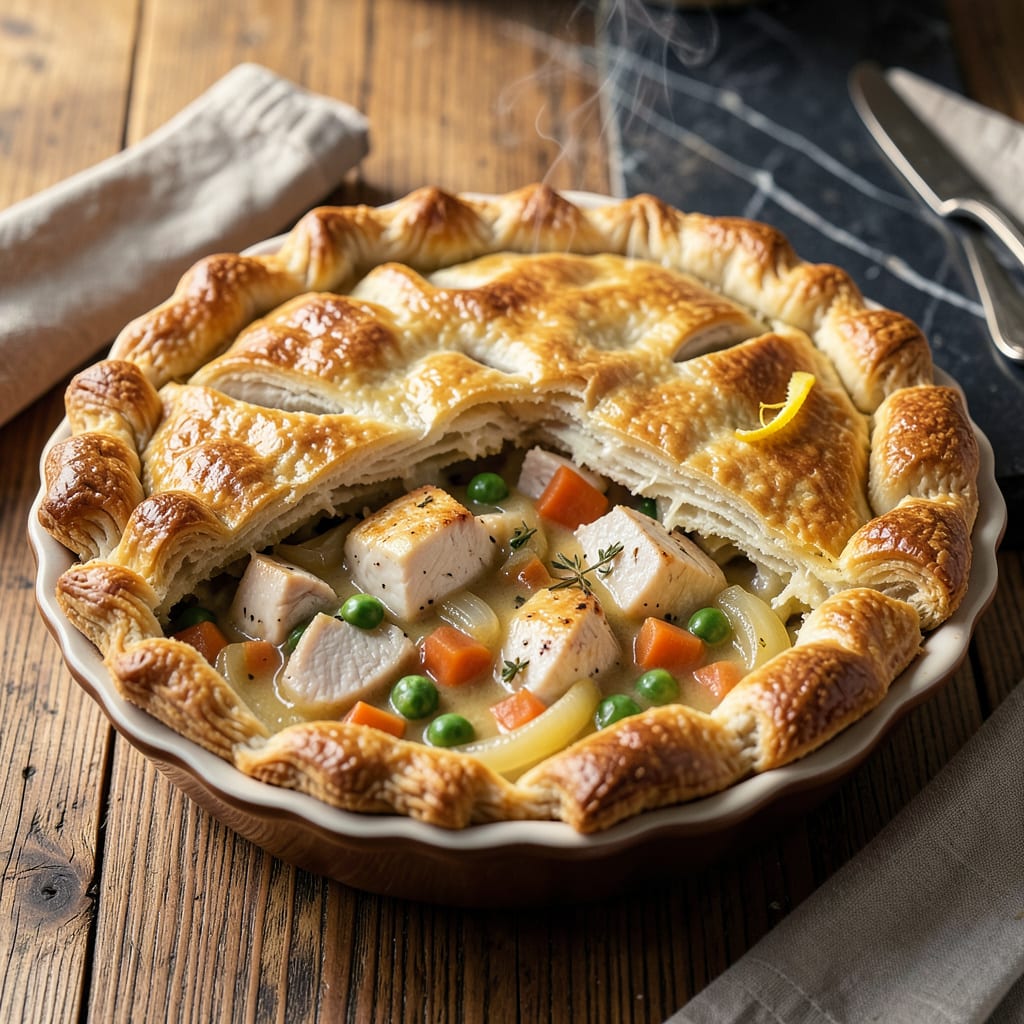
There’s something deeply satisfying about a homemade chicken pot pie—golden crust encasing a rich, creamy filling packed with tender chicken and vegetables. This recipe delivers the ultimate comfort food experience with a perfectly flaky pastry and velvety sauce that clings to every bite.
The secret lies in building layers of flavor: sautéed aromatics form the base, while a simple roux creates that signature creamy consistency. Whether you use homemade or store-bought crust, the result is a dish that brings warmth and satisfaction to any meal. Perfect for cozy dinners or impressive gatherings.
Ingredients for Chicken “pot Pie
This comforting classic requires tender chicken, fresh vegetables, and a velvety sauce—all encased in golden, flaky pastry.
| Ingredient | Amount | Notes |
|---|---|---|
| Boneless, Skinless Chicken Breasts 🍗 | 1 ½ lb | Cut into 1-inch cubes |
| Unsalted Butter 🧈 | ½ cup | Divided for roux and filling |
| All-Purpose Flour 🌾 | ⅓ cup | For roux thickening |
| Whole Milk 🥛 | 1 ½ cups | Full-fat for creaminess |
| Chicken Stock 🍲 | 1 ½ cups | Low-sodium preferred |
| Yellow Onion 🧅 | 1 whole | Finely diced for base |
| Carrots 🥕 | 2 whole | Peeled, diced into 1/4-inch cubes |
| Celery Stalks 🌿 | 2 whole | Diced for aromatic base |
| Garlic Cloves 🧄 | 3 cloves | Minced for depth |
| Frozen Peas 🌱 | 1 cup | No need to thaw |
| Fresh Thyme Leaves 🌿 | 1 tbsp | Stripped from stems |
| Fresh Flat-Leaf Parsley 🌿 | 2 tbsp | Chopped for garnish |
| Kosher Salt 🧂 | 1 ½ tsp | Diamond Crystal preferred |
| Freshly Ground Black Pepper 🌶️ | ½ tsp | Coarsely ground for texture |
| Refrigerated Pie Crusts 🥧 | 2 sheets | Homemade or store-bought |
| Large Egg 🥚 | 1 whole | For egg wash finish |
The chicken quality directly impacts the final dish. Boneless, skinless breasts ensure tender results without excess moisture. For the crust, Pillsbury refrigerated pie dough offers consistent flakiness, while Trader Joe’s version provides excellent buttery flavor. Opt for Diamond Crystal kosher salt—its larger crystals distribute more evenly. The vegetables should be uniformly diced for even cooking; organic carrots and celery offer superior texture and flavor (the conventional varieties can be fibrous).
For a richer filling, substitute half-and-half for whole milk, or use heavy cream at two-thirds the quantity. Fresh thyme can be replaced with 1 tsp dried thyme, though fresh provides brighter notes. If avoiding alcohol, deglaze with additional chicken stock instead of white wine. The peas are best added frozen—avoid canned as they become mushy. For gluten-free adaptations, use cup4cup multipurpose flour in the roux and a gluten-free pie crust.
Prepare components separately before assembly. The filling can be refrigerated for 2 days before baking, while unbaked pies freeze beautifully for 3 months. Store-bought crusts benefit from 10 minutes in the freezer before rolling to prevent tearing. Leftover pie keeps for 4 days refrigerated, though the crust softens over time. Reheat individual portions in a 350°F oven for 15 minutes to restore crispness.
Why You’ll Love This Recipe
- One-Pot Magic: I love that this comes together in a single skillet—sear the chicken, make the roux with butter and flour, then let the milk and stock simmer into that velvety filling. No mountain of dishes, just cozy food with minimal cleanup.
- That First-Bite Moment: The contrast of flaky crust (store-bought, because I’m honest about shortcuts) with the creamy, herby filling—infused with chicken stock so it’s rich but not heavy—makes me pause mid-meal. It’s the kind of comfort that sticks with you.
- Freezer-Friendly Lifesaver: I double the batch, assemble one for tonight and freeze the other unbaked. On chaotic weeks, I pull it straight from the freezer to the oven. No thawing, no stress—just a homemade meal when I’ve got nothing left.
- Stretches Like a Champ: Boneless chicken breasts keep it lean but hearty, and the milk-based filling (instead of heavy cream) cuts costs without sacrificing richness. I’ve fed four adults with leftovers to spare—or, let’s be real, enough for my lunch the next two days.
Step-by-Step Instructions for Chicken Pot Pie
This method ensures a velvety filling with perfectly cooked vegetables and a golden, flaky crust every time.
Step 1: Prepare the Chicken and Vegetable Base
Begin by cutting the 1.5 lb boneless, skinless chicken breasts into 1-inch cubes. Pat them dry with paper towels to ensure proper browning. In a large skillet over medium-high heat, add 1 tablespoon of the 0.5 cup unsalted butter and cook the chicken for 5-6 minutes until lightly golden and cooked through. Transfer to a plate and set aside.
In the same skillet, add the finely diced yellow onion, peeled and diced carrots, and diced celery stalks. Cook over medium heat for 6-8 minutes until the vegetables soften and the onions become translucent. Add the minced garlic cloves and cook for an additional 30 seconds until fragrant. This builds the aromatic foundation for your filling.
Step 2: Create the Creamy Roux-Based Sauce
Reduce the heat to medium-low and add the remaining unsalted butter to the skillet. Once melted, whisk in the 0.33 cup all-purpose flour to form a roux. Cook for 2 minutes, stirring constantly, until the mixture turns a light golden color. This step removes the raw flour taste and builds flavor.
Gradually pour in the 1.5 cups whole milk and 1.5 cups chicken stock, whisking continuously to prevent lumps. Increase the heat to medium and simmer for 5-7 minutes until the sauce thickens enough to coat the back of a spoon. Stir in the 1.5 tsp kosher salt, 0.5 tsp freshly ground black pepper, and 1 tbsp fresh thyme leaves. Return the cooked chicken to the skillet along with the 1 cup frozen peas and simmer for 2 minutes to heat through.
Step 3: Assemble the Pot Pie with Crust
Preheat your oven to 375°F. Unroll one sheet of the refrigerated pie crusts and press it into a 9-inch pie dish, allowing the edges to overhang slightly. Pour the chicken and vegetable filling into the crust, spreading it evenly. Top with the second pie crust, crimping the edges to seal. Cut 4-5 slits in the top crust to allow steam to escape during baking.
In a small bowl, whisk the large egg with 1 tablespoon water to create an egg wash. Brush the top crust evenly with the mixture. This ensures a deep golden-brown finish and adds a subtle sheen. Place the pie dish on a baking sheet to catch any potential drips during baking.
Step 4: Bake to Golden Perfection
Bake the pot pie on the center rack for 30-35 minutes until the crust is golden brown and the filling is bubbling through the slits. If the crust begins to brown too quickly, tent the pie loosely with aluminum foil for the remaining baking time. The internal temperature should reach 165°F when measured in the center of the filling.
Remove the pot pie from the oven and let it rest for 10 minutes before serving. This allows the filling to set slightly, making it easier to slice. Garnish with the 2 tbsp fresh flat-leaf parsley just before serving to add a pop of fresh color and flavor. The crust should be crisp and flaky, while the filling remains creamy and rich.
Regional Styles of This chicken pot pie
New England Classic
This version stays true to the traditional approach with a creamy, herb-infused filling and buttery crust. I use Pillsbury refrigerated pie dough for convenience, but the filling gets upgraded with 1 extra tablespoon of fresh thyme and a splash of heavy cream for richness. The key is layering flavors—sauté the vegetables until deeply caramelized before adding liquid. 🌿
Southern Comfort Style
Down South, they love to add a handful of shredded cheddar cheese to the filling for extra richness. I also include ½ cup diced potatoes along with the carrots and celery. The crust gets a cornmeal wash (mix 1 tbsp cornmeal with the egg wash) for a subtle crunch. This version feels like a warm hug on a chilly evening.
Midwest Hearty Version
In the Midwest, they go big on portions and hearty ingredients. I add 1 cup diced mushrooms and ½ cup corn kernels to the filling for extra texture. The crust often gets a whole wheat twist—replace one pie crust with Trader Joe’s whole wheat dough for nuttier flavor. This variation stands up to hungry appetites after a day outdoors.
Pacific Northwest Twist
The West Coast version incorporates fresh, local ingredients. I swap the peas for 1 cup chopped asparagus and add zest of 1 lemon to brighten the filling. The crust gets brushed with garlic-infused olive oil before baking for an aromatic touch. This lighter version still delivers that comforting satisfaction we all crave.
Texas Bold Flavor
Everything’s bigger in Texas, including the flavors. I add 1 diced jalapeño (seeds removed) to the vegetable mix and 1 tsp smoked paprika to the filling. The crust gets a chili powder dusting before baking. For extra richness, some Texans even mix crumbled bacon into the filling—about 4 slices cooked crispy does the trick. 🔥
California Lightened-Up
This version keeps the comfort but cuts some calories. I use low-fat milk instead of whole, and phyllo dough layered with cooking spray instead of pie crust. The filling gets boosted with extra vegetables—add 1 cup chopped zucchini and ½ cup bell peppers. The result is still satisfying but feels a bit lighter for those watching their intake.
Nutrition Facts
Frequently Asked Questions
Can I use pre-cooked chicken?
Rotisserie chicken or leftover cooked chicken works perfectly. Just shred or cube 1.5 lbs and add it when combining the filling. This cuts prep time by 15-20 minutes while keeping the dish flavorful.
Why is my filling too runny?
The most common cause is undercooking the roux.
Can I make this ahead of time? Yes! Assemble the pie completely, then refrigerate unbaked for up to 24 hours. For freezing, wrap tightly in plastic and foil—it keeps for 3 months. Bake directly from frozen, adding 10-15 minutes to the baking time.
What if I don’t have a pie dish?
Use a 9×9-inch baking dish or even a deep oven-safe skillet. Adjust the crust by rolling it slightly larger to cover the top. For individual servings, try ramekins with small crust circles on top.
How do I prevent a soggy bottom crust?
Blind-bake the bottom crust for 8 minutes before adding filling. Also, let the filling cool slightly (about 10 minutes) before assembling. This creates a barrier that keeps the crust crisp during baking.

- 8 Bean Soup Recipe Crock Pot: Hearty Vegetable Medley in One Pot - September 25, 2026
- 4C Bread Crumbs Meatballs Recipe: Crispy Crust and Juicy Centers - September 25, 2026
- 6 Oz Chocolate Chip Cookie Recipe: Perfectly Balanced Crispy Edges and Chewy Hearts - September 25, 2026