
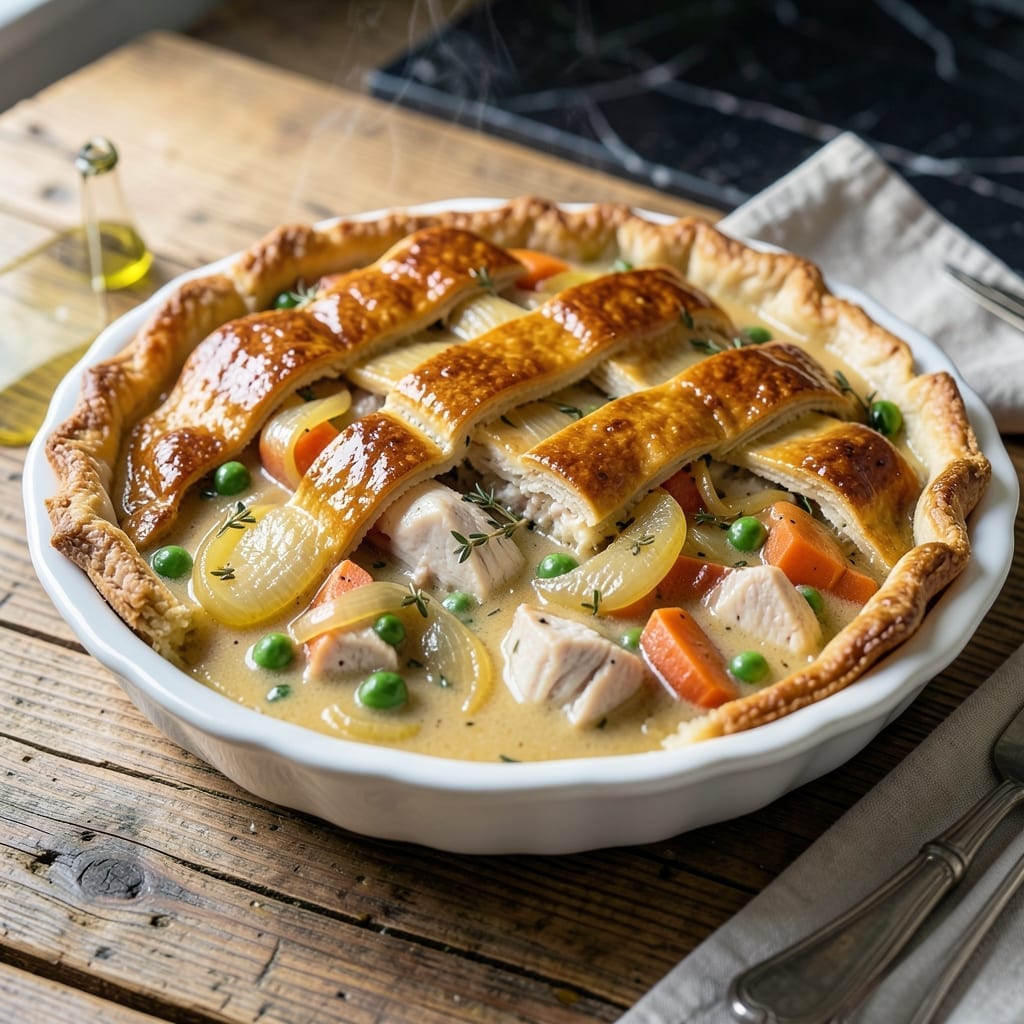
This chicken pot pie delivers on the promise of a flaky, golden crust encasing a rich, creamy filling packed with tender chicken and vegetables.
I’ve refined this method to ensure the crust stays perfectly crisp while the filling remains thick and flavorful, never soggy. The herb-infused sauce ties everything together with a comforting, home-style taste.
The secret lies in pre-cooking the filling to concentrate flavors and prevent a watery pie. Assembly is straightforward, with a top crust that bakes to a perfect finish.
Serve warm for a meal that feels like a hug in every bite. This is comfort food at its finest, with every element carefully balanced.
Ingredients for Chicken Pot Pie Recipe Cook’s Illustrated
Flaky crust requires cold butter and precise flour, while the filling needs tender chicken and fresh herbs.
| Ingredient | Amount | Notes |
|---|---|---|
| All-Purpose Flour 🌾 | 3 cups | Divided for crust and filling |
| Unsalted Butter 🧈 | 1 ½ cups | Cold, cubed for crust |
| Ice Water 💧 | ½ cup | For pie dough hydration |
| Salt 🧂 | 1 ½ tsp | Divided for crust and filling |
| Boneless Skinless Chicken Breasts 🍗 | 1 ½ lb | Cut into 1-inch cubes |
| Yellow Onion 🧅 | 1 whole | Medium, finely diced |
| Carrots 🥕 | 2 whole | Peeled and diced |
| Celery Ribs 🌿 | 2 whole | Trimmed and diced |
| Frozen Peas 🌱 | 1 cup | No need to thaw |
| Garlic Cloves 🧄 | 3 cloves | Minced for filling |
| Fresh Thyme Leaves 🌿 | 2 tsp | Chopped, for herb infusion |
| Fresh Rosemary 🍃 | 1 tsp | Finely chopped |
| Chicken Broth 🥣 | 1 ¾ cups | Low-sodium preferred |
| Whole Milk 🥛 | ¾ cup | For creamy sauce |
| Heavy Cream 🥛 | ½ cup | Full-fat for richness |
| Black Pepper 🌶️ | ½ tsp | Freshly ground preferred |
The crust demands cold, high-quality butter—Plugrá or European-style for superior flakiness. All-purpose flour from King Arthur ensures consistent results. For the chicken, boneless, skinless breasts stay moist; avoid pre-cut pieces (they dry out). The vegetables should be fresh—carrots and celery with good color and firm texture. Buy from a trusted grocer like Whole Foods for reliable quality.
No fresh thyme or rosemary? Dried herbs at one-third the amount work, but fresh delivers the best flavor. Swap chicken breasts for thighs (more forgiving, richer taste). Out of peas? Frozen corn or green beans are fine. For the broth, Better Than Bouillon paste dissolves better than canned. Milk can be substituted with half-and-half for extra creaminess.
Pre-made crust saves time, but homemade is worth it (use within 2 days or freeze for 1 month). Cooked filling keeps in the fridge for 3 days—assemble and bake just before serving. Leftovers reheat well, though the crust softens slightly. Store in an airtight container.
Why You’ll Love This Recipe
- One Bowl Wonder: I love that the flaky crust comes together right in the bowl—just flour, cold butter, ice water, and salt.
- That First Bite: The buttery crust shatters perfectly against the creamy chicken filling.
- Family Approved: Between us, even the pickiest eaters clean their plates with this one.
- Leftovers for Days: Honestly, it tastes even better the next day, and it freezes beautifully.
Step-by-Step Instructions for Chicken Pot Pie
Here’s the method that ensures a flaky crust and rich, herbaceous filling every time.
Step 1: Prepare the Pie Dough
In a food processor, pulse 3 cups All-Purpose Flour with 1 tsp Salt to combine. Add 1.5 cups Unsalted Butter, cubed and chilled, and pulse until the mixture resembles coarse crumbs with pea-sized butter pieces visible. This texture is crucial for flakiness.
With the processor running, drizzle in 0.5 cup Ice Water through the feed tube until the dough just begins to come together. It should look shaggy, not smooth. Transfer to a lightly floured surface and gently knead just until it forms a cohesive ball. Overworking develops gluten, which makes the crust tough.
Divide the dough into two equal portions, flatten into discs, wrap in plastic, and refrigerate for 1 hour. This chilling step relaxes the gluten and firms the butter, ensuring layers that separate beautifully during baking.
Step 2: Cook the Filling Base
In a large pot, melt 2 tbsp of the reserved Unsalted Butter over medium heat. Add the finely diced Yellow Onion, Carrots, and Celery Ribs, cooking for 8-10 minutes until the vegetables soften and the onion turns translucent.
Stir in the minced 3 cloves Garlic Cloves, 2 tsp Fresh Thyme Leaves, and 1 tsp Fresh Rosemary, cooking for 30 seconds until fragrant. This builds the aromatic foundation for your filling. Be careful not to let the garlic brown.
Sprinkle ¼ cup of the All-Purpose Flour over the vegetables and stir to coat. Cook for 1-2 minutes to remove the raw flour taste, creating a light roux that will thicken your sauce.
Step 3: Complete the Filling
Gradually whisk in 1.75 cups Chicken Broth, followed by 0.75 cup Whole Milk and 0.5 cup Heavy Cream. Bring to a simmer and cook for 5-7 minutes until the mixture thickens enough to coat the back of a spoon.
Add the 1.5 lb Boneless Skinless Chicken Breasts, cut into 1-inch cubes, along with 1 cup Frozen Peas and ½ tsp Black Pepper. Simmer for 8-10 minutes until the chicken is cooked through and the sauce has reached a thick, creamy consistency. The peas will thaw and heat directly in the sauce.
Taste and adjust seasoning with the remaining ½ tsp Salt if needed. The filling should be rich and velvety, with visible flecks of herbs throughout.
Step 4: Assemble and Bake
On a lightly floured surface, roll out one disc of dough to a 12-inch circle and transfer it to a 9-inch pie dish. Press it gently into the bottom and up the sides, letting the excess hang over the edge. Pour the filling into the crust—it should mound slightly in the center.
Roll out the second disc to an 11-inch circle and place it over the filling. Trim the excess dough from both layers, leaving a ½-inch overhang. Fold the edges under and crimp with your fingers or a fork to seal. Cut several 1-inch slits in the top crust to allow steam to escape.
Bake at 400°F for 30-35 minutes until the crust is deep golden brown and the filling is bubbling. Let it rest for 10 minutes before serving to allow the filling to set slightly. Each serving should reveal a perfect flaky crust over a creamy, herb-rich filling.
Pro Tips For Making Chicken Pot Pie Recipe Cook’S Illustrated
- Chill the Dough: Let the pie dough rest in the fridge for at least 30 minutes after mixing—this keeps the butter firm so your crust stays flaky instead of tough. I learned this the hard way after my first few attempts turned out more like crackers than crust.
- Dry the Chicken: Pat the boneless skinless chicken breasts completely dry before cooking. Sounds tedious, but it actually changes the outcome by helping them sear properly instead of steaming in their own juices.
- Vent the Top: Cut a few small slits in the top crust before baking. Skipping this step leads to a soggy bottom crust from trapped steam—I ruined two pies before figuring this out.
- Use Cold Butter: Keep your unsalted butter ice cold when cutting it into the flour. My grandmother swore by this, and she was right: it creates those perfect flaky layers in the crust.
Pro Cooking Tips for This Dish
Butter Temperature Control
Keep your 1.5 cups Unsalted Butter ice-cold until the moment you pulse it into the flour. I cut mine into ½-inch cubes, then chill for 15 minutes. Cold butter creates steam during baking, which makes those coveted flaky layers. 💡
Roux Perfection
When making the roux for your filling, cook the ¼ cup All-Purpose Flour and butter mixture for the full 1-2 minutes. This removes the raw flour taste and builds a sturdy base for your creamy sauce. Undercooking can make your filling taste pasty.
Filling Consistency
Simmer your sauce until it coats the back of a spoon. If it seems thin, mix 1 tbsp cornstarch with 1 tbsp water and stir in. The filling should mound slightly when poured into the crust, not run flat.
Venting the Crust
Cut 4-5 slits in the top crust, each about 1-inch long. This lets steam escape without causing the crust to split. I use a sharp paring knife for clean cuts. Proper venting prevents a soggy bottom crust.
Baking Surface
Place your pie dish on a preheated baking sheet in the lower third of the oven. This ensures the bottom crust gets crisp while the top browns evenly. Bake at 400°F for the full 30-35 minutes. 🔥
Resting Time
The 10-minute rest after baking is non-negotiable. It lets the filling set so it doesn’t spill out when sliced. I set a timer to resist the temptation of cutting too soon. The wait makes each bite more satisfying.
Nutrition Facts
Frequently Asked Questions
Can I use store-bought crust instead?
Yes, pre-made puff pastry or pie crust works well. Use 1 sheet for the top and 1 sheet for the bottom, but chill it for 15 minutes before assembling to prevent shrinking.
Why does my filling turn out watery?
This usually happens if the sauce wasn’t thickened enough. Simmer it until it coats a spoon, or add a slurry of 1 tbsp cornstarch and 1 tbsp water before baking.
How do I prevent a soggy bottom crust?
Pre-bake the bottom crust for 8 minutes at 400°F before adding filling. Also, ensure the filling is slightly cooled before assembling.
Can I make this ahead of time?
Assemble the pie, cover tightly, and refrigerate for up to 1 day. Bake as directed, adding 5-10 minutes if cold.

- 6 Oz Chocolate Chip Cookie Recipe: Perfectly Balanced Crispy Edges and Chewy Hearts - September 25, 2026
- 6-Inch Coffee Cake Recipe: Vanilla Bean Swirls and Buttery Streusel Topping - September 25, 2026
- 1 Hour Soup Recipe: Velvety Richness Without the Wait - September 25, 2026