
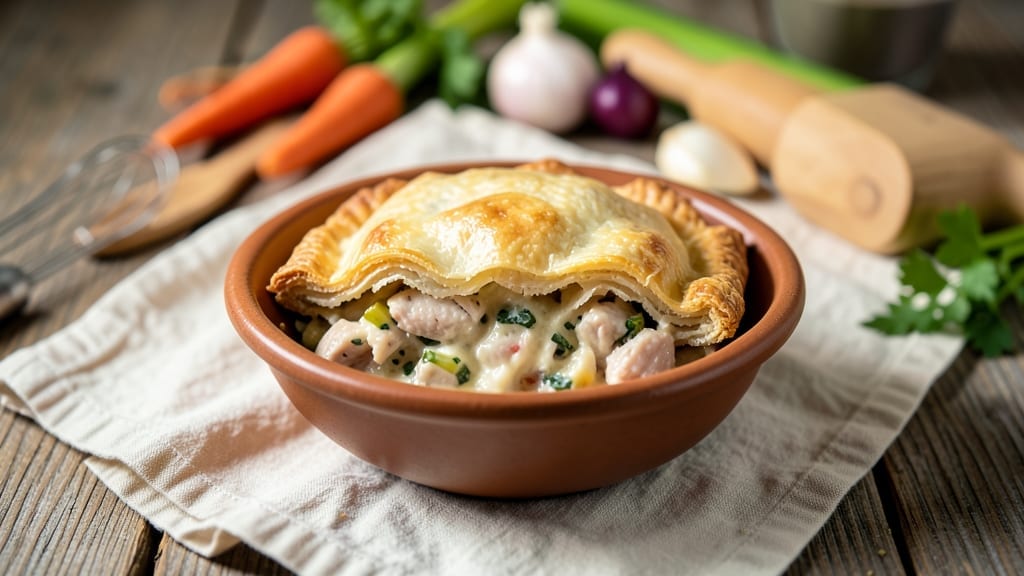
This chicken pot pie recipe in muffin pan transforms a classic comfort dish into crispy-topped, portable servings—perfect for meal prep or individual lunches. The secret lies in baking individual pies with a golden, flaky crust that stays crispy even when reheated, while the creamy filling remains rich and savory.
I developed this method after realizing how much easier it is to prep and store single servings without sacrificing texture or flavor.
The beauty of this approach is its foolproof simplicity: sauté chicken and vegetables, blend them with a velvety cream sauce, then spoon into a muffin pan lined with pie crust circles.
Baking at 375°F for 20 minutes ensures the crust is perfectly golden while the filling stays warm and comforting. Each portion is self-contained, making it ideal for office lunches or quick reheats—no messy sharing required.
What you’ll end up with is a collection of crispy-topped pot pies that look like they came from a bakery, complete with tender chicken, fluffy vegetables, and a creamy sauce that’s rich but not heavy.
The crust holds its shape beautifully, even after reheating, while the filling stays warm and inviting. This is the kind of meal that feels indulgent yet practical—perfect for busy schedules without sacrificing restaurant-quality results.
Whether you’re prepping for the week or making a single serving, this method delivers consistent, crispy tops every time. The muffin pan technique also allows for easy customization—swap vegetables, add herbs, or adjust seasoning to suit your taste.
Ready to make meal prep effortless? Let’s get started with this game-changing adaptation.
Ingredients for chicken pot pie recipe in muffin pan
Twelve crispy-topped pot pies in one muffin pan—no rolling required, all restaurant-quality results.
| Ingredient | Amount | Notes |
|---|---|---|
| Boneless Chicken Breast 🍗 | 2 lbs | Cut into 1-inch cubes |
| Unsalted Butter 🧈 | ½ cup | Cold, cubed for sauteing |
| Yellow Onion 🧅 | 1 whole | Diced, medium size |
| Carrots 🥕 | 1 ½ cups | Diced, medium size |
| Celery Stalks 🥬 | 2 whole | Diced, medium size |
| All-Purpose Flour 🌾 | ¼ cup | For thickening sauce |
| Heavy Cream 🥛 | 1 cup | Full-fat for richness |
| Chicken Broth 💧 | 1 ½ cups | Low-sodium preferred |
| Fresh Thyme Leaves 🌿 | ¼ cup | Chopped, or 1 tsp dried |
| Salt 🧂 | 1 ½ tsp | Diamond Crystal kosher |
| Black Pepper 🌶️ | ¾ tsp | Freshly ground preferred |
| Garlic Cloves 🧄 | 3 cloves | Minced, fresh preferred |
| Pie Crust 🥧 | 2 pre-made sheets | Store-bought or homemade |
The pie crust is non-negotiable for that signature flaky texture. Pillsbury refrigerated crust is the professional’s shortcut—just press into muffin cups and bake. For homemade, store-bought dough from Whole Foods or Trader Joe’s saves time while delivering superior results. The chicken breast should be cut uniformly—1-inch cubes ensure even cooking. Organic chicken from Costco or your local butcher yields the best texture, but standard supermarket cuts work perfectly fine. Pre-cut vegetables from the grocery store’s fresh section save prep time without sacrificing quality.
No fresh thyme? Dried thyme at one-third the amount maintains the herbaceous depth. Substituting half-and-half for heavy cream cuts richness but maintains creaminess—just add an extra splash of broth. The chicken broth can be homemade (simmer bones with aromatics) or Swanson or Pacific Foods for convenience. For a lighter option, swap half the heavy cream for Greek yogurt—it adds tang without heaviness. The garlic can be pre-minced from a jar (convenient) or freshly chopped (more flavor), but never skip it—the foundation of the sauce’s depth. If you’re short on time, frozen diced onions and carrots work perfectly—just thaw before using.
Assemble pies and refrigerate for up to 24 hours before baking—this prevents soggy crusts. Baked pies reheat beautifully: 375°F for 10 minutes restores crispiness. Store leftovers in airtight containers for 4 days in the fridge or 3 months frozen. For freezer prep, bake first, then freeze—this preserves texture better than raw assembly. Portion into single-serving containers for grab-and-go lunches. The filling reheats best when covered with a damp paper towel to prevent drying.
Why You’ll Love This Recipe
- No Chopping Nightmare: I swear by the muffin pan trick—just dice the onions, carrots, and celery once, dump them in, and let the pan do the work. No tiny pieces flying everywhere, no endless stirring. Honestly, I’ve made this while scrolling through emails.
- Creamy Edge, Savory Fill: That golden crust meets the tender chicken and buttery veggies? It’s the kind of combo that makes you pause mid-bite. The butter in the crust soaks into the filling just enough to make every spoonful feel indulgent—no heavy cream needed.
- Lunchbox Hero: Between us, these little pies reheat like a dream and disappear faster than my willpower on a bad day. Pack two for work, freeze two for later, and you’ve got a week’s worth of meals without the fuss. (Yes, even on a Tuesday night.)
- Budget-Friendly Feast: Chicken breast, onions, carrots, celery—these are ingredients I already have on hand. A single pan turns them into something that feels fancy, but costs less than takeout. My wallet and my freezer both thank me.
Step-by-step instructions for chicken pot pie in a muffin pan
Here’s how to transform classic comfort into portable, crispy-topped perfection.
Prepare the Chicken and Vegetable Filling
Cut the 2 lbs boneless chicken breast into 1-inch cubes for even cooking. In a large skillet, melt the 0.5 cup unsalted butter over medium-high heat. Add the chicken and cook for 6-8 minutes, stirring occasionally, until the pieces are no longer pink in the center and have developed a light golden crust. Remove the chicken and set aside.
In the same skillet, add the diced 1 whole yellow onion, 1.5 cups carrots, and 2 whole celery stalks. Cook for 8-10 minutes until the vegetables begin to soften and the onion becomes translucent. Add the 3 minced garlic cloves and cook for an additional 30 seconds until fragrant. Sprinkle with 1 tsp of the 1.5 tsp salt and 0.5 tsp of the 0.75 tsp black pepper, stirring to combine.
Return the chicken to the skillet and pour in the 1.5 cups chicken broth. Bring to a simmer, then reduce heat to low and let it cook for 5 minutes to allow the flavors to meld. Remove from heat and stir in the 0.25 cup chopped fresh thyme leaves and the remaining 0.5 tsp salt and 0.25 tsp black pepper. This creates a rich, flavorful base that will become the heart of your pot pie filling.
Thicken the Filling with Cream and Flour
In a small bowl, whisk together the 0.25 cup all-purpose flour and 0.5 cup unsalted butter (reserved from the skillet) until you have a smooth paste. This roux will help thicken the filling and create a velvety texture. Gradually whisk the flour-butter mixture into the chicken and vegetable mixture in the skillet, stirring constantly to prevent lumps from forming.
Return the skillet to medium heat and cook for 2-3 minutes until the mixture begins to thicken. Slowly pour in the 1 cup heavy cream while stirring continuously. The mixture should begin to thicken immediately into a creamy, lump-free sauce. Continue cooking for an additional 4-5 minutes until the filling reaches a consistency that coats the back of a spoon but isn’t overly thick.
Taste the filling and adjust seasoning if needed. The filling should be rich, flavorful, and perfectly balanced between the savory chicken, sweet carrots, and aromatic herbs. This step is crucial for achieving the ideal texture that makes each bite of your pot pie irresistible.
Assemble the Muffin Pan Pot Pies
Preheat your oven to 375°F. Lightly grease a 24-cup muffin pan with cooking spray or butter to ensure the pot pies release easily. Divide the chicken and vegetable filling evenly among the muffin cups, filling each about 3/4 full. The filling should be mounded slightly above the edges of the muffin cups, as it will shrink slightly during baking.
Unroll one of the 2 pre-made sheets of pie crust and cut it into 24 squares, each large enough to cover the top of a muffin cup with about 1/2 inch overhang. Press the pie crust squares gently over each muffin cup, creating a dome shape. Trim any excess crust hanging over the edges with kitchen shears or a sharp knife. This ensures each pot pie has a neat, professional appearance while maintaining that coveted crispy texture.
Brush the tops of the crusts lightly with a small amount of melted butter or water using a pastry brush. Sprinkle each crust with a pinch of salt and a few grains of black pepper. This simple step enhances the flavor and helps the crust achieve a beautiful golden-brown finish. The butter also promotes browning and adds richness to the crust.
Bake to Crispy Perfection
Place the assembled muffin pan pot pies on a baking sheet lined with parchment paper to catch any potential drips. Bake in the preheated oven at 375°F for 25-30 minutes, or until the crusts are deep golden brown and the filling is bubbling around the edges. The crust should be crisp to the touch, indicating it’s fully baked and ready to be enjoyed.
Here’s the thing—don’t overbake. The filling will continue to cook slightly as the pot pies cool, so it’s better to pull them out when the crusts are just beginning to reach their peak golden color. If you’re unsure, check the internal temperature of the filling with a thermometer; it should reach 165°F, ensuring the chicken is fully cooked and safe to eat.
Remove the pot pies from the oven and let them cool in the pan for 5 minutes. This resting period allows the filling to set slightly and makes it easier to handle each individual pot pie when serving. Serve warm, straight from the muffin pan for the most convenient and delicious meal prep experience.
Pro Tips For Making Chicken Pot Pie Recipe In Muffin Pan
- POACH CHICKEN FIRST: Skip the raw chicken in the muffin tin—it’ll turn rubbery. Poach the breast in simmering broth with a splash of vinegar (5 minutes max) until just cooked, then shred. The meat stays tender, and you avoid greasy muffin cups.
- DICE VEGETABLES UNIFORM: No one wants a bite with a giant carrot chunk. Cut onions, carrots, and celery into ¼-inch pieces—smaller than a pea. They’ll cook faster and blend into the filling instead of sitting like rocks.
- GREASE MUffin PANS: Butter the muffin cups and sprinkle them with flour, tapping out excess. This prevents soggy crusts and makes cleanup easier. (Yes, even if you’re using a muffin pan—it’s not foolproof without this.)
- BAKE UNTIL GOLDEN: Don’t pull it at 350°F—wait until the crust is deep golden, not just bubbly. If it’s pale, broil for 1-2 minutes at the end. That’s when the flavor hits, not when it’s still soft.
Essential equipment for this dish
Muffin Pan Essentials
A standard 24-cup muffin pan is your best friend for this recipe—it creates perfectly portioned individual pies. I recommend a non-stick muffin pan (like Wilton or Chicago Metallic) for easy release.
If you don’t have one, a greased standard muffin pan works too. The key is ensuring each cup is lightly coated with butter or cooking spray before filling to prevent sticking. 🥧
Pie Crust Shortcuts
Store-bought pie crust is a game-changer here. I use Pillsbury refrigerated crust for its reliability—just press it into the muffin cups and bake. For homemade, Whole Foods pre-made dough or Trader Joe’s puff pastry deliver restaurant-quality results with minimal effort.
Avoid rolling your own dough for this technique; it’s too fussy for the muffin pan’s tight spaces. Pre-cut the crust into 24 squares (about 3×3 inches) before pressing into the pan.
Sauce Thickening Tools
A whisk (like OXO Good Grips) is essential for creating a smooth, lump-free roux. For measuring, a small mixing bowl (8-inch diameter) works best for combining the 0.25 cup flour and 0.5 cup butter.
If you’re short on time, a hand mixer can speed up the process, but whisking by hand gives you better control over the sauce’s texture. A fine-mesh strainer (optional) helps remove any accidental lumps before filling the muffin cups.
Baking Gear
Preheat your oven to 375°F—a digital thermometer (like Thermoworks) ensures accuracy. Line a baking sheet with parchment paper to catch any filling drips during baking. A pastry brush (or clean silicone brush) is perfect for lightly coating the crust tops with melted butter.
For trimming excess crust, kitchen shears or a sharp chef’s knife work best. Avoid butter knives—they’ll tear the crust instead of cleanly cutting it.
Cooling and Storage
Let pies cool in the pan for 5 minutes before transferring to a wire rack. For meal prep, store in airtight containers (like Glasslock) in the fridge for up to 4 days or freeze for 3 months.
A damp paper towel over pies in the microwave reheats them to crispy perfection in 1-2 minutes. For oven reheating, bake at 375°F for 10 minutes to restore the golden crust. 💡
Nutrition facts
Frequently asked questions
Can I use puff pastry instead of pie crust for these individual pot pies?
Puff pastry creates an even flakier, lighter crust that works beautifully in this recipe. Use 1 sheet of frozen puff pastry (like Trader Joe’s or Whole Foods) and cut into 24 squares. Press gently into the muffin cups—they’ll puff up even more during baking, giving you those bakery-style layers. Just reduce baking time to 20-25 minutes to prevent over-browning.
How do I prevent the crust from getting soggy when reheating?
Soggy crusts happen when steam builds up. To avoid this, always reheat pies covered with a damp paper towel in the microwave for 1-2 minutes. For oven reheating, bake at 375°F for 10 minutes with a metal tray underneath to catch drips. The key is high heat for short periods—never microwave uncovered or you’ll lose crispiness.
Can I make these with ground turkey or chicken instead of breast?
Yes, but adjust cooking times! Ground meat browns faster, so cook it 3-4 minutes until no longer pink, then proceed with the recipe. For extra flavor, add 1 tsp smoked paprika or ½ tsp garlic powder to the filling. The texture will be slightly denser but still delicious—just ensure the internal temperature reaches 165°F for safety.
What’s the best way to freeze these for later?
Freeze fully baked pot pies uncovered on a tray for 1 hour to prevent sticking, then transfer to an airtight container. They’ll keep for 3 months. To reheat, bake at 375°F for 12-15 minutes until the crust is golden again. For raw assembly, fill muffin cups and cover tightly with foil before freezing—bake straight from frozen, adding 5-7 minutes to the baking time.
Can I make these gluten-free?
Certainly! Use a gluten-free pie crust (like King Arthur or Bob’s Red Mill) and ensure your flour is GF-certified. The filling recipe stays the same, but check that your chicken broth is also gluten-free. For extra richness, replace half the heavy cream with coconut cream. The texture may be slightly denser, but the flavor remains just as comforting.

- Crock Pot Round Steak Recipe: Slow-Sear Crust With Juicy Center - November 6, 2026
- Candied Sweet Potatoes Crock Pot Recipe: Caramelized Sweetness With Zero Effort - November 6, 2026
- Steak Recipe Crock Pot: Juicy, Caramelized Crust in 4 Hours - November 6, 2026