
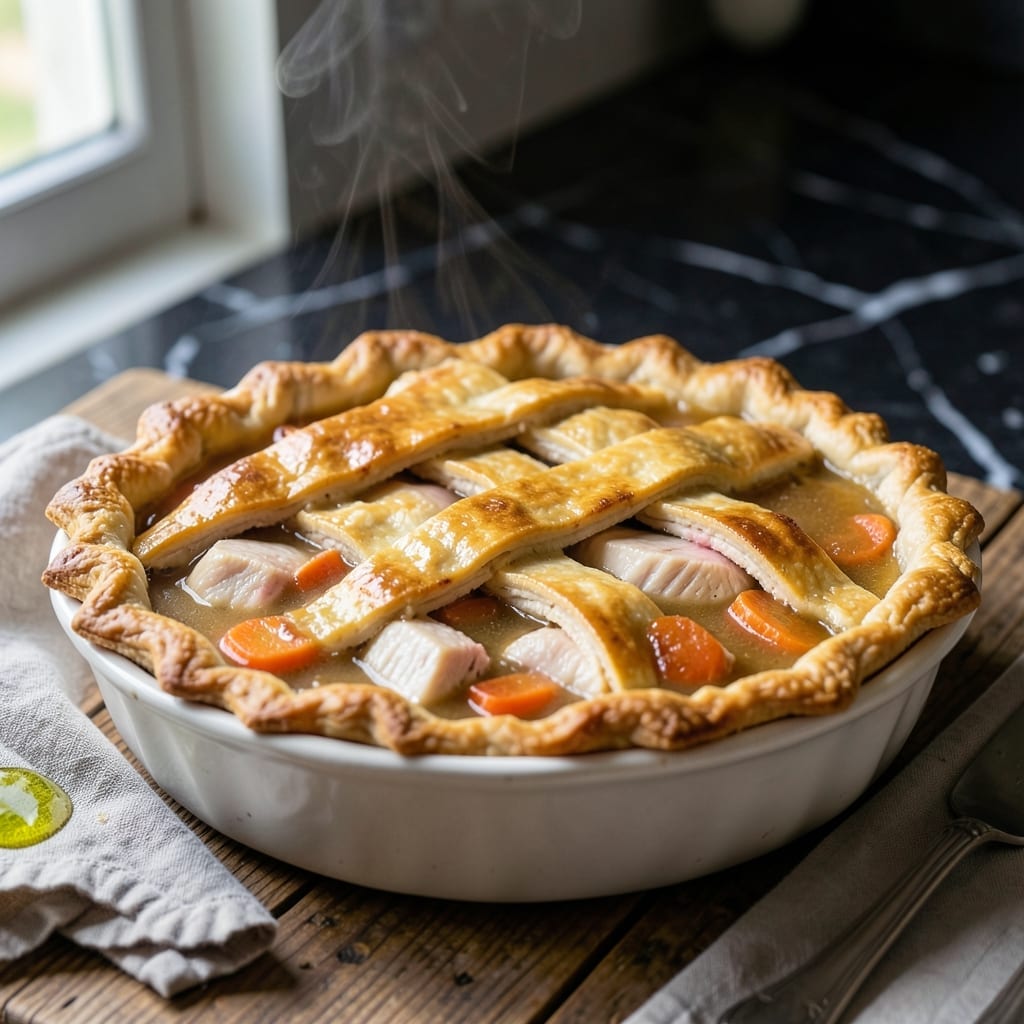
There’s a better way to make chicken pot pie without heavy cream—this version proves it. A rich, savory filling comes together with a simple milk-based sauce that’s just as velvety and satisfying.
The buttery crust stays flaky and golden, while the herb-infused filling delivers all the comfort of the classic. No compromise on flavor, just a lighter approach that still feels indulgent.
Perfectly balanced with tender chicken, hearty vegetables, and a sauce that clings to every bite. The crust bakes to a golden brown finish every time.
This dish brings homestyle warmth to your table with no cream in sight. Serve it fresh from the oven for the best results.
Ingredients for Chicken Pot Pie Recipe No Cream
Buttery crust, tender chicken, and a milk-based sauce. No cream needed for this comfort classic.
| Ingredient | Amount | Notes |
|---|---|---|
| Chicken Breast 🍗 | 1 ½ lb | Boneless, skinless, diced |
| All-Purpose Flour 🌾 | ½ cup | For thickener and crust |
| Whole Milk 🥛 | 1 ½ cups | Full-fat for creaminess |
| Chicken Broth 🍲 | 1 ½ cups | Low-sodium preferred |
| Butter 🧈 | ½ cup | Unsalted, for crust and filling |
| Carrots 🥕 | 2 whole | Peeled and diced |
| Celery Stalks 🌿 | 2 whole | Diced for filling |
| Yellow Onion 🧅 | 1 whole | Medium, finely chopped |
| Frozen Peas 🌱 | 1 cup | No need to thaw |
| Fresh Thyme 🍃 | 1 tbsp | Chopped, or 1 tsp dried |
| Fresh Rosemary 🌿 | 1 tsp | Chopped, or 0.5 tsp dried |
| Salt 🧂 | 1 tsp | Kosher or sea salt |
| Black Pepper 🌶️ | ½ tsp | Freshly ground |
| Pie Crust 🥧 | 2 sheets | Store-bought or homemade |
| Large Egg 🥚 | 1 whole | For egg wash on crust |
The chicken is the star here. Boneless, skinless breasts stay tender and cook evenly. Most grocery stores carry them pre-cut, but buying whole lets you control the size—aim for 1-inch pieces. For the crust, Pillsbury pie crust (in the refrigerated section) is a lifesaver. If you’re making it from scratch, use cold butter (cut into small cubes) and ice water for that flaky texture.
No milk? Half-and-half or whole milk substitute works in a pinch (but skip the cream—this recipe’s all about the no-cream promise). Swap fresh herbs for dried at one-third the amount. The carrots and celery can be subbed with frozen mixed veggies (just thaw and drain first). For extra richness, stir a spoonful of cream cheese into the filling—trust me, it’s worth it.
Assemble and bake right away, or prep the filling a day ahead (store it in the fridge). Leftovers keep for 3-4 days—reheat in the oven to crisp the crust. The crust sheets? Freeze extras for 2 months if unopened.
Why You’ll Love This Recipe
- I’ll be real: this is my go-to for busy nights when I need to feed everyone something hearty with minimal fuss.
- One Pot Wonder: Honestly, I love that this comes together in a single skillet—brown the chicken, make the sauce, and bake all in one pan.
- Rich Without Cream: The whole milk and butter give it that velvety texture without heavy cream, and the broth deepens the flavor.
- Feeds the Fam: I’ll be real: this is my go-to for busy nights when I need to feed everyone something hearty with minimal fuss.
Step-by-Step Instructions for Chicken Pot Pie Without Cream
Here’s the method I rely on for a flaky crust and rich, creamy filling without heavy cream.
Step 1: Cook the Chicken and Vegetables
In a large skillet, melt ¼ cup of butter over medium heat. Add the diced chicken breast and cook for 6-8 minutes until no longer pink. Remove the chicken and set it aside.
In the same skillet, add the chopped yellow onion, diced carrots, and diced celery stalks. Cook for 5 minutes until the vegetables begin to soften. This builds a flavorful base for your filling.
Step 2: Create the Creamy Filling
Sprinkle the 0.5 cup all-purpose flour over the vegetables and stir to coat. Cook for 1 minute to remove the raw flour taste. Slowly pour in the 1.5 cups whole milk and 1.5 cups chicken broth, whisking constantly to prevent lumps.
Bring the mixture to a simmer and cook for 3-4 minutes until it thickens to the consistency of gravy. Stir in the 1 tbsp fresh thyme, 1 tsp fresh rosemary, 1 tsp salt, and 0.5 tsp black pepper. Return the chicken to the skillet and add the 1 cup frozen peas. Stir to combine and cook for another 2 minutes.
Step 3: Assemble the Pot Pie
Preheat your oven to 375°F. Line a 9-inch pie dish with 1 sheet of pie crust. Pour the chicken and vegetable filling into the crust, spreading it evenly.
Top with the second pie crust sheet. Crimp the edges to seal and cut a few slits in the top crust to allow steam to escape. In a small bowl, beat the large egg and brush it over the top crust for a golden finish.
Step 4: Bake to Golden Perfection
Bake for 30-35 minutes until the crust is golden brown and the filling is bubbly. If the edges begin to brown too quickly, cover them with aluminum foil.
Let the pot pie rest for 10 minutes before slicing. This allows the filling to set slightly, making it easier to serve. Each serving should have a crisp, buttery crust and a creamy, herb-infused filling packed with tender chicken and vegetables.
Pro Tips For Making Chicken Pot Pie Recipe No Cream
- Poach the Chicken: Simmer chicken breast in chicken broth for 12-15 minutes—this keeps it juicy and infuses extra flavor into the filling. I learned this the hard way after too many dry, stringy pot pies.
- Make a Roux First: Cook equal parts butter and flour for 2-3 minutes before adding liquid to eliminate that raw flour taste. Sounds simple, but it actually changes the outcome of your filling.
- Skip Cold Milk: Use room temperature whole milk to prevent the butter from seizing up in your roux. After burning three batches, I finally figured out this was the culprit.
- Thicken Before Baking: Let your filling sit for 5 minutes off the heat after thickening—it’ll set properly and won’t turn your crust soggy. My grandmother swore by this, and she was right.
Common Mistakes When Making Great chicken pot pie recipe no cream
Overworking the Dough
When handling your pie crust, less is more. Overworking develops gluten, making it tough rather than flaky. I roll mine out just once, then transfer it to the pie dish without re-rolling. 💡
Skipping the Roux
Don’t rush the sauce base. Cooking the all-purpose flour with butter for at least 1 minute removes the raw taste and creates a proper roux. This step ensures your filling thickens properly without a pasty flavor.
Overfilling the Pie
Your 9-inch pie dish should be filled but not overflowing. Overfilling leads to a messy bake and a soggy bottom crust. I leave about ½ inch of space at the top for the filling to expand as it heats.
Neglecting the Steam Vents
Always cut a few slits in the top crust. Without steam vents, pressure builds up, which can cause the filling to burst through or create a dense, gummy texture. I use a sharp knife to make 3-4 small cuts in the center.
Underbaking the Crust
A pale crust means a soggy bottom. Bake at 375°F until it’s deep golden brown, which takes 30-35 minutes. If the edges brown too quickly, cover them with foil and continue baking.
Skipping the Rest
Let the pie rest for at least 10 minutes after baking. This gives the filling time to set, so it doesn’t run out when you slice into it. I use this time to set the table and pour drinks. ✨
Nutrition Facts
Frequently Asked Questions
Can I use a different milk type?
Whole milk gives the creamiest texture, but 2% works too. For dairy-free, try unsweetened almond milk with an extra 1 tbsp flour for thickness.
How do I prevent a soggy crust?
Blind-bake the bottom crust for 8 minutes before adding filling. Also, ensure filling is thick before baking and cool slightly before assembling.
Can I make this ahead?
Assemble fully and refrigerate for up to 24 hours before baking. Or freeze unbaked pie for 2 months. Add 5-10 minutes to bake time if frozen.
What if my filling is too thin?
Simmer longer until it coats the back of a spoon. If still thin, mix 1 tbsp cornstarch with 1 tbsp cold water, stir into filling, and cook for 2 more minutes.

- 6 Oz Chocolate Chip Cookie Recipe: Perfectly Balanced Crispy Edges and Chewy Hearts - September 25, 2026
- 6-Inch Coffee Cake Recipe: Vanilla Bean Swirls and Buttery Streusel Topping - September 25, 2026
- 1 Hour Soup Recipe: Velvety Richness Without the Wait - September 25, 2026