
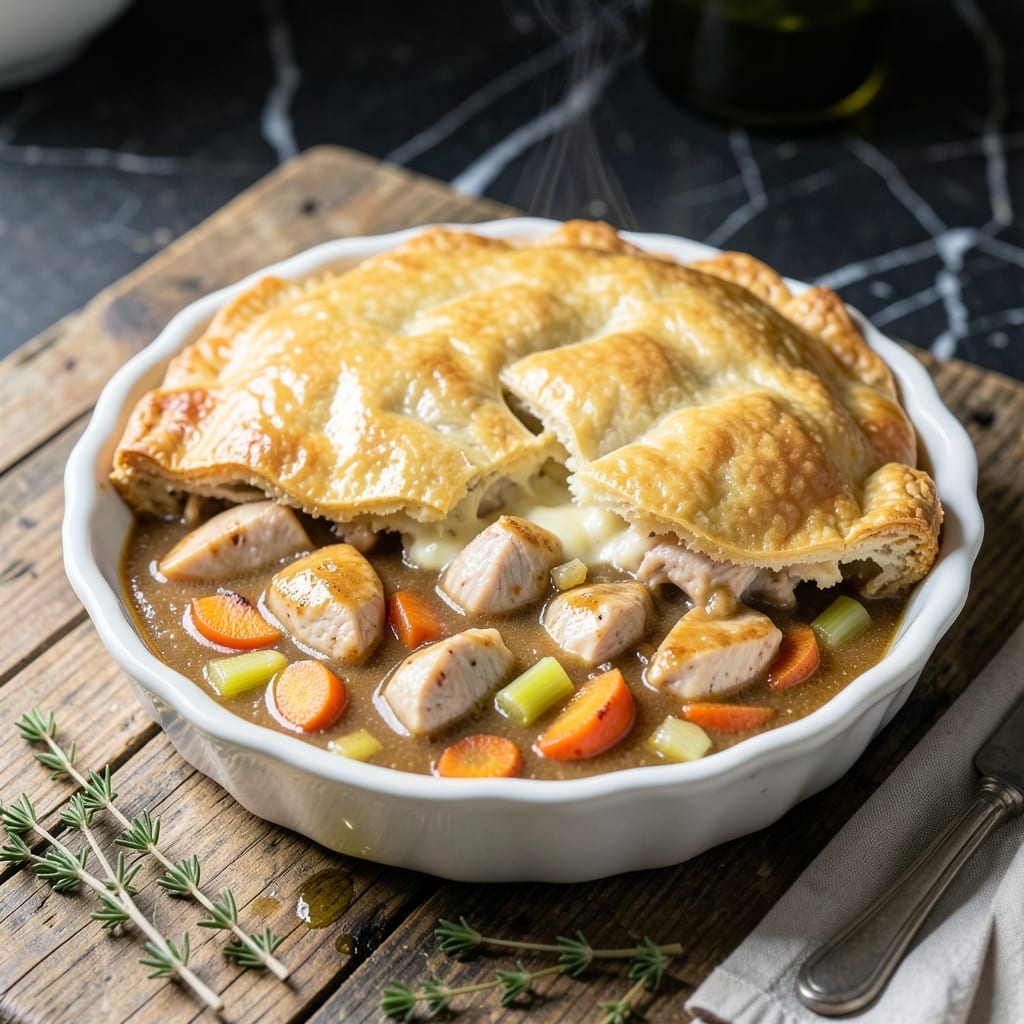
This chicken pot pie combines a creamy filling with a flaky Bisquick topping for ultimate comfort food. The secret lies in the biscuit layer, which bakes up golden and tender without the fuss of pie crust.
I developed this method to streamline the process while keeping all the classic flavors. The filling comes together in one pot, then gets topped with a simple Bisquick mixture before baking. It’s the perfect shortcut for busy weeknights.
You’ll get a bubbling, creamy chicken and vegetable filling under that buttery, flaky biscuit crust. The aroma alone will have everyone gathering around the table before it’s even out of the oven.
Ready in under an hour, this dish delivers homemade taste with minimal effort. Here’s how to make it.
Ingredients for Chicken Pot Pie Recipe Using Bisquick
Pantry staples and a Bisquick shortcut. Big comfort in every bite.
| Ingredient | Amount | Notes |
|---|---|---|
| Boneless Chicken Breast 🍗 | 1 ½ lb | Diced into 1-inch pieces |
| All-Purpose Flour 🌾 | ⅓ cup | For thickening the filling |
| Unsalted Butter 🧈 | ½ cup | Divided for cooking and topping |
| Yellow Onion 🧅 | 1 whole | Medium, finely diced |
| Carrots 🥕 | 2 whole | Medium, peeled and sliced |
| Celery Stalks 🌿 | 2 whole | Sliced thinly |
| Chicken Broth 🍲 | 2 cups | Low-sodium preferred |
| Whole Milk 🥛 | 1 cup | For creamy filling |
| Frozen Peas 🌱 | 1 cup | No need to thaw |
| Garlic Cloves 🧄 | 2 cloves | Minced finely |
| Salt 🧂 | 1 tsp | Divided, to taste |
| Black Pepper 🌶️ | ½ tsp | Freshly ground preferred |
| Dried Thyme 🍃 | ½ tsp | For seasoning the filling |
| Bisquick Baking Mix 🍞 | 2 cups | Plus extra for dusting |
| Whole Milk 🥛 | 0.67 cup | For Bisquick topping |
The Bisquick topping is the star here. General Mills Bisquick is the classic choice, but any biscuit baking mix works. For the chicken, I prefer boneless breasts for ease, but thighs add extra richness if you don’t mind the dark meat (and they’re often cheaper at Costco). The veggies—carrots, celery, onion—should be fresh, but frozen mixed veggies work in a pinch (just thaw and drain first).
No Bisquick? Homemade biscuit mix (2 cups flour + 1 tbsp baking powder + 1 tsp salt + 1/3 cup shortening) gets you close. Want more flavor? Swap the thyme for poultry seasoning or add a pinch of nutmeg to the filling. The milk can be whole or 2%—avoid skim as it won’t give you that creamy texture. For extra richness, stir a spoonful of sour cream into the filling.
Assemble and bake right away, or prep the filling ahead and refrigerate for up to 24 hours. Leftovers keep 3-4 days in the fridge—reheat covered to prevent the topping from drying out. The Bisquick mixture thickens as it sits, so don’t let it wait too long before baking.
Why You’ll Love This Recipe
- Bisquick Shortcut: I just stir together the Bisquick with a little milk and butter for the crust—no rolling, no fuss.
- Buttery Comfort: The flaky Bisquick topping soaks up the creamy chicken and carrot filling in the best way.
- Feeds a Crowd: One pan makes enough for dinner tonight and leftovers for tomorrow’s lunch.
- Pantry Friendly: I usually have all the ingredients—chicken, carrots, onion, Bisquick—already on hand, so it’s my go-to when I’m out of ideas.
Step-by-Step Instructions for Chicken Pot Pie Using Bisquick
Here’s the method. Straightforward, tested, works every time.
Step 1: Sauté the Vegetables and Chicken
Heat a large skillet over medium heat and melt ¼ cup of the unsalted butter. Add the diced yellow onion, sliced carrots, and sliced celery stalks. Cook for 5 minutes until the vegetables start to soften.
Add the diced boneless chicken breast and cook for 6-8 minutes until no longer pink. Stir in the minced garlic cloves and cook for 1 additional minute until fragrant. This builds the flavor foundation for your filling.
Step 2: Make the Creamy Filling
Sprinkle the 0.33 cup all-purpose flour over the chicken and vegetables, stirring to coat everything evenly. Cook for 1 minute to remove the raw flour taste.
Slowly pour in the 2 cups chicken broth and 1 cup whole milk, stirring constantly to avoid lumps. Add the 1 cup frozen peas, ½ tsp dried thyme, ½ tsp salt, and ½ tsp black pepper. Bring to a simmer and cook for 5-7 minutes until the filling thickens and coats the back of a spoon.
Step 3: Prepare the Bisquick Topping
In a bowl, combine the 2 cups Bisquick baking mix with the 0.67 cup whole milk and remaining ¼ cup melted unsalted butter. Stir just until the dough comes together—don’t overmix. The dough will be slightly sticky but manageable.
This simple combination creates a flaky, biscuit-like topping that bakes up golden and tender. The butter in the dough ensures those beautiful layers that make this pot pie special.
Step 4: Assemble and Bake
Transfer the creamy chicken filling to a greased 9×13-inch baking dish. Drop spoonfuls of the Bisquick dough evenly over the top—it doesn’t need to be perfect. The rough texture actually helps create those flaky layers.
Bake at 375°F for 25-30 minutes until the topping is golden brown and the filling is bubbly. Let it rest for 5 minutes before serving to allow the filling to set slightly. Each serving will have that perfect contrast of creamy filling and flaky topping.
Pro Tips For Making Chicken Pot Pie Recipe Using Bisquick
- Precook the Chicken: Poach or sauté the boneless chicken breast first—raw chicken in the filling often ends up dry or doesn’t cook through before the Bisquick topping browns.
- Dice Veggies Small: Cut the onion and carrots into ¼-inch pieces so they soften quickly in the filling; bigger chunks stay crunchy and ruin the texture.
- Chill the Dough: Let the Bisquick topping rest in the fridge for 10 minutes before baking—it prevents it from spreading too thin and getting soggy.
- Use Cold Butter: Cut the unsalted butter into the Bisquick mix while it’s still ice-cold; it creates flaky layers instead of a dense, flat crust.
Wine and Beer Pairings for chicken pot pie recipe using bisquick
White Wine Pairings
A crisp Chardonnay with bright acidity cuts through the creamy filling beautifully. I prefer unoaked versions from California—like Kendall-Jackson Avant—to avoid overpowering the dish. Serve chilled at 45-50°F for best results. 🍷
Red Wine Options
Lighter reds work surprisingly well here. A Pinot Noir from Oregon, such as Belle Pente, offers earthy notes that complement the thyme in the filling. Avoid heavy tannins that clash with the buttery topping.
Beer Pairings
An American Pale Ale like Sierra Nevada provides citrusy hops that balance the richness. For a malty option, try Amber Ale—the caramel notes harmonize with the biscuit topping. Both should be served at 45°F. 🍺
Non-Alcoholic Choices
Sparkling apple cider offers effervescence that cleanses the palate between bites. I love Martinelli’s Gold for its crisp, sweet profile. Alternatively, iced Earl Grey tea with a lemon wedge provides a refreshing contrast.
Coffee Pairing
For a cozy pairing, serve with a light breakfast blend coffee. The mild acidity complements without overwhelming. I recommend Starbucks Blonde Roast brewed slightly stronger than usual.
Nutrition Facts
Frequently Asked Questions
Can I use chicken thighs instead of breasts?
Thighs stay juicier and add richer flavor. Use 1.5 lb boneless thighs and cook until 165°F.
What if my topping isn’t browning?
Check your oven temperature first. If needed, broil for 1-2 minutes at the end, watching closely. A light brush of melted butter before baking helps too.
Can I make this ahead?
Assemble the filling, cover and refrigerate up to 24 hours. Add topping and bake just before serving. Don’t prepare the Bisquick dough in advance.
How do I know when it’s done?
The topping should be golden brown and the filling bubbly. A toothpick inserted in the center should come out clean. Let rest 5 minutes before serving.

- 6 Oz Chocolate Chip Cookie Recipe: Perfectly Balanced Crispy Edges and Chewy Hearts - September 25, 2026
- 6-Inch Coffee Cake Recipe: Vanilla Bean Swirls and Buttery Streusel Topping - September 25, 2026
- 1 Hour Soup Recipe: Velvety Richness Without the Wait - September 25, 2026