
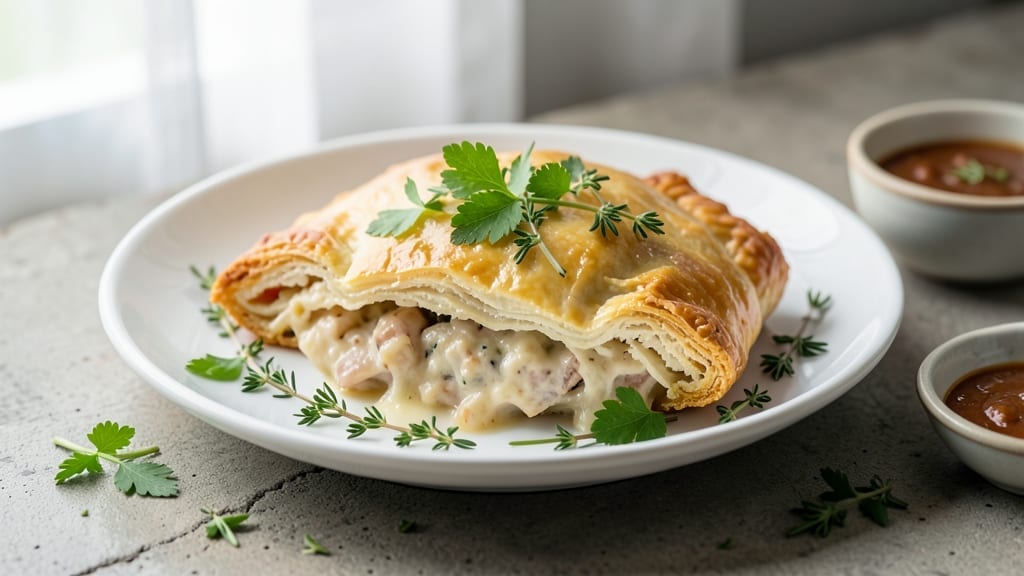
This chicken pot pie recipe with canned biscuits delivers all the comfort of homemade—creamy filling, flaky crust—without the fuss of rolling out dough. The secret lies in using canned biscuits as the shortcut crust, which still achieves that golden, tender texture with minimal effort.
I developed this version after realizing how much time I wasted on pie crusts that never turned out perfectly.
The filling combines tender chicken, seasonal vegetables, and a rich cream sauce that thickens beautifully without lumps. While canned biscuits save time, they still yield a crust that’s crisp at the edges and soft underneath—just like grandma’s, but with half the work.
The best part? This one-dish wonder comes together in under an hour, making it perfect for busy weeknights when you crave something hearty.
By the time it emerges from the oven, you’ll have a bubbling pot pie with a golden biscuit top that peeks through in perfect flakes. The filling stays creamy and flavorful, with chicken that’s just tender enough to melt in your mouth.
This is the kind of meal that feels indulgent but comes together with smart shortcuts—no one will guess it used canned biscuits.
Serve it warm with a side of green beans or a simple salad to round out the meal. The leftovers reheat beautifully, making this an ideal recipe for feeding a family or prepping ahead. Let’s get to the step-by-step instructions to create this comforting classic.
Ingredients for chicken pot pie recipe with canned biscuits
Pantry staples meet canned biscuits for the ultimate comforting shortcut—creamy filling, golden crust, zero fuss.
| Ingredient | Amount | Notes |
|---|---|---|
| Boneless Chicken Breast 🍗 | 1 ½ lb | Cut into bite-sized pieces |
| Yellow Onion 🧅 | 1 whole | Diced medium size |
| Carrots 🥕 | 4 medium | Peeled and sliced thin |
| Celery Stalks 🌿 | 3 whole | Diced small |
| All-Purpose Flour 🌾 | 2 tbsp | For thickening sauce |
| Heavy Cream 🥛 | 1 cup | Full-fat for best texture |
| Chicken Broth 💧 | 1 ½ cups | Low-sodium preferred |
| Canned Biscuits 🍞 | 8 whole | Pillsbury Grands preferred |
| Butter 🧈 | ½ cup | Melted for biscuit topping |
| Salt 🧂 | 1 tsp | Kosher or sea salt |
| Black Pepper 🌶️ | ½ tsp | Freshly ground preferred |
| Garlic Powder 🧄 | ½ tsp | For extra flavor |
| Fresh Parsley 🌿 | ¼ cup | Chopped for garnish |
| Unsalted Butter 🧈 | 2 tbsp | For sautéing vegetables |
The biscuits are the star here. Pillsbury Grands are my go-to—they’re sturdy enough to hold their shape but still get crispy. Grab the canned ones from the baking aisle, not the refrigerated section. For the chicken, boneless breasts work best since they stay tender without drying out. If you’re using thighs, they’ll be juicier but slightly darker. The carrots and celery should be fresh—bright orange and crisp—not wilted or rubbery. Most grocery stores have pre-diced veggie mixes, which save time, but chopping your own gives you better control over the texture.
No canned biscuits? Puff pastry or store-bought pie crust works in a pinch—just brush with melted butter and bake as directed. Short on chicken broth? Low-sodium beef or vegetable broth gets you close. The flour is just for thickening, so you can’t really mess this up—just whisk it into the cream until smooth. Want extra richness? Add 2 tbsp sour cream to the filling. The garlic powder is optional, but it adds a nice depth that makes the whole dish sing. Fresh parsley is ideal for garnish, but dried parsley at half the amount works if you’re in a hurry.
This reheats like a dream—just cover with foil and warm in the oven for 15-20 minutes. Keeps for 3-4 days in the fridge, freezes for 2 months. I always double the biscuits and freeze half—perfect for lazy days when you don’t feel like baking. The filling can be prepped ahead and stored separately for 2 days before adding the biscuit topping. Just make sure to bring everything to room temp before assembling.
Why You’ll Love This Recipe
- I swear by this trick: just shred the chicken, chop the veggies into bite-sized chunks, and dump everything into a skillet. No fancy layering, no stress—it still tastes like you slaved over it. (Between us, the biscuits do most of the work.)
- Foolproof Assembly: I swear by this trick: just shred the chicken, chop the veggies into bite-sized chunks, and dump everything into a skillet. No fancy layering, no stress—it still tastes like you slaved over it. (Between us, the biscuits do most of the work.)
- Creamy Crispy Magic: That golden crust from the canned biscuits? It’s the star. The tender chicken and carrot-celery mix soak up the gravy, while the top stays flaky—like a hug in pie form. Honestly, my picky-eater husband asks for seconds.
- Weeknight to Potluck: I make this when I’m too tired to bake from scratch, but it also impresses at holiday dinners. Swap the chicken for turkey, add peas or corn—it’s the same easy method, just dressed up. (Yes, even on a Tuesday night.)
Step-by-step instructions for chicken pot pie with canned biscuits
Here’s how to make a comforting, restaurant-style chicken pot pie with a golden, flaky biscuit top and rich, creamy filling.
Sauté the Chicken and Vegetables
Heat 2 tablespoons unsalted butter in a large oven-safe skillet over medium-high heat. Add the 1.5 lb boneless chicken breast, cut into bite-sized pieces, and cook for 5-6 minutes until the chicken is no longer pink in the center. Remove the chicken and set it aside on a plate.
In the same skillet, add the 1 whole yellow onion, 4 medium carrots, and 3 whole celery stalks, all diced as instructed. Cook for 5-7 minutes until the vegetables begin to soften and the onion becomes translucent. Stir occasionally to prevent sticking, and sprinkle with 1 teaspoon salt and 0.5 teaspoon black pepper halfway through cooking. This step builds the flavor foundation for your filling.
Make the Creamy Filling
Reduce the heat to medium-low and sprinkle the 2 tablespoons all-purpose flour over the sautéed vegetables. Stir well to coat the vegetables evenly with the flour, letting it cook for 1-2 minutes to remove the raw flour taste. Slowly pour in the 1.5 cups chicken broth and 1 cup heavy cream, whisking constantly to prevent lumps from forming.
Return the cooked chicken to the skillet and stir to combine. Bring the mixture to a gentle simmer, then reduce the heat to low and let it cook for 10-12 minutes until the sauce thickens slightly. The filling should be creamy and just thick enough to coat the back of a spoon. Stir in the 0.5 teaspoon garlic powder and taste to adjust seasoning if needed. This step ensures your filling is rich and flavorful without being too thick.
Assemble the Pot Pie
Preheat your oven to 375°F. Spread the creamy chicken and vegetable mixture evenly into the skillet, creating a flat, even layer. This will help the biscuit top cook uniformly. Sprinkle the 0.25 cup chopped fresh parsley over the top for a pop of color and freshness.
Open the package of 8 whole canned biscuits and arrange them on top of the filling in a single layer, slightly overlapping if necessary to cover the entire surface. Brush the biscuits generously with the 0.5 cup melted butter using a pastry brush. This step is crucial for achieving that golden, flaky crust we’re after. The butter will create steam as it bakes, helping the biscuits puff up beautifully.
Bake to Golden Perfection
Transfer the skillet to the preheated oven and bake for 25-30 minutes until the biscuit topping is deep golden brown and puffed up. The edges should look crispy, and you should smell that wonderful buttery aroma filling your kitchen. If the biscuits aren’t browning quickly enough, you can increase the oven temperature to 400°F for the last 5-10 minutes of baking.
Remove the pot pie from the oven and let it rest for 5 minutes before serving. This resting time allows the filling to set slightly, making it easier to serve without spilling. The result should be a creamy, flavorful chicken and vegetable filling topped with a golden, flaky biscuit crust that’s crispy on the outside and tender on the inside.
Pro Tips For Making Chicken Pot Pie Recipe With Canned Biscuits
- COOK CHICKEN TO 165°F: I used to pull chicken off the heat at 160°F, but it always ended up dry when the biscuits went in. Now I cook it to 165°F—just a few degrees more—and then let it rest in the broth. The meat stays juicy, and the biscuits get that perfect golden crust without steaming the chicken dry.
- DICE VEGETABLES EVENLY: Unevenly chopped carrots and celery mean some pieces stay crunchy while others turn to mush. Take the extra 30 seconds to cut everything into ¼-inch dice—yes, even the onion. It cooks faster and looks better, and you’ll actually taste each vegetable instead of just the broth.
- DON’T SKIP THE SOUFFLÉ: After burning the first batch of biscuits, I learned to puff them up like my grandma did. Before baking, press each biscuit into the pie dish, then use a fork to make shallow slits in the top. The steam escapes, and they rise instead of flattening—no fancy puff pastry needed.
- USE COLD BUTTER ON BISCUITS: I was skeptical until I tried it: take the biscuit dough out of the can and chill it for 10 minutes before pressing it into the dish. The butter stays firmer, which means flakier layers when baked. It’s a tiny step, but it makes a real difference in texture—especially when you’re using canned biscuits.
Dietary considerations for this dish
Gluten-Free Adaptation
For a gluten-free version, replace the canned biscuits with gluten-free biscuit dough like Pillsbury Gluten-Free Biscuits or King Arthur Gluten-Free Biscuit Mix. Brush these with melted dairy-free butter (like Miyoko’s) instead of regular butter.
The filling remains safe as it only contains all-purpose flour for thickening, but ensure your broth is certified gluten-free. 🌱
Dairy-Free Options
Swap the heavy cream for full-fat coconut cream or cashew cream (blend 1 cup soaked cashews with ½ cup water). Use dairy-free butter (like Earth Balance) for brushing the biscuits.
The filling will still be creamy but with a subtle coconut or nutty undertone. Always check labels for hidden dairy in broth and biscuits.
Lower-Carb/Keto
Replace the biscuit crust with a cauliflower crust or almond flour crust (mix 1 cup almond flour, 1 egg, and 2 tbsp melted butter). For the filling, reduce the heavy cream to ¼ cup and add 1 tbsp xanthan gum to thicken without extra carbs.
Use cauliflower rice instead of carrots/celery to cut carbs further. This version keeps the cozy vibe while fitting keto macros.
Allergen-Friendly
For nut-free kitchens, use sunflower seed butter (like SunButter) instead of cashew cream. If avoiding eggs (common in biscuit dough), try Bob’s Red Mill Gluten-Free Biscuit Mix (egg-free).
Always double-check labels—many canned biscuits contain egg wash. For soy-free, ensure broth is soy-free and use tapioca starch instead of flour if needed.
Protein Swaps
Replace chicken with shredded rotisserie turkey (lower fat) or chickpeas (for vegan). For higher protein, add 1 cup cooked quinoa to the filling. If using ground turkey, brown it first with 1 tsp Italian seasoning for extra flavor.
These swaps keep the dish hearty while adapting to dietary needs.
Kid-Friendly Adjustments
For picky eaters, blend the filling until smooth (like a creamy soup) and serve with cool ranch dressing on the side. Use mild cheddar cheese (like Kraft Singles) on top of the biscuits for a fun touch.
Cut the pie into small squares for easy handling. The familiar biscuit crust often wins over hesitant little diners! 🍽️
Nutrition facts
Frequently asked questions
Can I use refrigerated biscuits instead of canned?
Yes, but with adjustments! Refrigerated biscuits work, but they won’t puff up as dramatically. Flatten them slightly before placing on top and brush with extra butter. For best results, bake at 400°F for 15-20 minutes to crisp them up. The texture will be more like a biscuit-topped casserole than a traditional pot pie.
How do I prevent the biscuit top from getting soggy?
Prevent sogginess by baking the filling 5 minutes before adding the biscuits, then baking the biscuit layer separately on a baking sheet for 8-10 minutes at 375°F. Press the biscuits onto the filling gently but firmly. For extra insurance, sprinkle a pinch of flour between the filling and biscuits.
Can I make this ahead of time?
Assemble the pot pie (without baking) up to 24 hours ahead and refrigerate. Bake straight from the fridge at 375°F for 35-40 minutes. For freezing, bake completely, cool, then freeze for up to 2 months. Reheat covered with foil in a 350°F oven for 20-25 minutes.
What if my biscuit top doesn’t brown?
If the biscuits stay pale, they likely need more time or heat. Try broiling for 2-3 minutes at the end (watch closely!) or increase oven temp to 425°F for the last 5 minutes. For extra browning, sprinkle 1 tbsp granulated sugar or 1 tsp smoked paprika on top before baking. Avoid over-brushing with butter—just enough to coat.

- Baked Potatoes in Crock Pot Recipe: Buttery Interiors and Crispy Top Magic - November 1, 2026
- Braised Beef Short Ribs Recipe: Crock Pot Fall-Off-Bone Magic in 6 Hours - November 1, 2026
- Crock Pot Cocoa Recipe: Velvety Warmth With Hidden Spice Magic - November 1, 2026