
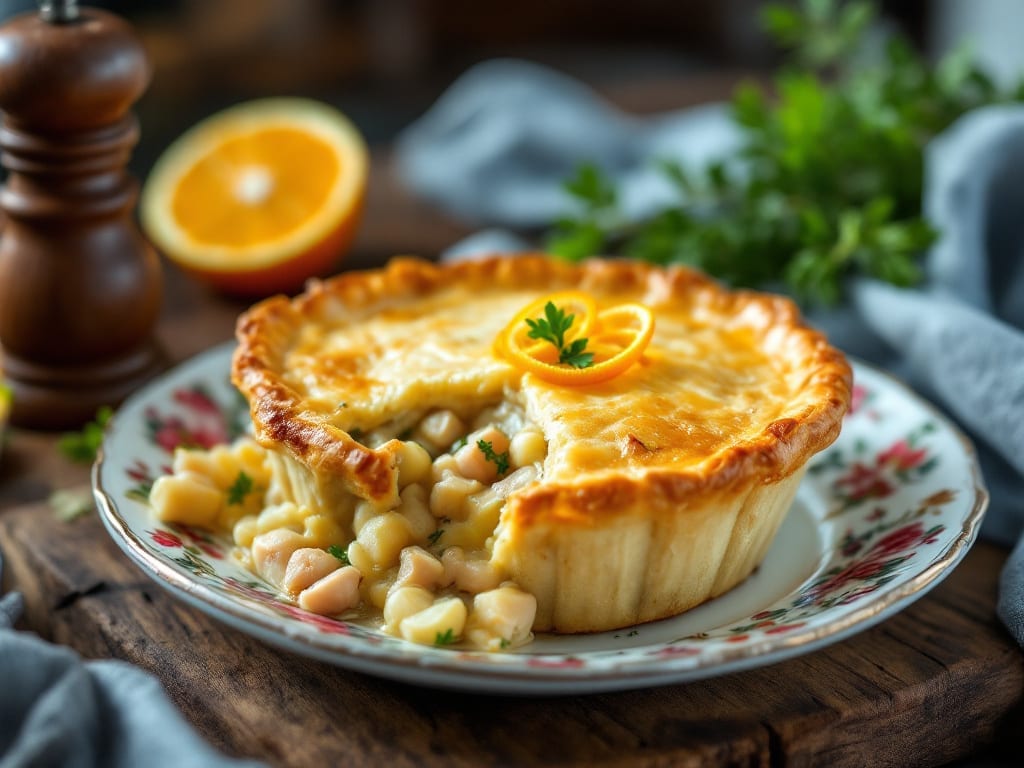
This chicken pot pie recipe with premade crust delivers all the cozy, layered comfort of a classic—without the hours of pie crust work. I developed it after years of perfecting the filling (shredded chicken, tender veggies, and rich gravy) while realizing most people don’t need to make crust from scratch.
The secret lies in using a high-quality store-bought crust that still achieves that golden, flaky finish.
The filling is where the magic happens—a perfect balance of savory chicken, sweet carrots, and earthy mushrooms simmered in a velvety gravy. I use a 30-minute stovetop method to build flavor, then top with a single premade crust that puffs beautifully in the oven.
The result? A pie that tastes homemade but comes together in under one hour, with just 15 minutes of active prep.
What you’ll end up with is a bubbling, golden pie with a crisp top and tender filling that practically melts in your mouth. The aroma alone will fill your kitchen with warmth, and every bite delivers that perfect harmony of creamy gravy, tender chicken, and seasonal vegetables.
This is the kind of comfort food that feels like a hug on a plate.
Serve with a simple side salad or crusty bread to soak up every last drop of gravy. The best part? Leftovers reheat beautifully, making this the ultimate meal-prep solution for busy weeks. Let’s get to that one-pan comfort you’ve been craving.
Ingredients for chicken pot pie recipe with premade crust
Fifteen ingredients for a pie that tastes like love—all without the crust stress.
| Ingredient | Amount | Notes |
|---|---|---|
| Premade Pie Crust 🥧 | 1 sheet | High-quality, refrigerated or frozen |
| Boneless Chicken Breast 🍗 | 1 ½ lb | Skinless, cut into bite-sized pieces |
| Carrots 🥕 | 1 lb | Peeled, cut into small cubes |
| Cream of Chicken Soup 🍲 | 1 cup | Condensed, low-sodium preferred |
| Whole Milk 🥛 | ½ cup | Full-fat for creaminess |
| All-Purpose Flour 🌾 | ¼ cup | For thickening gravy |
| White Mushrooms 🍄 | 8 oz | Sliced, fresh or frozen |
| Yellow Onion 🧅 | 1 whole | Diced, medium size |
| Garlic Cloves 🧄 | 3 cloves | Minced, fresh preferred |
| Chicken Broth 💧 | 1 cup | Low-sodium, homemade or store-bought |
| Unsalted Butter 🧈 | 2 tbsp | For sauteing vegetables |
| Salt 🧂 | 1 tsp | Kosher or sea salt |
| Black Pepper 🌶️ | ½ tsp | Freshly ground |
| Fresh Parsley 🌿 | ¼ cup | Chopped, for garnish |
| Egg 🥚 | 1 whole | For egg wash |
The pie crust is the game-changer here. Pillsbury refrigerated crust is my go-to—it’s foolproof and gives that golden, flaky finish. If you’re feeling fancy, Whole Foods’ organic puff pastry takes it to the next level. Grab one that’s already rolled out to save time, or thaw your frozen crust in the fridge for 20 minutes before using. Pro tip: brush the top with a little milk before baking for extra crispiness. And if you’re worried about soggy bottoms? Vent the crust with a fork before baking—trust me on this one.
No cream of chicken soup? Homemade roux with chicken stock works perfectly—just simmer equal parts butter and flour, then whisk in the broth. Fresh mushrooms are ideal, but frozen sliced mushrooms (thawed and drained) cut the prep time in half. Short on carrots? Sweet potatoes or butternut squash add a nice twist. The chicken can be rotisserie for even more convenience—just shred it yourself. And if you’re watching salt, low-sodium broth and skip the added salt in the filling. The herbs? Fresh parsley is best, but dried thyme at half the amount works in a pinch.
This pie reheats like a dream—just cover with foil and warm in the oven for 15 minutes. Keeps for 3 days in the fridge, but honestly, it’s even better the next day. Freeze portions for up to 3 months—just thaw overnight in the fridge. I always make a double batch because it disappears faster than you can say ‘comfort food.’ Store leftovers in an airtight container, and if the crust gets soft, just reheat it covered with a damp paper towel for 2 minutes to crisp it back up.
Why You’ll Love This Recipe
- Here’s what sold me: the soup and milk blend into a velvety sauce that feels restaurant-worthy, but requires zero whisking or roux. Toss in the shredded chicken and carrots, and you’ve got comfort food magic in 20 minutes.
- No-Roll-Out Hassle: I’ll admit, homemade pie crust intimidates me—until now. That premade crust means no chilling, no rolling, no stress. Just unfold, fold, and bake while the filling simmers.
- Creamy Without the Work: Here’s what sold me: the soup and milk blend into a velvety sauce that feels restaurant-worthy, but requires zero whisking or roux. Toss in the shredded chicken and carrots, and you’ve got comfort food magic in 20 minutes.
- Leftovers for Days: Between us, this recipe makes way more than I can eat in one sitting. The filling reheats beautifully—whether I’m microwaving a bowl for lunch or packing it for my kid’s school lunchbox (they still ask for it).
Step-by-step instructions for chicken pot pie with premade crust
Here’s how to create this comforting classic with minimal effort—flaky crust, tender chicken, and a velvety filling every time.
Sauté the Vegetables and Chicken
In a large oven-safe skillet, melt the 2 tablespoons unsalted butter over medium heat. Add the 1 whole yellow onion and 8 ounces sliced white mushrooms, cooking for 5 minutes until the mushrooms release their moisture and begin to soften. Stir occasionally to prevent browning.
Push the vegetables to one side of the pan and add the 1.5 pounds boneless chicken breast, cut into bite-sized pieces. Season immediately with 1 teaspoon salt and 0.5 teaspoon black pepper. Cook the chicken for 6-8 minutes, stirring occasionally, until it turns opaque and reaches an internal temperature of 165°F. You’ll see the edges start to crisp—that’s your signal the chicken is ready.
Build the Creamy Filling
Remove the skillet from heat and stir in the 1 cup cream of chicken soup, 0.5 cup whole milk, and 1 cup chicken broth. Return the pan to low heat and let the mixture simmer gently for 3-4 minutes until slightly thickened. This step ensures the filling has time to meld flavors without curdling.
In a small bowl, whisk together the 0.25 cup all-purpose flour with 1 tablespoon cold water to create a slurry. Slowly pour this into the simmering filling while stirring constantly. The mixture should thicken noticeably within 1-2 minutes. If it’s too thick, add 1-2 tablespoons water to reach your desired consistency. Here’s where the magic happens—the flour creates that luscious, creamy texture we all love.
Prepare the Crust for Topping
Unroll the 1 sheet premade pie crust on a clean surface and cut it to fit your skillet with about 1 inch overhang on all sides. This extra crust will help create those beautiful flaky edges. Brush the exposed crust with the 1 whole egg beaten with 1 tablespoon water for a golden finish. Sprinkle with a pinch of salt and black pepper for extra flavor.
Gently fold the overhanging crust edges up and over the filling, creating a sealed border. Press the edges firmly to seal, then use a fork to create decorative slits in the top crust. This allows steam to escape while keeping the filling juicy. Place the skillet on a baking sheet to catch any potential drips.
Bake to Golden Perfection
Transfer the skillet to a preheated 375°F oven and bake for 35-40 minutes until the crust is deep golden brown and the filling is bubbling through the slits. The crust should be crispy to the touch, and the filling should be thick and inviting. If the edges brown too quickly, cover them loosely with aluminum foil.
Real talk: your oven might run hot, so start checking at the 30-minute mark. The filling should be hot and the crust should have a beautiful golden hue. Let the pie rest for 10 minutes before serving—this allows the filling to set slightly and makes slicing much easier. Garnish with 0.25 cup chopped fresh parsley for a pop of color and freshness.
Pro Tips For Making Chicken Pot Pie Recipe With Premade Crust
- Sear the Chicken First: The soup base will only do so much—browning the chicken before shredding adds depth. Hit a hot pan with a little oil, cook the chicken until golden on both sides (about 4-5 minutes per side), then shred. The crust will thank you later.
- Cut Carrots Small: I used to slice them into thick rounds, thinking they’d soften nicely. Wrong. Dice them into ¼-inch pieces—they’ll cook evenly and disappear into the filling without turning mushy. (Yes, even if it looks like overkill.)
- Brush Crust with Milk: That premade crust? It’s dry. Before adding the top layer, lightly brush the bottom crust with a little whole milk—it’ll make the filling look glossy and help the crust brown instead of staying pale. (Trust me, it’s not just for looks.)
- Bake Low and Slow: Your oven’s upper rack is tempting, but resist. Bake this at 375°F (not 400°F) for 35-40 minutes—the filling needs time to set, and a lower temp keeps the crust from burning before the center’s done. (I learned this after one sad, soggy bottom.)
Troubleshooting perfect results
Crust Too Soggy
If your crust ends up soggy instead of flaky, it’s usually because the filling was too wet or the crust wasn’t pre-baked. To fix this, brush the bottom of your premade crust with 1 tablespoon melted butter before adding the filling—this creates a moisture barrier.
For extra insurance, blind-bake the crust for 5 minutes at 375°F before adding filling. I’ve also had success using Pillsbury Golden Flaky Crust, which holds up better to wet fillings than some store brands. 🥧
Filling Too Thin
When the gravy separates or looks watery, it’s usually because the flour wasn’t cooked long enough or the liquid wasn’t reduced properly. For a foolproof fix, whisk the flour into the cold milk first to create a paste, then stir it into the simmering filling.
Let it cook for an extra 2-3 minutes until it thickens to a pudding-like consistency. If it’s still too thin, mix 1 tablespoon cornstarch with 1 tablespoon cold water and stir it in—it’ll thicken instantly. 💡
Uneven Baking
If the edges brown too quickly while the center stays pale, your oven’s heat isn’t distributing evenly. Rotate the skillet halfway through baking and place a baking sheet on the lower rack to reflect heat upward.
For stubborn spots, cover the edges with aluminum foil for the last 10 minutes of baking. I also recommend using a light-colored oven-safe skillet (like All-Clad) to help distribute heat more evenly. 🔥
Chicken Overcooked
If your chicken ends up dry, it’s likely been cooked too long in the filling. To prevent this, remove the chicken from the pan as soon as it reaches 165°F and set it aside. Then, build the filling around the cooked chicken—this way, you’re not adding extra heat.
For extra juicy results, shred the chicken while it’s still warm and fold it into the filling just before baking. I’ve also had great success using rotisserie chicken (shredded) to skip the cooking step entirely. 🍗
Filling Curdled
Curdling usually happens when dairy (like milk or cream of chicken soup) is added to a filling that’s too hot. To fix this, always stir the dairy into the filling off the heat, then return the pan to low heat just to warm through.
If it’s already curdled, whisk in 1 tablespoon cold butter to smooth it out. For prevention, use whole milk (it’s more stable than heavy cream) and avoid boiling the filling. 🥛
Crust Not Golden
A pale crust usually means the egg wash wasn’t applied properly or the oven wasn’t hot enough. For a golden finish, beat the egg with 1 tablespoon water and brush it on generously—don’t skimp! Also, preheat your oven for at least 15 minutes before baking.
If your crust still looks dull, broil it for 1-2 minutes at the end, watching closely to avoid burning. I swear by Pillsbury’s Egg Wash Mix for extra shine. 🌟
Nutrition facts
Frequently asked questions
Can I use rotisserie chicken instead of cooking my own?
Rotisserie chicken is a fantastic shortcut that saves time and adds flavor. Just shred 1.5 pounds of cooked chicken (about 2-3 cups) and fold it into the filling before baking. The seasoning from the rotisserie adds delicious depth without extra effort.
How do I prevent the crust from getting soggy?
Brush the bottom of your premade crust with 1 tablespoon melted butter before adding filling to create a moisture barrier. For extra insurance, blind-bake the crust for 5 minutes at 375°F before adding filling. I recommend Pillsbury Golden Flaky Crust—it handles wet fillings better than some store brands.
Can I make this ahead of time?
This pie reheats beautifully! Assemble it completely, refrigerate for up to 24 hours, then bake as directed (add 5-10 minutes to baking time). For freezing, bake the pie, cool completely, then wrap tightly in plastic wrap and foil. Freeze for up to 3 months—thaw overnight in the fridge before reheating.
What if I don’t have cream of chicken soup?
No problem! Make a quick roux by melting 2 tablespoons butter, whisking in 0.25 cup flour, then gradually adding 1.5 cups chicken broth until smooth. Simmer for 5 minutes to thicken. For extra richness, stir in 0.5 cup milk at the end.
How do I make the crust extra crispy?
For maximum crispiness, brush the top crust with a mix of 1 egg beaten with 1 tablespoon water before baking. Sprinkle with 1 teaspoon coarse salt and bake at 400°F for the last 5 minutes of baking. For a restaurant-style finish, broil for 1-2 minutes at the very end.

- Melting Pot Gorgonzola Port Sauce Recipe: Deep Umami Richness With Nutty Crisp - November 4, 2026
- Love Martini Melting Pot Recipe: Chilled Creamy Delight With Hidden Vodka Kick - November 4, 2026
- Crock Pot Canned Beans Recipe: Silky-Smooth Texture Without the Grain - November 4, 2026