
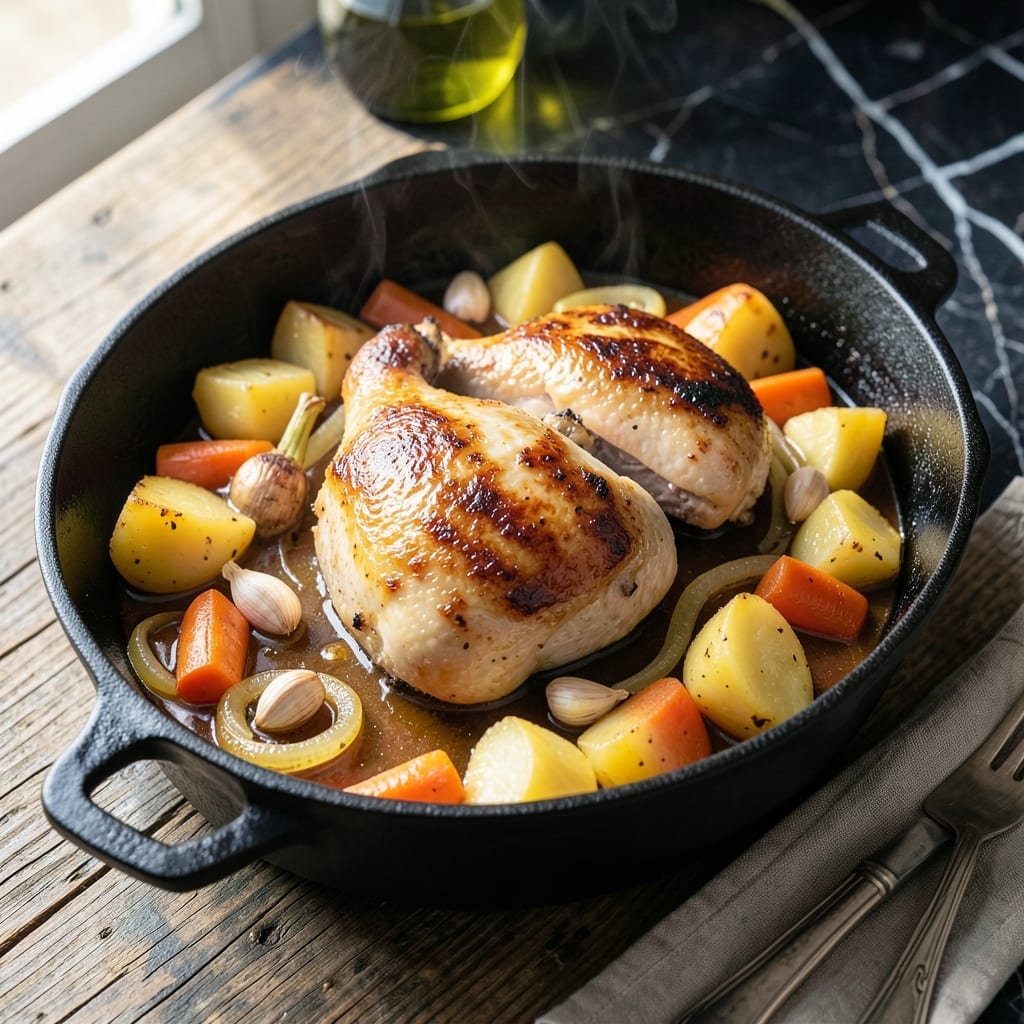
This Dutch oven chicken pot roast transforms simple ingredients into a deeply flavorful meal with minimal effort. The slow braising process ensures tender chicken and vegetables that absorb every herb-infused bite.
The method is straightforward: sear the chicken first to build a rich foundation, then let the oven do the work. A blend of fresh herbs and aromatic vegetables creates layers of savory depth as everything cooks together.
What emerges is fall-off-the-bone chicken surrounded by root vegetables that have soaked up the rich, golden broth. The result is a complete, satisfying dish that feels special without demanding complicated techniques.
The beauty lies in its simplicity and reliability—this is the kind of recipe that delivers consistent results every time you make it.
Ingredients for Chicken Pot Roast
Dutch oven essentials for a braised dish with layered flavors and tender results.
| Ingredient | Amount | Notes |
|---|---|---|
| Chicken Thighs 🍗 | 2 ½ lb | Bone-in, skin-on preferred |
| Olive Oil 🫒 | 2 tbsp | Divided for searing and sautéing |
| Yellow Onion 🧅 | 1 whole | Large, diced into chunks |
| Garlic Cloves 🧄 | 6 cloves | Smashed, peeled |
| Carrots 🥕 | 4 whole | Peeled, cut into thick pieces |
| Yukon Gold Potatoes 🥔 | 1 ½ lb | Peeled, quartered |
| Low-Sodium Chicken Broth 🥣 | 2 cups | Homemade or high-quality store-bought |
| Dry White Wine 🍷 | ½ cup | Optional, deglaze pan |
| Fresh Thyme Sprigs 🌿 | 4 whole | Plus extra for garnish |
| Fresh Rosemary Sprigs 🌿 | 2 whole | Woody stems removed |
| Bay Leaves 🍃 | 2 whole | Dried, for braising liquid |
| All-Purpose Flour 🌾 | ¼ cup | For thickening broth |
| Kosher Salt 🧂 | 1 ½ tsp | Diamond Crystal preferred for even seasoning |
| Black Pepper 🌶️ | 1 tsp | Freshly ground for best flavor |
For optimal results, select bone-in, skin-on chicken thighs—they retain moisture better than breasts during the long braise. Whole Foods or Costco offer reliable quality, but any supermarket with a good butcher counter will suffice. Look for thighs with vibrant color and no off odors. The Yukon Gold potatoes should be firm and smooth, while carrots should feel heavy for their size (a sign of freshness).
No dry white wine? Substitute additional chicken broth with a splash of apple cider vinegar for acidity. Fresh herbs are ideal, but dried thyme and rosemary at one-third the amount work in a pinch. If avoiding alcohol entirely, mushroom broth adds depth. For a richer finish, swap the all-purpose flour for cornstarch slurry (mix 2 tbsp cornstarch with 2 tbsp cold water before adding).
Store raw chicken in the coldest part of the fridge and use within 2 days. The braised dish keeps well, covered, for 4-5 days in the refrigerator. For longer storage, freeze in airtight containers for up to 3 months. Reheat gently to preserve the meat’s tenderness.
Why You’ll Love This Recipe
- I’ll be real: chicken thighs are cheap, and this stretches to leftovers for days.
- One Pan Magic: I toss the chicken thighs, carrots, and onions in one pot, and the oven does the rest.
- Rich and Savory: Honestly, the garlic and olive oil make the chicken so tender it falls off the bone.
- Feeds Everyone: Between us, it’s my go-to for Sunday dinner or meal prepping for the week.
Step-by-Step Instructions for Chicken Pot Roast
This method delivers tender meat and rich, herb-infused gravy with minimal hands-on time.
Step 1: Sear the Chicken Thighs to Build Flavor
Pat the 2.5 lb Chicken Thighs dry with paper towels and season both sides with 1.5 tsp Kosher Salt and 1 tsp Black Pepper. Heat 1 tbsp Olive Oil in a Dutch oven over medium-high heat until shimmering but not smoking.
Working in batches if needed, add the chicken thighs skin-side down. Sear undisturbed for 5-6 minutes until the skin is deep golden brown and crisp. Flip and sear the other side for 3-4 minutes. Transfer to a plate and set aside.
This searing step creates a flavorful fond on the bottom of the pot, which will later become the base for your rich braising liquid. Don’t rush it—proper browning is essential for depth of flavor.
Step 2: Sauté the Aromatics and Vegetables
Reduce heat to medium and add the remaining 1 tbsp Olive Oil to the Dutch oven. Add the Yellow Onion, Carrots, and Yukon Gold Potatoes. Cook for 5 minutes, stirring occasionally, until the onions begin to soften and the vegetables develop some color.
Add the 6 cloves Garlic Cloves, Fresh Thyme Sprigs, Fresh Rosemary Sprigs, and Bay Leaves. Stir for 1 minute until the garlic is fragrant. Be careful not to let the garlic burn, as it can turn bitter quickly.
This step builds layers of flavor in your dish. The vegetables will soften and absorb the chicken drippings, creating a complex base for your braise.
Step 3: Deglaze and Create the Braising Liquid
Pour in the 0.5 cup Dry White Wine and use a wooden spoon to scrape up all the browned bits from the bottom of the pot. Let the wine reduce by half, which should take about 2-3 minutes.
Sprinkle the 0.25 cup All-Purpose Flour over the vegetables and stir to coat. This will help thicken your braising liquid. Slowly pour in the 2 cups Low-Sodium Chicken Broth while stirring constantly to prevent lumps from forming.
The wine deglazing step is crucial—it lifts all those flavorful browned bits from the bottom of the pot, incorporating them into your sauce. The flour creates a velvety texture that coats the chicken and vegetables beautifully.
Step 4: Braise Until Tender and Flavorful
Return the chicken thighs to the Dutch oven, nestling them into the vegetables and liquid. The liquid should come about halfway up the chicken. If needed, add a bit more broth to achieve this level.
Bring the mixture to a simmer, then reduce heat to low. Cover and let it braise for 45-50 minutes, or until the chicken is fall-off-the-bone tender and the vegetables are easily pierced with a fork.
Occasionally check the pot and give it a gentle stir to prevent sticking. The low and slow cooking process allows the flavors to meld together while keeping the chicken moist and tender.
Step 5: Adjust and Serve
Once the chicken is cooked through, remove the thyme, rosemary, and bay leaves. Taste the braising liquid and adjust seasoning if needed. The sauce should be rich and flavorful, coating the back of a spoon.
If the sauce is too thin, simmer uncovered for 5-10 minutes to reduce and thicken. If it’s too thick, add a splash of broth or water to reach your desired consistency.
Serve the chicken pot roast hot, with the vegetables and sauce spooned over the top. Garnish with fresh thyme if desired. The chicken should be tender and juicy, with vegetables that have absorbed all the wonderful flavors of the braising liquid.
Pro Tips For Making Chicken Pot Roast
- Brown the Thighs: Sear the chicken thighs in olive oil until deeply golden—about 4-5 minutes per side. I learned this the hard way: skipping this step means you’ll miss that rich, caramelized flavor in the final dish.
- Slice Onions Evenly: Cut the yellow onion into consistent ¼-inch slices so they soften at the same rate. Sounds fussy, but it makes a real difference in texture.
- Skip the Overcrowding: Don’t cram all the chicken and veggies into the pot at once. Steer clear of this, or they’ll steam instead of brown.
- Use Bone-In Thighs: Bone-in, skin-on thighs stay juicier and add more depth to the broth. My grandmother swore by this, and she was right.
Troubleshooting This Dish
Chicken Sticks to Pot
If your chicken is sticking during searing, your Dutch oven may not be hot enough. Heat the pot for 3-4 minutes over medium-high heat before adding oil. Also, ensure chicken is completely dry—pat with paper towels and let sit uncovered in the fridge for 10 minutes if needed. 💡
Sauce Too Thin
If your braising liquid is watery, remove the lid and simmer on medium heat for 10-15 minutes. Stir occasionally to prevent scorching. For a quick fix, mix 1 tbsp cornstarch with 1 tbsp cold water, then stir into the sauce.
Vegetables Not Soft
If your potatoes or carrots are undercooked, they may have been cut too large. Aim for 1.5-2 inch chunks. If already braising, extend cooking time by 15-20 minutes with the lid on. Check liquid level and add ½ cup broth if needed.
Bland Flavor
If the dish lacks depth, boost seasoning with ½ tsp salt and ¼ tsp black pepper. A splash of 1 tbsp apple cider vinegar or lemon juice can brighten flavors. Stir well and taste again after 5 minutes. 🌟
Sauce Too Thick
If your gravy is gluey, thin it with ¼ cup broth or water, stirring constantly. Simmer for 2-3 minutes to blend flavors. Avoid adding too much liquid at once—it’s easier to add more than to reduce excess.
Herbs Overpowering
If the herb flavor is too strong, remove the stems and simmer uncovered for 10 minutes. This lets some aroma dissipate. Balance with 1 tsp honey or brown sugar to mellow the herbs’ sharpness.
Nutrition Facts
Frequently Asked Questions
Can I use chicken breasts instead of thighs?
Thighs work best due to their higher fat content, keeping the meat moist. If using breasts, reduce braising time to 30-35 minutes to prevent dryness.
What if I don’t have a Dutch oven?
Use a heavy oven-safe pot with a tight lid. A slow cooker works too—cook on low for 6-7 hours or high for 3-4 hours.
Can I make this ahead of time?
The flavors deepen overnight. Refrigerate for up to 3 days or freeze for 3 months. Reheat gently on the stove.
How do I keep the chicken skin crispy?
Sear skin-side down first for 5-6 minutes without moving. After braising, broil for 2-3 minutes to crisp it up.

- 4C Bread Crumbs Meatballs Recipe: Crispy Crust and Juicy Centers - September 25, 2026
- 6 Oz Chocolate Chip Cookie Recipe: Perfectly Balanced Crispy Edges and Chewy Hearts - September 25, 2026
- 6-Inch Coffee Cake Recipe: Vanilla Bean Swirls and Buttery Streusel Topping - September 25, 2026