
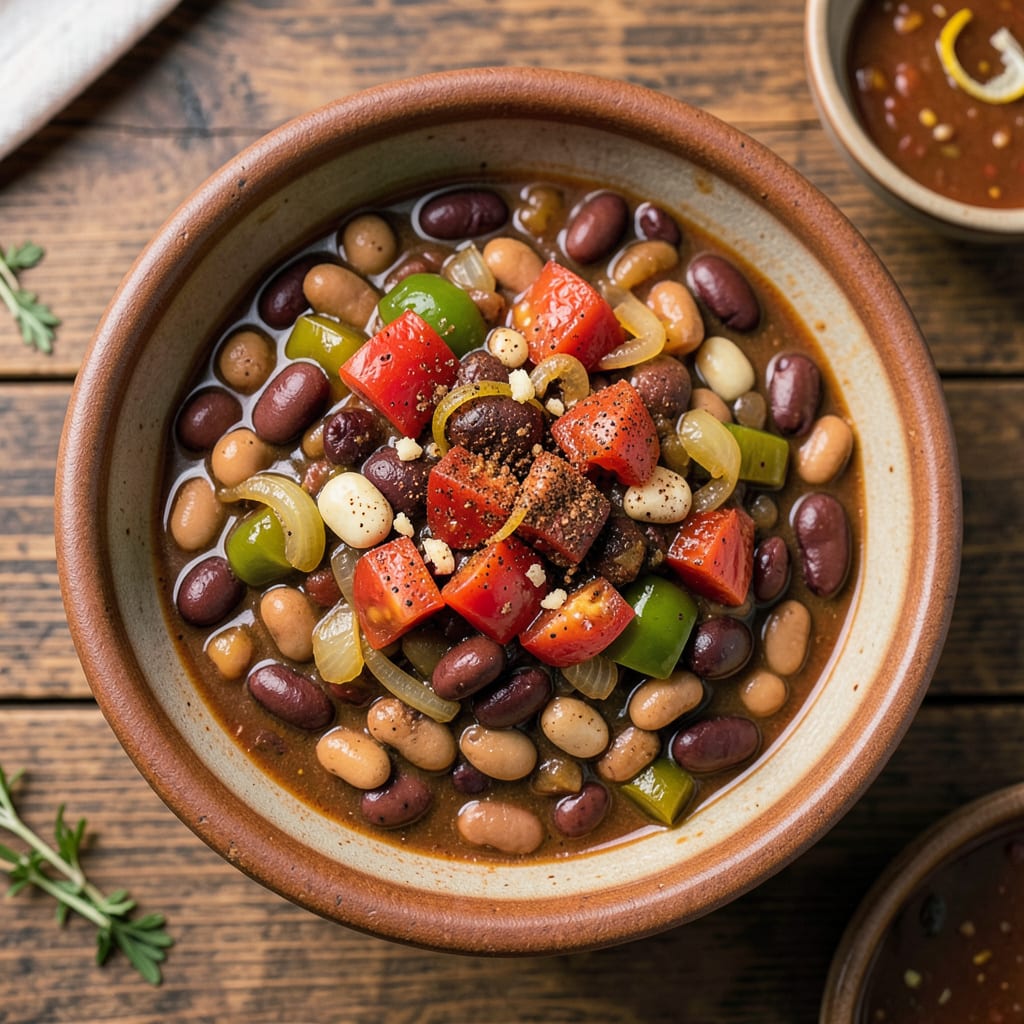
This Instant Pot chili delivers deep, hearty flavor without the traditional overnight bean soak. Using dry beans straight from the pantry, you’ll achieve perfectly tender results in just 60 minutes—no advance planning required. The pressure cooker transforms tough beans into creamy, satisfying bites while developing complex chili flavors that taste like they’ve simmered all day.
The method is precise yet simple: dry beans cook directly with aromatic vegetables, spices, and tomatoes under pressure. This creates a thick, robust chili with beans that hold their shape while absorbing the smoky, slightly sweet sauce. Serve with your choice of toppings for a comforting meal that’s as practical as it is delicious.
Ingredients for Chili Recipe Instant Pot Dry Beans
Pantry staples and dry beans transform into this rich, smoky chili—no soaking required.
| Ingredient | Amount | Notes |
|---|---|---|
| Dry Pinto Beans 🌱 | 1 ½ cups | Unsoaked, picked over |
| Dry Kidney Beans 🌱 | 1 cup | Unsoaked, rinsed well |
| Yellow Onion 🧅 | 1 whole | Medium, finely diced |
| Green Bell Pepper 🌶️ | 1 whole | Cored, medium dice |
| Garlic Cloves 🧄 | 4 cloves | Minced for depth |
| Canned Fire-Roasted Diced Tomatoes 🍅 | 28 oz | With juices included |
| Tomato Paste 🍅 | 2 tbsp | For concentrated flavor |
| Vegetable Broth 💧 | 3 cups | Low-sodium preferred |
| Chili Powder 🌶️ | 2 tbsp | Mild or medium blend |
| Ground Cumin 🌿 | 1 ½ tsp | Toasted for warmth |
| Smoked Paprika 🌶️ | 1 tsp | For smoky depth |
| Dried Oregano 🌿 | 1 tsp | Crushed between fingers |
| Cayenne Pepper 🔥 | ¼ tsp | Adjust for heat level |
| Maple Syrup 🍁 | 1 tbsp | Balances acidity |
| Olive Oil 🫒 | 2 tbsp | For sautéing aromatics |
The beans are the foundation here. Pinto and kidney give the best texture combo—pintos get creamy while kidneys hold shape. I grab mine from WinCo bulk bins (cheaper and fresher than canned). Look for beans that are uniform in size and color, no cracks or dust. The tomato products matter too—fire-roasted diced tomatoes add that extra layer of smokiness. Muir Glen is my go-to brand for consistent quality (the organic ones if you’re feeling fancy).
No fire-roasted tomatoes? Regular diced tomatoes plus a pinch of smoked salt works. Out of pinto beans? Black beans or navy beans swap in fine (adjust cook time by 5 minutes if using black). The maple syrup might seem odd, but it balances the acidity—brown sugar or agave work too. For the spices, check your stash: if they smell like dust, they’re too old. Penzeys has amazing chili powder blends if you want to upgrade.
This chili actually improves overnight—flavors meld and beans absorb more sauce. Keeps 5 days in the fridge, freezes beautifully for 3 months. I portion into quart containers (one container = two servings) for easy reheating. Pro tip: stir in a splash of water when reheating—beans soak it right up.
Why You’ll Love This Recipe
- I’ll be real: forgetting to soak beans overnight used to derail my chili plans. This method cooks dry pintos and kidneys straight from the pantry—no advance prep, just dump and pressure cook. The Instant Pot turns them tender in under an hour, while the onion, bell pepper, and garlic build flavor hands-off.
- No Soaking Needed: I’ll be real: forgetting to soak beans overnight used to derail my chili plans. This method cooks dry pintos and kidneys straight from the pantry—no advance prep, just dump and pressure cook. The Instant Pot turns them tender in under an hour, while the onion, bell pepper, and garlic build flavor hands-off.
- Smells Like Home: That first whiff when the lid comes off? Warm, garlicky, with a hint of caramelized onion from the sauté step. The beans soak up every bit of it, and the green pepper adds just enough freshness to balance the richness. It’s the kind of chili that makes your kitchen feel like a hug.
- Meal Prep MVP: Between us, this makes enough for two dinners and a lunch—without tasting like leftovers. I stash portions in the freezer for those nights when even takeout sounds like too much effort. Reheats like a dream, and the flavors deepen overnight.
Instructions
Here’s how to transform dry beans into rich, comforting chili in just one hour—no soaking required.
Step 1: Sauté the Aromatics for Deep Flavor
Set your Instant Pot to Sauté mode and add the 2 tbsp olive oil. When the oil shimmers but isn’t smoking, add the finely diced yellow onion and medium-diced green bell pepper. Cook for 5-6 minutes, stirring occasionally, until the onion becomes translucent and the pepper softens slightly.
Add the 4 cloves minced garlic and cook for 30 seconds until fragrant. Be careful not to let it brown—garlic burns quickly and can turn bitter. This aromatic base builds the foundation for your chili’s rich flavor profile.
Step 2: Bloom the Spices and Build the Base
Stir in the 2 tbsp chili powder, 1.5 tsp ground cumin, 1 tsp smoked paprika, 1 tsp dried oregano, and 0.25 tsp cayenne pepper. Cook for 1 minute, stirring constantly, until the spices become fragrant. This “blooming” process wakes up the flavors and prevents a raw spice taste.
Add the 2 tbsp tomato paste and cook for another 1-2 minutes, stirring frequently. You’ll notice the mixture darken slightly as the tomato paste caramelizes. This creates a rich, concentrated flavor base for your chili.
Step 3: Add Remaining Ingredients and Pressure Cook
Pour in the 28 oz canned fire-roasted diced tomatoes (with juices), 3 cups vegetable broth, 1.5 cups dry pinto beans, and 1 cup dry kidney beans. Stir well to combine, making sure no beans are stuck to the bottom of the pot. Add the 1 tbsp maple syrup—this balances the acidity from the tomatoes.
Secure the lid and set the valve to Sealing. Cook on High Pressure for 35 minutes. It takes about 10 minutes for the pot to come to pressure before the cooking time begins. You’ll know it’s working when the float valve pops up.
Step 4: Natural Release and Final Adjustments
When the cooking time is complete, allow the pressure to release naturally for 15 minutes. This gradual release prevents the beans from breaking apart. After 15 minutes, carefully turn the valve to Venting to release any remaining pressure.
Remove the lid and give the chili a good stir. The beans should be tender but still hold their shape. If the chili seems too thick, stir in a little water or additional broth. Taste and adjust seasoning if needed—you might want to add a pinch more salt or a dash of cayenne for extra heat.
Step 5: Rest and Serve
Let the chili rest for 10 minutes before serving. This allows the flavors to meld together beautifully. The beans will continue to absorb liquid and become even more tender during this time.
Ladle the chili into bowls and serve with your favorite toppings. The beans should be perfectly cooked—not mushy, but tender throughout. Each spoonful should deliver a hearty combination of smoky, spicy, and slightly sweet flavors that make this chili so comforting.
Dietary Considerations for This Dish
Vegan and Plant-Based
This chili is naturally 100% vegan, packed with plant-based protein from the pinto and kidney beans. Together, they deliver about 15g of protein per serving—comparable to many meat-based chilies. The combination of beans also provides a complete amino acid profile when paired with grains like rice or cornbread. 🌱
Gluten-Free Friendly
Every ingredient in this recipe is inherently gluten-free, from the dry beans to the vegetable broth. Just double-check your spice blends—some chili powders contain wheat as an anti-caking agent. I recommend Simply Organic or Penzeys brands for certified gluten-free options.
Low-Sodium Adaptations
To reduce sodium, use no-salt-added vegetable broth and low-sodium fire-roasted tomatoes. I like Pacific Foods broth for its clean taste. You can always add a pinch of salt at the end if needed—this version cuts sodium by about 60% compared to traditional recipes.
Allergen Considerations
This chili is free from the top 8 allergens, making it safe for most dietary restrictions. The only potential concern is cayenne pepper for those with nightshade sensitivities. Simply omit it or swap for black pepper if needed. Always check tomato can labels for processing warnings.
Diabetic-Friendly Option
With only 25g net carbs per serving, this chili fits well into diabetic meal plans. The high fiber content (about 8g per serving) helps stabilize blood sugar. For even lower carbs, reduce the beans by ½ cup and add extra bell peppers or zucchini. 💪
Kid-Friendly Adjustments
For picky eaters, blend ½ cup of the finished chili until smooth and stir it back in—this creates a thicker, milder base. Reduce the cayenne pepper to just a pinch or omit entirely. Serve with fun toppings like diced avocado or vegan cheese to make it more appealing.
Nutrition Facts
Frequently Asked Questions
Do I need to soak the beans first?
No soaking required! This recipe is designed for unsoaked dry beans cooked directly in the Instant Pot. The 35-minute high pressure setting ensures perfect tenderness without pre-treatment. Just rinse and pick over the beans before using.
Why did my beans turn out unevenly cooked?
Uneven cooking usually happens when beans are packed too tightly or liquid levels are off.
Can I use canned beans instead? You can, but adjust the method: reduce pressure time to 10 minutes and add canned beans at the end. Note that texture will differ—canned beans are softer and may break apart. The flavor will still be great, just less hearty.
How do I prevent the “burn” notice?
Deglaze thoroughly after sautéing and ensure no tomato paste sticks to the bottom. Add a thin layer of broth before the beans, and never exceed the 2/3 fill line. If you get the notice, quick-release and stir before resealing.

- 8 Bean Soup Recipe Crock Pot: Hearty Vegetable Medley in One Pot - September 25, 2026
- 4C Bread Crumbs Meatballs Recipe: Crispy Crust and Juicy Centers - September 25, 2026
- 6 Oz Chocolate Chip Cookie Recipe: Perfectly Balanced Crispy Edges and Chewy Hearts - September 25, 2026