
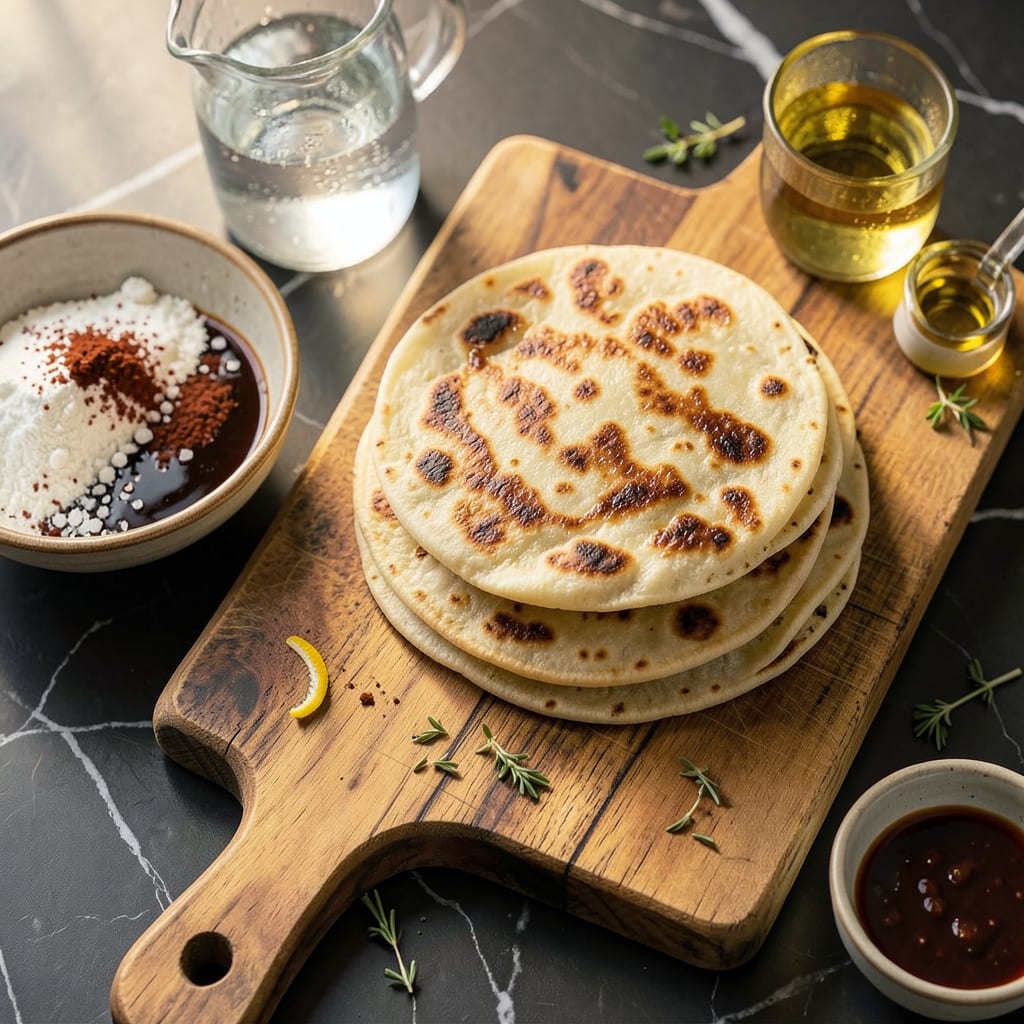
Creating restaurant-quality tortillas at home becomes effortless with this proven method for soft, pliable chipotle-infused flatbreads. The secret lies in balancing smoky chipotle flavor with the perfect dough consistency—achieved through precise hydration and resting time. This technique delivers professional results without specialized equipment.
Whether using chipotle powder or adobo sauce, the infusion process creates a subtle heat that complements any filling. Mastering the cooking temperature ensures even browning and that signature slightly charred aroma. These tortillas elevate tacos, quesadillas, or simple wraps with authentic Mexican flair.
Ingredients for Chipotle Tortilla
These twelve ingredients transform into restaurant-quality chipotle tortillas with professional texture and smoky depth.
| Ingredient | Amount | Notes |
|---|---|---|
| All-Purpose Flour 🌾 | 2 cups | Unbleached, plus extra for dusting |
| Chipotle Powder 🌶️ | 1 ½ tsp | Smoked variety for authentic flavor |
| Adobo Sauce 🫑 | 1 tbsp | From canned chipotles in adobo |
| Warm Water 💧 | ¾ cup | 110°F for optimal dough activation |
| Vegetable Oil 🫒 | 2 tbsp | Divided for dough and cooking |
| Kosher Salt 🧂 | 1 tsp | Diamond Crystal preferred |
| Baking Powder 🧂 | 1 tsp | Ensures soft, pliable texture |
| Granulated Sugar 🍚 | ½ tsp | Balances smoky chipotle heat |
| Cornstarch 🌽 | 1 tbsp | For dusting work surface |
| Lime Zest 🍋 | ½ tsp | Freshly grated for brightness |
| Cilantro 🌿 | 1 tbsp | Finely chopped, optional garnish |
| Queso Fresco 🧀 | ½ cup | Crumbled, for serving |
[recipeingredientscaler]
The flour foundation requires unbleached all-purpose for optimal gluten development—King Arthur or Bob’s Red Mill deliver consistent results. Chipotle powder must be smoked variety (not generic chili powder) for authentic flavor; Penzeys or McCormick Gourmet offer superior quality. Adobo sauce from canned chipotles provides deeper complexity than powder alone—La Costeña brand maintains ideal balance. Hydration precision demands water at 110°F (use an instant-read thermometer) to activate gluten without overheating.
For smoky intensity adjustments, increase chipotle powder to 2 tsp or add 1 additional tbsp adobo sauce (reduce water by 1 tbsp to compensate). Vegetable oil may be substituted with avocado oil for higher smoke point or melted coconut oil for subtle sweetness. Queso fresco alternatives include cotija (saltier) or feta (tangier)—both should be freshly crumbled for texture. Lime zest may be replaced with 0.5 tsp lime juice, though zest provides superior aroma without additional moisture.
Dough rests best in a lightly oiled bowl covered with damp towel for 30-45 minutes at room temperature. Cooked tortillas stay pliable when stacked and wrapped in clean kitchen towel for up to 2 hours. For longer storage, cool completely before sealing in ziplock bags with parchment between layers—retains quality for 5 days refrigerated or 3 months frozen. Reheat in dry skillet over medium-low to restore freshness.
Why You’ll Love This Recipe
- No Fancy Tools: I’ve made these with just a bowl, a fork, and a rolling pin—no stand mixer, no food processor, not even a pastry cutter. The dough comes together faster than ordering takeout, and honestly? The slightly uneven edges make them taste even more homemade.
- Smoky Heat Kick: That first bite where the chipotle powder and adobo sauce hit? It’s like your regular tortilla grew up and got interesting. The warmth lingers just enough to make you reach for another, but it’s not overpowering—just a solid, smoky hug for whatever you stuff inside.
- Taco Night’s Secret Weapon: These aren’t just for tacos. I’ve used them for breakfast burritos (scrambled eggs + cheese = magic), quick quesadillas when friends drop by unannounced, and even as a wrap for leftover grilled chicken. They reheat like a dream, so I double the batch and stash extras in the freezer.
- Penny-Pincher Approved: A bag of flour, a can of chipotles in adobo (which lasts for weeks in the fridge), and pantry staples? That’s about $3 for a stack of tortillas that’d cost $6 at the store. Plus, no weird preservatives—just flour, spice, and a little oil. My wallet and my taste buds are equally happy.
Step-by-Step Instructions for Chipotle Tortillas
Master the technique for creating tender, flavorful tortillas with the perfect balance of smoky heat and citrus brightness.
Step 1: Combine Dry Ingredients for Optimal Texture
In a large mixing bowl, whisk together the 2 cups all-purpose flour, 1.5 tsp chipotle powder, 1 tsp kosher salt, 1 tsp baking powder, and 0.5 tsp granulated sugar. The chipotle powder should be evenly distributed throughout the flour mixture to ensure consistent flavor in every bite. I recommend sifting the baking powder first to prevent any clumping that could create uneven pockets in your tortillas.
The sugar serves a dual purpose here: it balances the smoky heat from the chipotle while promoting proper browning during cooking. Use a fork to break up any small lumps in the flour mixture, creating a uniform base for your dough. This step establishes the foundation for tortillas that are both flavorful and structurally sound.
Step 2: Incorporate Wet Ingredients for Proper Dough Development
Create a well in the center of your dry ingredients and add the 1 tbsp adobo sauce, 0.75 cup warm water, and 1 tbsp vegetable oil. Using a wooden spoon or silicone spatula, gradually incorporate the wet ingredients into the dry mixture, starting from the center and working outward. The water should be precisely 110°F—warm enough to activate the baking powder but not so hot it would cook the flour.
As the dough begins to form, you’ll notice it transitioning from shaggy to cohesive. Switch to kneading by hand once the mixture becomes too stiff for the spoon. Knead for 3-4 minutes until the dough is smooth and slightly tacky but not sticky. If the dough feels too wet, add additional flour 1 tsp at a time; if too dry, incorporate water 1 tsp at a time. The finished dough should spring back slightly when pressed with a finger.
Step 3: Rest and Portion the Dough for Even Cooking
Divide the dough into 8 equal portions (about 2.5 oz each) and roll them into smooth balls. Place the dough balls on a lightly floured surface, cover with a clean kitchen towel, and let rest for 20-30 minutes. This resting period allows the gluten to relax, making the tortillas easier to roll out and preventing them from shrinking during cooking.
While the dough rests, prepare your work surface by dusting it with the 1 tbsp cornstarch. The cornstarch creates a non-stick surface that’s more effective than regular flour for rolling out these tortillas. It also helps absorb any excess moisture, preventing the dough from sticking to your rolling pin or counter. Keep the dough balls covered during this entire process to prevent them from drying out.
Step 4: Roll and Cook the Tortillas to Perfect Doneness
Heat a cast-iron skillet or comal over medium-high heat until a drop of water sizzles and evaporates immediately. Working with one dough ball at a time, roll it out on your cornstarch-dusted surface to a 6-7 inch diameter, about ⅛-inch thick. The edges should be slightly thinner than the center to promote even cooking.
Carefully transfer the rolled tortilla to the dry skillet and cook for 30-45 seconds per side. You’re looking for small golden-brown spots to appear and the tortilla to puff slightly in places. Avoid pressing down on the tortilla with a spatula, as this prevents proper puffing. As each tortilla finishes cooking, wrap it in a clean kitchen towel to keep warm and pliable. The residual steam in the towel will help maintain the perfect texture.
Step 5: Finish and Serve with Authentic Garnishes
Once all tortillas are cooked, transfer them to a serving plate. Immediately sprinkle with the 0.5 tsp lime zest, rubbing it gently into the warm tortillas to release the citrus oils. The heat from the tortillas will amplify the lime’s bright aroma, creating a perfect counterpoint to the smoky chipotle flavor.
Garnish with the 1 tbsp finely chopped cilantro and serve with the 0.5 cup crumbled queso fresco on the side. For best results, serve the tortillas within 15 minutes of cooking while they’re still warm and at their most pliable. The queso fresco adds a creamy, slightly tangy element that complements the complex flavors of the tortillas beautifully.
Storing and Reheating This chipotle tortilla
Short-Term Storage
After cooking, let your tortillas cool completely to room temperature—this prevents condensation inside storage containers. Stack them with parchment paper between each layer to prevent sticking. I use a glass airtight container (like Pyrex) or a ziplock bag with all air pressed out. They’ll stay soft and pliable at room temperature for up to 2 days. 💡
Refrigerator Storage
For longer freshness, refrigerate your tortillas in an airtight container with a paper towel on top to absorb moisture. They’ll keep for 5-7 days this way. When ready to use, let them sit at room temperature for 15-20 minutes before reheating—they’ll become more flexible and less likely to crack.
Freezing for Longevity
Freeze tortillas in a single layer on a baking sheet for 1 hour before transferring to a freezer bag. This prevents them from sticking together. Label with the date—they maintain quality for 3 months. I recommend vacuum-sealing if you have the equipment, as it prevents freezer burn and extends shelf life.
Reheating on Stovetop
Heat a dry skillet or comal over medium-low heat and warm each tortilla for 20-30 seconds per side. Spritz with a tiny bit of water if they seem dry—the steam will restore softness. Avoid high heat, which can make them brittle. Wrap reheated tortillas in a clean towel to keep them warm and pliable.
Microwave Method
Place tortillas between damp paper towels on a microwave-safe plate. Heat on 50% power for 30-second intervals until warm. This gentle approach prevents rubbery texture. For best results, reheat only what you’ll use immediately—microwaved tortillas dry out faster once cooled.
Reviving Day-Old Tortillas
If your tortillas have dried out, wrap them in a damp kitchen towel and place in a 200°F oven for 5-10 minutes. The steam will rehydrate them beautifully. Alternatively, spray lightly with water and warm in a skillet. This trick works wonders for bringing back that fresh-off-the-comal quality. ✨
Nutrition Facts
Frequently Asked Questions
Can I make these without a comal?
A cast-iron skillet or nonstick pan works perfectly. Heat it over medium-high until water droplets dance. The key is maintaining consistent heat—adjust as needed to prevent burning.
Why did my tortillas turn out tough?
Toughness usually comes from over-kneading or insufficient resting. Knead just until smooth (3-4 minutes max), then let dough rest 20-30 minutes covered. This relaxes gluten for tender results.
How do I adjust the spice level?
Start with 1 tsp chipotle powder for mild heat. For more kick, add 1 tbsp adobo sauce or increase powder to 2 tsp. Balance with extra 0.5 tsp lime zest to brighten the flavor.
Can I use whole wheat flour?
Yes, but replace only 50% of all-purpose flour. Whole wheat absorbs more liquid, so add 1-2 tbsp extra water. Expect slightly denser tortillas with nuttier flavor.
What’s the best way to keep them warm?
Wrap cooked tortillas in a clean kitchen towel immediately. The steam keeps them soft for up to 2 hours. Avoid aluminum foil—it makes them soggy.

- 8 Bean Soup Recipe Crock Pot: Hearty Vegetable Medley in One Pot - September 25, 2026
- 4C Bread Crumbs Meatballs Recipe: Crispy Crust and Juicy Centers - September 25, 2026
- 6 Oz Chocolate Chip Cookie Recipe: Perfectly Balanced Crispy Edges and Chewy Hearts - September 25, 2026