
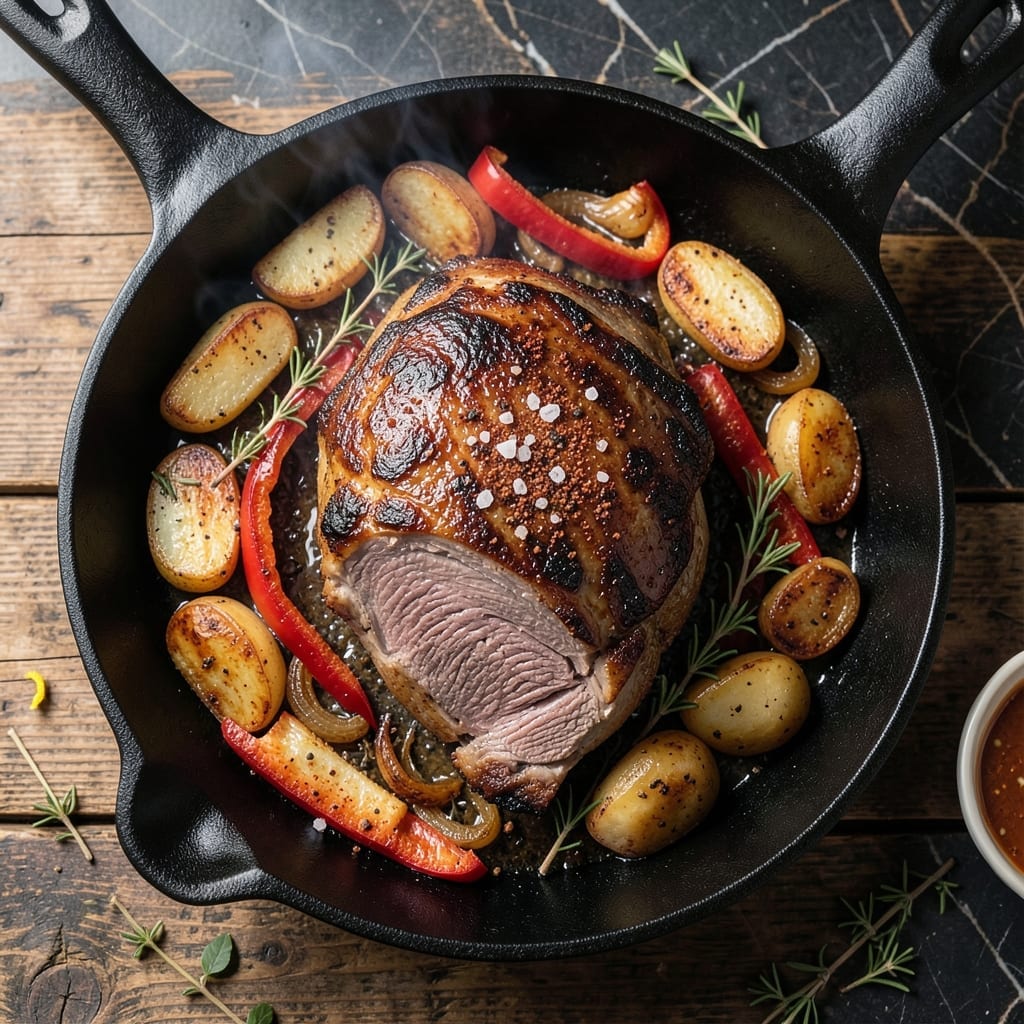
Grilling a chuck pot roast transforms tough beef into a fork-tender masterpiece with smoky char. This method proves that slow cooking isn’t the only path to melt-in-your-mouth results.
The secret lies in reverse searing—start low on the grill to render fat and break down collagen, then finish hot for that coveted crust. It’s a professional technique that delivers restaurant-quality beef at home.
What emerges is meat so tender it pulls apart effortlessly, with a deep, caramelized exterior that locks in juices. Every bite carries the essence of wood-fired grilling.
Serve sliced thick, with the natural jus spooned over the top. This is grilling at its most rewarding.
Ingredients for Chuck Pot Roast Grill
Transform tough beef into fork-tender perfection with these professional-grade ingredients for the grill.
| Ingredient | Amount | Notes |
|---|---|---|
| Chuck Pot Roast 🥩 | 3 lb | Well-marbled, trimmed of excess fat |
| Kosher Salt 🧂 | 1 ½ tbsp | Diamond Crystal preferred for even seasoning |
| Coarsely Ground Black Pepper 🌶️ | 1 tbsp | Freshly ground for optimal flavor |
| Garlic Powder 🧄 | 1 tbsp | Not garlic salt for pure flavor |
| Onion Powder 🧅 | 1 tbsp | Enhances depth of seasoning blend |
| Smoked Paprika 🌶️ | 1 tsp | Adds authentic smoky depth |
| Dried Thyme 🍃 | 1 tsp | Crushed between fingers to release oils |
| Dried Rosemary 🌿 | 1 tsp | Finely chopped for even distribution |
| Olive Oil 🫒 | 2 tbsp | High smoke point variety for searing |
| Beef Broth 💧 | 1 cup | Low-sodium for controlled seasoning |
| Red Wine 🍷 | ½ cup | Dry variety like Cabernet Sauvignon |
| Unsalted Butter 🧈 | 2 tbsp | For basting during final sear |
| Fresh Parsley 🌿 | ¼ cup | Chopped, for garnish |
The chuck roast is non-negotiable here—look for heavy marbling (those white fat streaks) at Whole Foods or your local butcher. This fat renders during cooking, basting the meat from within. Costco offers excellent quality at a better price point for larger cuts. Avoid pre-cut stew meat; a whole roast ensures even cooking and better texture. The beef broth should be high-quality, preferably homemade or a premium brand like Better Than Bouillon.
No red wine? Substitute with additional beef broth plus 1 tbsp balsamic vinegar for acidity. Smoked paprika can be replaced with regular, but you’ll lose some depth. Fresh rosemary and thyme work at a 1:1 ratio if you have them (double the amount since dried is more concentrated). The unsalted butter can be swapped for ghee if you prefer a higher smoke point. Don’t skip the kosher salt—its coarse texture adheres better to the meat.
The raw roast keeps in the fridge for 3-4 days or can be frozen for up to 12 months. Once cooked, store leftovers in airtight containers for 4-5 days. The flavors intensify overnight, making this even better as leftovers. Reheat gently in the juices to maintain moisture.
Why You’ll Love This Recipe
- Set It and Forget: I rub the chuck with salt, pepper, garlic and onion powders, slap it on the grill, and walk away—no babysitting required.
- Smoky Depth: That crust from the grill locks in juice while the dry rub turns into a bark that’s ridicously good.
- Feeds the Week: One roast gives me sandwiches, tacos, and a killer hash—honestly, it’s my meal-prep MVP.
- Pocket-Friendly Feast: Chuck roast is the budget cut that still wows, so I get a restaurant-quality dinner without the bill.
Step-by-Step Instructions for Chuck Pot Roast on the Grill
This method transforms the chuck pot roast into a smoky, fork-tender masterpiece with minimal effort.
Step 1: Season the Chuck Pot Roast Generously
Pat the 3 lb chuck pot roast completely dry with paper towels. In a small bowl, combine the 1.5 tbsp kosher salt, 1 tbsp coarsely ground black pepper, 1 tbsp garlic powder, 1 tbsp onion powder, 1 tsp smoked paprika, 1 tsp dried thyme, and 1 tsp dried rosemary.
Massage the seasoning blend evenly over every surface of the chuck pot roast, pressing firmly to ensure it adheres. The well-marbled fat will render beautifully during cooking, infusing the meat with flavor. Let the seasoned roast sit at room temperature for 30-45 minutes to allow the salt to penetrate the surface.
Step 2: Sear the Roast Over Direct Heat
Preheat your grill to high heat (about 450-500°F), ensuring the grates are clean and well-oiled. Brush the chuck pot roast lightly with 2 tbsp olive oil to help it develop a deep sear. Place the roast directly over the hottest part of the grill.
Sear for 4-5 minutes per side until a dark, caramelized crust forms. You’ll notice the edges begin to char slightly—that’s the smoky depth developing. Resist the urge to move the roast; let it sear undisturbed to build a proper crust. This step locks in juices and creates a flavorful foundation for the final dish.
Step 3: Slow-Cook with Liquid for Tenderness
Once seared, move the chuck pot roast to a cooler part of the grill (indirect heat). In a small saucepan, combine the 1 cup beef broth and 0.5 cup red wine, warming it slightly. Place a disposable aluminum pan beneath the roast on the grill grates to catch drippings.
Pour the warm broth and wine mixture into the pan, then place the roast on the grill grate above it. Cover the grill and maintain a temperature of 275-300°F. Cook for 2.5 to 3 hours, basting the roast occasionally with the pan juices. The meat is done when it reaches an internal temperature of 195-200°F and shreds easily with a fork.
Step 4: Rest and Finish with Butter and Parsley
Carefully transfer the chuck pot roast to a cutting board and tent loosely with foil. Let it rest for 15-20 minutes to allow the juices to redistribute. This step ensures the meat stays moist and tender when sliced or pulled apart.
While the roast rests, melt the 2 tbsp unsalted butter and stir it into the pan juices for a rich finishing touch. Slice or shred the roast against the grain, then drizzle with the buttery pan juices. Garnish with 0.25 cup fresh parsley for a pop of color and freshness before serving.
Pro Tips For Making Chuck Pot Roast Grill
- Sear it hard: Crank the grill to high and sear the chuck roast for 3-4 minutes per side—I learned this the hard way after my first attempt came out gray and sad.
- Salt it first: Hit the roast with kosher salt at least 40 minutes before grilling, or even overnight. Sounds weird, but it works: the salt penetrates deep and seasons every bite.
- Skip cold meat: Let the chuck sit at room temp for 30 minutes before grilling. After ruining a cut by tossing it straight from the fridge, I finally figured out why it was tough.
- Double season: Pat the roast dry, season heavily with salt, pepper, garlic and onion powder, then sear and season again before resting. My grandmother swore by this, and she was right.
Common Mistakes When Making This Recipe
Skipping the Rest
I see people slice into their roast right off the grill, but this is a cardinal sin. The juices need 15-20 minutes to redistribute after cooking. Cutting too soon sends all that flavor onto your cutting board instead of staying in the meat. That rest time transforms a good roast into a great one. 💡
Ignoring Internal Temp
Don’t rely on time alone—195-200°F internal temperature is your target. I use a ThermoWorks instant-read thermometer to check multiple spots. The collagen in chuck breaks down completely at this range, creating that fork-tender texture we’re after.
Wrong Heat Zones
Reverse searing requires two distinct heat zones. If your entire grill is blasting at 450°F, you’ll burn the exterior before the center cooks. Set up one side for direct searing and the other for 275-300°F indirect heat. This control defines the difference between success and disappointment.
Neglecting the Pan
Place a disposable aluminum pan under the roast to catch drippings. Without it, you’ll lose precious juices that could be used for basting. I add 1 cup beef broth and 0.5 cup red wine to this pan for extra moisture and flavor. Those pan juices become liquid gold for serving.
Overcrowding the Grill
Give your roast space to breathe. Crowding with other foods creates uneven cooking and prevents proper air circulation. These 3 lb chuck roasts need room to develop that perfect crust. I cook nothing else on my grill when I’m making this dish.
Using Lean Cuts
The marbling in chuck is what makes this work. I’ve tried leaner cuts, and they turn out dry and tough. Look for that well-marbled fat streaking through the meat—it’s your insurance policy against dryness during the long cook. Trust me on this one.
Nutrition Facts
Frequently Asked Questions
What’s the best way to check doneness?
Use an instant-read thermometer to verify the internal temperature reaches 195-200°F. This ensures the collagen has fully broken down for that perfect fork-tender texture.
Can I use a gas grill for this?
Set up two heat zones: one side at 450-500°F for searing and the other at 275-300°F for slow cooking. This method works on any grill type.
Why does the meat need to rest?
Resting for 15-20 minutes allows juices to redistribute throughout the roast. Skipping this step means those flavorful juices will end up on your cutting board instead of in the meat.
What if my grill doesn’t have a temperature gauge?
Use the hand test: hold your hand 5 inches above the grate. If you can only hold it for 1-2 seconds, it’s high heat; 4-5 seconds is medium. Adjust your zones accordingly.

- 6 Oz Chocolate Chip Cookie Recipe: Perfectly Balanced Crispy Edges and Chewy Hearts - September 25, 2026
- 6-Inch Coffee Cake Recipe: Vanilla Bean Swirls and Buttery Streusel Topping - September 25, 2026
- 1 Hour Soup Recipe: Velvety Richness Without the Wait - September 25, 2026