
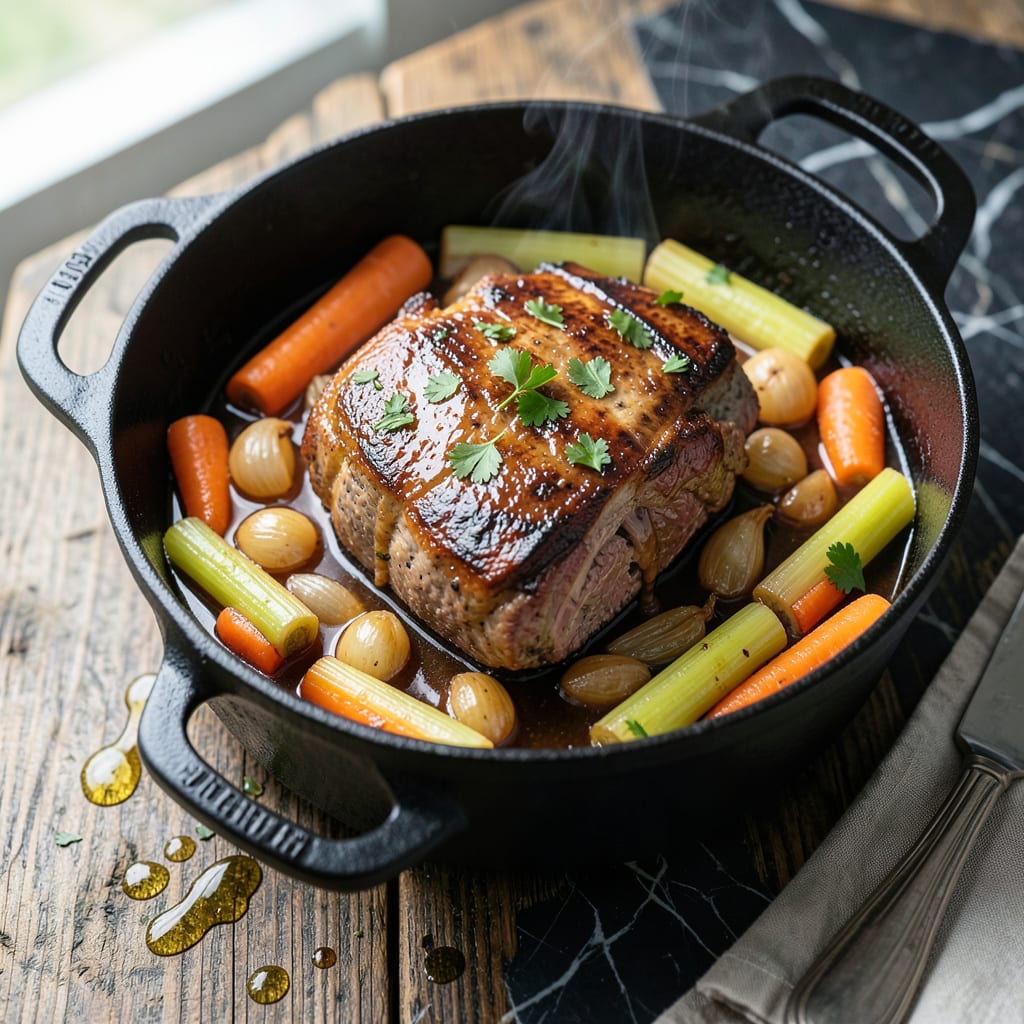
This Dutch oven method transforms tough chuck roast into fall-apart tender meat with rich, deeply flavored gravy. The secret lies in low, slow braising that coaxes maximum flavor from simple ingredients.
Root vegetables absorb the savory broth as they cook, creating a complete meal that’s hearty yet elegant. Perfect for Sunday suppers or special occasions when you want restaurant-quality results at home.
Ingredients for Chuck Pot Roast
Transform tough chuck into restaurant-quality comfort with these simple, flavorful components.
| Ingredient | Amount | Notes |
|---|---|---|
| Chuck Roast 🥩 | 3 lb | Well-marbled, boneless preferred |
| Kosher Salt 🧂 | 1 ½ tsp | Diamond Crystal preferred |
| Black Pepper 🌶️ | 1 tsp | Freshly ground for best flavor |
| Olive Oil 🫒 | 2 tbsp | Extra-virgin for searing |
| Yellow Onion 🧅 | 1 whole | Large, diced into chunks |
| Garlic Cloves 🧄 | 6 cloves | Peeled, smashed for depth |
| Carrots 🥕 | 4 whole | Large, cut into 2-inch pieces |
| Celery Stalks 🌿 | 3 pieces | Cut into 2-inch pieces |
| Russet Potatoes 🥔 | 1 ½ lb | Peeled, cut into chunks |
| Tomato Paste 🍅 | 2 tbsp | For umami depth in gravy |
| Beef Broth 💧 | 4 cups | Low-sodium preferred for control |
| Dry Red Wine 🍷 | 1 cup | Bold variety like Cabernet |
| Fresh Thyme Sprigs 🌿 | 4 pieces | Plus 1 tsp chopped leaves |
| Bay Leaves 🍃 | 2 pieces | Dried, for aromatic depth |
| All-Purpose Flour 🌾 | 2 tbsp | For thickening gravy if needed |
The chuck roast is non-negotiable here—well-marbled chuck (not round or sirloin) delivers the fall-apart texture. Source from Costco for consistent quality at a good price, or ask your butcher for a whole chuck to cube yourself. Look for vibrant red color with visible fat streaks. The root vegetables should be uniform in size to ensure even cooking—organic when possible for best flavor.
No red wine? Substitute with additional beef broth plus 1 tbsp balsamic vinegar for acidity. Out of fresh thyme? Dried thyme at one-third the amount works, but add it with the liquids to rehydrate. Tomato paste in a tube (like Amoretti) prevents waste. If using pre-cut vegetables, choose thick-cut to prevent them from turning mushy during the long braise.
This tastes even better the next day. Store in an airtight container in the fridge for up to 4 days, or freeze for 3 months. Reheat gently on the stove with a splash of broth to restore the gravy’s consistency. Always bring chuck roast to room temperature before searing for even cooking.
Why You’ll Love This Recipe
- Set It and Forget It: I brown the chuck roast, toss in onions, salt, and pepper, then let the oven do the rest.
- Melt-in-Your-Mouth Good: The slow cook transforms the chuck into tender, juicy perfection every time.
- Sunday Dinner, Tuesday Leftovers: One roast feeds us Sunday, then turns into sandwiches or tacos by Tuesday.
- Budget Hero: A cheap cut like chuck becomes a showstopper with just olive oil and basic seasonings.
Step-by-Step Instructions for Dutch Oven Braised Chuck Roast with Root Vegetables
This method delivers fork-tender beef and rich gravy with root vegetables every time.
Step 1: Season and Sear the Chuck Roast
Pat the 3 lb chuck roast dry with paper towels, then season all sides generously with 1.5 tsp kosher salt and 1 tsp black pepper. I press the seasoning in firmly to ensure it adheres during searing.
Heat 2 tbsp olive oil in a Dutch oven over medium-high heat until shimmering. Add the roast and sear for 4-5 minutes per side until a deep, dark brown crust forms. Don’t rush this step—proper browning builds the flavor foundation for the entire dish.
Transfer the seared roast to a plate and set aside.
Step 2: Sauté Aromatics and Build the Braising Liquid
In the same Dutch oven, add the diced yellow onion, carrots, and celery stalks. Cook for 5-6 minutes, stirring occasionally, until the onions soften and begin to brown slightly.
Add the 6 cloves garlic cloves and 2 tbsp tomato paste, stirring for 1-2 minutes until the tomato paste darkens in color. This step develops a rich umami base. Pour in the 1 cup dry red wine to deglaze, scraping up all the browned bits from the bottom of the pot.
Stir in the 4 cups beef broth, 4 pieces fresh thyme sprigs, and 2 pieces bay leaves. Bring to a simmer.
Step 3: Braise the Roast with Vegetables
Return the seared chuck roast to the Dutch oven, along with its accumulated juices. Add the 1.5 lb russet potatoes cut into chunks, ensuring they’re submerged in the liquid. The potatoes should be completely covered to cook evenly.
Cover the Dutch oven and transfer it to a preheated 325°F oven. Braise for 3 to 3.5 hours, turning the roast once halfway through, until the meat is fork-tender and pulls apart easily with minimal resistance.
Step 4: Thicken the Gravy and Serve
Remove the roast and vegetables from the Dutch oven and set aside. Skim any excess fat from the surface of the braising liquid. Place the Dutch oven on the stovetop over medium heat.
Mix 2 tbsp all-purpose flour with 2 tbsp of the hot braising liquid to create a slurry, then whisk it into the remaining liquid. Simmer for 3-4 minutes until the gravy thickens enough to coat the back of a spoon.
Strain the gravy if desired, then pour it over the roast and vegetables. The gravy should be rich, glossy, and full of depth. Serve hot, with the vegetables arranged around the roast.
Pro Tips For Making Chuck Pot Roast
- Dry the Meat: Pat the chuck roast dry with paper towels before seasoning—it’s the only way to get that deep, flavorful sear in olive oil. I learned this the hard way after years of steaming my roast instead of browning it.
- Salt Aggressively: Use more kosher salt than you think, especially on a thick cut like chuck. My grandmother swore by this, and she was right: it’s the difference between bland and bold.
- Don’t Rush the Sear: Let the roast sit in the hot oil for at least 3-4 minutes per side until it releases easily—this guarantees a proper crust. After burning a few batches, I finally figured out that patience here pays off.
- Slice the Onions Thin: Thinly sliced yellow onions melt into the pot and sweeten the braising liquid. Sounds weird, but it works: the texture blends in without overpowering the beef.
Perfect Pairings for chuck pot roast
Wine Pairings
A bold Cabernet Sauvignon complements the rich beef flavors beautifully—I love a Napa Valley vintage for its dark fruit notes and firm tannins that cut through the fat. For a budget-friendly option, try Josh Cellars Cabernet. 🍷
Beer Options
A malty amber ale like Fat Tire from New Belgium pairs wonderfully with the savory depth of this dish. The caramel notes in the beer mirror the caramelization of the roast. For darker beer lovers, a porter with coffee undertones works surprisingly well.
Side Dish Ideas
Serve with buttery mashed potatoes to soak up the gravy, or try creamy polenta for an Italian twist. I make mine with 4 cups whole milk and 1 cup polenta, stirring constantly for 20 minutes until thick and velvety.
Bread Pairings
A crusty sourdough or baguette is perfect for mopping up every last drop of gravy. Warm it in the oven at 350°F for 5 minutes before serving. I love the chewy texture of San Francisco-style sourdough with this meal. 🔥
Simple Salad
Balance the richness with a crisp green salad dressed with a bright vinaigrette. I toss 6 cups mixed greens with 3 tbsp olive oil, 1 tbsp balsamic vinegar, and 1 tsp Dijon mustard for contrast.
Vegetable Addition
For extra color and nutrition, serve with roasted Brussels sprouts. Toss 1 lb halved sprouts with 2 tbsp olive oil, salt, and pepper, then roast at 400°F for 20-25 minutes until crispy.
Nutrition Facts
Frequently Asked Questions
What’s the best cut for a tender result?
Always use well-marbled chuck roast for the most tender, flavorful outcome. The fat content breaks down during long, slow cooking, creating that melt-in-your-mouth texture. Avoid leaner cuts like round or sirloin.
Can I make this in a slow cooker instead?
Yes! Sear the meat first, then transfer everything to a slow cooker. Cook on low for 8-10 hours or high for 5-6 hours. The Dutch oven method gives better browning, but a slow cooker works in a pinch.
How do I know when it’s done?
The meat is ready when it pulls apart easily with a fork. For best results, use a meat thermometer—it should read at least 195°F internally. Don’t rush it; low and slow is key.

- 4C Bread Crumbs Meatballs Recipe: Crispy Crust and Juicy Centers - September 25, 2026
- 6 Oz Chocolate Chip Cookie Recipe: Perfectly Balanced Crispy Edges and Chewy Hearts - September 25, 2026
- 6-Inch Coffee Cake Recipe: Vanilla Bean Swirls and Buttery Streusel Topping - September 25, 2026