
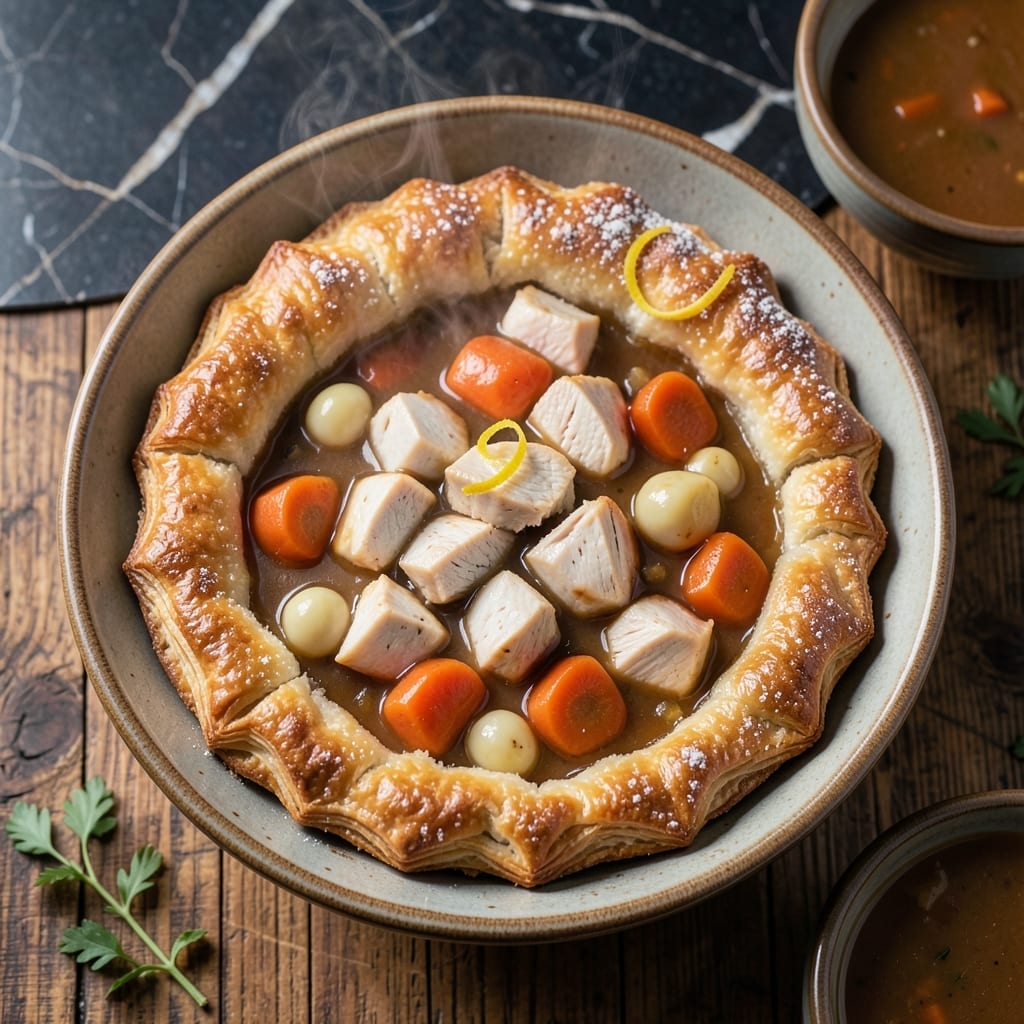
This chicken pot pie delivers the flaky crust and hearty filling that made the restaurant version famous. The key is a perfect balance of tender chicken, creamy herb sauce, and mixed vegetables all encased in golden pastry.
I developed this recipe after years of trying to replicate that signature Claim Jumper texture and taste. The double crust technique ensures a buttery, flaky top and bottom that holds up to the rich, savory filling without getting soggy.
What you get is comfort food at its finest—creamy chicken and vegetable filling with just the right herb seasoning, all baked until bubbling and golden. The crust stays crisp and layered, just like the original.
Serve this for a cozy family dinner or special occasion. The process is simpler than you might expect.
Ingredients for Claim Jumper Chicken Pot Pie
Double crust, creamy filling, and those signature flaky layers. Nothing beats this comfort classic.
| Ingredient | Amount | Notes |
|---|---|---|
| All-Purpose Flour 🌾 | 2 ½ cups | Plus extra for dusting |
| Unsalted Butter 🧈 | 1 cup | Cold, cubed for crust |
| Ice Water 💧 | ½ cup | Plus 1 tbsp as needed |
| Salt 🧂 | 1 tsp | Divided for crust and filling |
| Boneless Skinless Chicken Breasts 🍗 | 1 ½ lb | Cut into 1-inch cubes |
| Carrots 🥕 | 2 whole | Peeled and diced |
| Celery Stalks 🥬 | 2 whole | Diced for filling |
| Frozen Peas 🌱 | 1 cup | No need to thaw |
| Yellow Onion 🧅 | 1 whole | Finely chopped |
| Garlic Cloves 🧄 | 3 cloves | Minced for sauce |
| Butter 🧈 | ¼ cup | Unsalted, for roux |
| All-Purpose Flour 🌾 | ¼ cup | For thickening sauce |
| Chicken Broth 🥣 | 1 ½ cups | Low-sodium preferred |
| Whole Milk 🥛 | ¾ cup | For creamy sauce |
| Dried Thyme 🌿 | 1 tsp | For herb seasoning |
| Dried Rosemary 🌿 | 1 tsp | Crushed for flavor |
| Black Pepper 🌶️ | ½ tsp | Freshly ground |
The crust is everything here. King Arthur Flour gives the best texture for that flaky finish—just keep it cold (the good stuff, not the pre-shredded kind). I grab my butter from Trader Joe’s or Costco—European-style if you want to splurge. For the chicken, boneless thighs work too (trust me on the full-fat version), but breasts stay more uniform. Don’t skip the ice water—it’s what makes the pastry tender.
No fresh herbs? Dried work at one-third the amount—just rub between your fingers to release the oils. Out of peas? Corn or green beans are great swaps (frozen works in a pinch). Whole milk not on hand? Half-and-half or cream makes it even richer. The broth can be swapped for vegetable if you prefer. And yes, store-bought pie crust works—just don’t expect that same flaky magic.
Bake and cool completely before storing—keeps the crust crisp. Leftovers hold 3-4 days in the fridge, or freeze for 2 months (don’t skip this part). Reheat covered in foil to keep the top from browning too much. Worth the extra minute to let it rest before slicing.
Why You’ll Love This Recipe
- One Bowl Magic: I love that the flaky crust comes together with just flour, butter, ice water, and salt—no fancy tools, no mess.
- That Golden Crust: The butter in the crust bakes up so crispy it shatters, while the chicken stays juicy underneath.
- Feeds the Crew: Honestly, this pot pie stretches to feed six with leftovers, and it reheats like a dream the next day.
- Pantry Friendly: Between us, I always have these ingredients on hand, so dinner’s saved even on a chaotic weeknight.
Step-by-Step Instructions for Flaky Chicken Pot Pie
Here’s how I get that perfect golden crust and creamy filling every time.
Step 1: Prepare the Flaky Crust
In a large bowl, combine 2.5 cups all-purpose flour and 1 tsp salt. Cut in 1 cup cold unsalted butter (cubed) using a pastry cutter or your fingers until the mixture resembles coarse crumbs with some pea-sized butter pieces visible.
Gradually add 0.5 cup ice water, 1 tbsp at a time, mixing just until the dough comes together. It should hold when pressed but not be sticky. Divide the dough into two equal portions, flatten into discs, wrap in plastic, and refrigerate for 1 hour.
This chilling step is non-negotiable—it relaxes the gluten and keeps the butter cold for maximum flakiness.
Step 2: Make the Creamy Herb Filling
In a large skillet, melt 0.25 cup butter over medium heat. Add 1 whole yellow onion (finely chopped), 2 carrots (peeled and diced), and 2 celery stalks (diced). Cook for 5-7 minutes until softened.
Add 3 cloves garlic cloves (minced) and cook for 30 seconds until fragrant. Sprinkle 0.25 cup all-purpose flour over the vegetables and stir for 1 minute to cook off the raw flour taste.
Slowly whisk in 1.5 cups chicken broth and 0.75 cup whole milk. Stir in 1.5 lb boneless skinless chicken breasts (cut into 1-inch cubes), 1 cup frozen peas, 1 tsp dried thyme, 1 tsp dried rosemary, and 0.5 tsp black pepper. Simmer for 10-12 minutes until the chicken is cooked through and the sauce thickens.
Step 3: Assemble and Bake
Roll out one dough disc on a floured surface to fit a 9-inch pie dish. Transfer the crust to the dish, pressing it into the bottom and sides. Trim any excess, leaving a ½-inch overhang.
Pour the filling into the crust. Roll out the second dough disc and place it over the filling. Trim, seal, and crimp the edges, then cut several slits in the top for steam to escape. For extra flakiness, brush the top with a little milk.
Bake at 375°F for 45-50 minutes until the crust is golden brown and the filling is bubbling. If the edges brown too quickly, cover them with foil.
Step 4: Rest and Serve
Let the pot pie rest for 10-15 minutes after baking. This allows the filling to set slightly, making it easier to slice.
Serve warm, with the top crust breaking apart into flaky layers. Each serving should have a generous portion of creamy chicken and vegetables under that perfect golden crust.
Pro Tips For Making Claim Jumper Chicken Pot Pie
- Chill the Dough: Give your crust dough at least 30 minutes in the fridge before rolling—I learned this the hard way after my first few pies turned into tough, shrinking disasters.
- Dry the Chicken: Pat those boneless breasts completely dry before searing; it’s the only way to get that golden crust instead of steamed, sad meat.
- Salt the Flour: Mix ½ teaspoon of salt directly into your all-purpose flour before cutting in the butter—it distributes flavor evenly and prevents a bland crust.
- Use Ice-Cold Water: Keep your water truly icy (I float a few cubes in mine) and add it slowly; this keeps the butter from melting too soon and guarantees flaky layers.
Flavor Customization for This Dish
Herb Variations
Swap the dried thyme and rosemary for 1 tbsp fresh sage and 1 tsp poultry seasoning for a Thanksgiving-inspired twist. I love this combo during the holidays—it adds warmth and depth to the filling without overpowering the chicken.
Spicy Kick
Add ½ tsp cayenne pepper or 1 chopped jalapeño to the filling for heat lovers. A dash of hot sauce stirred in at the end works too. Just 1 tbsp of Franks RedHot gives a subtle, tangy spice that complements the creamy sauce beautifully.
Creamier Sauce
Replace 0.75 cup whole milk with heavy cream for an ultra-rich filling. For a lighter version, use half-and-half instead. I find the cream version makes the dish feel extra indulgent, perfect for special occasions. 💛
Vegetable Swaps
Swap frozen peas for 1 cup corn kernels or diced green beans. For extra texture, add ½ cup diced potatoes to the filling. These swaps keep the dish hearty while letting you use seasonal produce.
Cheesy Upgrade
Sprinkle ½ cup shredded cheddar or Gruyère over the filling before adding the top crust. The cheese melts into the sauce, creating a gooey, irresistible layer. I use Cabot sharp cheddar for a bold flavor boost.
Top Crust Twist
For a decorative finish, use a lattice top instead of a full crust. Cut the second dough disc into 1-inch strips and weave them over the filling. Brush with egg wash and sprinkle 1 tbsp coarse salt for extra crunch and shine. 🔥
Nutrition Facts
Frequently Asked Questions
Can I use store-bought pie crust instead?
Yes, but the texture won’t match the homemade version. For best results, use 2 refrigerated pie crusts and follow the assembly steps. The filling is rich enough to carry the dish even with shortcuts.
How do I prevent a soggy bottom crust?
Blind-bake the bottom crust for 10 minutes at 375°F before adding filling. Also, ensure the filling is thick (not runny) before assembling. This creates a barrier against moisture.
Can I make this ahead of time?
Assemble the pie (unbaked), wrap tightly, and refrigerate for up to 24 hours. Bake as directed, adding 5-10 minutes if cold. Freeze for up to 1 month—thaw overnight before baking.
What’s the best way to reheat leftovers?
Cover with foil and warm at 350°F for 15-20 minutes. For single servings, microwave for 1-2 minutes with a damp paper towel over the top to retain moisture.

- 6 Oz Chocolate Chip Cookie Recipe: Perfectly Balanced Crispy Edges and Chewy Hearts - September 25, 2026
- 6-Inch Coffee Cake Recipe: Vanilla Bean Swirls and Buttery Streusel Topping - September 25, 2026
- 1 Hour Soup Recipe: Velvety Richness Without the Wait - September 25, 2026