
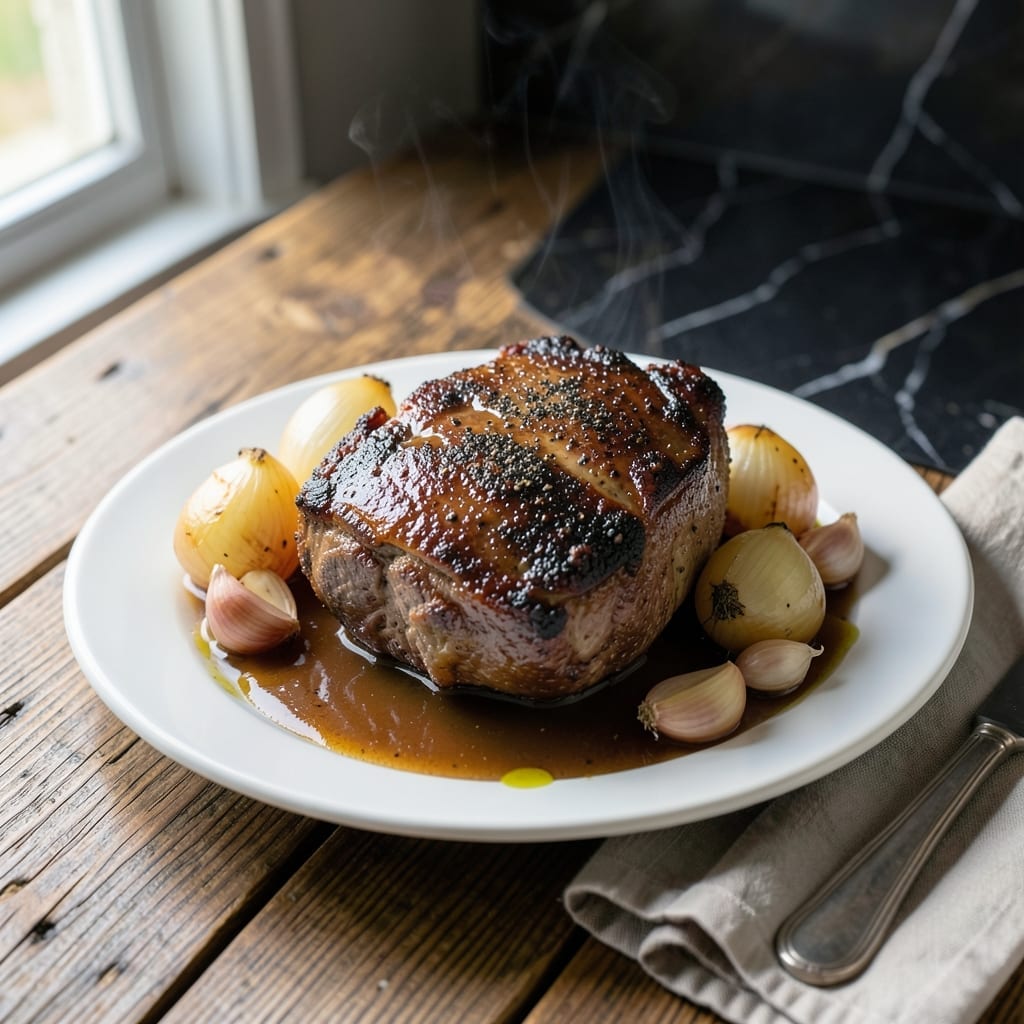
Sundays were made for this timeless Dutch oven tradition. I’ve perfected a method that transforms tough cuts into fall-apart tender beef with rich, deeply flavored gravy.
The secret lies in proper browning and low, slow braising. This approach builds layers of flavor that define a truly classic pot roast, using simple ingredients and traditional techniques.
What emerges after hours in the oven is meat so tender it nearly dissolves, surrounded by vegetables that have absorbed all the savory goodness. The aroma alone announces dinner is ready.
This is the kind of dish that gathers everyone at the table. Here’s how to make it right.
Ingredients for Classic Beef Pot Roast
Transform tough beef into fall-apart tenderness with these classic braising ingredients and aromatics.
| Ingredient | Amount | Notes |
|---|---|---|
| Beef Chuck Roast 🥩 | 3 lb | Well-marbled, trimmed of excess fat |
| Kosher Salt 🧂 | 2 tsp | Diamond Crystal preferred for even seasoning |
| Freshly Ground Black Pepper 🌶️ | 1 tsp | Coarse grind for texture |
| Olive Oil 🫒 | 2 tbsp | Divided for searing and sautéing |
| Yellow Onion 🧅 | 2 whole | Large, cut into thick wedges |
| Garlic Cloves 🧄 | 6 cloves | Smashed for maximum flavor release |
| Carrots 🥕 | 4 whole | Peeled, cut into 3-inch chunks |
| Yukon Gold Potatoes 🥔 | 1 ½ lb | Peeled, cut into large chunks |
| Fresh Thyme Sprigs 🌿 | 4 sprigs | Tied with kitchen twine |
| Fresh Rosemary Sprigs 🌿 | 2 sprigs | Tied with kitchen twine |
| Bay Leaves 🍃 | 2 whole | Dried, for aromatic depth |
| Beef Stock 💧 | 3 cups | Low-sodium preferred for control |
| Tomato Paste 🍅 | 2 tbsp | For umami richness in gravy |
| Dry Red Wine 🍷 | 1 cup | Bold variety like Cabernet Sauvignon |
| All-Purpose Flour 🌾 | 2 tbsp | For thickening the gravy |
The beef is non-negotiable here. Chuck roast with good marbling (look for those white fat streaks) is ideal—it breaks down beautifully during the long braise. Costco and Whole Foods carry excellent pre-cut options, but any well-stocked butcher counter will have what you need. Avoid lean cuts like sirloin; they’ll turn out dry and stringy. The fresh herbs should be vibrant and fragrant—wilted sprigs won’t deliver the same depth.
Out of red wine? Substitute an extra cup of beef stock plus 1 tbsp balsamic vinegar for similar depth. No fresh thyme or rosemary? Dried herbs at one-third the amount work in a pinch, but fresh is strongly preferred. For the stock, Better Than Bouillon paste makes a rich substitute if you don’t have liquid stock on hand. The tomato paste can be swapped with 1 tbsp ketchup (yes, really) if that’s all you’ve got.
The roast can be refrigerated in its braising liquid for up to 4 days—it actually improves as the flavors meld. Freeze portions for up to 3 months in airtight containers. Always bring refrigerated leftovers to room temperature before reheating to maintain that tender texture (trust me on this).
Why You’ll Love This Recipe
- Set It and Forget: I brown the chuck roast, add onions, salt, pepper, and let the oven do the work for hours.
- Sunday or Wednesday: Honestly, it’s just as good for a lazy weekend as it is for a quick weeknight dinner.
- Leftovers for Days: One roast feeds us for two meals, and the sandwiches the next day might be even better.
Step-by-Step Instructions for Classic Beef Pot Roast
Master the art of Dutch oven braising with this time-tested approach to melt-in-your-mouth beef.
Step 1: Sear and Season the Beef Chuck Roast
Pat the 3 lb Beef Chuck Roast thoroughly dry with paper towels, then season all sides generously with the 2 tsp Kosher Salt and 1 tsp Freshly Ground Black Pepper. This ensures a deep, flavorful crust during searing.
Heat 1 tbsp Olive Oil in a Dutch oven over medium-high heat until shimmering. Sear the roast for 4-5 minutes per side until deeply browned and a rich fond forms on the bottom of the pot. Transfer the beef to a plate and set aside.
Step 2: Sauté Aromatics and Build the Braising Liquid
Add the remaining 1 tbsp Olive Oil to the Dutch oven. Sauté the 2 whole Yellow Onion (cut into wedges) and 4 whole Carrots for 5 minutes until they begin to soften. Stir in the 6 cloves Garlic Cloves and 2 tbsp Tomato Paste, cooking for 1-2 minutes until fragrant.
Pour in the 1 cup Dry Red Wine and scrape up the browned bits from the bottom with a wooden spoon. Simmer for 3 minutes to reduce slightly, then stir in the 3 cups Beef Stock, 2 whole Bay Leaves, 4 sprigs Fresh Thyme Sprigs, and 2 sprigs Fresh Rosemary Sprigs.
Step 3: Braise the Beef with Vegetables
Return the seared beef to the Dutch oven, nestling it among the vegetables. The liquid should come about halfway up the roast. Cover and transfer to a preheated 325°F oven. Braise for 2 hours, then add the 1.5 lb Yukon Gold Potatoes (cut into chunks) and continue cooking.
Braise for an additional 1 to 1.5 hours until the beef is fork-tender and easily pulls apart. The vegetables should be soft and infused with the rich braising liquid. Turn the beef occasionally to ensure even cooking and basting.
Step 4: Thicken the Gravy and Finish
Remove the beef and vegetables to a serving platter, tenting with foil to keep warm. Skim excess fat from the braising liquid, then place the Dutch oven over medium heat. Whisk in the 2 tbsp All-Purpose Flour and simmer for 3-5 minutes until the gravy thickens to your desired consistency.
Strain the gravy if you prefer a smoother texture, then pour it over the beef and vegetables. Discard the herb sprigs and bay leaves. Let the pot roast rest for 10-15 minutes before serving to allow the juices to redistribute.
Pro Tips For Making Classic Beef Pot Roast
- Sear It Hard: I learned this the hard way—get your pan screaming hot before adding the chuck roast, and don’t move it for at least 3-4 minutes per side. That deep brown crust is what gives your pot roast its rich, meaty flavor.
- Season Overnight: Sounds weird, but it works: salt the roast generously the night before and leave it uncovered in the fridge. The dry brine penetrates deeper and guarantees even seasoning throughout the meat.
- Skip the Cold Meat: After ruining a roast by tossing it straight from the fridge into the pot, I now always let the chuck sit at room temperature for 45 minutes first. It cooks more evenly and sears better—no tough, uneven edges.
- Deglaze Well: Once the meat’s out, pour about ½ cup of water or stock into the pan and scrape up every browned bit. Those stuck-on bits are pure flavor, and skipping this step leaves your pot roast tasting flat.
Regional Styles of This Dish
New England Style
This version adds 1 cup apple cider and 2 tbsp apple cider vinegar to the braising liquid for a subtle sweet-tart note. The acidity helps tenderize the beef while adding bright complexity. I love how the cider pairs with the beef’s richness. 💛
Texas Chuck Wagon
Increase the heat with 1 chopped chipotle pepper in adobo and 1 tsp smoked paprika added to the searing stage. Use Lone Star beer instead of wine for the braising liquid. The smoky depth makes this a Lone Star State favorite.
French Daube
Add ½ cup pitted niçoise olives and 2 tbsp capers during the final 30 minutes of braising. Use Côtes du Rhône wine for authenticity. The briny elements cut through the richness beautifully.
Midwest Comfort
Incorporate 1 cup cream of mushroom soup and ½ cup sour cream into the gravy at the end. This creamy variation is a heartland staple. I prefer Campbell’s for that nostalgic flavor.
Italian Sunday Gravy
Add 1 cup crushed San Marzano tomatoes and ½ cup dry white wine to the braising liquid. Include 1 lb Italian sausage (sweet or spicy) browned with the beef. The tomatoes create a rich, sauce-like consistency. 🔥
Nutrition Facts
Frequently Asked Questions
Why do I need to sear the beef first?
Searing creates a flavorful crust through the Maillard reaction. This step also builds a rich fond in the pot, which deepens the gravy’s taste. Skip it and you’ll miss out on complex, meaty depth.
Can I use a slow cooker instead?
Yes, but browning the meat first is still crucial. Cook on low for 8-10 hours or high for 5-6 hours with the same ingredients. The texture will be slightly different but still delicious.
How do I know when it’s done?
The beef should pull apart easily with a fork. Internal temperature should reach at least 195°F for perfect tenderness. Don’t rely on time alone—always check for doneness.
What if my gravy is too thin?
Mix 1 tbsp cornstarch with 1 tbsp cold water and stir into simmering gravy. Cook for 2-3 minutes until thickened. Avoid over-thickening as it will continue to set as it cools.

- 6 Oz Chocolate Chip Cookie Recipe: Perfectly Balanced Crispy Edges and Chewy Hearts - September 25, 2026
- 6-Inch Coffee Cake Recipe: Vanilla Bean Swirls and Buttery Streusel Topping - September 25, 2026
- 1 Hour Soup Recipe: Velvety Richness Without the Wait - September 25, 2026