
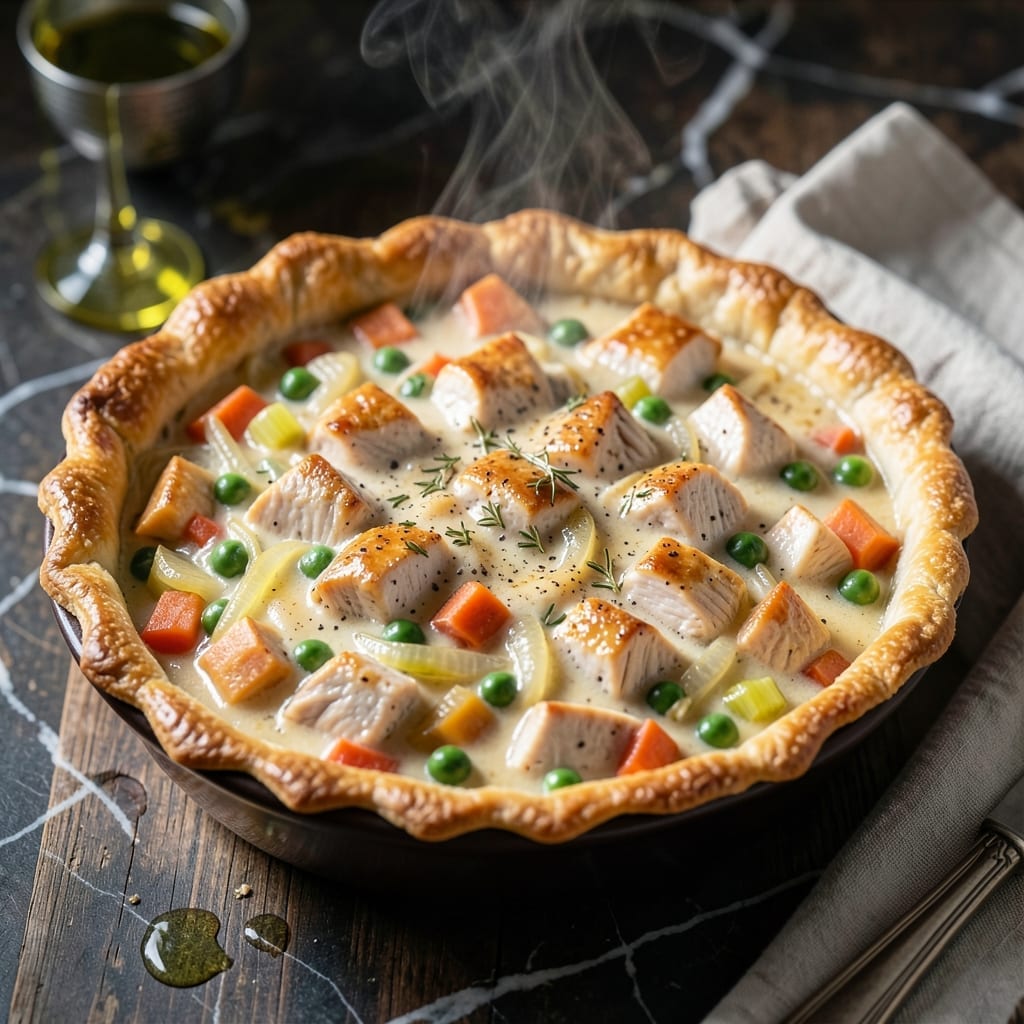
There’s a reason chicken pot pie remains a timeless favorite—it delivers comfort in every bite. This version stays true to the classic with tender chicken, hearty vegetables, and a creamy sauce all encased in flaky, golden crust.
The filling comes together with a simple roux-based sauce that coats the chicken, peas, and carrots without overpowering their natural flavors. The double crust ensures a satisfying crunch with every forkful.
What makes this dish special is its ability to feel both nostalgic and freshly made. The aroma alone signals a meal that warms the soul as much as it fills the stomach.
Perfect for family dinners or cozy nights in, this pot pie is as rewarding to make as it is to eat.
Ingredients for Classic Chicken Pot Pie
Tender chicken, hearty veggies, and a flaky crust make this dish pure comfort.
| Ingredient | Amount | Notes |
|---|---|---|
| Boneless Skinless Chicken Breast 🍗 | 1 ½ lb | Diced into bite-sized pieces |
| Carrots 🥕 | 1 cup | Peeled and diced |
| Frozen Green Peas 🌱 | 1 cup | No need to thaw |
| Yellow Onion 🧅 | 1 whole | Finely diced |
| Celery Stalks 🌿 | 2 pieces | Finely diced |
| Garlic Cloves 🧄 | 2 cloves | Minced |
| Unsalted Butter 🧈 | ½ cup | For the roux |
| All-Purpose Flour 🌾 | ½ cup | For thickening the sauce |
| Chicken Broth 🥫 | 1 ½ cups | Low-sodium preferred |
| Whole Milk 🥛 | ½ cup | For creamy sauce |
| Salt 🧂 | 1 tsp | Adjust to taste |
| Black Pepper 🌶️ | ½ tsp | Freshly ground preferred |
| Dried Thyme 🍃 | ½ tsp | For aromatic depth |
| Pie Crust 🥧 | 2 sheets | Store-bought or homemade |
| Large Egg 🥚 | 1 whole | For egg wash |
The chicken should be fresh—look for plump, moist breasts at Whole Foods or your local butcher. I prefer Tyson or Perdue for consistent quality. For the crust, Pillsbury pie dough is a lifesaver (find it in the dairy aisle at most supermarkets). If making your own, use ice-cold butter and don’t overwork the dough. The veggies? Any grocery store will do—just grab what looks freshest.
Out of thyme? Rosemary or sage works in a pinch. No fresh celery? Extra carrot or a pinch of celery seed can fill the gap. For the milk, half-and-half makes it extra rich, or use 2% if that’s what you’ve got. If avoiding dairy, unsweetened almond milk works (though the sauce won’t be as creamy). Frozen peas can be swapped for corn or green beans.
The filling keeps 3-4 days in the fridge, but assemble and bake the pie fresh. Leftovers reheat well in the oven at 350°F. You can freeze unbaked pies for up to 2 months—just thaw overnight before baking.
Why You’ll Love This Recipe
- One Pan Magic: I just dump everything—chicken, carrots, peas, onion, celery—into one skillet and let the oven do the work.
- That Golden Crust: The flaky top hiding creamy chicken and veggies? I’ll be real: it’s the only reason I make this on rainy nights.
- Feeds Everyone: From Sunday dinner to potlucks, this pie disappears fast—even my picky nephew goes back for seconds.
- Leftovers for Days: Honestly, it tastes even better the next day, and the portions stretch for lunches all week.
Step-by-Step Instructions for Classic Chicken Pot Pie
Here’s how to build this comforting double-crust masterpiece from start to finish.
Step 1: Cook the Chicken and Vegetables
In a large pot, combine the 1.5 lb boneless skinless chicken breast (diced), 1 cup carrots, 1 cup frozen green peas, 1 whole yellow onion, 2 pieces celery stalks, and 2 cloves garlic cloves with enough water to cover. Bring to a boil, then reduce to a simmer.
Cook for 12-15 minutes until the chicken is no longer pink inside and the vegetables are tender but still firm. Drain and set aside—this keeps the filling from getting soggy later. I always check the largest chicken piece to ensure it’s fully cooked through.
Step 2: Make the Creamy Roux-Based Sauce
In the same pot, melt the 0.5 cup unsalted butter over medium heat. Once foaming, whisk in the 0.5 cup all-purpose flour to create a smooth paste. Cook for 1-2 minutes until the mixture turns a light golden color—this removes the raw flour taste.
Slowly pour in the 1.5 cups chicken broth and 0.5 cup whole milk, whisking constantly to prevent lumps. Add the 1 tsp salt, 0.5 tsp black pepper, and 0.5 tsp dried thyme. Simmer for 3-4 minutes until the sauce thickens enough to coat the back of a spoon.
Step 3: Combine Filling and Prepare the Pie
Fold the cooked chicken and vegetables into the sauce until everything is evenly coated. Taste and adjust seasoning if needed—I sometimes add a pinch more salt here. Let the filling cool for 10 minutes while you preheat the oven to 375°F.
Line a 9-inch pie dish with one pie crust sheet, pressing it gently into the bottom and sides. Pour in the filling, smoothing the top with a spoon. Don’t overfill or the pie might bubble over during baking.
Step 4: Top, Vent, and Bake to Golden Perfection
Place the second pie crust over the filling. Trim any excess dough, then crimp the edges with a fork to seal. Cut 4-5 slits in the top crust to allow steam to escape—this prevents a soggy top crust.
Whisk the 1 whole large egg with 1 tablespoon water and brush it evenly over the top crust. Bake for 40-45 minutes until the crust is deep golden brown and the filling is bubbling through the vents. Let it rest for 10 minutes before slicing—this helps the filling set.
Pro Tips For Making Classic Chicken Pot Pie
- Precook the Chicken: Poach the chicken breasts in broth for 12-15 minutes until just done, then shred—this keeps them moist instead of turning rubbery in the pie filling. I learned this the hard way after too many dry, overcooked bites.
- Sauté Veggies First: Cook the onion, celery, and carrots in butter until soft before adding liquid; raw veggies release moisture and make the filling watery. About 5-7 minutes on medium heat does the trick.
- Thicken the Filling: Use a roux (equal parts butter and flour) and let it cook for 2 minutes to remove the raw flour taste. My grandmother swore by this, and she was right: it makes the filling rich, not pasty.
- Vent the Crust: Cut a few small slits in the top crust before baking to let steam escape. Sounds weird, but it works—no soggy bottoms or exploded pies here.
Pro Cooking Tips for classic chicken pot pie
Perfect Roux Technique
Cook your butter and flour together for the full 1-2 minutes until golden—this builds flavor and removes the raw taste. I use Land O’Lakes butter for consistent results. The mixture should bubble but not brown too deeply. 💡
Venting the Crust
Cut 4-5 slits in the top crust with a sharp knife, not just a fork. This allows steam to escape while creating decorative vents. I use a Wüsthof paring knife for clean, precise cuts.
Prevent Soggy Bottom
Preheat your pie dish in the oven for 5 minutes before adding the bottom crust. This creates a barrier against moisture. Also, brush the bottom crust with a thin layer of beaten egg before adding filling.
Egg Wash Secret
For a glossy finish, whisk your egg wash with 1 tablespoon cold water, not milk. I find this creates a more golden, professional-looking crust. Brush it on just before baking, not earlier. 🌟
Resting Matters
The 10-minute rest after baking isn’t optional. It lets the filling thicken so it doesn’t run out when sliced. I set a timer—this is the hardest part because the aroma is irresistible.
Crust Edge Protection
If your crust edges brown too quickly, cover them with aluminum foil after 25 minutes of baking. This prevents burning while allowing the top to continue browning beautifully.
Nutrition Facts
Frequently Asked Questions
Can I use rotisserie chicken instead?
Use 3 cups of shredded rotisserie chicken to save time. Just skip the cooking step and add it directly to the sauce.
Why does my filling turn out watery?
This usually happens if the sauce wasn’t thick enough before baking. Simmer your roux for the full 3-4 minutes and ensure it coats the back of a spoon.
Can I make this ahead of time?
Yes! Assemble the pie, cover tightly, and refrigerate for up to 1 day before baking. Add 5-10 minutes to the baking time if starting cold.
How do I prevent a soggy bottom crust?
Preheat your pie dish for 5 minutes before adding the crust. Also, brush the bottom with beaten egg to create a moisture barrier.

- 4C Bread Crumbs Meatballs Recipe: Crispy Crust and Juicy Centers - September 25, 2026
- 6 Oz Chocolate Chip Cookie Recipe: Perfectly Balanced Crispy Edges and Chewy Hearts - September 25, 2026
- 6-Inch Coffee Cake Recipe: Vanilla Bean Swirls and Buttery Streusel Topping - September 25, 2026