
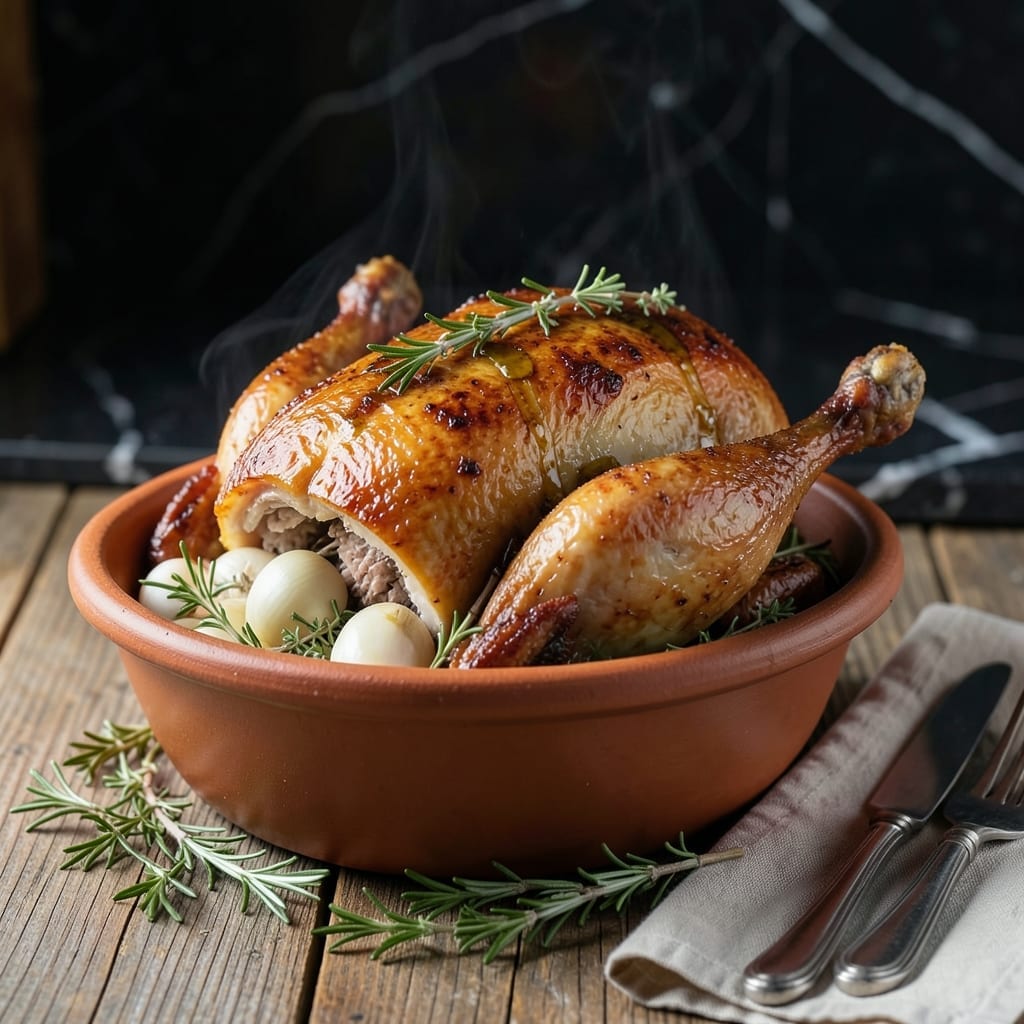
This clay pot method transforms an ordinary chicken into something extraordinary. The unglazed clay allows moisture to circulate, resulting in exceptionally tender meat with crispy, golden skin.
I developed this technique after years of experimenting with different roasting vessels. The clay pot’s natural heat retention creates an oven-like environment that locks in juices while allowing the skin to brown perfectly.
What emerges is a bird with fall-off-the-bone tenderness and deep, aromatic flavor. The clay infuses subtle earthiness that complements the chicken’s natural richness without overpowering it.
The process requires minimal effort but delivers restaurant-quality results. The clay pot does most of the work, ensuring even cooking and consistent, impressive outcomes every time.
Ingredients for Clay Pot Roast Chicken
Eleven ingredients transform a whole chicken into clay-infused aromatic perfection with minimal effort.
| Ingredient | Amount | Notes |
|---|---|---|
| Whole Chicken 🍗 | 4 lb | Giblets removed, patted dry |
| Kosher Salt 🧂 | 1 ½ tbsp | Diamond Crystal preferred for even seasoning |
| Freshly Ground Black Pepper 🌶️ | 1 tsp | Coarse grind recommended |
| Garlic Cloves 🧄 | 8 cloves | Smashed but left whole |
| Fresh Rosemary Sprigs 🌿 | 4 sprigs | Woodsy stems, about 6 inches long |
| Fresh Thyme Sprigs 🍃 | 6 sprigs | Tender stems acceptable |
| Lemon 🍋 | 1 whole | Halved, for cavity aromatics |
| Yellow Onion 🧅 | 1 whole | Quartered, skin left on |
| Extra-Virgin Olive Oil 🫒 | 2 tbsp | High-smoke-point variety preferred |
| Dry White Wine 🍷 | ½ cup | Sauvignon Blanc or Pinot Grigio |
| Chicken Stock 🥣 | ½ cup | Low-sodium for better control |
| Unsalted Butter 🧈 | 2 tbsp | For basting, softened |
The chicken quality is paramount here. Opt for air-chilled, free-range birds from Whole Foods or a trusted butcher—skin should be smooth and pale, with no bruising. The clay pot (unglazed Romertopf or similar) must be soaked in water for 15-20 minutes before use to prevent cracking. For the herbs, organic rosemary and thyme from the refrigerated section at Trader Joe’s offer superior fragrance to dried.
No white wine? Substitute apple cider or additional stock with a splash of lemon juice for acidity. Fresh herbs are ideal but dried at one-third the amount works—just rub between palms to release oils. The lemon can be swapped for lime or orange for variation. For the clay pot, any unglazed terra cotta with a lid functions similarly (test for cracks first).
Soaked clay pot can be stored in the fridge for up to 24 hours before cooking. Leftovers keep 3-4 days refrigerated—reheat gently in the clay pot with a splash of stock. The rendered chicken fat? Save it. Freezes for 3 months and elevates future dishes.
Why You’ll Love This Recipe
- Hands-Off Cooking: I just season the chicken, pop it in the clay pot, and let the oven do the rest—no babysitting required.
- Herb-Infused Perfection: Honestly, the rosemary and garlic work their magic, giving the meat this juicy, aromatic depth that’s hard to beat.
- Feeds and Impresses: I’ve served this for Sunday dinner and casual weeknights alike, and it always feels special without the fuss.
- Leftovers for Days: Between us, the meat tastes even better the next day—sandwiches, salads, or just picked straight from the bone.
Step-by-Step Instructions for Clay Pot Roast Chicken
Master the technique that transforms simple ingredients into an aromatic centerpiece with minimal effort.
Step 1: Season and Prepare the Chicken
Pat the 4 lb Whole Chicken completely dry with paper towels, inside and out. This ensures the skin crisps properly. Season the cavity and exterior aggressively with the 1.5 tbsp Kosher Salt and 1 tsp Freshly Ground Black Pepper, massaging it into the flesh.
Let the chicken sit uncovered at room temperature for 30 minutes while you prepare the aromatics. This step allows the salt to penetrate the meat, ensuring even seasoning and better moisture retention during cooking.
Step 2: Load the Cavity with Aromatics
Stuff the cavity with the 8 cloves Garlic Cloves, 4 sprigs Fresh Rosemary Sprigs, 6 sprigs Fresh Thyme Sprigs, and the two halves of the 1 whole Lemon. The citrus and herbs will infuse the meat with bright, earthy flavors as it roasts.
Add the quartered 1 whole Yellow Onion to the bottom of your clay pot. The onion will caramelize slightly, adding depth to the pan juices. This aromatic foundation is key to the dish’s signature fragrance.
Step 3: Sear and Begin Roasting
Heat the 2 tbsp Extra-Virgin Olive Oil in the clay pot over medium-high heat. Once shimmering, place the chicken breast-side down in the pot. Sear for 5-7 minutes until the skin turns deep golden brown and releases easily from the pot.
Flip the chicken breast-side up and pour the 0.5 cup Dry White Wine and 0.5 cup Chicken Stock into the pot. The liquid should come about halfway up the chicken. Cover the pot and transfer it to a preheated 375°F oven.
Step 4: Baste and Roast to Perfection
After 30 minutes in the oven, baste the chicken with the 2 tbsp Unsalted Butter, which you’ve softened and divided into small pieces. The butter will melt into the cooking liquids, enriching the sauce and helping the skin crisp further.
Continue roasting, basting every 15-20 minutes, until the internal temperature at the thickest part of the thigh reaches 165°F. This should take about 1.5 hours total. The chicken is done when the juices run clear and the skin is deeply browned and crisp.
Step 5: Rest and Serve
Carefully transfer the chicken to a cutting board and let it rest, tented loosely with foil, for 15 minutes. This allows the juices to redistribute, ensuring moist, tender meat.
Skim excess fat from the cooking liquids in the clay pot, then serve the juices alongside the chicken. The clay pot retains heat beautifully, so the dish stays warm throughout serving. Carve the chicken and enjoy immediately.
Pro Tips For Making Clay Pot Roast Chicken
- Preheat the Clay Pot: Soak the clay pot in water for 15 minutes before preheating it in the oven at 400°F—this prevents cracking and ensures even heat distribution.
- Dry the Chicken: Pat the chicken completely dry with paper towels before seasoning; I learned this the hard way after my first few attempts had soggy skin.
- Don’t Overcrowd: Leave space around the chicken in the clay pot so the heat circulates properly—packing it with veggies sounds good but steams instead of roasts.
- Use Room Temp Garlic: Let the garlic cloves sit out for 10 minutes after peeling so their flavor mellows; sounds weird, but it works and keeps the aroma from turning bitter.
Flavor Customization for These Flavors
Herb Variations
Swap the rosemary and thyme for fresh tarragon and sage for a more delicate, slightly sweet aroma. I love this combo with a Dijon mustard glaze brushed on during the last 20 minutes of cooking. 🌿
Citrus Twists
Replace the lemon with orange halves and 3 sliced limes for a bright, tropical note. The citrus oils in the peel will perfume the meat beautifully. Add 1 tsp orange zest to the butter for basting.
Spice Infusions
For heat, add 2 dried chipotle peppers or 1 tbsp smoked paprika to the cavity. The smokiness pairs wonderfully with the clay pot’s earthy flavors. I often add 1 tsp cumin seeds for depth.
Wine Alternatives
Use dry vermouth instead of white wine for a more herbal complexity. For a non-alcoholic option, ½ cup apple cider with 1 tbsp apple cider vinegar works beautifully. The acidity brightens the dish.
Butter Enhancements
Mix 1 minced garlic clove and 1 tbsp chopped parsley into the softened butter before basting. This creates a gremolata butter that adds freshness to each bite. I sometimes add ½ tsp lemon zest too.
Asian Fusion
Add 3 sliced ginger coins, 2 star anise pods, and 1 cinnamon stick to the cavity. Replace the wine with ½ cup soy sauce diluted with ¼ cup water. This creates a fragrant, umami-rich twist. 💫
Nutrition Facts
Frequently Asked Questions
Should I soak the clay pot before using?
Yes, soak it in cool water for 15-20 minutes to prevent cracking from thermal shock. This step is crucial for unglazed clay pots to handle oven heat safely.
How do I know when the chicken is done?
Use a meat thermometer to check the thickest part of the thigh for 165°F. The juices should run clear, and the skin will be deep golden brown and crisp.
Can I use a different cooking vessel?
A Dutch oven works as a substitute, but it won’t replicate the clay pot’s moisture circulation. For best results, stick with unglazed terra cotta or a Romertopf.
What if my chicken skin isn’t crispy?
Pat the chicken thoroughly dry before seasoning and ensure the oven is fully preheated to 375°F. Basting too frequently can also soften the skin.

- 4C Bread Crumbs Meatballs Recipe: Crispy Crust and Juicy Centers - September 25, 2026
- 6 Oz Chocolate Chip Cookie Recipe: Perfectly Balanced Crispy Edges and Chewy Hearts - September 25, 2026
- 6-Inch Coffee Cake Recipe: Vanilla Bean Swirls and Buttery Streusel Topping - September 25, 2026