
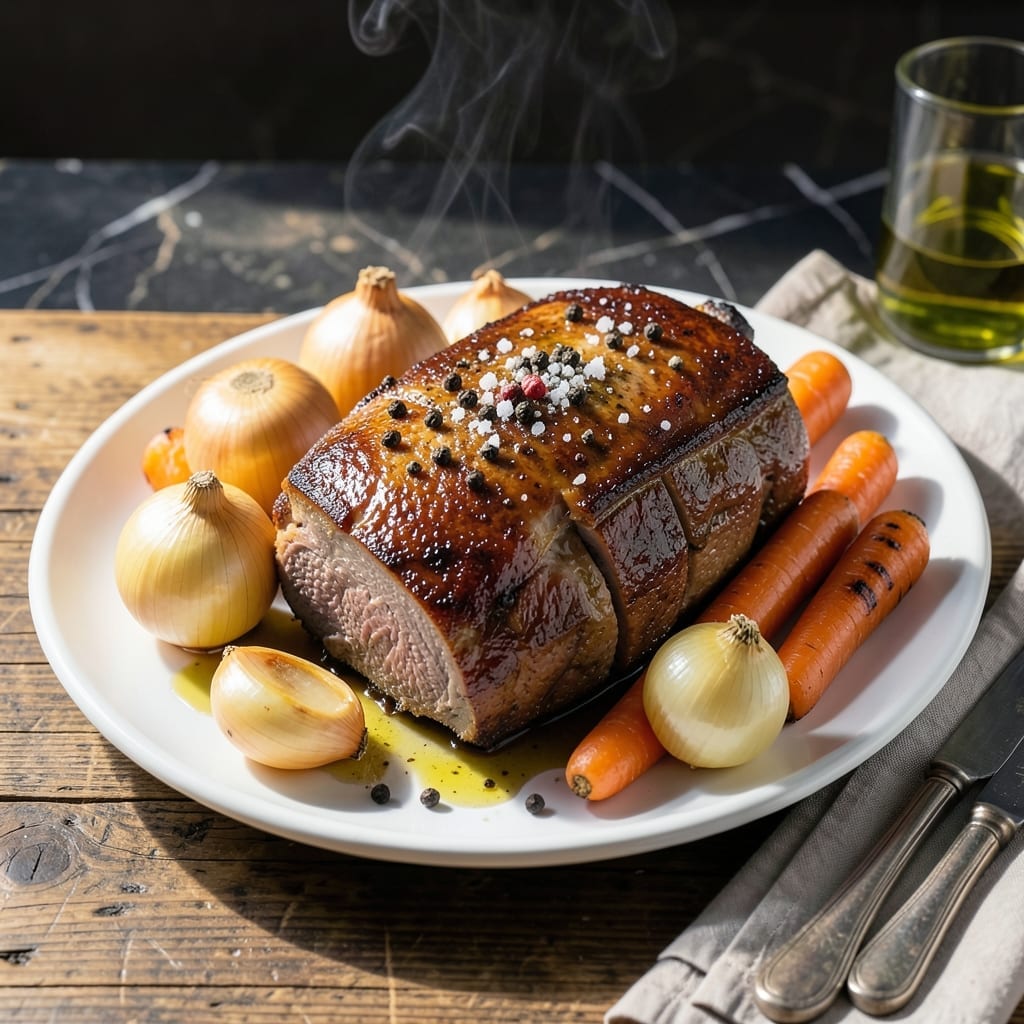
There’s nothing quite like the rich aroma of a pot roast simmering on the stovetop, filling the kitchen with warmth and promise. This recipe strips back to the essentials—tender beef, root vegetables, and a handful of pantry staples—letting natural flavors shine without unnecessary additives.
What sets this version apart is its simplicity and precision. A low and slow cooking method ensures the beef becomes fall-apart tender, while carrots, potatoes, and onions absorb the savory broth. The result is a dish that feels both comforting and wholesome.
The beauty lies in the process: sear the meat, layer in the vegetables, and let time work its magic. No shortcuts, no artificial enhancements—just honest, traditional cooking that delivers every time.
Perfect for Sunday suppers or cozy weeknight dinners, this pot roast proves that the best meals often come from the simplest methods.
Ingredients for Clean Pot Roast
Traditional ingredients for a slow-cooked masterpiece with root vegetables and tender beef.
| Ingredient | Amount | Notes |
|---|---|---|
| Beef Chuck Roast 🥩 | 3 lb | Well-marbled, boneless preferred |
| Kosher Salt 🧂 | 2 tsp | Diamond Crystal recommended |
| Freshly Ground Black Pepper 🌶️ | 1 tsp | Coarsely ground for texture |
| Olive Oil 🫒 | 2 tbsp | Divided for searing and vegetables |
| Yellow Onions 🧅 | 2 whole | Large, quartered |
| Carrots 🥕 | 4 whole | Peeled, cut into 3-inch chunks |
| Yukon Gold Potatoes 🥔 | 1 ½ lb | Peeled, halved if large |
| Garlic Cloves 🧄 | 6 cloves | Smashed, peeled |
| Fresh Thyme Sprigs 🌿 | 4 sprigs | Or 1 tsp dried thyme |
| Fresh Rosemary Sprigs 🌿 | 2 sprigs | Or 1 tsp dried rosemary |
| Bay Leaves 🍃 | 2 whole | Dried, whole leaves |
| Low-Sodium Beef Broth 💧 | 2 cups | Or homemade stock |
| Tomato Paste 🍅 | 2 tbsp | For depth of flavor |
| Dry Red Wine 🍷 | ½ cup | Cabernet Sauvignon recommended |
| Water 💧 | 1 cup | To adjust liquid level |
The beef is the foundation here. Chuck roast with visible marbling ensures melt-in-your-mouth tenderness after slow cooking. Look for USDA Choice or Prime at your butcher or the meat counter at Whole Foods. The potatoes should be Yukon Gold—they hold their shape better than russets but still absorb the broth beautifully. Fresh herbs are ideal, but dried work in a pinch (cut the amount by half).
Substituting the wine? Beef broth plus 1 tbsp balsamic vinegar mimics the acidity and depth. No thyme? Use savory or marjoram at the same ratio. The tomato paste can be omitted, but it adds a rich backbone—Trader Joe’s sells it in convenient tubes. For extra flavor, add a splash of Worcestershire sauce (check for gluten-free if needed).
This reheats wonderfully—actually improves overnight as flavors meld. Store in an airtight container for up to 4 days in the fridge, or freeze for 3 months. Slice the beef against the grain before serving for optimal tenderness.
Why You’ll Love This Recipe
- I’ll be real: a chuck roast feeds my family for days, and the leftovers taste even better.
- One Pot Wonder: I love how this recipe just needs a single pot—beef chuck, onions, olive oil, salt, and pepper, then let the oven do the work.
- Sunday Supper Star: Between us, this is my go-to for feeding a crowd or meal prepping for the week.
- Budget Friendly: I’ll be real: a chuck roast feeds my family for days, and the leftovers taste even better.
Step-by-Step Instructions for Slow-Cooked Pot Roast With Root Vegetables
Master the technique for fall-apart tender beef and perfectly cooked vegetables every time.
Step 1: Sear and Season the Beef Chuck Roast
Pat the 3 lb Beef Chuck Roast completely dry with paper towels. This ensures a proper sear. Season all sides generously with the 2 tsp Kosher Salt and 1 tsp Freshly Ground Black Pepper, pressing the seasoning into the meat so it adheres well.
Heat 1 tbsp Olive Oil in a large Dutch oven over medium-high heat until shimmering. Add the beef chuck roast and sear for 4-5 minutes per side until deeply browned. You want a rich, dark crust—this builds the flavor foundation for the entire dish. Transfer the seared roast to a plate and set aside.
Step 2: Sauté the Aromatics and Deglaze the Pan
In the same Dutch oven, add the remaining 1 tbsp Olive Oil. Add the 2 whole Yellow Onions (quartered), 4 whole Carrots (cut into 3-inch chunks), and 6 cloves Garlic Cloves (smashed). Sauté for 5 minutes until the vegetables begin to soften and develop color.
Stir in the 2 tbsp Tomato Paste and cook for 1-2 minutes until it darkens slightly. This step deepens the tomato flavor and prevents a raw taste in the finished dish. Pour in the 0.5 cup Dry Red Wine and scrape up all the browned bits from the bottom of the pan with a wooden spoon. Let the wine reduce by half, about 3-4 minutes.
Step 3: Build the Braising Liquid and Add the Beef
Add the 2 cups Low-Sodium Beef Broth, 1 cup Water, 4 sprigs Fresh Thyme Sprigs, 2 sprigs Fresh Rosemary Sprigs, and 2 whole Bay Leaves to the Dutch oven. Stir to combine all the flavors. The liquid should come about halfway up the sides of the roast when added.
Return the seared beef chuck roast to the Dutch oven, along with any accumulated juices from the plate. Add the 1.5 lb Yukon Gold Potatoes (peeled and halved if large), nestling them into the liquid around the beef. The liquid should just cover the vegetables—this ensures even cooking and maximum flavor absorption.
Step 4: Braise to Tender Perfection
Bring the mixture to a gentle simmer, then reduce the heat to low. Cover the Dutch oven with a tight-fitting lid and transfer it to a preheated 325°F oven. Braise for 2.5 to 3 hours until the beef is fork-tender and easily pulls apart.
Check the dish occasionally to ensure the liquid maintains a gentle simmer. You’ll know it’s ready when the beef shreds easily with a fork and the vegetables are tender. The internal temperature of the beef should reach 195-200°F for optimal tenderness.
Once done, remove the Dutch oven from the oven and let the pot roast rest, covered, for 15-20 minutes before serving. This allows the juices to redistribute throughout the beef, ensuring every bite is moist and flavorful.
Pro Tips For Making Clean Pot Roast
- Sear Hard First: Crank the heat to medium-high and sear the chuck roast until deeply browned on all sides—this builds a flavor base that simmering alone can’t match. I learned this the hard way after making pale, bland pot roasts for years.
- Salt the Meat Early: Pat the roast dry, then salt it at least 40 minutes before cooking (or even overnight). Sounds weird, but it works: the salt penetrates deeper, seasoning the meat through and through.
- Don’t Crowd the Pot: If browning onions with the beef, do it in batches—overcrowding steams instead of sears, and you’ll end up with soggy onions and a weak fond.
- Use Enough Oil: Don’t skimp—use about 2 tablespoons of olive oil to coat the bottom of the pot before searing. After burning three roasts to a sticky mess, I finally figured out that a proper layer of oil is non-negotiable.
Pro Cooking Tips for This Recipe
Perfect Searing Technique
Pat the beef completely dry with paper towels—this is non-negotiable for a proper sear. I use Bounty for its absorbency. Heat your Dutch oven over medium-high heat until the oil shimmers, then don’t move the meat for at least 4 minutes per side. 🔥
Deglazing Mastery
After removing the beef, add ½ cup red wine to the hot pan and scrape aggressively with a wooden spoon. Those browned bits are pure flavor. Let the wine reduce by half before adding other liquids—this takes about 3-4 minutes.
Liquid Level Control
Your braising liquid should come about halfway up the roast. If it’s too low, add extra beef broth. Too high? Remove some with a ladle. I check this right before covering the pot to avoid steam loss.
Oven Temperature Precision
Maintain a steady 325°F in your oven—any higher and the meat may toughen. I use an oven thermometer to verify, as many home ovens run hot or cold. The low and slow method transforms tough cuts into tender perfection.
Resting Time Importance
Never skip the 15-20 minute rest after cooking. This lets juices redistribute through the meat. I tent the pot with foil during resting to keep it warm. Slicing too soon sends all those beautiful juices onto the cutting board. 💡
Vegetable Placement
Nestle potatoes and carrots around the beef, not under it. This ensures even cooking and prevents burning. I cut larger potatoes in half so they cook at the same rate as the meat.
Nutrition Facts
Frequently Asked Questions
What’s the best cut of beef for this?
Use chuck roast for the most tender results. Its marbling breaks down beautifully during the 2.5-3 hour braise, creating that classic fall-apart texture. Brisket or round work too but may need extra time.
Can I make this in a slow cooker?
Yes! Sear the beef first, then transfer everything to your slow cooker. Cook on low for 8 hours or high for 5-6 hours. The flavor will be just as rich, with hands-off convenience.
Why does my roast come out tough?
It likely didn’t cook long enough. The collagen needs time to break down at 195-200°F internal temp. Also, avoid boiling—keep it at a gentle simmer. Resting for 15-20 minutes is also key.
Can I add other vegetables?
Try parsnips, turnips, or mushrooms. Add heartier veggies at the start and delicate ones like peas in the last 30 minutes. Just ensure they’re submerged in liquid.

- 4C Bread Crumbs Meatballs Recipe: Crispy Crust and Juicy Centers - September 25, 2026
- 6 Oz Chocolate Chip Cookie Recipe: Perfectly Balanced Crispy Edges and Chewy Hearts - September 25, 2026
- 6-Inch Coffee Cake Recipe: Vanilla Bean Swirls and Buttery Streusel Topping - September 25, 2026