
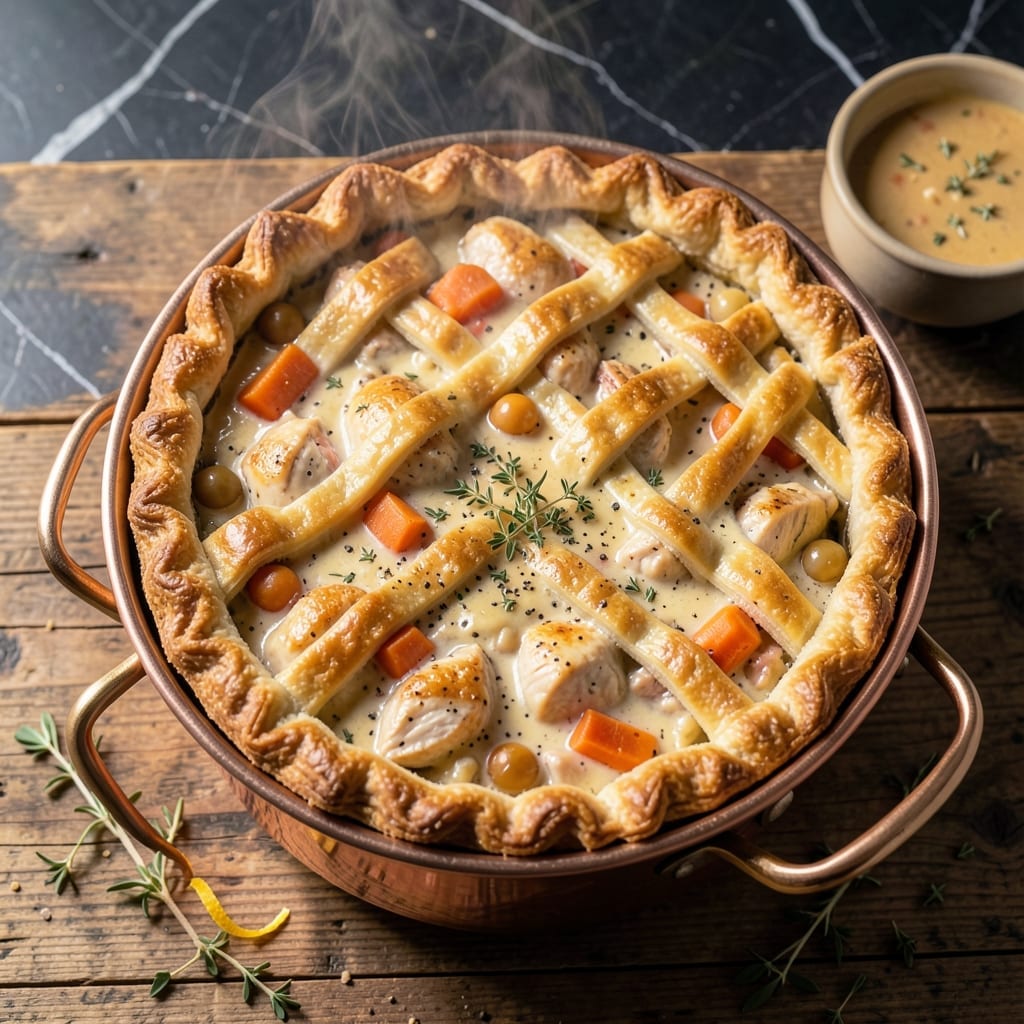
There’s something deeply satisfying about a pot pie with layers so flaky they shatter at the touch. This version delivers that perfect golden crust every time, thanks to a technique refined through careful testing.
The Copper Chef pan ensures even heat distribution, which means the bottom crust bakes to the same flaky perfection as the top. A rich, savory filling comes together with simple ingredients and a few smart steps to lock in moisture.
What you get is a dish that looks as impressive as it tastes—tender filling encased in buttery, layered pastry. The contrast between the crisp crust and creamy interior makes every bite memorable.
Serve it straight from the pan for a meal that feels both comforting and special.
Ingredients for Copper Chef Pot Pie
These ingredients create a buttery, layered crust and rich filling that shatters with every bite.
| Ingredient | Amount | Notes |
|---|---|---|
| All-Purpose Flour 🌾 | 3 cups | Plus extra for dusting |
| Unsalted Butter 🧈 | 1 ½ cups | Cold, cubed for crust |
| Ice Water 💧 | ½ cup | For crust dough |
| Salt 🧂 | 1 tsp | Divided between crust and filling |
| Boneless Skinless Chicken Breasts 🍗 | 1 ½ lb | Diced into bite-sized pieces |
| Carrots 🥕 | 2 whole | Peeled and diced |
| Celery Stalks 🥬 | 2 whole | Diced for filling |
| Yellow Onion 🧅 | 1 whole | Finely chopped |
| Garlic Cloves 🧄 | 3 cloves | Minced for flavor |
| Frozen Peas 🌱 | 1 cup | No need to thaw |
| Chicken Broth 🥣 | 2 cups | Low-sodium preferred |
| Heavy Cream 🥛 | ¾ cup | For creamy filling |
| All-Purpose Flour 🌾 | ¼ cup | For thickening filling |
| Dried Thyme 🌿 | 1 tsp | For aromatic depth |
| Dried Rosemary 🌿 | 1 tsp | Crushed for flavor |
| Black Pepper 🌶️ | ½ tsp | Freshly ground preferred |
The butter is non-negotiable for that flaky texture—European-style with higher fat content (like Plugrá or Kerrygold) delivers the best layers. The all-purpose flour should be standard, nothing fancy. For the chicken, organic or free-range stays juicier during cooking. Most supermarkets carry everything needed, but Whole Foods has solid organic options if you’re particular about sourcing.
No chicken? Turkey breast works identically. Vegetarian? Try mushrooms or chickpeas—just pat them dry first. Short on fresh herbs? Dried at one-third the amount works fine. The heavy cream can be swapped for half-and-half (less rich) or whole milk in a pinch. For the broth, Better Than Bouillon makes a great paste that’s easy to keep on hand.
The unbaked pie keeps 1 day in the fridge (cover tightly). Baked, it’s best eaten fresh but reheats well for 2-3 days—cover with foil and warm at 350°F until hot. Freezing? Assemble but don’t bake, then freeze. Bake from frozen, adding 10-15 minutes to the time.
Why You’ll Love This Recipe
- I’ll be real: this is my go-to for busy evenings when I need something hearty fast.
- One Pan Wonder: Honestly, I love that this comes together in a single Copper Chef pan—no extra bowls, no mess.
- Buttery Crust: The flaky layers from the butter and flour make every bite ridiculously good.
- Weeknight Hero: I’ll be real: this is my go-to for busy evenings when I need something hearty fast.
Step-by-Step Instructions for Copper Chef Pot Pie
Here’s the method for creating a dish with perfectly flaky layers and a rich, creamy filling.
Step 1: Prepare the Flaky Crust Dough
In a large bowl, combine the 3 cups All-Purpose Flour with ½ tsp Salt. Add the 1.5 cups Unsalted Butter, cold and cubed, and work it into the flour using your fingers or a pastry cutter until the mixture resembles coarse crumbs with pea-sized butter pieces visible.
Gradually add the ½ cup Ice Water, 1 tablespoon at a time, mixing just until the dough comes together. Be careful not to overwork it—this is what creates those flaky layers. Divide the dough into two equal portions, flatten into discs, wrap in plastic, and refrigerate for 1 hour.
Step 2: Make the Creamy Chicken Filling
In a large skillet over medium heat, cook the diced 1.5 lb Boneless Skinless Chicken Breasts until no longer pink, about 6-8 minutes. Remove and set aside. In the same skillet, add the 2 whole Carrots, 2 whole Celery Stalks, and 1 whole Yellow Onion, all diced, and sauté until softened, about 5 minutes.
Add the minced 3 cloves Garlic Cloves and cook for 30 seconds until fragrant. Stir in the ¼ cup All-Purpose Flour, then slowly pour in the 2 cups Chicken Broth while whisking constantly. Add the 1 cup Frozen Peas, ¾ cup Heavy Cream, 1 tsp Dried Thyme, 1 tsp Dried Rosemary, and remaining ½ tsp Salt and ½ tsp Black Pepper. Simmer for 5 minutes until thickened, then return the chicken to the skillet and stir to combine.
Step 3: Assemble and Bake the Pot Pie
On a lightly floured surface, roll out one disc of dough to fit the bottom of a 9-inch pie dish. Transfer the dough to the dish, pressing it gently into place. Spoon the chicken filling into the crust, spreading it evenly.
Roll out the second disc of dough and place it over the filling. Crimp the edges to seal, then cut a few small slits in the top crust to allow steam to escape. For extra flakiness, brush the top crust with a bit of melted butter. Bake at 375°F for 40-45 minutes, or until the crust is golden brown and the filling is bubbly.
Step 4: Rest and Serve
Remove the pot pie from the oven and let it rest for 10-15 minutes. This allows the filling to set slightly, making it easier to slice and serve. The crust should be golden and flaky, and the filling should be thick and creamy, with chunks of tender chicken and vegetables throughout.
Serve warm, with each portion showcasing those beautiful flaky layers on top and bottom. The contrast of the crisp, buttery crust with the rich, savory filling is what makes this dish truly special.
Pro Tips For Making Copper Chef Pot Pie
- Chill the Dough: After mixing the flour, butter, and ice water, let the dough rest in the fridge for at least 30 minutes—this keeps the butter cold so your crust stays flaky instead of tough.
- Poach the Chicken: Simmer the boneless chicken breasts in salted water for 12-15 minutes until just cooked through, then shred—this guarantees tender meat that doesn’t dry out in the pot pie.
- Avoid Overworking: I learned this the hard way—mix the dough just until it comes together, or the crust will turn chewy instead of light and crisp.
- Use Cold Butter: Cut the unsalted butter into small cubes and freeze for 10 minutes before mixing—sounds fussy, but it’s the only way to get that perfect flaky texture in your Copper Chef pot pie crust.
Common Mistakes When Making This Dish
Overworking the Dough
I see many home cooks make the mistake of kneading the crust dough too much. This develops excess gluten, making your layers tough instead of flaky. Mix just until the dough comes together—visible butter pieces are what create those beautiful layers. 💡
Skipping the Chill
Rushing the 1-hour refrigeration step is a common error. Cold butter is essential for steam pockets that create flakiness. If you skip this, your crust will spread and lose its structure during baking.
Soggy Bottom Crust
To prevent a soggy bottom, pre-bake your bottom crust for 8-10 minutes before adding filling. The Copper Chef pan helps with even heat distribution, but this extra step guarantees crispness. Also, don’t forget to vent the top crust properly.
Underseasoned Filling
Pot pie filling needs bold seasoning to shine through the crust. Taste as you go—add the full 1 tsp Dried Thyme and 1 tsp Dried Rosemary, and don’t be shy with salt. The ½ tsp Black Pepper adds necessary depth.
Filling Too Thin
Your filling should coat the back of a spoon. If it’s runny, simmer it longer after adding the ¼ cup All-Purpose Flour. The flour needs 5 minutes of cooking to thicken properly. A thin filling will make your pie watery.
Not Resting Before Slicing
Cutting too soon causes the filling to spill out. That 10-15 minute rest lets the sauce set. I learned this the hard way—patience ensures clean slices and that perfect presentation we all want.
Nutrition Facts
Frequently Asked Questions
Can I use store-bought pie crust instead?
Yes, but homemade delivers superior flakiness. If using store-bought, opt for an all-butter version and chill it for 30 minutes before rolling. This helps prevent shrinking during baking.
How do I know when the crust is done?
The top should be golden brown and the filling bubbly. If the edges brown too quickly, cover them with foil and continue baking until the center reaches 165°F.
Can I make this ahead of time?
Assemble the pie but don’t bake it. Refrigerate for up to 1 day or freeze for 1 month. Bake from cold, adding 10-15 minutes to the time if frozen.
Why is my filling runny?
Likely the flour didn’t cook long enough. Simmer the filling for the full 5 minutes after adding thickener. Also, let the pie rest for 10-15 minutes before slicing.

- 4C Bread Crumbs Meatballs Recipe: Crispy Crust and Juicy Centers - September 25, 2026
- 6 Oz Chocolate Chip Cookie Recipe: Perfectly Balanced Crispy Edges and Chewy Hearts - September 25, 2026
- 6-Inch Coffee Cake Recipe: Vanilla Bean Swirls and Buttery Streusel Topping - September 25, 2026