
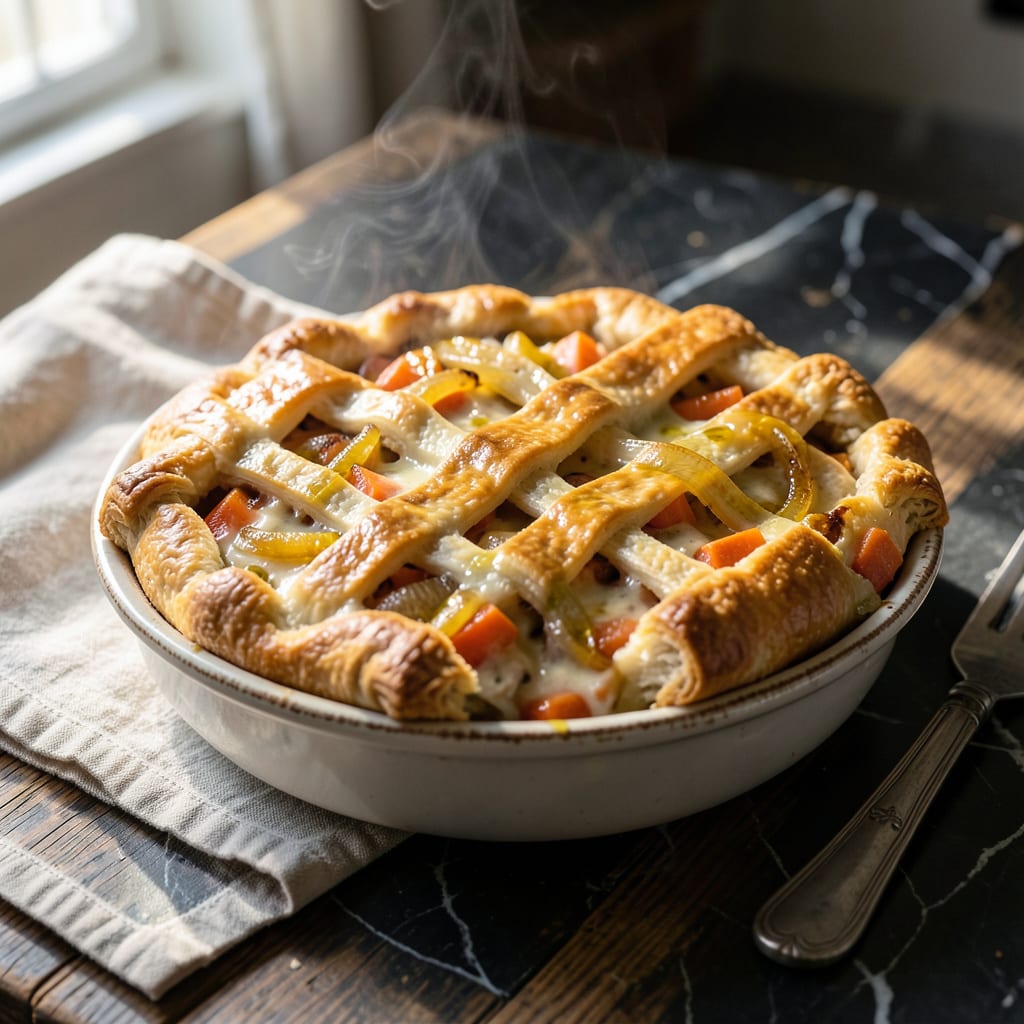
This vegetarian cottage pot pie delivers a flaky golden crust over a rich, hearty filling that satisfies like comfort food should.
I developed this recipe to prove that meat-free versions can be just as substantial, with a creamy vegetable filling that bakes up bubbling under that perfect pastry top.
Ingredients for Cottage Pot Pie
Flaky crust meets creamy vegetarian filling with pantry-friendly staples and fresh herbs.
| Ingredient | Amount | Notes |
|---|---|---|
| All-Purpose Flour 🌾 | 2 cups | Plus extra for dusting |
| Unsalted Butter 🧈 | 1 cup | Cold, cubed for crust |
| Ice Water 💧 | ½ cup | For pie dough |
| Salt 🧂 | 1 tsp | Divided, fine sea salt |
| Yellow Onion 🧅 | 1 whole | Medium, finely diced |
| Carrots 🥕 | 2 whole | Medium, peeled and diced |
| Celery Stalks 🌿 | 2 whole | Finely diced |
| Cottage Cheese 🧀 | 2 cups | Full-fat for creaminess |
| Heavy Cream 🥛 | ½ cup | Or whole milk |
| Frozen Peas 🌱 | 1 cup | Thawed and drained |
| Fresh Thyme 🌿 | 1 tbsp | Chopped, or 1 tsp dried |
| Fresh Rosemary 🌿 | 1 tbsp | Chopped, or 1 tsp dried |
| Black Pepper 🌶️ | ½ tsp | Freshly ground |
| Nutmeg 🌰 | ¼ tsp | Freshly grated |
| Large Egg 🥚 | 1 whole | For egg wash |
The crust demands cold unsalted butter—Plugrá or Kerrygold give superior flakiness. Use King Arthur Flour for the crust if available; its higher protein content creates a more tender pastry. For the cottage cheese, Nancy’s Organic or Breakstone’s full-fat varieties provide the best texture. Fresh herbs from Whole Foods or a local farmers market will elevate the filling’s aroma.
No fresh thyme or rosemary? Dried herbs at one-third the amount work fine, but add them earlier in cooking. Full-fat Greek yogurt can replace cottage cheese if needed (strain it first). For a richer filling, swap heavy cream for whole milk. Vegetable stock can thin the mixture if it’s too thick—add 1-2 tbsp at a time.
Assemble the pie just before baking for the flakiest crust. Leftovers keep 3-4 days refrigerated, though the pastry softens. Freeze unbaked pies for up to 3 months—wrap tightly in plastic then foil to prevent freezer burn.
Why You’ll Love This Recipe
- One-Bowl Wonder: I make the flaky crust right in the same bowl I’ll mix the filling—no extra dishes, just butter, flour, and ice water.
- Buttery Crust Love: That golden, flaky top made with unsalted butter and a pinch of salt? It’s the kind of crispy I’d fight over.
- Weeknight Lifesaver: Between us, I’ve served this for Sunday supper and Tuesday chaos—it’s just as welcome both times.
- Stretches the Budget: Honestly, yellow onion and a simple crust turn humble ingredients into a meal that feels fancy without the price tag.
Step-by-Step Instructions for Cottage Pot Pie
Master the technique for achieving a flaky crust with a rich, creamy cottage filling.
Step 1: Prepare the Flaky Pie Crust
In a food processor, pulse the 2 cups all-purpose flour and 1 tsp salt until combined. Add the 1 cup cold unsalted butter (cubed) and pulse in short bursts until the mixture resembles coarse crumbs with pea-sized butter pieces visible. This texture ensures layers in your crust.
With the processor running, slowly drizzle in the 0.5 cup ice water through the feed tube, processing just until the dough begins to come together. It should hold when pressed but not be sticky. Turn the dough onto a lightly floured surface, divide in half, shape into disks, and refrigerate for 1 hour—this resting period is crucial for a tender, flaky result.
Step 2: Sauté the Aromatic Vegetable Base
In a large skillet, melt 2 tablespoons of the reserved butter from your dough preparation over medium heat. Add the 1 whole finely diced yellow onion, 2 whole peeled and diced carrots, and 2 whole finely diced celery stalks. Cook for 8-10 minutes, stirring occasionally, until the vegetables soften and the onion becomes translucent.
Add the 1 tbsp chopped fresh thyme and 1 tbsp chopped fresh rosemary, cooking for an additional 1 minute until fragrant. This builds a flavor foundation that complements the cottage cheese beautifully. Remove from heat and let cool slightly before mixing with the filling ingredients.
Step 3: Create the Creamy Cottage Filling
In a large bowl, combine the 2 cups full-fat cottage cheese, 0.5 cup heavy cream, 1 cup thawed and drained frozen peas, 0.5 tsp freshly ground black pepper, and 0.25 tsp freshly grated nutmeg. Stir in the cooled vegetable mixture until everything is evenly distributed.
The filling should be thick but spreadable. The cottage cheese provides a subtle tang that balances the sweetness of the vegetables, while the cream ensures a luscious texture. Taste and adjust seasoning if needed, though remember the crust will add saltiness.
Step 4: Assemble and Bake the Pot Pie
On a lightly floured surface, roll out one disk of dough to a 12-inch circle. Transfer it to a 9-inch pie dish, pressing gently into the bottom and up the sides. Trim the edges, leaving a ½-inch overhang. Spoon the cottage filling into the crust, mounding slightly in the center.
Roll out the second dough disk and place it over the filling. Trim the top crust, leaving a ½-inch overhang, then fold the edges under and crimp to seal. Cut several slits in the top crust to allow steam to escape. Brush the entire surface with 1 large egg beaten with 1 tablespoon water for a golden finish.
Bake at 375°F for 45-50 minutes until the crust is deep golden brown and the filling is bubbling. If the edges brown too quickly, cover them with foil. Let rest for 10 minutes before serving to allow the filling to set.
Pro Tips For Making Cottage Pot Pie
- Chill the Dough: After mixing the flour, butter, and ice water, let the dough rest in the fridge for at least 30 minutes—I learned this the hard way when my first few pies had tough, shrinking crusts.
- Sweat the Onions: Cook the yellow onions low and slow in a little butter until they’re nearly caramelized; this builds deep flavor that raw onions just can’t deliver.
- Use Ice-Cold Water: Sounds obvious, but I was skeptical until I tried it: the colder the water, the flakier the crust, so keep it icy and measure it quickly.
- Vent the Top: Cut a few small slits in the top crust before baking—steam needs to escape, or you’ll end up with a soggy, sunken pie (yes, even if you’re impatient like me).
Essential Equipment for Perfect Results
Dough Preparation Tools
I always start with a food processor for the crust—it blends the cold butter and flour perfectly without warming the dough. The Cuisinart 14-Cup is my go-to for even distribution. A pastry cutter works too, but requires more elbow grease. 💪
Rolling Essentials
A large wooden rolling pin gives you the control needed for even thickness. I dust my marble pastry board with flour to prevent sticking. For precise 12-inch circles, a 9-inch pie dish as a guide helps maintain the right size.
Skillet for Filling
Use a 12-inch stainless steel skillet—like All-Clad—for sautéing the vegetables. Its wide surface ensures even cooking, and the medium heat control prevents burning. A wooden spoon helps scrape up any browned bits for extra flavor.
Assembly Helpers
A pastry brush is essential for that golden egg wash finish. I also keep a sharp paring knife handy for trimming edges and cutting steam vents. A ruler ensures your overhang is consistently ½ inch all around.
Baking Equipment
Bake on the middle oven rack for even heat distribution. A baking sheet under the pie catches any drips. If your edges brown too fast, aluminum foil strips protect them while the top finishes. 🔥
Cooling Rack
After baking, transfer your pie to a wire cooling rack to prevent the crust from steaming. This keeps it crisp while the filling sets during the 10-minute rest. I use OXO’s stackable rack for space efficiency.
Nutrition Facts
Frequently Asked Questions
Can I make the crust ahead of time?
Yes! Prepare the dough, wrap it tightly in plastic, and refrigerate for up to 2 days. For longer storage, freeze the wrapped dough for up to 3 months. Thaw overnight in the fridge before rolling.
Why did my filling turn out runny?
This usually happens if the vegetables weren’t cooled before mixing or too much liquid was added. Ensure you drain the peas well and let the sautéed veggies cool slightly. 1-2 tbsp cornstarch can thicken it if needed.
Can I use a store-bought crust?
Use 1 sheet for the bottom and 1 sheet for the top. Roll them slightly thinner for even baking. Homemade tastes better, but store-bought saves time.
How do I know when it’s done?
The crust should be deep golden brown and the filling bubbling through the vents. If the edges brown too fast, cover them with foil and continue baking. Let it rest for 10 minutes before serving.

- 4C Bread Crumbs Meatballs Recipe: Crispy Crust and Juicy Centers - September 25, 2026
- 6 Oz Chocolate Chip Cookie Recipe: Perfectly Balanced Crispy Edges and Chewy Hearts - September 25, 2026
- 6-Inch Coffee Cake Recipe: Vanilla Bean Swirls and Buttery Streusel Topping - September 25, 2026