
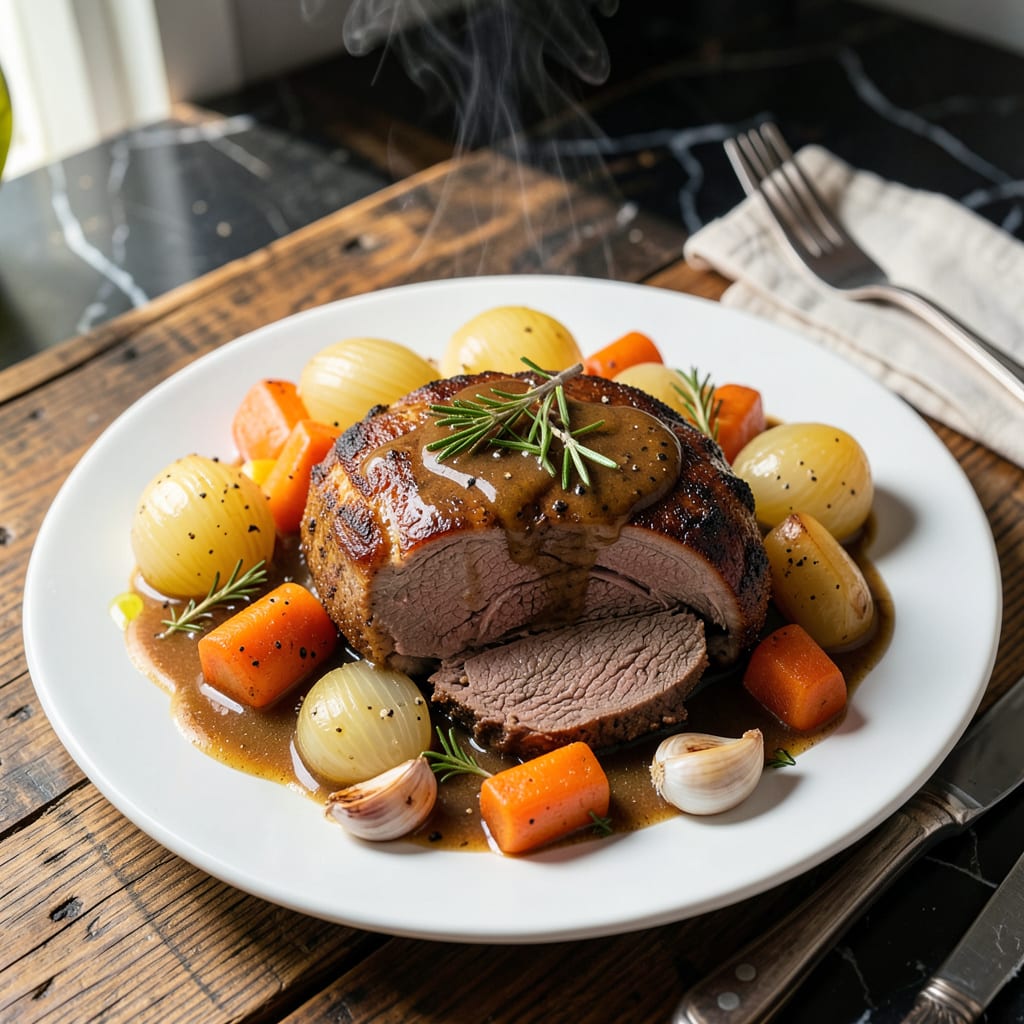
This set-it-and-forget-it method delivers tender, fall-apart beef with minimal effort. The slow cooker or pressure cooker transforms tough cuts into a savory masterpiece.
With simple ingredients and hands-off cooking, you’ll achieve restaurant-quality results. Perfect for busy days when you want a hearty meal ready at dinnertime.
Ingredients for Crock Pot Instant Pot Roast
Simple ingredients transform tough cuts into a savory masterpiece with minimal effort.
| Ingredient | Amount | Notes |
|---|---|---|
| Beef Chuck Roast 🥩 | 3 lb | Well-marbled, boneless preferred |
| Kosher Salt 🧂 | 1 ½ tsp | Diamond Crystal recommended |
| Black Pepper 🌶️ | 1 tsp | Freshly ground preferred |
| Garlic Cloves 🧄 | 6 cloves | Peeled, smashed |
| Yellow Onion 🧅 | 1 whole | Large, quartered |
| Carrots 🥕 | 4 whole | Peeled, cut into chunks |
| Yukon Gold Potatoes 🥔 | 1 ½ lb | Cut into large pieces |
| Beef Broth 💧 | 2 cups | Low-sodium preferred |
| Worcestershire Sauce 🫒 | 2 tbsp | Lea & Perrins recommended |
| Dried Thyme 🌿 | 1 tsp | Rubbed between fingers |
| Dried Rosemary 🍃 | 1 tsp | Crushed before adding |
| Bay Leaves 🌿 | 2 whole | Removed before serving |
| Tomato Paste 🍅 | 2 tbsp | For depth of flavor |
| Olive Oil 🫒 | 2 tbsp | For searing beef |
[recipeingredientscaler]
The beef is the foundation—select a well-marbled chuck roast from a reputable butcher or Whole Foods. Boneless is easier to serve, but bone-in adds depth. For the broth, low-sodium allows you to control seasoning. Diamond Crystal kosher salt is the standard in professional kitchens for its clean flavor and consistent grain size.
No chuck roast? Brisket or short ribs work but require longer cook times. Substitute vegetable broth if avoiding beef products. Fresh herbs can replace dried at triple the amount, but dried are more convenient for slow cooking. Lea & Perrins Worcestershire is the benchmark, but Annie’s is a solid organic alternative.
Store raw beef in the coldest part of your fridge—use within 3 days. Roast freezes beautifully for up to 3 months. Leftovers reheat well and taste even better the next day as flavors meld.
Why You’ll Love This Recipe
- One roast feeds us twice: dinner the first night, then incredible leftovers for sandwiches or tacos.
- Set It and Forget: I toss the chuck roast, garlic, and onion in before work and come home to dinner ready.
- Sunday or Wednesday: Here’s what sold me—this works for fancy family dinners or lazy midweek meals.
- Stretches for Days: One roast feeds us twice: dinner the first night, then incredible leftovers for sandwiches or tacos.
Step-by-Step Instructions for Crock Pot Instant Pot Roast
Master this hands-off technique for melt-in-your-mouth beef and perfectly tender vegetables every time.
Step 1: Sear the Beef Chuck Roast
Heat the 2 tbsp olive oil in your Instant Pot using the sauté function on high heat. Pat the 3 lb beef chuck roast dry with paper towels, then season aggressively with the 1.5 tsp kosher salt and 1 tsp black pepper on all sides.
Sear the roast for 4-5 minutes per side until deeply browned. This creates a flavorful fond that will dissolve into the cooking liquid. Don’t rush this step—the Maillard reaction here builds the base of your sauce’s complexity.
Step 2: Build the Flavor Foundation
Add the 1 whole yellow onion (quartered), 6 cloves garlic cloves (smashed), and 2 tbsp tomato paste to the pot. Cook for 2-3 minutes, stirring constantly, until the tomato paste darkens slightly and the onions begin to soften.
Pour in the 2 cups beef broth and 2 tbsp Worcestershire sauce, then use a wooden spoon to scrape up any browned bits from the bottom. Add the 1 tsp dried thyme (rubbed between your fingers), 1 tsp dried rosemary (crushed), and 2 whole bay leaves.
Step 3: Pressure Cook to Perfection
Return the seared beef to the pot along with the 4 whole carrots and 1.5 lb Yukon Gold potatoes. Secure the lid, set the valve to sealing, and cook on high pressure for 60 minutes.
Allow for a natural pressure release for 15 minutes, then quick-release any remaining pressure. The beef should be fork-tender, with fibers that separate easily under gentle pressure. The vegetables should be soft but still hold their shape.
Step 4: Finish and Serve
Remove the 2 whole bay leaves and discard. Skim any excess fat from the surface of the cooking liquid if desired. For a thicker sauce, switch back to sauté mode and simmer uncovered for 5-7 minutes until reduced to your preferred consistency.
Taste and adjust seasoning if needed, though the initial salting should be sufficient. Serve the roast sliced or shredded, with the vegetables and sauce spooned over the top. The beef should be so tender it nearly collapses at the touch of a fork.
Pro Tips For Making Crock Pot Instant Pot Roast
- Sear the Chuck First: I learned this the hard way—browning the beef chuck in batches with a little oil before pressure cooking adds a depth of flavor that skipping this step just can’t match.
- Cut Onions Thick: Sounds weird, but it works: slice the yellow onion into ½-inch chunks so they hold up during the long cook and don’t turn to mush in the pot.
- Skip the Overfilling: Resist the urge to cram in extra liquid or veggies—fill the Instant Pot no more than two-thirds full to avoid a messy, incomplete cook.
- Use a Natural Release: After burning three batches, I finally figured out that letting the pressure release naturally for 10-15 minutes keeps the roast tender instead of tough.
Common Mistakes When Making This Dish
Skipping the Sear
I know it’s tempting to dump everything in and walk away, but skipping the sear means missing out on the Maillard reaction that builds deep flavor. Take the extra 10 minutes to brown the beef—it makes all the difference in your final dish. 🔥
Overfilling the Pot
Both crock pots and Instant Pots have maximum fill lines for safety. Never exceed ⅔ full for pressure cooking or ½ full for grains/beans. Overfilling can cause uneven cooking or even dangerous pressure buildup.
Using the Wrong Cut
Lean cuts like sirloin will dry out during long cooking. Stick with well-marbled chuck roast—the fat melts into the meat, creating that fall-apart texture. I’ve learned this lesson the hard way with tough, dry results.
Ignoring Liquid Requirements
Pressure cookers need at least 1 cup of liquid to build pressure. For slow cookers, you’ll want enough to cover the bottom but not submerge the meat. Too little liquid burns, too much dilutes your flavors.
Skipping the Release
With pressure cooking, always allow for 15 minutes natural release before quick-releasing. This prevents tough meat and potential pressure valve issues. I set a timer to remind myself—it’s an easy step to forget in a hurry.
Adding Dairy Too Soon
If you want to add cream or cheese to make a sauce, wait until after pressure cooking. Dairy can curdle under high pressure. Stir in ½ cup heavy cream at the end for a rich finish.
Nutrition Facts
Frequently Asked Questions
Should I sear the beef first?
Searing for 4-5 minutes per side creates a flavorful crust via the Maillard reaction. This step builds the base for your sauce’s rich complexity.
Can I use a different cut of meat?
Stick with well-marbled chuck roast for best results. Lean cuts like sirloin will dry out. Brisket or short ribs work but require longer cooking times.
How long does pressure cooking take?
Cook on high pressure for 60 minutes, then allow a 15-minute natural release. The meat should be fork-tender when done.
What if my sauce is too thin?
Switch to sauté mode and simmer uncovered for 5-7 minutes. This reduces the liquid to your preferred consistency.

- 4C Bread Crumbs Meatballs Recipe: Crispy Crust and Juicy Centers - September 25, 2026
- 6 Oz Chocolate Chip Cookie Recipe: Perfectly Balanced Crispy Edges and Chewy Hearts - September 25, 2026
- 6-Inch Coffee Cake Recipe: Vanilla Bean Swirls and Buttery Streusel Topping - September 25, 2026