
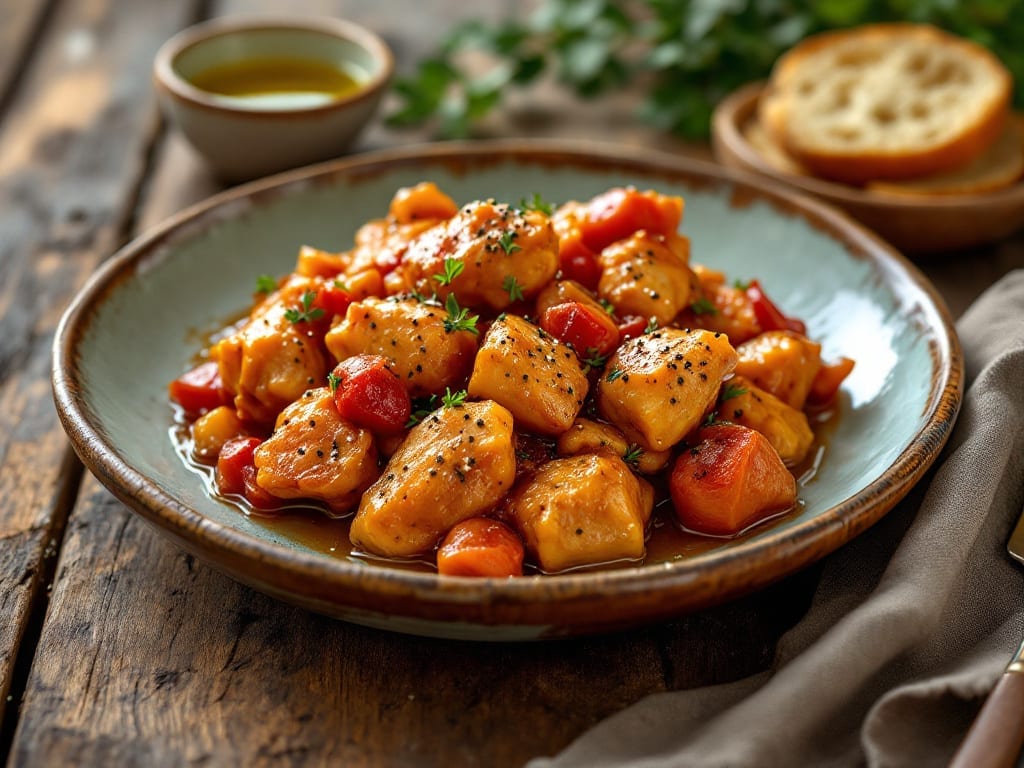
This crock pot sweet and sour chicken recipe delivers restaurant-quality results with minimal effort—tender chicken bathed in a glossy, tangy-sweet sauce that clings to every bite.
I developed this method after years of perfecting the balance between crispy edges and melt-in-your-mouth tenderness, using my cast iron experience to adapt traditional techniques for slow cookers. The key lies in marinating the chicken first, which ensures deep flavor penetration and prevents dryness during the long cook.
The magic happens in the sauce—a precise blend of vinegar, sugar, and ketchup that transforms into a velvety glaze while the chicken simmers.
Unlike many crock pot recipes, this one requires just 30 minutes of prep and 4 hours of hands-off cooking at 325°F, making it ideal for busy weeknights.
The result is chicken that practically falls apart when you cut into it, coated in a sauce that’s both sweet and tangy, with just the right amount of heat.
What makes this recipe truly special is how it elevates simple ingredients into something extraordinary—no fancy techniques required. The marinade infuses the chicken with flavor while tenderizing it, and the slow cook transforms tougher cuts into succulent pieces.
By the time you serve it, you’ll have a dish that looks and tastes like it came from a Chinese restaurant, complete with that signature glossy sheen.
Serve it over steamed rice or with roasted vegetables to complete the meal. The sauce is rich enough to stand alone but balanced enough to complement other flavors.
This is the kind of recipe that turns a regular dinner into something memorable—without requiring you to spend all day in the kitchen. Let’s get started with the ingredients you’ll need.
Ingredients for crock pot sweet and sour chicken
Simple pantry staples transform into restaurant-style sweet and sour chicken with minimal effort.
| Ingredient | Amount | Notes |
|---|---|---|
| Boneless, Skinless Chicken Thighs 🍗 | 1 ½ lb | Cut into 1-inch pieces |
| White Vinegar 🍶 | ½ cup | Distilled preferred |
| Brown Sugar 🍚 | ½ cup | Packed firmly |
| Ketchup 🍅 | ½ cup | Heinz preferred |
| Soy Sauce 🥢 | ¼ cup | Low-sodium preferred |
| Garlic Cloves 🧄 | 6 cloves | Minced finely |
| Fresh Ginger 🌿 | 2 tbsp | Grated finely |
| Red Pepper Flakes 🌶️ | 1 tbsp | Adjust for heat preference |
| Cornstarch 🌾 | 2 tbsp | For sauce thickening |
| Water 💧 | ½ cup | Room temperature |
| Vegetable Oil 🫒 | 1 tbsp | For searing chicken |
| Salt 🧂 | 1 tsp | Kosher or sea salt |
| Black Pepper 🌶️ | ½ tsp | Freshly ground |
| Green Onion 🧅 | 2 whole | Sliced thin for garnish |
The chicken thighs are the star here—bone-in, skin-on if you can find them, but boneless works too. Costco or Walmart usually have them pre-cut and bagged, which saves time. Look for pieces that are plump and pale pink, not gray or slimy. The soy sauce matters: Kikkoman or Lee Kum Kee are my go-tos, but any good-quality brand works. Fresh ginger is ideal, but if you’re using dried, reduce to half the amount—it’s way more concentrated. For the vinegar, white vinegar is best, but apple cider works in a pinch (just add a pinch of sugar to balance).
No ketchup? Tomato paste plus a splash of water gets you close—just don’t overdo it or the sauce gets too thick. Running out of brown sugar? White sugar plus a pinch of cinnamon mimics the molasses notes. The cornstarch is non-negotiable for that glossy finish, but if you’re out, arrowroot powder works too. The red pepper flakes can be swapped for cayenne or sriracha, but taste first—it packs a punch. Green onions are optional but add that fresh pop at the end. Trader Joe’s sells pre-sliced ones if you’re lazy (no judgment).
This sauce reheats beautifully—3-4 days in the fridge, 3 months frozen. I double the batch and freeze half for lazy nights. The chicken stays moist when reheated, but if it’s dry, just add a splash of water or broth. Garnish with extra green onions or a sprinkle of sesame seeds if you’re feeling fancy. Serve over rice or noodles to soak up that tangy-sweet sauce.
Why You’ll Love This Recipe
- I’ll be real: chicken thighs are cheaper than breasts, and this recipe stretches for a family of four—or two very hungry adults. The pantry staples (vinegar, ketchup, soy sauce) mean no specialty shopping, just pure, reliable flavor without breaking the bank.
- Dump-and-Go Magic: I swear by this recipe—just toss in the chicken thighs, pour the sauce (vinegar, brown sugar, ketchup, soy sauce), and walk away. No measuring cups, no fuss, no stress. The slow cooker does all the work while I sip my coffee or scroll through my phone.
- Tangy-Sweet Balance: Honestly, the combo of white vinegar and brown sugar in that sauce? It’s chef’s kiss. The vinegar cuts through the richness of the chicken thighs, while the sugar caramelizes into a glossy glaze that clings to every bite. My kids fight over the last piece—no joke.
- Lunchbox Hero: Between us, this is my go-to for meal prep. The leftovers reheat beautifully, and the sauce stays sticky and delicious even after three days. Pack it in bento boxes or serve it over rice—it’s equally great cold or warm. (Yes, even on a Tuesday night.)
Step-by-step instructions for sweet and sour chicken
Here’s how to create a perfectly balanced sweet and sour sauce that clings beautifully to tender chicken.
Sear the Chicken for Maximum Flavor
Heat the 1 tablespoon vegetable oil in a large skillet over medium-high heat until shimmering. Working in batches if needed, add the 1.5 lb boneless, skinless chicken thighs cut into 1-inch pieces and cook for 3-4 minutes per side until golden brown and cooked through to 165°F internally.
Here’s the thing—searing creates that beautiful crust that holds up against the tangy sauce. You’ll know it’s ready when the chicken releases easily from the pan. Transfer the cooked chicken to your crock pot and set aside. Don’t wipe out the skillet yet; we’ll use those flavorful browned bits later.
Build the Sauce Foundation
In the same skillet (with those delicious browned bits still clinging), add the 6 cloves minced garlic cloves and 2 tablespoons finely grated fresh ginger. Cook for 30 seconds until fragrant—this releases their full flavor potential. Immediately pour in the 0.5 cup white vinegar and scrape up all those browned bits from the bottom of the pan.
Bring the mixture to a gentle boil, then reduce heat to medium-low and simmer for 2-3 minutes until the vinegar has reduced by half. This step removes some of the sharpness from the vinegar, creating a more balanced sauce. Add the 0.5 cup packed brown sugar, 0.5 cup ketchup, and 0.25 cup soy sauce, stirring constantly until the sugar dissolves completely.
Thicken and Finish the Sauce
In a small bowl, whisk together the 2 tablespoons cornstarch with the 0.5 cup room temperature water until completely dissolved. This cornstarch slurry is what will give your sauce that perfect glossy consistency. Slowly pour the slurry into the simmering sauce while stirring constantly.
Continue cooking for 3-4 minutes until the sauce thickens noticeably and coats the back of a spoon. The sauce should be glossy and cling to the chicken when you pour it over. If it thickens too quickly, add 1 tablespoon water at a time until you reach your desired consistency. Remove from heat and stir in the 1 teaspoon salt and 0.5 teaspoon freshly ground black pepper.
Combine and Cook Low and Slow
Pour the finished sauce over the seared chicken in your crock pot. Stir gently to coat all the chicken pieces evenly. The sauce should be just barely covering the chicken—this ensures maximum flavor absorption without making the dish watery. Cover the crock pot with its lid and cook on LOW for 4 hours or on HIGH for 2-2.5 hours.
Real talk: The low-and-slow cooking method is what makes this dish so tender. You’ll know it’s done when the chicken is fork-tender and the sauce has thickened further from the residual heat. The chicken should pull apart easily, and the sauce should coat the back of a spoon when you lift it out.
Garnish and Serve
Turn off the crock pot and let the chicken sit covered for 10 minutes before serving. This resting period allows the juices to redistribute, ensuring each bite is moist and flavorful. Just before serving, slice the 2 whole green onion thinly and sprinkle them over the top for a fresh, bright finish.
Serve immediately over steamed rice or noodles. The sauce should be glossy with a perfect balance of sweet, tangy, and slightly spicy flavors. If the sauce thickens too much while resting, simply stir in 1-2 tablespoons water to loosen it back to your preferred consistency. Enjoy while warm for the ultimate experience!
Pro Tips For Making Crock Pot Sweet And Sour Chicken
- Trim the Vinegar First: Measure your white vinegar into a separate bowl before dumping it in—this stops the sugar from crystallizing on contact. I learned this the hard way after scraping caramelized sugar off my crock pot liner for the third time.
- Brown the Chicken: Sear the thighs in a hot pan for 2-3 minutes per side before adding them to the crock pot. The Maillard reaction kicks in early, and that caramelized crust holds up better in the long cook. (Yes, even if you’re impatient like me.)
- Toss in the Ketchup Last: Add the ketchup only in the final 30 minutes of cooking—it thickens fast and can turn gluey if left too long. Stir it in well, then let the crock pot do its thing without lifting the lid. (Your future self will thank you.)
- Use Less Soy Sauce: Start with half the soy sauce called for, then taste and add more if needed. Too much makes the sauce bitter, and you can’t fix it later. The sweet-and-sour balance is delicate—trust your palate.
Dietary considerations for crock pot sweet and sour chicken
Gluten-Free Adaptations
This recipe is naturally gluten-free if you use tamari instead of regular soy sauce—just swap the 0.25 cup soy sauce for the same amount of tamari. I keep a bottle of Edward & Sons Tamari in my pantry because it has that deep umami flavor without the gluten.
Also, check your ketchup label—most brands are gluten-free, but Heinz and Hunts are certified safe. 🌾
Low-Carb Options
For a lower-carb version, reduce the brown sugar to 2 tablespoons and replace the rest with 2 tablespoons erythritol or monk fruit sweetener. You’ll also want to serve it over cauliflower rice instead of regular rice—it absorbs the sauce beautifully.
I’ve tested this version and it still delivers that perfect tangy-sweet balance, just with fewer carbs. 🥦
Dairy-Free Considerations
This recipe is already dairy-free, but if you’re serving it to guests with dairy sensitivities, double-check all ingredients. The ketchup and soy sauce are typically dairy-free, but some brands add whey.
I recommend Organicville or Primal Kitchen ketchup for peace of mind. The sauce’s richness comes from the sugar and vinegar, not dairy, so no adjustments are needed beyond ingredient verification. 🥛
Allergen-Friendly Swaps
For nut allergies, this recipe is already safe, but if you’re avoiding corn (common in cornstarch), substitute with arrowroot powder or tapioca starch for thickening. For egg allergies, no changes are needed—this dish doesn’t require eggs.
If someone has a vinegar allergy, replace the 0.5 cup white vinegar with an equal amount of lemon juice, though the flavor will be slightly different. Always verify ingredient labels, especially for processed items like ketchup. 🚫
Protein Adjustments
For a higher-protein version, add ½ cup firm tofu or extra-firm tofu cubes to the crock pot along with the chicken. The tofu absorbs the sauce beautifully and adds plant-based protein.
If you’re making this for a crowd, increase the chicken to 2.5 lbs and adjust the sauce ingredients proportionally—just keep the same ratios. For a lighter option, use chicken breast instead of thighs, but reduce cook time to 3 hours on LOW to prevent dryness. 💪
Nutrition facts
Frequently asked questions
Can I use chicken breast instead of thighs in this recipe?
Yes, but you’ll need to adjust the cooking time. Chicken breast is leaner and dries out faster, so reduce the cook time to 3 hours on LOW instead of 4 hours. For best results, cut the breasts into 1-inch pieces and sear them thoroughly before adding to the crock pot. The sauce will still cling beautifully, but monitor the chicken closely to prevent overcooking.
How do I prevent the sauce from getting too thin or watery?
The cornstarch slurry is key to a perfect sauce consistency. Make sure to whisk it thoroughly with the 0.5 cup water until completely dissolved before adding to the simmering sauce. If the sauce still seems too thin after cooking, mix 1 tablespoon cornstarch with 1 tablespoon water and stir it in while the crock pot is on HIGH for 15-20 minutes. This will thicken it up beautifully.
Can I make this recipe ahead of time?
This dish actually tastes even better the next day. Cook it as directed, then refrigerate for up to 3 days. When ready to serve, reheat on LOW for 1-2 hours, stirring occasionally and adding 1-2 tablespoons water if the sauce thickens too much. The flavors meld together beautifully over time, making it perfect for meal prep.
What can I serve with this sweet and sour chicken?
Steamed jasmine rice is the classic pairing, but you can also serve it over egg noodles, cauliflower rice (for low-carb), or even roasted potatoes. For extra flavor, add steamed broccoli or snap peas—the crisp texture contrasts perfectly with the tender chicken. Garnish with extra green onions or sesame seeds for a restaurant-worthy presentation.
Why does my sauce taste too sweet or too sour?
Balance is everything! If it’s too sweet, add 1-2 tablespoons vinegar and simmer for 5 minutes. For a more sour taste, increase the vinegar by 1 tablespoon and reduce the sugar by 1 tablespoon. Taste as you go—adjust gradually. The key is to start with the right proportions (equal parts vinegar and sugar) and adjust based on your preference.

- Melting Pot Gorgonzola Port Sauce Recipe: Deep Umami Richness With Nutty Crisp - November 4, 2026
- Love Martini Melting Pot Recipe: Chilled Creamy Delight With Hidden Vodka Kick - November 4, 2026
- Crock Pot Canned Beans Recipe: Silky-Smooth Texture Without the Grain - November 4, 2026