
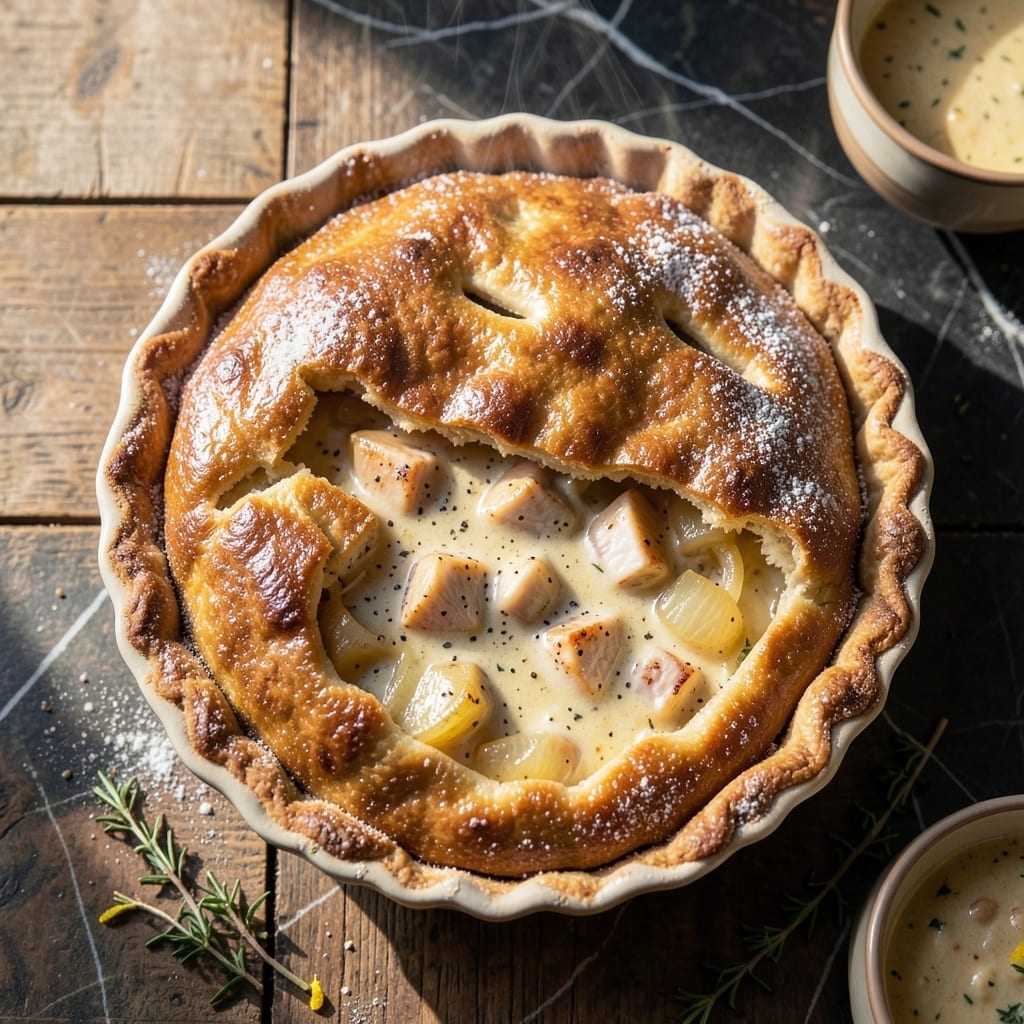
There’s nothing quite like a chicken pot pie fresh from the oven, with its flaky golden crust and rich, creamy filling. This recipe brings back memories of Sunday dinners, where the aroma alone could gather the family around the table.
The secret lies in a buttery, homemade crust and a filling packed with tender chicken, hearty vegetables, and a velvety sauce. It’s the kind of dish that feels like a warm hug on a chilly evening.
What makes this version special is the balance of textures—crisp crust, creamy filling, and chunks of chicken and veggies that hold their shape. Every bite delivers comfort in its purest form.
Bake it for a cozy weeknight meal or serve it as the centerpiece of a gathering. Here’s how to make it just right.
Ingredients for Dad’s Chicken Pot Pie
Buttery crust and creamy filling come together with simple, hearty ingredients for pure comfort.
| Ingredient | Amount | Notes |
|---|---|---|
| All-Purpose Flour 🌾 | 2 ½ cups | Plus extra for dusting surface |
| Unsalted Butter 🧈 | 1 cup | Cold, cubed for crust |
| Salt 🧂 | 1 tsp | Divided for crust and filling |
| Ice Water 💧 | 6 tbsp | For pie crust dough |
| Boneless Skinless Chicken Breast 🍗 | 1 ½ lb | Cut into 1-inch cubes |
| Yellow Onion 🧅 | 1 whole | Medium, finely diced |
| Carrots 🥕 | 2 whole | Medium, peeled and diced |
| Celery Stalks 🥬 | 2 whole | Diced for filling |
| Frozen Peas 🌱 | 1 cup | No need to thaw |
| Garlic Cloves 🧄 | 3 cloves | Minced for sauce |
| All-Purpose Flour 🌾 | ¼ cup | For thickening sauce |
| Chicken Stock 🍲 | 1 ½ cups | Low-sodium preferred |
| Whole Milk 🥛 | ½ cup | For creamy sauce |
| Heavy Cream 🥣 | ½ cup | Full-fat for richness |
| Fresh Thyme Leaves 🌿 | 1 tbsp | Or 1 tsp dried thyme |
| Black Pepper 🌶️ | ½ tsp | Freshly ground preferred |
The crust demands cold butter—Land O’Lakes or Kerrygold work beautifully. Use all-purpose flour from King Arthur for consistent results. For the chicken, boneless, skinless breasts stay tender. Buy them fresh from the butcher counter at Whole Foods if possible—the texture difference is noticeable. The vegetables should be fresh, not pre-cut (those dry out).
Swapping chicken? Rotisserie chicken at about 3 cups saves time. No thyme? Poultry seasoning at half the amount works. Short on milk? Half-and-half adds extra richness. The peas can be fresh, but frozen hold their shape better. If avoiding dairy, substitute coconut milk for the cream—flavor will differ but it’ll still be delicious.
Assemble and bake right away, or prep the filling a day ahead. Leftovers keep 3-4 days refrigerated, though the crust softens. Freeze unbaked pies for up to 2 months—thaw overnight before baking. Always reheat in the oven to crisp the crust.
Why You’ll Love This Recipe
- One Bowl Wonder: I mix the crust right in the same bowl I use for the filling—flour, butter, ice water, done.
- Buttery Crust Magic: That flaky, golden crust made with unsalted butter and just a pinch of salt? It’s the kind of thing that makes people pause mid-bite.
- Weeknight Hero: I’ve served this for Sunday dinner, busy Tuesdays, and even potlucks. Between us, it always disappears first.
- Leftovers for Days: One pie feeds us for two meals, and honestly, it tastes even better the next day. My daughter picks out the chicken but still cleans her plate.
Step-by-Step Instructions for Dad’s Chicken Pot Pie
Master the technique that delivers a golden, flaky crust over a creamy, hearty filling.
Step 1: Prepare the Flaky Pie Crust
In a large bowl, combine 2.5 cups all-purpose flour and ½ tsp salt. Cut in 1 cup cold unsalted butter using a pastry cutter or your fingers until the mixture resembles coarse crumbs with pea-sized butter pieces visible.
Gradually add 6 tbsp ice water, one tablespoon at a time, mixing gently with a fork until the dough just comes together. It should hold when pressed but not be sticky. Overworking the dough will develop gluten, making the crust tough.
Divide the dough into two equal portions, flatten into discs, and wrap in plastic. Chill for at least 1 hour—this relaxes the gluten and firms the butter, ensuring those coveted flaky layers.
Step 2: Cook the Chicken and Vegetables
Cut 1.5 lb boneless skinless chicken breast into 1-inch cubes. In a large pot, bring 1.5 cups chicken stock to a simmer and poach the chicken for 8-10 minutes until cooked through. Remove chicken and set aside.
In the same pot, sauté 1 diced yellow onion, 2 diced carrots, and 2 diced celery stalks until softened, about 5 minutes. Add 3 minced garlic cloves and 1 tbsp fresh thyme leaves, cooking for 30 seconds until fragrant.
Step 3: Make the Creamy Filling
Stir 0.25 cup all-purpose flour into the vegetable mixture and cook for 1 minute to remove the raw flour taste. Slowly whisk in 0.5 cup whole milk and 0.5 cup heavy cream, ensuring no lumps form.
Return the chicken to the pot along with 1 cup frozen peas and remaining ½ tsp salt and ½ tsp black pepper. Simmer for 5-7 minutes until the mixture thickens and coats the back of a spoon. The filling should be rich and creamy, not watery.
Step 4: Assemble and Bake the Pot Pie
On a lightly floured surface, roll out one dough disc to fit a 9-inch pie dish. Transfer the filling into the crust-lined dish. Roll out the second disc and place it over the filling, crimping the edges to seal.
Cut several slits in the top crust to allow steam to escape. Bake at 425°F for 30-35 minutes until the crust is golden brown and the filling is bubbling. If the edges brown too quickly, cover them with foil.
Let the pot pie rest for 10 minutes before serving. This allows the filling to set slightly, making it easier to slice neatly.
Pro Tips For Making Dad’S Chicken Pot Pie
- Chill the Dough: After mixing the flour, butter, salt, and ice water, let the dough rest in the fridge for at least 30 minutes—this keeps the butter from melting too soon and guarantees a flaky crust.
- Poach the Chicken: Simmer the boneless chicken breasts in lightly salted water for 12-15 minutes until just cooked through, then shred or cube it—this method keeps the meat juicy instead of dry.
- Avoid Soggy Bottom: Blind-bake the bottom crust for 10 minutes before adding the filling, or brush it with a thin layer of egg wash to create a barrier against the wet mixture.
- Use Cold Butter: Cut the unsalted butter into small cubes and keep it ice-cold until mixing with the flour—this creates those coveted flaky layers in the crust.
Essential Equipment for This Dish
Pie Dish Essentials
I always reach for my 9-inch glass pie dish—the Pyrex brand is my go-to. Glass conducts heat evenly and lets you monitor the crust’s browning. For extra crispness, a dark metal pie pan works too, but watch for over-browning.
Rolling Pin Choice
A French-style rolling pin (no handles) gives you better control for even thickness. I use my J.K. Adams maple wood pin—it’s durable and doesn’t stick. Lightly flour it and your surface to prevent the dough from clinging.
Pastry Tools
A pastry cutter makes quick work of cutting cold butter into flour. I love my OXO Good Grips model for comfort. If you don’t have one, two knives or your fingers work, but the cutter saves time and effort. 💪
Measuring Accurately
For consistent results, use nested measuring cups and spoons. I prefer stainless steel for durability. A kitchen scale is helpful for weighing butter if you want to be precise—1 cup equals 227g.
Heat-Resistant Utensils
When making the filling, a wooden spoon prevents scratching your pot. I use a silicone spatula to scrape every bit of sauce from the pan. These small tools make a big difference in ease and cleanup.
Oven Thermometer
Don’t trust your oven’s built-in thermometer. I keep a Taylor oven thermometer inside to verify the 425°F temperature. This ensures your crust bakes evenly and the filling cooks perfectly. 🌡️
Nutrition Facts
Frequently Asked Questions
Can I use store-bought pie crust instead?
Yes, but the texture will differ. Homemade crust offers superior flakiness and flavor. If using store-bought, opt for an all-butter version and ensure it’s fully thawed before rolling.
How do I prevent a soggy bottom crust?
Blind-bake the bottom crust for 10 minutes before adding the filling. Also, ensure the filling is thick and not watery before assembling. Let it rest 10 minutes after baking too.
Can I make this ahead of time?
Assemble the pie completely and refrigerate for up to 1 day before baking. Alternatively, freeze unbaked pies for up to 2 months. Thaw overnight in the fridge before baking.
What can I substitute for heavy cream?
Use half-and-half for a lighter option, or whole milk with an extra 1 tbsp butter for richness. For dairy-free, try full-fat coconut milk, but expect a slight flavor change.

- 4C Bread Crumbs Meatballs Recipe: Crispy Crust and Juicy Centers - September 25, 2026
- 6 Oz Chocolate Chip Cookie Recipe: Perfectly Balanced Crispy Edges and Chewy Hearts - September 25, 2026
- 6-Inch Coffee Cake Recipe: Vanilla Bean Swirls and Buttery Streusel Topping - September 25, 2026