
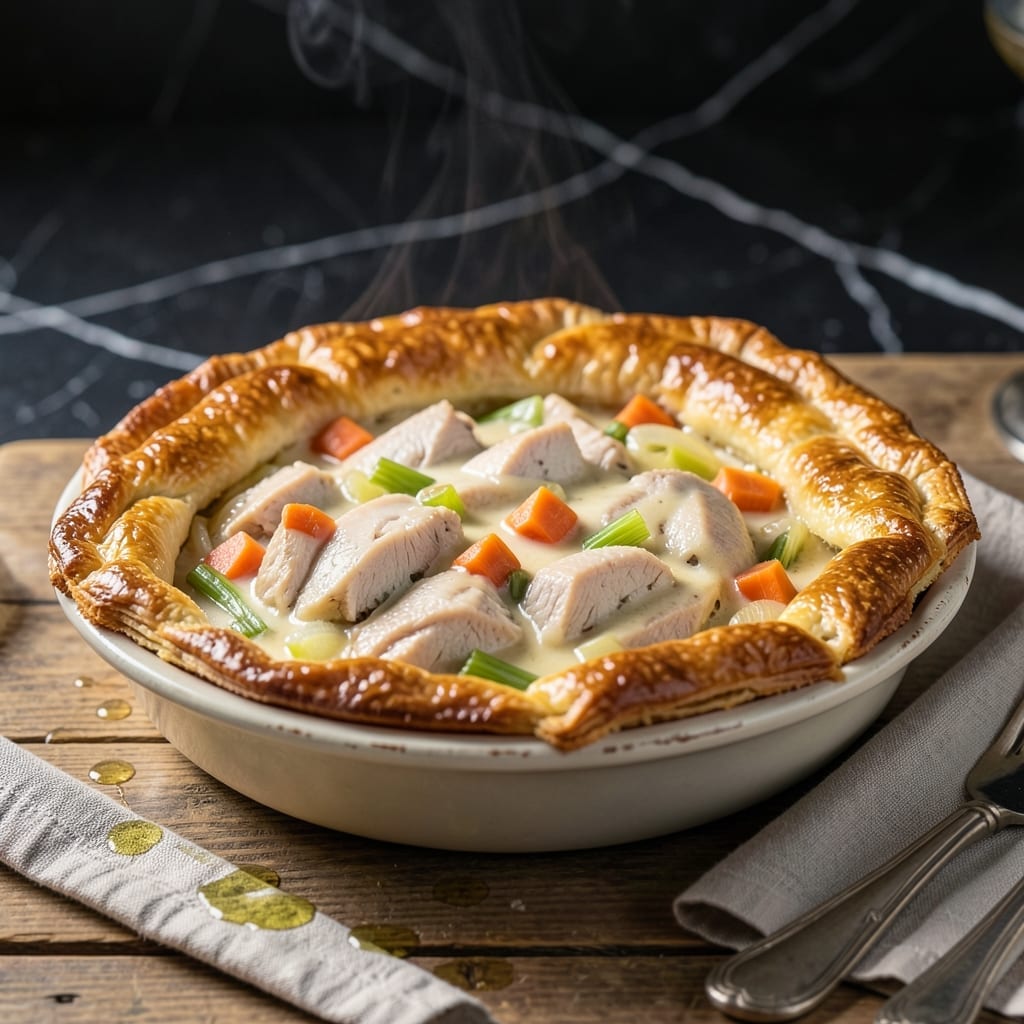
There’s nothing like the first bite of a golden pot pie, with its flaky crust giving way to rich, creamy filling inside. This is homestyle comfort food at its finest—warm, satisfying, and perfect for cozy family dinners.
I developed this version to capture that classic taste without complicated techniques. The secret is in the roux-based filling that coats every piece of turkey and vegetable in velvety gravy. A double crust ensures that buttery, crispy top and bottom.
You’ll end up with a pie that’s hearty enough for a main course but still feels like a hug on a plate. The filling stays thick and flavorful, while the crust bakes to a perfect golden brown.
Serve it straight from the oven for the ultimate comfort meal.
Ingredients for Dad’s Turkey Pot Pie
Golden crust, creamy filling, and all the comfort you crave. Probably have most of this already.
| Ingredient | Amount | Notes |
|---|---|---|
| Turkey Breast 🦃 | 2 cups | Cooked, shredded or diced |
| All-Purpose Flour 🌾 | ½ cup | For roux and crust |
| Unsalted Butter 🧈 | ¾ cup | Cold, cubed for crust |
| Chicken Broth 🥣 | 2 ½ cups | Low-sodium preferred |
| Whole Milk 🥛 | ¾ cup | For creamy filling |
| Carrots 🥕 | 1 cup | Diced into small cubes |
| Frozen Peas 🌱 | 1 cup | No need to thaw |
| Yellow Onion 🧅 | 1 whole | Finely diced |
| Celery Stalks 🌿 | 2 pieces | Diced small |
| Garlic Cloves 🧄 | 2 cloves | Minced finely |
| Dried Thyme 🌿 | 1 tsp | Or 1 tbsp fresh |
| Salt 🧂 | 1 tsp | Divided for filling and crust |
| Black Pepper 🌶️ | ½ tsp | Freshly ground preferred |
| Egg 🥚 | 1 whole | For egg wash |
The turkey is the star—rotisserie chicken works great if you’re skipping the roasting step. For the crust, cold butter is non-negotiable (it’s what gives you those flaky layers). I grab mine from Whole Foods—their organic butter has the perfect fat content. The broth matters too; low-sodium lets you control the seasoning. Don’t skip the milk in the filling—it’s what makes it velvety.
No turkey? Chicken or even leftover ham works in a pinch. Fresh herbs can swap in at one-third the amount of dried. Short on veggies? Green beans or corn are great additions. The peas can stay frozen—no need to thaw. If you’re out of milk, half-and-half makes it even richer (just reduce the broth slightly).
Assemble and bake right away, or prep the filling a day ahead (store it in the fridge). Leftovers keep 3-4 days refrigerated. The crust freezes beautifully—just roll it out and freeze between parchment for up to 3 months.
Why You’ll Love This Recipe
- I’ll be real: this makes enough for dinner tonight plus leftovers for tomorrow’s lunch.
- One Bowl Wonder: I just dump the turkey, flour, and butter into a single bowl—no fancy prep, no extra dishes.
- Golden Crust: The butter and milk create this flaky, rich top that cracks perfectly with every spoonful.
- Feeds a Crowd: I’ll be real: this makes enough for dinner tonight plus leftovers for tomorrow’s lunch.
Step-by-Step Instructions for Dad’s Turkey Pot Pie
This is where the magic happens—simple steps to homestyle comfort in every bite.
Step 1: Sauté the Vegetables and Turkey for Maximum Flavor
Heat a large skillet over medium heat and melt 2 tablespoons of the unsalted butter. Add the diced yellow onion, carrots, and celery stalks, cooking for 5-6 minutes until the onion turns translucent and the vegetables begin to soften.
Stir in the minced garlic cloves and cook for 30 seconds until fragrant. Add the 2 cups Turkey Breast, dried thyme, salt, and black pepper, cooking for another 2 minutes to meld the flavors. This builds a rich, savory base that defines the filling.
Step 2: Create a Rich, Creamy Filling with the Roux
Sprinkle the 0.5 cup All-Purpose Flour over the vegetable and turkey mixture, stirring constantly for 1-2 minutes to cook off the raw flour taste. This creates a light roux that will thicken the filling beautifully.
Slowly pour in the 2.5 cups Chicken Broth and 0.75 cup Whole Milk, whisking continuously to avoid lumps. Bring the mixture to a simmer and cook for 5-7 minutes until it thickens to the consistency of a creamy gravy. Stir in the frozen peas—no need to thaw them first.
Step 3: Prepare and Roll Out the Buttery Crust
In a food processor, pulse the remaining 0.75 cup Unsalted Butter (cubed and cold) with an additional 1 cup All-Purpose Flour and a pinch of salt until the mixture resembles coarse crumbs. Add 2-3 tablespoons of ice water, 1 at a time, until the dough just comes together.
Turn the dough onto a lightly floured surface and knead gently until smooth. Roll it out to fit a 9-inch pie dish. Transfer the dough to the dish, pressing it gently into the bottom and up the sides. Trim any excess dough, leaving a slight overhang for crimping.
Step 4: Assemble and Bake to Golden Perfection
Pour the turkey and vegetable filling into the prepared crust, spreading it evenly. Roll out the remaining dough to create the top crust and place it over the filling. Crimp the edges tightly to seal, then cut a few small slits in the top to allow steam to escape.
Whisk the egg with 1 tablespoon of water and brush it lightly over the top crust for a beautiful golden finish. Bake in a preheated 375°F oven for 35-40 minutes until the crust is golden brown and the filling is bubbling.
Step 5: Rest and Serve Warm for Ultimate Comfort
Remove the pot pie from the oven and let it rest for 10-15 minutes before slicing. This allows the filling to set slightly, making it easier to serve neat portions. The crust should be flaky and golden, while the filling stays creamy and rich.
Serve warm, straight from the dish, and enjoy the cozy, heartwarming flavors. Each bite delivers tender turkey, savory vegetables, and a buttery crust that’s pure comfort food.
Pro Tips For Making Dad’S Turkey Pot Pie
- Pre-Cook the Turkey: Poach the turkey breast in chicken broth for 15-20 minutes until just done—this keeps it moist and infuses extra flavor before mixing into the filling.
- Chill the Dough: Rest your flour-butter crust in the fridge for at least 30 minutes before rolling; I learned this the hard way after my first few pies turned out tough and shrunken.
- Thicken It Right: Mix a little cold milk with flour to make a slurry before stirring into the hot filling—this prevents lumps and gives that perfect creamy consistency.
- Vent the Top: Cut a few small slits in the top crust before baking—sounds obvious, but I skipped it once and ended up with a soggy, collapsed center.
Make-Ahead Tips for This Dish
Prep Filling Ahead
You can cook and cool the filling up to 2 days ahead. Store it in an airtight container in the fridge. The flavors meld beautifully overnight, making the dish even tastier. 💡
Crust Preparation
Make the crust dough up to 3 days ahead and refrigerate it wrapped in plastic. Or roll it out, layer with parchment, and freeze for up to 1 month. Thaw in the fridge overnight before using.
Assemble Early
Assemble the entire pie (unbaked) and refrigerate for up to 12 hours. Let it sit at room temperature for 30 minutes before baking. This saves time without sacrificing quality.
Freeze for Later
Bake the pot pie completely, cool, then freeze whole for up to 2 months. Wrap tightly in foil and plastic. Reheat covered at 350°F for 30-40 minutes. ❄️
Reheating Tips
For individual servings, microwave covered with a damp paper towel for 2-3 minutes. For best results, reheat in the oven at 350°F for 15-20 minutes to crisp the crust.
Nutrition Facts
Frequently Asked Questions
Can I use store-bought pie crust instead?
Use 2 refrigerated pie crusts for convenience. Just thaw them first and roll out slightly to fit your dish. The taste will still be delicious.
How do I prevent a soggy bottom crust?
Pre-bake the bottom crust for 8-10 minutes at 375°F before adding filling. Also, avoid overfilling and make sure the filling isn’t too wet.
What if my filling is too thin?
Simmer it longer uncovered until thickened. If needed, mix 1 tablespoon cornstarch with 1 tablespoon cold water and stir into the filling.
Can I add other vegetables?
Yes! Try diced potatoes, green beans, or mushrooms. Just pre-cook harder veggies so they’re tender before baking.

- 4C Bread Crumbs Meatballs Recipe: Crispy Crust and Juicy Centers - September 25, 2026
- 6 Oz Chocolate Chip Cookie Recipe: Perfectly Balanced Crispy Edges and Chewy Hearts - September 25, 2026
- 6-Inch Coffee Cake Recipe: Vanilla Bean Swirls and Buttery Streusel Topping - September 25, 2026