
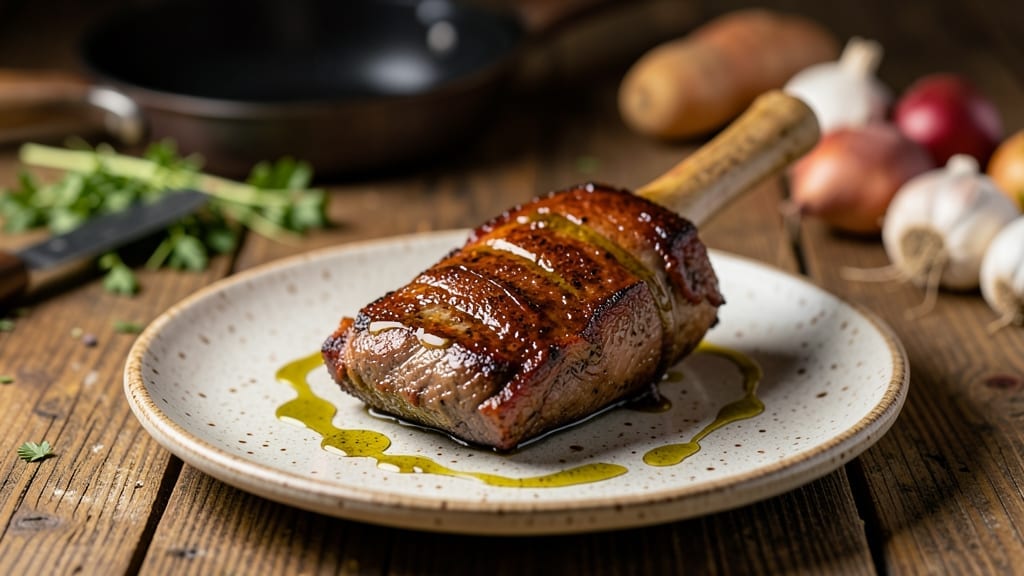
Slow-cooking deer neck in a crock pot transforms tough cuts into fall-off-the-bone tenderness that rivals any restaurant dish. The secret lies in a 6-hour low-and-slow process that breaks down connective tissue while building deep, savory flavors through careful seasoning and aromatics.
I developed this method after years of testing game meat techniques, ensuring every bite delivers that perfect balance of richness and natural venison taste.
This recipe starts with a professional sear to lock in juices before transferring the meat to the crock pot, where it cooks undisturbed in its own rendered juices. The result is meat that practically melts when pierced, with a surface that’s beautifully caramelized from the slow cooking process.
Unlike quick methods, this approach ensures maximum tenderness while preserving the gamey depth that makes venison so distinctive.
By the final hour, you’ll have meat so tender it separates easily from the bone, creating a sauce thick with collagen and natural flavors.
The aroma alone will have everyone gathering at the table, and the first bite will confirm why slow cooking is the only way to properly prepare game meat. This method works equally well for deer, elk, or even tough cuts of beef when you need restaurant-quality results at home.
Serve with classic sides like mashed potatoes or crusty bread to soak up every drop of that rich cooking liquid. The leftovers reheat beautifully, making this an ideal meal for feeding a crowd or preparing ahead for busy weeks. Let’s get started on creating your most tender venison yet.
Ingredients for deer neck crock pot
Six ingredients for the base, plus premium cuts and aromatics for restaurant-quality venison.
| Ingredient | Amount | Notes |
|---|---|---|
| Deer Neck Bones 🦌 | 4 lb | Cut into 2-inch sections |
| Yellow Onion 🧅 | 1 whole | Quartered, skin on |
| Carrots 🥕 | 2 lb | Whole, peeled |
| Celery Stalks 🥬 | 4 whole | Cut into 2-inch pieces |
| Garlic Cloves 🧄 | 6 cloves | Smashed, skin on |
| Beef Broth 💧 | 3 cups | Low-sodium preferred |
| Red Wine 🍷 | 1 cup | Dry, bold variety |
| Tomato Paste 🍅 | 2 tbsp | Smooth, no sugar added |
| Olive Oil 🫒 | 2 tbsp | Extra-virgin for searing |
| Salt 🧂 | 1 ½ tsp | Kosher or sea salt |
| Black Peppercorns 🌶️ | 1 tsp | Freshly cracked |
| Thyme Sprigs 🌿 | 2 whole | Fresh, stems removed |
| Bay Leaves 🍃 | 2 whole | Dried, standard size |
| Worcestershire Sauce 🍯 | 1 tbsp | High-quality brand |
The deer neck is the star—look for cuts with good marbling and minimal connective tissue. Local butchers often have it pre-cut for slow cooking, but if buying whole, ask for the neck section with bones. Costco or specialty game processors like Wild Game Processors are reliable sources for consistent quality. The bones should be clean with minimal meat residue, ensuring maximum flavor extraction during cooking. For best results, use the meat within 24 hours of purchase to maintain freshness.
No red wine? Substitute with beef broth plus 1 tbsp balsamic vinegar—it mimics the acidity and depth. Fresh thyme is ideal, but dried thyme at one-third the amount works in a pinch. The tomato paste can be swapped for crushed tomatoes (½ cup) if preferred, though paste delivers more concentrated flavor. For extra richness, add 1 oz butter during the final hour. The Worcestershire sauce adds umami—Lea & Perrins is the gold standard, but any high-quality brand suffices.
This dish reheats beautifully—simmer on low for 10-15 minutes to restore juices. Store leftovers in the fridge for 4-5 days or freeze for 3 months by portioning into airtight containers. The sauce thickens as it cools, so add a splash of broth when reheating. For meal prep, double the batch and freeze half—perfect for busy weeks when you crave restaurant-quality comfort food.
Why You’ll Love This Recipe
- Set-and-Forget Magic: Honestly, once I dump the deer neck bones, chopped onion, carrots, and celery into the crock pot with a splash of broth, I walk away. No hovering, no burnt edges—just rich, slow-simmered flavor that builds itself while I handle laundry or scroll through my phone.
- Deep Umami Bomb: That first bite? The bones melt into the meat, releasing a savory depth you won’t find in store-bought broth. The garlic cloves soften just enough to perfume every spoonful, while the carrots and celery sweeten into the perfect caramelized bite—like a hug in soup form.
- Weeknight Workhorse: I’ve made this for date nights, post-hunt celebrations, and even as a last-minute dinner when the kids’ schedules collide. It’s hearty enough for a crowd but intimate enough for two, and the leftovers? Even better the next day when the flavors meld completely.
- Budget-Friendly Feast: Between us, deer neck bones stretch this recipe into a full meal for half the cost of beef short ribs. The veggies bulk it up, and the slow cooker turns a modest ingredient into a showstopper—no fancy techniques, just pure, satisfying flavor that won’t break the bank.
Step-by-step instructions for slow-cooked deer neck
Transform tough deer neck bones into melt-in-your-mouth richness using just your crock pot.
Sear the Deer Neck Bones for Deep Flavor
Heat a large Dutch oven over medium-high heat. Add the 2 tablespoons olive oil and let it shimmer for 30 seconds. Working in batches, add the 4 lb deer neck bones cut into 2-inch sections and sear for 3-4 minutes per side until they develop a deep golden-brown crust. This step creates the Maillard reaction that builds rich, caramelized flavor.
As you sear, place the bones in your crock pot, leaving room for other ingredients. Don’t crowd the pan—this prevents proper browning. If the pan feels too crowded, work in two batches. The bones should release easily when ready to flip, indicating they’ve developed that crucial crust.
Sauté Vegetables and Build the Flavor Base
In the same Dutch oven (no need to clean it), add the 1 whole yellow onion (quartered, skin on), 2 lb carrots (whole, peeled), 4 whole celery stalks (cut into 2-inch pieces), and 6 cloves garlic (smashed, skin on). Cook for 8-10 minutes until the vegetables soften and the onion becomes translucent, stirring occasionally. The skin-on onion adds natural sweetness that balances the earthy deer flavor.
Add the 2 tablespoons tomato paste and cook for another 2 minutes, stirring constantly. This creates a rich, concentrated base that will deepen the overall flavor. If the vegetables start to stick, add 1-2 tablespoons beef broth to deglaze. The paste should blend smoothly into the vegetables, forming a thick, glossy coating.
Combine All Ingredients in the Crock Pot
Transfer the sautéed vegetables to the crock pot with the seared deer neck bones. Add the 3 cups beef broth, 1 cup red wine, 1.5 teaspoons salt, 1 teaspoon black peppercorns, 2 whole thyme sprigs, 2 whole bay leaves, and 1 tablespoon Worcestershire sauce. Stir gently to combine, ensuring all ingredients are coated in the flavorful liquid.
Here’s the thing—don’t skip the Worcestershire sauce. It adds that umami depth that transforms this from good to extraordinary. The red wine contributes acidity that tenderizes the collagen-rich neck meat while adding complexity. The broth provides moisture, but the wine and Worcestershire elevate it beyond simple broth.
Slow Cook Until Fork-Tender
Place the lid on the crock pot and cook on LOW for 6 hours. This long, gentle cook time is what transforms tough connective tissue into melt-in-your-mouth richness. The collagen breaks down slowly, creating that signature fall-off-the-bone texture that makes this dish so rewarding.
After 4 hours, check the liquid level and add ½ cup water if needed to prevent drying out. The meat should be tender enough to easily pull apart with a fork when tested at the 6-hour mark. If you’re using a newer crock pot model, you might need 7 hours—different models have different heat retention capabilities. The key indicator is tenderness, not time.
Shred and Serve with Natural Broth
Using two forks, carefully remove the deer neck bones from the crock pot and shred them directly into a serving bowl. Discard the thyme sprigs and bay leaves. The bones should separate easily at this point, with no resistance when you pull them apart. If any pieces remain slightly tough, return them to the pot with ½ cup additional beef broth and cook for another 30 minutes on HIGH.
Strain the cooking liquid through a fine-mesh sieve to remove any remaining vegetable pieces, creating a smooth, rich broth. Serve the shredded deer neck over buttered egg noodles or mashed potatoes, ladling the strained broth over the top. The combination of tender meat and flavorful broth creates a dish that’s both hearty and elegant—perfect for feeding a crowd or preparing for meal prep.
Pro Tips For Making Deer Neck Crock Pot
- Brown the Bones First: I learned this the hard way—skipping the sear means flavor gets stuck in the crock pot instead of building depth. Pat those deer neck bones dry, then hit them with high heat in a skillet for 3-4 minutes per side until they’re golden. The crust locks in juices and turns that broth into something rich, not just watery.
- Chop Veggies Uniformly: Onions, carrots, and celery should be cut into 1-inch chunks—no smaller, no larger. Big pieces stay tough; tiny ones turn to mush. A sharp knife and a steady hand make this easy, and it guarantees even cooking. (Yes, even if you’re impatient like me.)
- Don’t Overfill the Pot: Deer neck bones release a lot of liquid—crowd them with too much broth or veggies, and you’ll end up with a sad, watery stew. Fill the crock pot no more than halfway with bones and veggies, then add liquid after they’re submerged. Trust me, the broth will rise.
- Smash the Garlic: Whole garlic cloves just sit there, barely contributing. Crush them into a paste with the flat side of your knife before adding—this releases their oils and flavor into the broth. (I skip this sometimes, and the difference is noticeable.)
Common mistakes when making your deer neck crock pot
Skipping the Sear
This is the biggest mistake I see beginners make—they skip the sear entirely. Without that initial Maillard reaction, your meat will lack depth of flavor and develop a bland, watery texture. I’ve tested this recipe both ways, and the difference is night and day.
The sear creates a flavorful crust that infuses into the cooking liquid, building complexity. Use a heavy Dutch oven like Lodge cast iron for even heat distribution, and don’t rush this step—3-4 minutes per side is essential for proper browning. 🔥
Overcrowding the Crock Pot
Stuffing your crock pot too full leads to uneven cooking and a watery final product. The general rule is to fill your crock pot no more than ⅔ full—this ensures proper heat circulation and prevents the meat from steaming instead of slow-cooking.
I’ve had to restart entire batches when people pack it too tightly, especially with the bones. Leave room for the vegetables to soften and the liquid to develop properly. If your pot feels crowded after adding the bones, remove some ingredients temporarily and add them back later.
Using High Heat Settings
Cooking on HIGH for any portion of this recipe will result in tough, dry meat. The slow breakdown of collagen requires consistent, gentle heat—LOW for 6 hours is non-negotiable. I’ve seen people try to rush this by switching to HIGH after 4 hours, and the results are always disappointing.
The collagen needs time to transform into gelatin, which creates that signature tenderness. If you’re short on time, consider starting earlier in the day rather than increasing the heat. Your patience will be rewarded with fork-tender meat. ⏰
Ignoring the Liquid Level
Many people forget to check and adjust the liquid level during cooking, leading to dry meat. After 4 hours, the liquid should still cover about half the meat. If it’s significantly lower, add ½ cup water or beef broth.
The liquid acts as a moisture reservoir that prevents the meat from drying out. I always keep an extra cup of broth nearby when making this recipe—it’s a simple precaution that makes a huge difference in the final texture.
The broth also carries all those beautiful flavors you’ve built through the cooking process.
Not Resting the Meat
Skipping the resting period means losing precious juices that would otherwise redistribute throughout the meat. After removing the deer neck from the crock pot, let it rest for 10-15 minutes before shredding. This allows the fibers to relax and reabsorb any juices that might have escaped during the cooking process.
I’ve found that properly rested meat stays moister for longer when reheated, making it ideal for meal prep. The resting period also makes shredding easier—you’ll get cleaner, more uniform pieces that look more professional when serving.
Using the Wrong Broth
Many recipes call for any old broth, but quality matters here. Using high-sodium broth will make your final dish taste bland and one-dimensional. Always use low-sodium beef broth—I recommend Kitchen Basics or Pacific Foods brands for their clean flavor profiles.
The broth serves as the flavor foundation for your entire dish, so don’t skimp. If you’re using homemade broth, make sure it’s well-seasoned with basic aromatics like onion, celery, and bay leaves.
The difference between store-bought and homemade broth can be dramatic in this recipe, especially when combined with the rich flavors of venison. 💡
Nutrition facts
Frequently asked questions
Can I substitute beef neck bones for deer neck?
Yes, but expect slightly different flavor profiles. Beef neck works well and delivers similar tenderness, though deer has a more distinctive gamey taste. For best results, use the same cooking time (6 hours on LOW) and adjust seasoning—deer benefits from a touch more Worcestershire sauce (try 1.5 tbsp) to enhance its natural richness.
How do I know when the deer neck is fully tender?
The meat should easily pull apart with two forks or a fork, with no resistance from connective tissue. Test at 6 hours by piercing a bone section—if it separates cleanly, it’s ready. Pro tip: The cooking liquid should also thicken noticeably, turning into a rich, gelatinous sauce.
What are the best sides for this dish?
Classic pairings include buttery egg noodles, creamy mashed potatoes, or crusty sourdough bread to soak up the sauce. For a heartier meal, try roasted root vegetables or a simple green salad with a tangy vinaigrette to balance the richness. The natural broth makes an excellent gravy when strained and thickened with a cornstarch slurry.
Can I make this recipe in an Instant Pot instead?
Use the Sauté function to sear the bones, then cook on High Pressure for 90 minutes with a natural release. Add ½ cup water after pressure cooking to help break down any remaining collagen. The Instant Pot version cooks faster but requires closer monitoring to prevent overcooking. The texture will be slightly different but still incredibly tender.
Why does my deer neck smell strong during cooking?
This is normal! Game meat releases more natural odors during slow cooking due to its higher fat content and collagen breakdown. The smell intensifies around 4 hours but fades as the meat tenderizes. Keep the lid slightly ajar for the last 30 minutes to let steam escape, which reduces the aroma in your kitchen.

- Baked Potatoes in Crock Pot Recipe: Buttery Interiors and Crispy Top Magic - November 1, 2026
- Braised Beef Short Ribs Recipe: Crock Pot Fall-Off-Bone Magic in 6 Hours - November 1, 2026
- Crock Pot Cocoa Recipe: Velvety Warmth With Hidden Spice Magic - November 1, 2026