
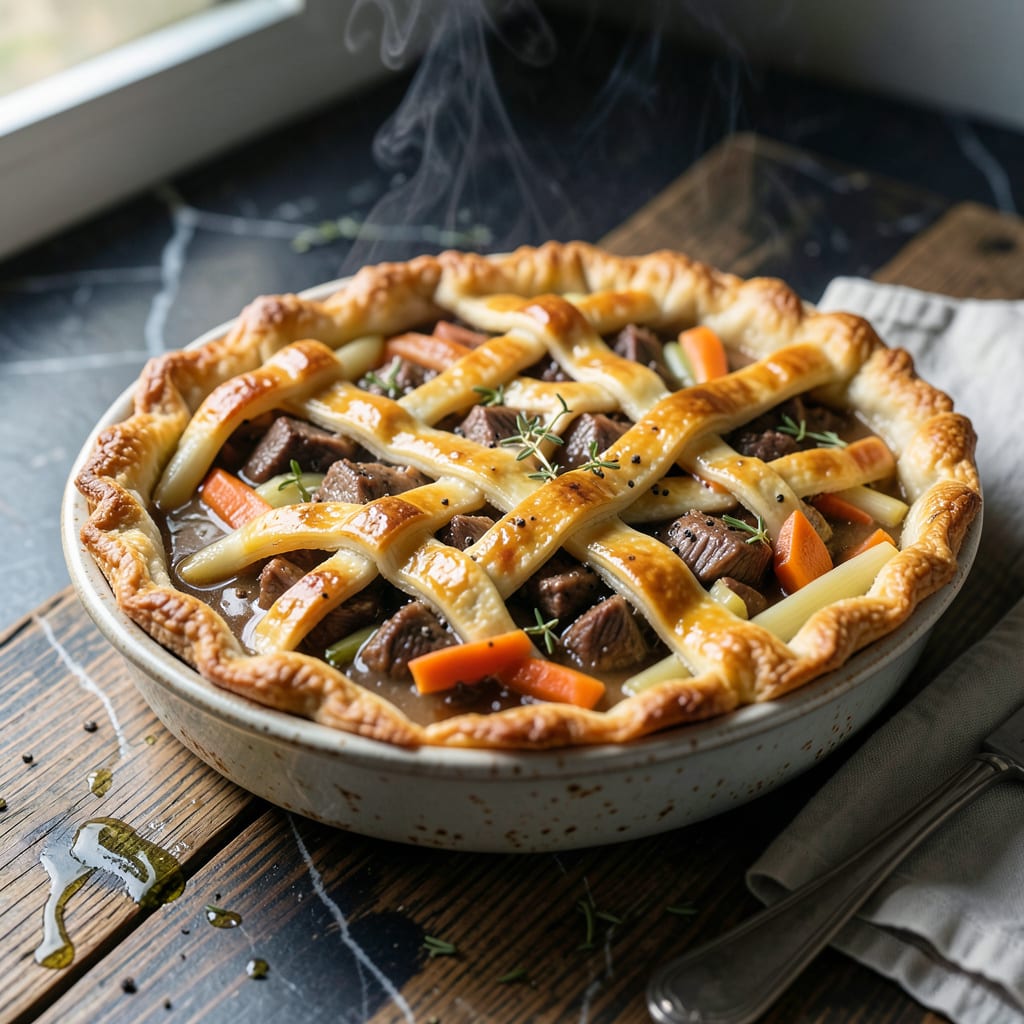
There’s something deeply satisfying about transforming wild game into a comfort dish that feels both rustic and refined. This pot pie brings out the rich, robust flavor of deer while wrapping it in a flaky crust.
I’ve perfected this recipe to ensure the filling is hearty and flavorful, with a golden-brown top that shatters with every bite. It’s the kind of meal that warms you from the inside out.
Ingredients for Deer Pot Pie
Wild venison meets buttery crust in this hearty, comforting dish with a flaky finish.
| Ingredient | Amount | Notes |
|---|---|---|
| Deer Meat 🦌 | 1 ½ lb | Venison stew meat, cubed |
| All-Purpose Flour 🌾 | ½ cup | For thickening the filling |
| Butter 🧈 | ½ cup | Unsalted, for the roux |
| Onion 🧅 | 1 whole | Yellow or white, diced |
| Carrots 🥕 | 2 whole | Peeled and diced |
| Celery Stalks 🌿 | 2 whole | Diced for flavor base |
| Garlic Cloves 🧄 | 3 cloves | Minced for depth |
| Beef Broth 💧 | 2 cups | Low-sodium preferred |
| Frozen Peas 🌱 | 1 cup | No need to thaw |
| Fresh Thyme 🍃 | 1 tbsp | Chopped, or 1 tsp dried |
| Fresh Rosemary 🌿 | 1 tbsp | Chopped, or 1 tsp dried |
| Pie Crust 🥧 | 2 sheets | Store-bought or homemade |
| Salt 🧂 | 1 tsp | Adjust to taste |
| Black Pepper 🌶️ | ½ tsp | Freshly ground preferred |
| Heavy Cream 🥛 | ½ cup | For creamy filling |
[recipeingredientscaler]
The venison is key here. Use shoulder or hindquarter cuts—they’re lean but full of flavor. Source from a reputable butcher or your own hunt (the good stuff, not freezer-burnt). If you’re buying pre-packaged, look for vacuum-sealed to ensure freshness. The pie crust can be store-bought (I won’t tell), but if you’re making it from scratch, keep everything cold for that perfect flake.
No venison? Beef stew meat is the closest swap. Out of fresh herbs? Dried at one-third the amount works fine. Frozen mixed veggies (peas, carrots, corn) can replace the fresh ones—Trader Joe’s has a great blend. The beef broth can be chicken broth in a pinch, but stick with low-sodium to control the salt. Heavy cream can be subbed with half-and-half, but it won’t be quite as rich.
Assemble and bake right away or refrigerate for up to 2 hours before baking. Leftovers keep in the fridge for 3-4 days and reheat beautifully. Freeze unbaked pies for up to 3 months—just thaw overnight before baking.
Why You’ll Love This Recipe
- One Pot Wonder: I love that everything—tender deer meat, buttery crust, and hearty veggies—comes together in a single dish.
- Rich and Earthy: The deer meat combined with sweet carrots and onions creates a deep, savory flavor that’s hard to beat.
- Feeds the Crew: This pot pie is my go-to for Sunday dinners or when I need to feed a hungry group without fuss.
- Leftovers for Days: Honestly, it tastes even better the next day, and the portions stretch perfectly for a few meals.
Step-by-Step Instructions for Deer Pot Pie
This method ensures a rich, hearty filling with a perfectly golden, flaky crust every time.
Step 1: Brown the Deer Meat and Build the Flavor Base
Start by cubing the 1.5 lb deer meat into bite-sized pieces. Season with 1 tsp salt and 0.5 tsp black pepper. Heat a large skillet over medium-high heat, then add 2 tablespoons of the 0.5 cup butter.
Sear the deer meat in batches to avoid overcrowding, cooking for 3-4 minutes per side until browned on all sides. Remove the meat and set aside. In the same skillet, add the diced 1 whole onion, 2 whole carrots, and 2 whole celery stalks. Cook for 5-6 minutes until the vegetables soften and begin to develop color.
Step 2: Create the Roux and Thicken the Filling
Reduce heat to medium and add the remaining butter to the skillet. Once melted, sprinkle in the 0.5 cup all-purpose flour and stir constantly for 1-2 minutes until the mixture forms a smooth paste and turns a light golden color. This roux will thicken the filling beautifully.
Slowly pour in the 2 cups beef broth, whisking continuously to prevent lumps. Add the minced 3 cloves garlic cloves, 1 tbsp fresh thyme, and 1 tbsp fresh rosemary. Stir in the 1 cup frozen peas and the browned deer meat. Simmer for 10-12 minutes until the filling thickens and coats the back of a spoon.
Step 3: Finish the Filling with Cream and Prepare the Pie Crust
Stir in the 0.5 cup heavy cream and simmer for an additional 2-3 minutes. Taste and adjust seasoning if needed. The filling should be rich and creamy, with the deer meat tender and the vegetables soft. Remove from heat and let the filling cool slightly while you prepare the crust.
Unroll the 2 sheets pie crust and place one sheet in a standard 9-inch pie dish. Trim any excess dough hanging over the edge, leaving a slight overhang. Pour the filling into the crust, spreading it evenly.
Step 4: Assemble and Bake to Golden Perfection
Place the second sheet of pie crust over the filling. Crimp the edges to seal, then cut several slits in the top crust to allow steam to escape. For extra flakiness, brush the top crust with a bit of melted butter or beaten egg.
Bake in a preheated 400°F oven for 30-35 minutes until the crust is deep golden brown and the filling is bubbly. If the edges begin to brown too quickly, cover them with foil. Let the pot pie rest for 10 minutes before slicing to allow the filling to set.
Pro Tips For Making Deer Pot Pie
- Braise the Deer: I learned this the hard way—deer meat gets tough if you rush it. Simmer it in broth for at least 2 hours until it’s fork-tender, then shred it for the filling.
- Chill the Dough: After burning three batches, I finally figured out resting the flour-butter crust for 30 minutes in the fridge prevents shrinking and makes it flakier.
- Skip Raw Onions: Sounds weird, but it works: sauté the onions until golden before adding to the filling—raw ones stay crunchy and overpower the deer flavor.
- Pre-Cook the Carrots: My grandmother swore by this, and she was right: parboil the carrots for 3 minutes so they stay firm in the pie, not mushy.
Make-Ahead Tips for This Recipe
Prep Ahead Strategy
I always prep the filling the day before—it lets the flavors meld beautifully. Cook and cool the deer meat mixture completely, then store in an airtight container in the fridge for up to 2 days. This saves time on baking day.
Crust Prep Tips
If using store-bought crust, keep it chilled until assembly. For homemade, make the dough and refrigerate for at least 1 hour before rolling. Cold dough prevents shrinking during baking. I use Pillsbury for convenience when short on time.
Assembly Timeline
Assemble the pie up to 2 hours before baking—just cover with plastic wrap and refrigerate. This allows the crust to relax and prevents toughening. Brush with egg wash just before baking for that perfect golden finish. 💡
Freezing for Later
Unbaked pies freeze beautifully for up to 3 months. Wrap tightly in plastic wrap and aluminum foil, then label with the date. Thaw overnight in the fridge before baking as usual.
Reheating Success
For leftovers, cover with foil and warm in a 350°F oven for 15-20 minutes. Microwaving works in a pinch, but the crust loses its flakiness. I always add a splash of broth to keep the filling moist.
Nutrition Facts
Frequently Asked Questions
Can I use beef instead of venison?
Yes! Substitute with 1.5 lb beef stew meat for similar texture. Venison is leaner, so beef adds richness while keeping the dish hearty.
How do I prevent a soggy bottom crust?
Pre-bake the bottom crust for 8-10 minutes at 400°F before adding filling. This creates a barrier against moisture.
What if my filling is too thin?
Simmer uncovered for 5-10 extra minutes or mix 1 tbsp cornstarch with cold water and stir in. The filling should coat a spoon.
Can I make individual pot pies?
Use ramekins and adjust baking time to 20-25 minutes at 400°F. Perfect for portion control.

- 4C Bread Crumbs Meatballs Recipe: Crispy Crust and Juicy Centers - September 25, 2026
- 6 Oz Chocolate Chip Cookie Recipe: Perfectly Balanced Crispy Edges and Chewy Hearts - September 25, 2026
- 6-Inch Coffee Cake Recipe: Vanilla Bean Swirls and Buttery Streusel Topping - September 25, 2026