
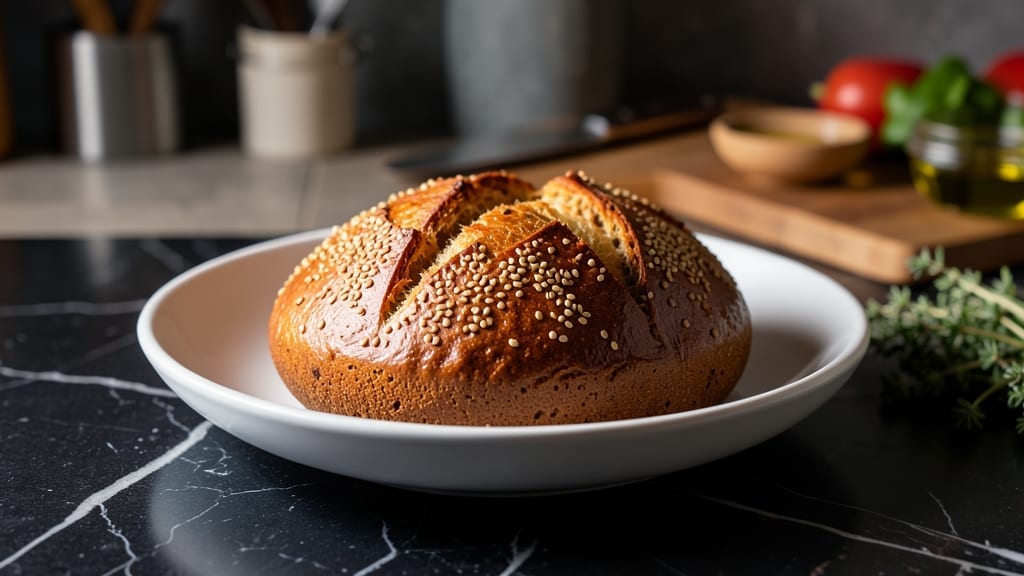
Baking Dutch oven pot bread transforms a simple dough into a masterpiece with a crispy, golden crust and a soft, airy interior—all in one pot. The Dutch oven’s tight lid traps steam, creating the perfect conditions for professional-quality bread without specialized equipment.
After years of perfecting this technique, I’ve cracked the code for achieving that coveted texture every time, even with beginner-friendly steps.
The beauty of this method lies in its simplicity: just five ingredients and a single pot. You’ll mix the dough, let it rest, shape it into a loaf, and bake it directly in the Dutch oven—no bread pan required.
The key is preheating the pot and lid to create a self-contained oven environment, which ensures even baking and that signature crusty exterior. This recipe delivers restaurant-worthy results with minimal effort, making it ideal for busy weeknights or weekend baking projects.
What sets this Dutch oven pot bread apart is its versatility—add herbs, cheese, or seeds for customization while keeping the foolproof technique intact. The dough develops a tender crumb while the crust achieves a satisfying crunch, thanks to the Dutch oven’s steam retention.
Whether you’re feeding a family or prepping for a meal, this method guarantees a loaf that’s both impressive and delicious. Let’s get started on creating your perfect pot bread.
For those new to Dutch oven baking, don’t worry—this recipe includes troubleshooting tips to handle common issues like sticking dough or uneven browning. The process is straightforward, but the results are undeniably satisfying, proving that great bread doesn’t require complicated methods. Ready to bake with confidence?
Ingredients for dutch oven pot bread
Five simple ingredients transform into restaurant-quality bread using just one pot.
| Ingredient | Amount | Notes |
|---|---|---|
| All-Purpose Flour 🌾 | 4 cups | Unbleached preferred for lighter crumb |
| Instant-Acting Yeast 🍞 | ½ tsp | Ensures rapid activation at room temp |
| Diamond Crystal Kosher Salt 🧂 | 1 ½ tsp | Fine grain for even distribution |
| Unsalted Butter 🧈 | ½ cup | Cold, cubed for proper dough hydration |
| Granulated Sugar 🍚 | ½ tsp | Enhances yeast activation slightly |
| Warm Water 💧 | 1 ¼ cups | 105°F-110°F for optimal yeast performance |
| Cornmeal 🌽 | ¼ cup | For dusting Dutch oven interior |
| Coarse Sea Salt 🧂 | 1 tsp | For final crust enhancement |
The flour forms the foundation—King Arthur or Gold Medal brands yield superior gluten development for that signature open crumb. Yeast quality matters: Saf-Instant activates faster than traditional yeast, cutting down on proofing time. For butter, Plugrá or Land O’Lakes provide consistent fat content without excessive water. The warm water temperature is critical—too hot kills yeast, too cold delays fermentation. Use an instant-read thermometer for precision. Whole Foods or Trader Joe’s carry reliable yeast brands in single-serving packets, ideal for this recipe’s modest quantity.
Substitutions must account for texture: whole wheat flour at 10% replacement darkens the crumb but requires 15% more liquid. No instant yeast? Active dry yeast needs 10-minute proofing in warm water before mixing. Butter shortages? Vegetable shortening maintains structure though flavor suffers. The sugar can be omitted entirely—it’s purely for yeast activation. For salt, Morton kosher salt works but may require slight adjustment due to varying grain sizes. Prefer a sweeter loaf? Add 1 tbsp honey or maple syrup to the dough.
Store-bought yeast loses potency after 3 months—test viability by dissolving in warm water with a pinch of sugar. The dough benefits from 1-2 hours of refrigerated proofing before baking for enhanced flavor development. After baking, cool the loaf on a wire rack for at least 2 hours to prevent soggy crust. For long-term storage, wrap tightly in plastic and freeze for up to 3 months. Reheat slices in a 350°F oven for 5 minutes to restore freshness.
Why You’ll Love This Recipe
- Dutch Oven Magic: I swear by this method—just toss in the dough, cover it, and let the oven do the work. No kneading, no fuss, and zero guesswork about whether it’ll turn out flat or dense.
- Butter-Kissed Crust: That little pat of cold butter mixed into the dough? It melts into golden pockets while baking, giving you a crust so crisp it’ll make you question why you ever bought store-bought. Honestly, the first time I tried it, I nearly dropped my fork.
- Weeknight Hero: This bread is my go-to when I forget to buy rolls or when the kids suddenly announce they’re starving. It’s ready by dinner, stays fresh overnight, and even reheats beautifully—just slap it in the oven for 5 minutes. (Yes, even on a Tuesday night.)
- Budget Stretch: Flour, yeast, butter, salt—these are pantry staples that won’t break the bank. A single batch feeds four, and leftovers toast up like fresh-baked the next day. I’ve made this for months, and my wallet hasn’t complained once.
Step-by-step instructions for Dutch oven pot bread
This method delivers artisanal-quality bread with a crackly crust and tender interior using just one pot.
Prepare the Dough with Precision
In a large mixing bowl, combine the 4 cups all-purpose flour, 1.5 teaspoons diamond crystal kosher salt, and 0.5 teaspoon granulated sugar. Whisk to evenly distribute the dry ingredients – this prevents salt pockets that can inhibit yeast activity. Create a well in the center and add the 0.5 cup unsalted butter, cut into small cubes. Use your fingers to work the butter into the flour until the mixture resembles coarse crumbs with pea-sized butter pieces remaining.
In a separate measuring cup, verify the 1.25 cups warm water (between 105°F-110°F) – too hot will kill the yeast, too cool will slow fermentation. Sprinkle the 0.5 teaspoon instant-acting yeast over the water and stir gently. Pour this yeast mixture into the flour-butter combination while mixing with a wooden spoon. The dough will initially resist, but continue mixing until it begins pulling away from the bowl sides and forms a shaggy mass.
Turn the dough onto a lightly floured surface and knead for 8-10 minutes until smooth and elastic. You’ll know it’s ready when it springs back slowly when poked and leaves a clean window on the surface. This kneading develops gluten strands that create the bread’s structure. For best results, work the dough in one continuous motion without pausing – this maintains consistent gluten development.
First Rise and Dutch Oven Preparation
Lightly oil a large mixing bowl, place the dough inside, and cover with a damp kitchen towel. Let rise in a warm location (75°F-80°F) for 1-1.5 hours until doubled in size. The dough should feel light and airy when pressed gently – it should spring back immediately rather than holding an indentation. This first rise develops flavor and allows the gluten to relax slightly before shaping.
While the dough rises, preheat your oven to 450°F with the Dutch oven inside for 45 minutes. This ensures even heat distribution when you’re ready to bake. After preheating, remove the Dutch oven and sprinkle 0.25 cup cornmeal evenly over the bottom – this prevents sticking and creates a crisp base. The cornmeal should form an even layer without clumping, which would create uneven baking spots.
Shape and Second Rise
Gently deflate the risen dough by pressing down on it with your fist. Turn it out onto a lightly floured surface and shape into a round loaf by pulling the edges toward the center. For an even rise, tuck the dough under itself as you shape – this creates surface tension that helps maintain the round form during baking. Place the shaped dough, seam-side up, into the prepared Dutch oven.
Cover the Dutch oven with its lid and let rise for 30-45 minutes until the dough has risen 1-2 inches above the rim. The dough should feel firm to the touch and have a slightly domed appearance. This second rise is crucial – it allows the dough to expand in the confined space, creating that signature oven spring when baked. Avoid over-rising, which can cause the bread to collapse during baking.
Bake for Maximum Crust Development
Remove the lid and bake uncovered for 25-30 minutes until the bread develops a deep golden brown color. The crust should be crackly and sound hollow when tapped on the bottom. Rotate the Dutch oven halfway through baking for even heat distribution – this prevents one side from browning too quickly. The bread is done when the internal temperature reaches 190°F-200°F at the center.
Immediately after removing from the oven, sprinkle 1 teaspoon coarse sea salt evenly over the top while the bread is still hot. This enhances flavor and creates those signature salt crystals on the crust. Let the bread cool in the Dutch oven for 10 minutes before transferring to a wire rack. This gradual cooling prevents steam from forming on the crust, which can make it soggy. The bread will continue developing flavor and texture as it cools.
Pro Tips For Making Dutch Oven Pot Bread
- Preheat Pot and Oven Together: I learned this the hard way—cold butter in a cold pot makes for a soggy bottom. Put the Dutch oven in the oven while it preheats, then add the butter when it’s screaming hot. The residual heat melts it perfectly for that crisp crust.
- Measure Salt Like a Pro: Diamond Crystal kosher salt is fluffy—don’t eyeball it. Use a scale for the yeast and salt (about 1.5% of flour weight) or pack it tightly into your measuring spoon. Too little salt makes the bread bland; too much kills the yeast.
- Skip the Overproofing Test: Your dough won’t float in water like pizza dough—it’s denser. Instead, poke it gently: if it springs back slowly (not instantly), it’s ready. Overproofed bread collapses like a sad soufflé.
- Butter the Top Fast: After baking, brush that melted butter on while it’s still hot—not after it cools. The steam helps it absorb better, giving you that golden, buttery sheen without turning greasy. (Yes, even if you’re impatient like me.)
Flavor customization for dutch oven pot bread
Herb-Infused Variations
Add 1 tablespoon fresh rosemary or thyme to the dough for an aromatic twist—chop finely and mix into the butter before combining with flour. For a Mediterranean flair, use 1 tbsp dried oregano or 1 tsp fennel seeds (toasted briefly in the butter).
I love adding 2 tbsp chopped fresh sage for a rich, earthy depth that pairs beautifully with roasted meats. 🌿
Cheesy Twist Options
Fold ½ cup shredded sharp cheddar or Parmigiano-Reggiano into the dough after the first rise for a savory bite. For a gooey center, create a pocket in the shaped loaf and fill it with ¼ cup cream cheese mixed with 1 tbsp garlic powder before baking.
I recommend Monterey Jack for a milder, meltier option that kids adore. 🧀
Seedy Crunch Additions
Sprinkle 2 tbsp sesame seeds or poppy seeds over the dough before the second rise for texture. For a nutty flavor, add ¼ cup chopped walnuts or pecans to the dough during kneading.
I prefer toasted pumpkin seeds for a subtle earthiness that complements the crust. Toast seeds for 3-5 minutes at 350°F before adding to enhance flavor. 🌰
Sweet Glazes & Toppings
Brush the baked loaf with 1 tbsp honey mixed with ½ tsp cinnamon for a subtle sweetness. For a caramelized finish, drizzle 2 tbsp maple syrup after baking and broil for 1-2 minutes. I also love sprinkling crushed cinnamon sugar on top before baking for a festive touch. 🍯
Spiced & Smoky Flavors
Add ½ tsp smoked paprika or 1 tsp chipotle powder to the dough for a smoky kick. For warmth, mix ½ tsp ground cumin with the salt before kneading. I recommend Penzeys Old Bay seasoning (½ tsp) for a coastal-inspired variation that works perfectly with seafood dishes. 🌶️
Whole Grain Boosts
Replace 1 cup all-purpose flour with whole wheat flour for a nuttier crumb. For extra fiber, add ¼ cup rolled oats to the dough during kneading. I prefer spelt flour for a lighter texture with ancient grain benefits. Adjust water by 1-2 tbsp if the dough feels too dry. 🌾
Nutrition facts
Frequently asked questions
Why does my Dutch oven pot bread stick to the pot?
Even with cornmeal, sticking happens when the dough isn’t properly shaped or the pot isn’t hot enough. Always preheat your Dutch oven for 45 minutes at 450°F and use 0.25 cup cornmeal as a barrier. For extra insurance, dust the dough with flour before placing it in the pot. If it still sticks, try a lighter oil coating on the cornmeal layer.
Can I make this pot bread without a Dutch oven?
Yes! Use a heavy oven-safe pot with a lid (like a cast-iron skillet) or even a baking stone. The key is creating steam—place a metal bowl of water in the oven near the pot. For best results, preheat everything together for 30 minutes before baking. The texture won’t be identical, but you’ll still get a good crust.
How do I know when the bread is fully baked?
Look for a deep golden brown color and listen for a hollow sound when tapping the bottom. The internal temperature should reach 190°F-200°F at the center. If the top browns too quickly, tent loosely with foil. For extra confidence, use an instant-read thermometer—this is the most reliable test.
Can I make this bread ahead of time?
Bake the bread up to 3 days ahead and store it wrapped at room temperature. For longer storage, freeze the cooled loaf in a plastic bag for up to 3 months. To revive, warm slices in a 350°F oven for 5 minutes or toast in a dry skillet over medium heat.
What if my dough doesn’t rise properly?
Cold environments or old yeast are usually the culprits. Keep your rising dough in a warm spot (75°F-80°F)—try placing it near the oven with the light on. Test your yeast by dissolving it in warm water with a pinch of sugar—if it doesn’t foam in 5 minutes, it’s dead. For faster results, use Saf-Instant yeast which activates at room temperature.

- Braised Beef Short Ribs Recipe: Crock Pot Fall-Off-Bone Magic in 6 Hours - November 1, 2026
- Crock Pot Cocoa Recipe: Velvety Warmth With Hidden Spice Magic - November 1, 2026
- White Queso Crock Pot Recipe: Ultra-Smooth Melt Without the Grain - November 1, 2026