
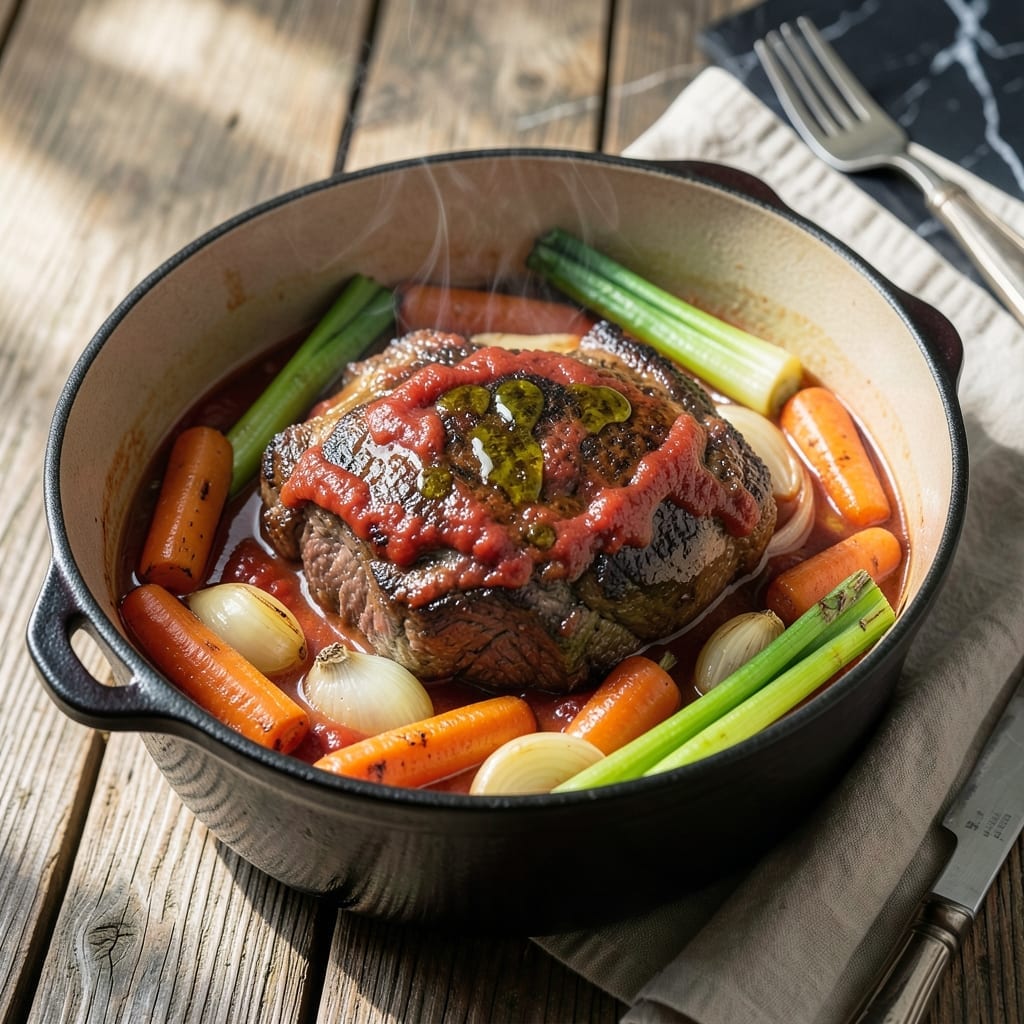
There’s a reason dutch ovens are kitchen legends—they transform simple ingredients into deeply flavorful meals with minimal effort.
This one-pot method lets you sear, braise, and simmer in the same vessel, locking in rich, layered tastes. The heavy lid traps steam, ensuring every bite is infused with intensity.
You’ll end up with tender meat, perfectly cooked vegetables, and a sauce so robust it’ll have everyone asking for seconds. No extra pans, no complicated steps—just one-pot perfection.
Ideal for busy weeknights or cozy weekends, this approach delivers restaurant-quality results with less cleanup.
Ingredients for Dutch Oven Pot
A handful of humble ingredients transforms into something extraordinary in the dutch oven.
| Ingredient | Amount | Notes |
|---|---|---|
| Beef Chuck Roast 🥩 | 2 lb | Cut into 2-inch cubes, well-marbled |
| Yellow Onions 🧅 | 2 whole | Medium, diced into 1/2-inch pieces |
| Carrots 🥕 | 3 whole | Large, peeled and sliced into rounds |
| Celery Stalks 🌿 | 3 whole | Sliced into 1/2-inch pieces |
| Garlic Cloves 🧄 | 6 cloves | Minced finely for depth of flavor |
| Tomato Paste 🍅 | 3 tbsp | For umami richness and thickness |
| Dry Red Wine 🍷 | 1 cup | Bold variety like Cabernet Sauvignon |
| Beef Broth 💧 | 3 cups | Low-sodium preferred for control |
| Dried Thyme 🌿 | 1 tsp | Crushed between fingers to release aroma |
| Dried Rosemary 🌿 | 1 tsp | Finely crumbled for even distribution |
| Bay Leaves 🍃 | 2 whole | Fresh or dried, removed before serving |
| Olive Oil 🫒 | 2 tbsp | Extra-virgin for searing and depth |
| All-Purpose Flour 🌾 | ¼ cup | For thickening the sauce |
| Kosher Salt 🧂 | 1 ½ tsp | Diamond Crystal preferred for consistency |
| Black Pepper 🌶️ | 1 tsp | Freshly ground for optimal flavor |
The beef is the foundation here. Chuck roast with ample marbling ensures tenderness after long braising. Look for pieces with visible fat streaks—this renders down for rich flavor. Most butchers will cube it for you if asked, or Costco carries pre-cut stew meat that works well. The onions, carrots, and celery form the classic mirepoix base; freshness matters more than organic labels here.
Out of red wine? Substitute with 1 cup beef broth plus 1 tbsp balsamic vinegar for similar depth. No fresh herbs? Dried work at one-third the quantity. If you lack tomato paste, a 2 tbsp ketchup plus 1 tbsp tomato sauce combination does the trick. For gluten-free needs, cornstarch or arrowroot can replace the flour—just mix with cold water before adding.
This dish improves overnight as flavors meld. Store in an airtight container in the fridge for up to 5 days, or freeze for 3 months. The sauce thickens upon cooling—reheat gently with a splash of water if needed. Always remove bay leaves before serving (trust me on this one).
Why You’ll Love This Recipe
- One Pot Wonder: I toss in the beef, veggies, and garlic, then let the Dutch oven do all the work—no babysitting required.
- Rich and Hearty: The beef chuck roast soaks up the onions and garlic, making every bite ridiculously tender and full of depth.
- Feeds a Crowd: Honestly, it’s my go-to for Sunday dinners, potlucks, or just prepping lunches for the week.
- Budget Stretcher: A single chuck roast and a few veggies make multiple meals, and the leftovers taste even better the next day.
Step-by-Step Instructions for Dutch Oven Pot
Here’s the method to build deep, complex flavors in a single vessel with minimal effort.
Step 1: Sear the Beef Chuck Roast
Heat the 2 tbsp olive oil in your Dutch oven over medium-high heat until shimmering. Pat the 2 lb beef chuck roast dry with paper towels and season generously with the 1.5 tsp kosher salt and 1 tsp black pepper. Working in batches if necessary to avoid crowding, sear the beef until deeply browned on all sides, about 8-10 minutes total.
The fond (browned bits) that forms on the bottom is essential for building rich flavor in your sauce. Don’t rush this process—proper browning creates the foundation for your entire dish. Transfer the seared beef to a plate and set aside.
Step 2: Build the Aromatic Base
In the same Dutch oven, add the 2 whole yellow onions, 3 whole carrots, and 3 whole celery stalks. Sauté over medium heat for 5-7 minutes until the vegetables begin to soften and develop color. Add the 6 cloves garlic cloves and cook for an additional 1 minute until fragrant.
Stir in the 3 tbsp tomato paste and cook for 2-3 minutes to deepen its flavor and eliminate any raw taste. This step is crucial—cooking the tomato paste until it darkens slightly intensifies its umami contribution to the final dish.
Step 3: Deglaze and Combine All Components
Pour in the 1 cup dry red wine, using a wooden spoon to scrape up all the browned bits from the bottom of the pot. Simmer for 3-4 minutes until the liquid reduces by half. This deglazing step captures all the concentrated flavor from the searing process.
Return the beef to the Dutch oven along with any accumulated juices. Add the 3 cups beef broth, 1 tsp dried thyme, 1 tsp dried rosemary, and 2 whole bay leaves. Stir to combine, ensuring all the beef is submerged in the liquid.
Step 4: Slow Cook to Tender Perfection
Bring the mixture to a simmer, then reduce heat to low. Cover the Dutch oven and let it cook for 2.5 to 3 hours, stirring occasionally, until the beef is fork-tender. The low and slow cooking method breaks down the connective tissue in the beef, resulting in melt-in-your-mouth tenderness.
Check the beef periodically after the 2-hour mark. You’ll know it’s done when it shreds easily with a fork. The sauce should have thickened naturally from the collagen in the beef, but if it’s still thin, you can create a quick slurry with the 0.25 cup all-purpose flour and a small amount of the cooking liquid, then stir it in and simmer for an additional 5 minutes.
Step 5: Finish and Serve
Once the beef is tender, remove and discard the 2 whole bay leaves. Taste the sauce and adjust seasoning if needed. The flavors should be rich and well-balanced from the long cooking process.
Serve the beef and vegetables hot, ladled directly from the Dutch oven with plenty of the flavorful sauce. This one-pot wonder delivers deep, complex flavors with the beef so tender it nearly falls apart. The vegetables will have absorbed all the rich flavors from the cooking liquid, making every component of the dish delicious.
Pro Tips For Making Dutch Oven Pot
- Sear the Beef First: I learned this the hard way—browning the chuck roast in the Dutch oven before adding liquids creates a deep, caramelized crust that adds layers of flavor to the final dish.
- Cut Vegetables Evenly: After ending up with mushy carrots and undercooked celery, I now chop all veggies to roughly the same size (about 1-inch pieces) so they cook at the same rate.
- Skip the Cold Water: Sounds weird, but it works: always use hot water or broth when deglazing the pot—cold liquid can shock the meat and stall the cooking process.
- Let It Rest: My grandmother swore by this, and she was right: give the beef a solid 15 minutes under foil before serving to let the juices redistribute (yes, even if you’re hungry).
Pro Cooking Tips for dutch oven pot
Perfect Searing Technique
Pat the beef completely dry with paper towels before searing—this ensures a deep brown crust. Heat your Dutch oven over medium-high heat until the 2 tbsp olive oil shimmers. Don’t overcrowd the pan; work in batches if needed to avoid steaming the meat. 🔥
Master the Deglaze
After removing the beef, pour in the 1 cup dry red wine while scraping the browned bits with a wooden spoon. This step lifts all the flavorful fond into your sauce. Simmer until reduced by half for maximum concentration.
Low and Slow Cooking
Once everything’s combined, maintain a gentle simmer at low heat. Cover the Dutch oven and let it cook for 2.5 to 3 hours. Resist lifting the lid too often—each peek releases valuable heat and steam.
Thickening the Sauce
If your sauce is thin after braising, mix the 0.25 cup all-purpose flour with a little cold water to make a slurry. Stir it in and simmer for 5 minutes to reach your desired consistency. The beef’s collagen will naturally thicken the sauce too.
Rest Before Serving
Let the dish rest off heat for 10 minutes after cooking. This allows the flavors to meld and the sauce to settle. Remove the 2 bay leaves before serving—they’ve done their job infusing the dish. 💡
Nutrition Facts
Frequently Asked Questions
Can I use a different cut of beef?
Yes, but choose tougher cuts with connective tissue like brisket or short ribs. These benefit from the 2.5 to 3 hours braising time. Avoid lean cuts like sirloin, as they’ll dry out.
Is it safe to leave cooking unattended?
It’s best to check occasionally, especially during the first hour. Maintain a gentle simmer at low heat and ensure your Dutch oven has a tight-fitting lid to retain steam and prevent drying.
How do I store leftovers?
Cool completely, then refrigerate in an airtight container for up to 5 days. For longer storage, freeze for 3 months. Reheat gently on the stove with a splash of water.

- 4C Bread Crumbs Meatballs Recipe: Crispy Crust and Juicy Centers - September 25, 2026
- 6 Oz Chocolate Chip Cookie Recipe: Perfectly Balanced Crispy Edges and Chewy Hearts - September 25, 2026
- 6-Inch Coffee Cake Recipe: Vanilla Bean Swirls and Buttery Streusel Topping - September 25, 2026