
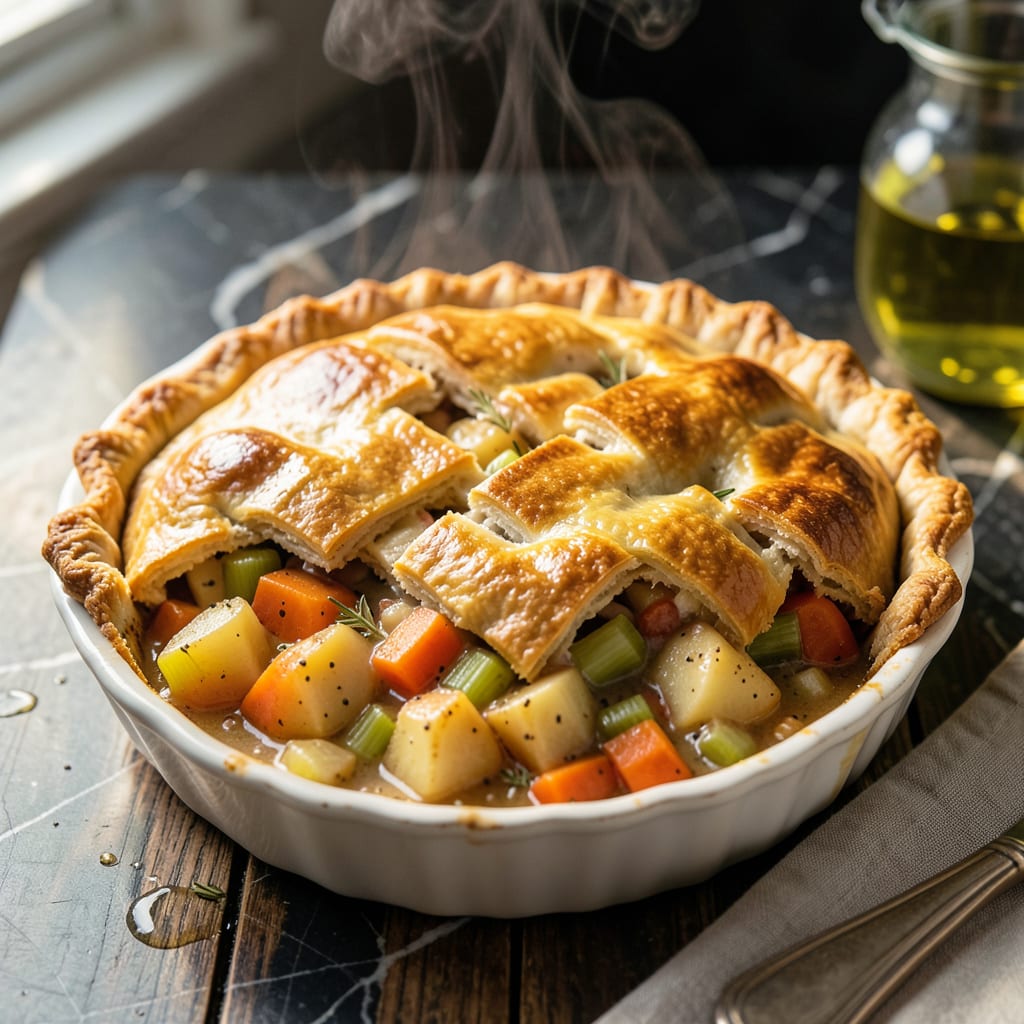
This classic comfort dish brings a flaky golden crust together with a rich, hearty filling that satisfies every time. The secret lies in a well-seasoned vegetable mix and a baking method that ensures the perfect texture.
With a tender, buttery crust and a savory filling packed with fresh ingredients, this pot pie delivers the warmth and flavor of a home-cooked meal. It’s a timeless recipe that never fails to impress.
Ingredients for Family Pot Pie
Buttery crust, fresh vegetables, and tender chicken make this a satisfying meal.
| Ingredient | Amount | Notes |
|---|---|---|
| Pie Crust 🥧 | 2 sheets | Store-bought or homemade, thawed |
| Unsalted Butter 🧈 | 2 tbsp | For sautéing vegetables |
| Yellow Onion 🧅 | 1 whole | Medium, finely diced |
| Carrots 🥕 | 2 whole | Medium, peeled and diced |
| Celery Stalks 🌿 | 2 whole | Finely diced |
| Russet Potatoes 🥔 | 2 whole | Medium, peeled and cubed |
| Frozen Peas 🌱 | 1 cup | No need to thaw |
| All-Purpose Flour 🌾 | ¼ cup | For thickening |
| Chicken Broth 🥣 | 1 ½ cups | Low-sodium preferred |
| Whole Milk 🥛 | ½ cup | For creamy filling |
| Chicken Breast 🍗 | 1 lb | Boneless, skinless, cubed |
| Garlic Cloves 🧄 | 2 cloves | Minced |
| Dried Thyme 🌿 | 1 tsp | For seasoning |
| Dried Rosemary 🌿 | 1 tsp | Crushed for flavor |
| Salt 🧂 | 1 tsp | Kosher or sea salt |
| Black Pepper 🌶️ | ½ tsp | Freshly ground preferred |
[recipeingredientscaler]
The crust defines this dish. Pillsbury pie crust works in a pinch, but homemade delivers that true flaky texture (cold butter, minimal handling). For the chicken, boneless thighs stay juicier than breasts—Costco or Sam’s Club have great bulk options. Fresh thyme and rosemary elevation this, but dried works fine if that’s what you’ve got.
No chicken? Turkey breast or tofu cubes work well. Swap peas for corn or green beans (frozen is fine). Out of milk? Half-and-half adds richness, or use 2% for lighter filling. The broth can be vegetable if you’re going meatless. For extra depth, add a splash of white wine when deglazing.
Assemble and bake right away, or prep filling ahead and refrigerate 1 day. Leftovers keep 3-4 days in the fridge—reheat in oven to keep crust crisp. Freezes beautifully for 2-3 months (thaw overnight before reheating).
Why You’ll Love This Recipe
- One Pan Magic: I toss the onions, carrots, and celery right in with the butter—no extra bowls, no fuss.
- Buttery Crisp Top: That golden pie crust on top with the flaky layers? I’ll admit I sneak a bite before serving.
- Feeds Everyone: Between us, it’s the only meal my picky nephew and my veggie-loving sister both devour.
- Leftovers for Days: Honestly, it tastes even better the next day, and the portions stretch for lunches too.
Step-by-Step Instructions for Family Pot Pie
This method delivers a golden, flaky crust with a rich, creamy filling every time.
Step 1: Sauté Vegetables and Chicken
Heat 2 tbsp unsalted butter in a large skillet over medium-high heat until it melts and foams. Add the finely diced yellow onion, carrots, and celery stalks. Sauté for 5-7 minutes until the onion turns translucent and the carrots begin to soften.
Add the cubed chicken breast and cook for 6-8 minutes, stirring occasionally, until the chicken loses its pink color and is cooked through. Stir in the minced garlic cloves and cook for 30 seconds until fragrant. This builds a deep flavor base for the filling.
Step 2: Create the Creamy Filling
Sprinkle 0.25 cup all-purpose flour evenly over the chicken and vegetables. Stir well to coat everything in the flour, which will thicken the filling. Cook for 1 minute to remove the raw flour taste.
Slowly pour in 1.5 cups chicken broth and 0.5 cup whole milk, stirring constantly to avoid lumps. Add the cubed russet potatoes, 1 cup frozen peas, 1 tsp dried thyme, 1 tsp dried rosemary, 1 tsp salt, and 0.5 tsp black pepper. Bring the mixture to a simmer.
Step 3: Simmer Until Thickened
Reduce the heat to medium-low and let the filling simmer for 10-12 minutes, stirring occasionally, until the potatoes are tender and the mixture has thickened to a creamy consistency. The filling should coat the back of a spoon without running off easily.
Taste and adjust the seasoning if needed. The filling should be rich and flavorful, with the vegetables and chicken evenly distributed. Remove the skillet from the heat and let the filling cool slightly while you prepare the crust.
Step 4: Assemble and Bake the Pot Pie
Preheat your oven to 375°F. Line a 9-inch pie dish with one sheet of pie crust, pressing it gently into the bottom and sides. Trim any excess dough from the edges and set the remaining sheet aside for the top crust.
Pour the warm filling into the crust-lined dish, spreading it evenly. Place the second pie crust sheet over the filling, crimping the edges to seal it with the bottom crust. Cut a few small slits in the center of the top crust to allow steam to escape.
Bake for 35-40 minutes until the crust is golden brown and the filling is bubbling. If the edges begin to brown too quickly, cover them with foil or a pie shield. Let the pot pie rest for 10 minutes before slicing and serving to allow the filling to set.
Pro Tips For Making Family Pot Pie
- Chill the Crust: Always let your pie crust rest in the fridge for at least 30 minutes before rolling—this prevents shrinking and makes it easier to handle, especially with a top and bottom crust.
- Sweat the Veggies: Cook the onion, carrots, and celery in unsalted butter until soft but not browned; this builds flavor without overpowering the filling.
- Avoid Soggy Bottom: Blind-bake the bottom crust for 10 minutes before adding the filling—it’s the only way to guarantee a crisp base instead of a gummy mess.
- Cut Evenly: Dice the onion, carrots, and celery into uniform, small pieces so they cook at the same rate and every bite has the right texture.
Dietary Considerations for This Recipe
Gluten-Free Option
Swap traditional pie crust for a gluten-free version like Mi-Del or King Arthur’s mix. Ensure all other ingredients, including broth and flour, are certified gluten-free. Thicken with cornstarch instead of all-purpose flour for the filling.
Dairy-Free Adaptation
Use vegetable oil or dairy-free butter for sautéing and a plant-based crust. Replace whole milk with unsweetened almond milk or coconut milk. The filling will still be creamy and rich. 💪
Vegetarian Variation
Replace chicken with chickpeas or tofu cubes for protein. Use vegetable broth and add extra veggies like mushrooms or bell peppers for heartiness. The flavors will still shine through beautifully.
Lower-Carb Twist
Skip the top crust and bake with just the bottom layer to reduce carbs. Use cauliflower or zucchini in place of potatoes. Thicken the filling with xanthan gum for a lower-carb meal. 🥗
Allergen-Friendly Swaps
For nut allergies, avoid store-bought crusts processed in nut facilities—opt for homemade crusts with safe ingredients. Always check labels on broth and other packaged items to avoid hidden allergens.
Lactose-Intolerant Fix
Use lactose-free milk and a dairy-free crust. Earth Balance butter works well for sautéing. The dish remains just as comforting without the lactose. ✨
Nutrition Facts
Frequently Asked Questions
Can I use rotisserie chicken to save time?
Shred 2 cups of cooked rotisserie chicken and skip the sautéing step. Add it when mixing in the broth and milk to warm through.
Why is my filling runny?
This usually means the filling didn’t simmer long enough. Cook it for the full 10-12 minutes after adding flour. If still thin, mix 1 tbsp cornstarch with water and stir in before baking.
Can I make individual pot pies?
Yes! Use ramekins and cut crust to fit. Bake at 375°F for 20-25 minutes until golden. This is great for portion control.
How do I keep the bottom crust crisp?
Pre-bake the bottom crust for 8 minutes before adding filling. Also, ensure your filling is thick and hot when poured in.

- 4C Bread Crumbs Meatballs Recipe: Crispy Crust and Juicy Centers - September 25, 2026
- 6 Oz Chocolate Chip Cookie Recipe: Perfectly Balanced Crispy Edges and Chewy Hearts - September 25, 2026
- 6-Inch Coffee Cake Recipe: Vanilla Bean Swirls and Buttery Streusel Topping - September 25, 2026